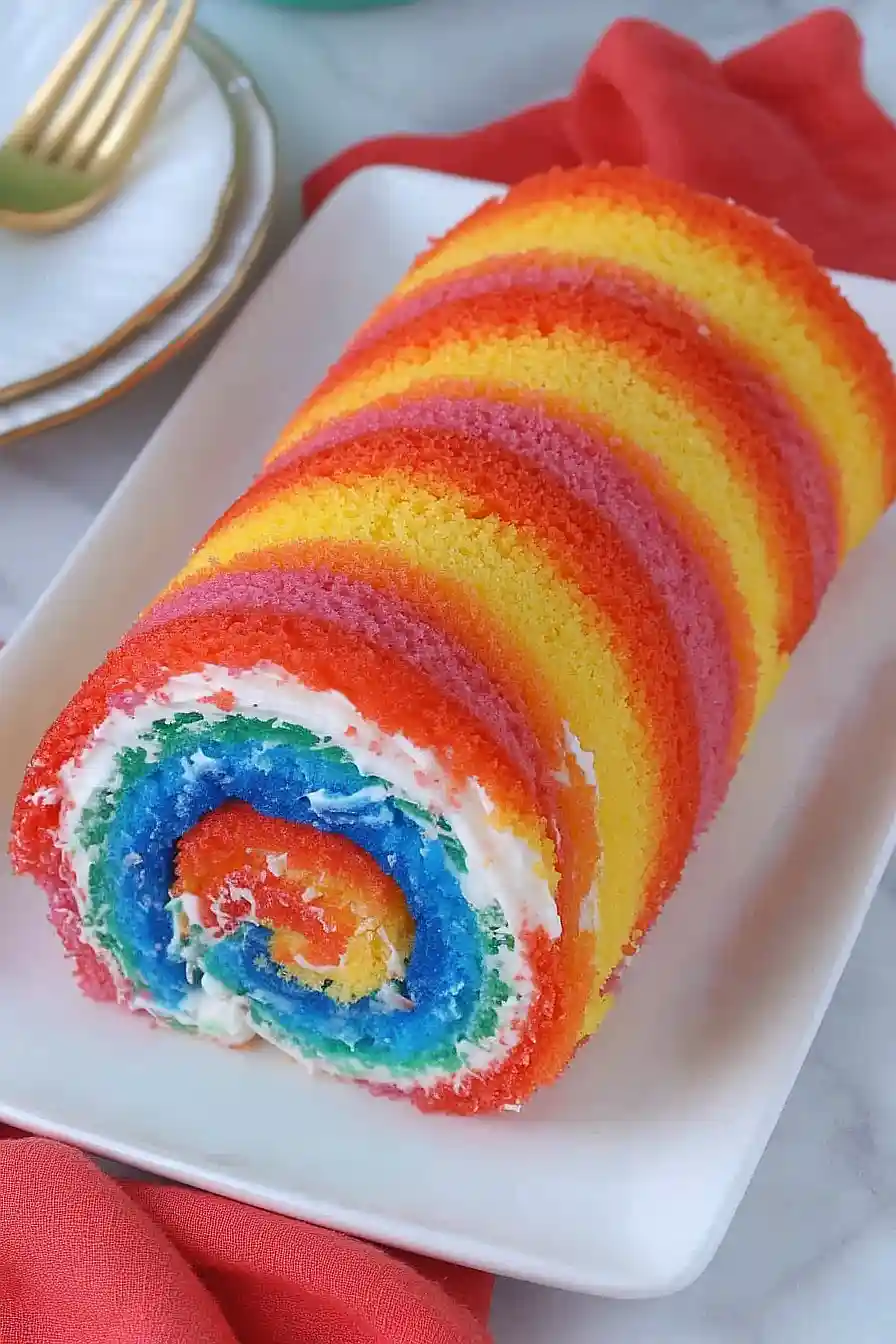
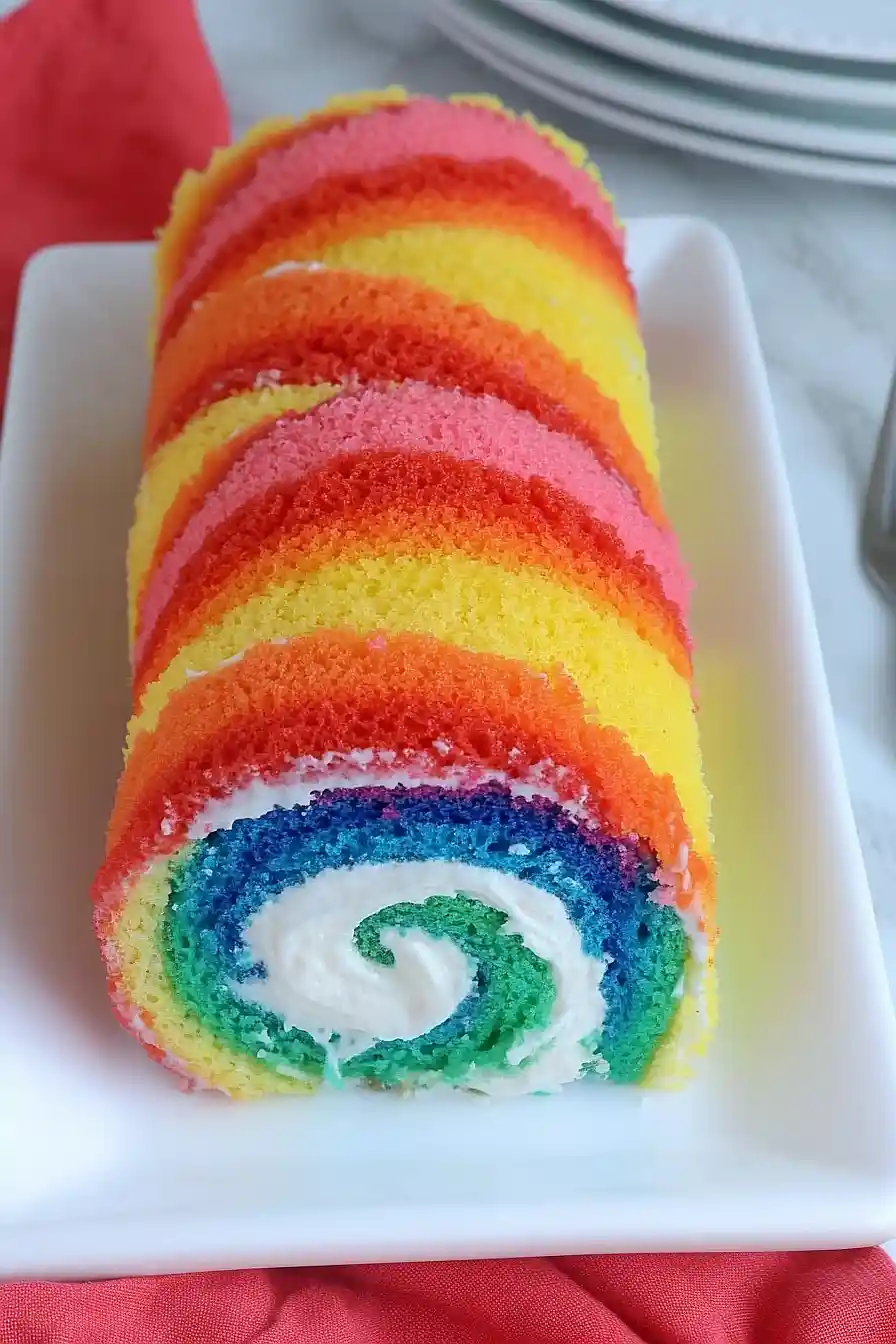
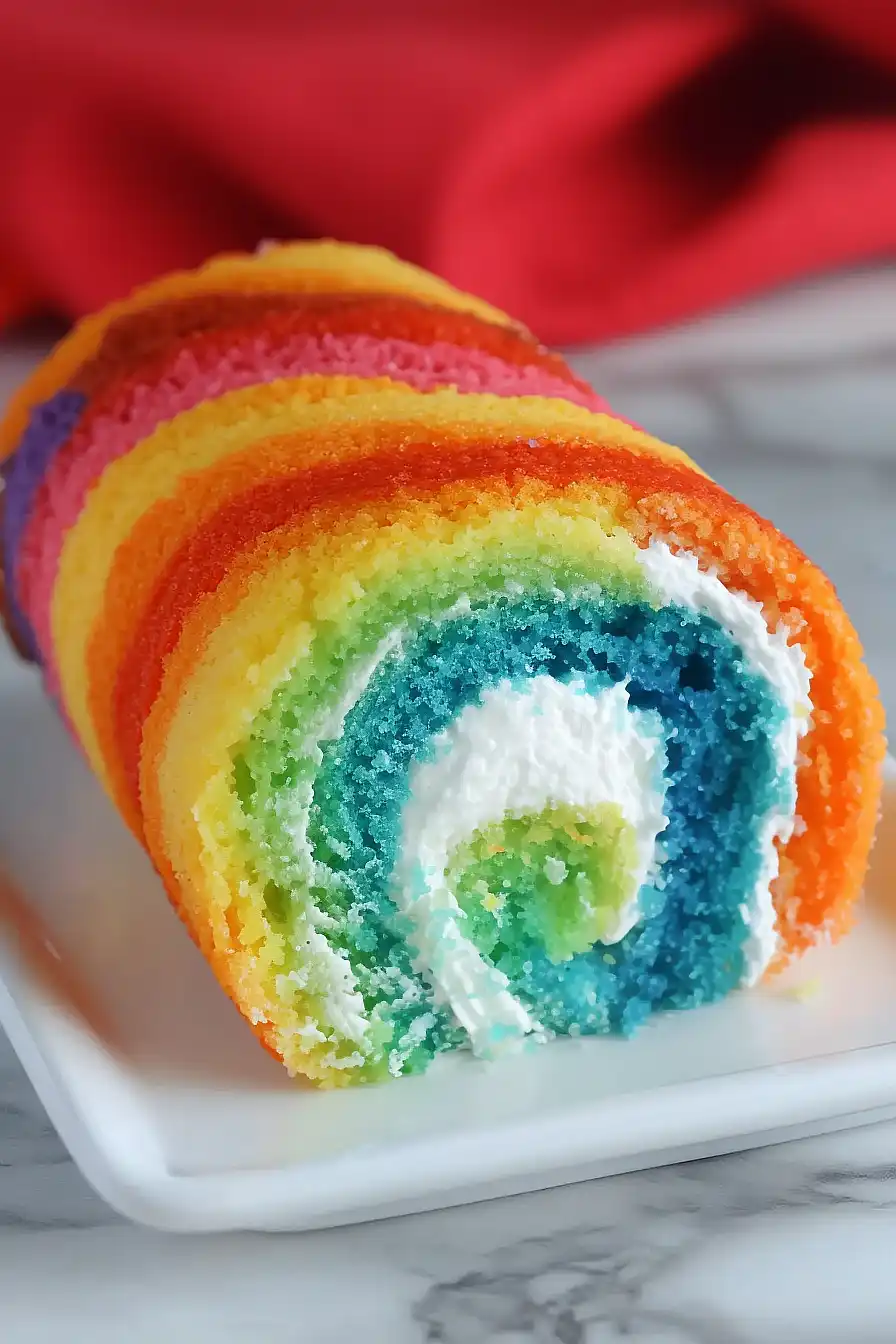
Here’s my go-to rainbow cake roll recipe, with a light and fluffy sponge cake base that’s tinted in pretty rainbow colors, filled with smooth cream cheese frosting, and rolled into a perfect spiral.
This cake roll has become a birthday party favorite at our house. I make it for just about every celebration now because the kids (and grown-ups!) love watching me slice into it and reveal those fun rainbow layers. And let’s be honest – who doesn’t smile at the sight of rainbow-colored desserts?
Why You’ll Love This Rainbow Cake Roll
- Show-stopping appearance – The beautiful rainbow swirl pattern inside this cake roll makes it perfect for birthdays, pride celebrations, or any time you want to bring a smile to someone’s face.
- Easier than it looks – While the end result looks fancy, this recipe starts with a box cake mix and simple ingredients you can find at any grocery store.
- Make-ahead friendly – You can prepare this cake roll a day in advance and keep it refrigerated until you’re ready to serve, making it perfect for party planning.
- Customizable colors – You can adjust the food coloring to create any color combination you like – perfect for matching party themes or holiday celebrations.
What Kind of Food Coloring Should I Use?
For a vibrant rainbow cake roll, gel food coloring is definitely the way to go over liquid food coloring. Gel colors are more concentrated, which means you’ll need less to achieve bright colors without changing the texture of your cake batter. Regular liquid food coloring can thin out your batter and sometimes create muted, pastel shades instead of the bold rainbow effect we’re looking for. When shopping, look for brands like AmeriColor, Wilton, or Chefmaster – these are reliable options you can find at craft stores or online. Just remember to start with a small amount and add more gradually until you reach your desired shade, since gel colors are pretty powerful and a little goes a long way.
Options for Substitutions
Need to make some swaps? Here are some helpful substitutions for this colorful cake roll:
- Sour cream: You can replace sour cream with plain Greek yogurt in the same amount, or use regular yogurt that’s been strained for 30 minutes to remove excess liquid.
- Buttermilk: No buttermilk? Mix 3/4 cup regular milk with 2 teaspoons of lemon juice or white vinegar. Let it sit for 5 minutes before using.
- White cake mix: This is pretty important for getting those bright rainbow colors, but if needed, you can use vanilla cake mix – just know your colors might be slightly less bright.
- Food coloring gels: While gel colors work best for bright results, you can use regular liquid food coloring. You’ll need to use more drops, and the cake might be slightly more moist.
- Heavy cream: For the frosting, you can use whole milk or half-and-half instead of heavy cream. Start with less liquid and add more as needed to get the right consistency.
- Unsalted butter: If you only have salted butter, that’s fine – just skip the added salt in the frosting recipe.
Watch Out for These Mistakes While Baking
The biggest challenge when making a rainbow cake roll is preventing cracks, which often happen because bakers wait too long to roll the cake – you must roll it in a clean kitchen towel while it’s still warm from the oven, usually within 1-2 minutes of baking. A common error is under-beating the egg whites, which should be whipped to stiff peaks to ensure your cake has enough structure to roll without breaking. When adding food coloring, less is more – start with small amounts of gel coloring and gradually add more until you reach your desired shade, as too much can affect the cake’s texture and make the colors look artificial. For the smoothest results, make sure all your dairy ingredients are truly at room temperature before starting, and don’t rush the cooling process after the initial roll – let the cake cool completely before unrolling and adding the filling to prevent the dreaded crack-and-crumble situation.
What to Serve With Rainbow Cake Roll?
This fun and colorful cake roll calls for some simple but tasty accompaniments that won’t overshadow its rainbow charm! A scoop of vanilla ice cream on the side adds a cool, creamy element that kids and adults both love. I like to serve this dessert with a glass of cold milk or, for the grown-ups, a cup of coffee or tea to balance the sweetness. If you’re hosting a party, consider adding some fresh berries on the side – they add a natural pop of color that complements the cake’s rainbow design while keeping things light and fresh.
Storage Instructions
Keep Fresh: Once you’ve rolled up your rainbow cake, wrap it well in plastic wrap and pop it in the fridge. It’ll stay fresh and tasty for up to 3 days. The plastic wrap helps keep the cake from drying out and maintains that pretty swirl pattern we worked so hard to create!
Freeze: Want to make this cake ahead? You can freeze the whole roll for up to 2 months! Just wrap it tightly in plastic wrap, then add a layer of aluminum foil. When you’re ready to serve, let it thaw overnight in the fridge – it’ll be just as colorful and delicious as the day you made it.
Make Ahead: If you’re planning for a party, you can make this cake roll a day or two before. The flavors actually blend together nicely after a day in the fridge, and the buttercream filling stays perfectly creamy. Just remember to take it out about 30 minutes before serving so it can come to room temperature – that’s when it tastes best!
| Preparation Time | 30-45 minutes |
| Cooking Time | 20-25 minutes |
| Total Time | 50-70 minutes |
| Level of Difficulty | Medium |
Estimated Nutrition
Estimated nutrition for the whole recipe (without optional ingredients):
- Calories: 3200-3500
- Protein: 20-25 g
- Fat: 180-200 g
- Carbohydrates: 400-450 g
Ingredients
- 2/3 cup sour cream at room temperature
- 3/4 cup buttermilk at room temperature
- 1 tablespoon pure vanilla essence
- 4 egg whites at room temperature
- 1/3 cup vegetable or canola oil
- 1 box white cake mix (15.25 oz, such as duncan hines)
- Food coloring gels in red, orange, yellow, green, blue, and purple
- 1 cup unsalted butter (2 sticks), softened
- 1/4 teaspoon salt
- 4 cups powdered sugar
- 2 teaspoons pure vanilla essence
- 4 tablespoons heavy cream or milk
Step 1: Prepare the Baking Sheet
Preheat the oven to 325℉.
Line a half sheet pan (13×18-inches) with parchment paper, ensuring a few inches overhang for easy cake removal.
You may opt to spray the parchment-lined sheet with Baker’s Joy, a nonstick spray with flour, for added release ease.
Set the prepared pan aside.
Step 2: Make the Cake Batter
In a large bowl, combine sour cream, buttermilk, vanilla, egg whites, and oil.
Whisk until well blended.
Sift the white cake mix into the wet ingredients, and stir gently until the mixture is just combined.
Make sure not to over-mix to maintain a light texture.
Step 3: Color and Fill Piping Bags
Divide the batter evenly into six small bowls, about 2/3 cup each.
Use gel food coloring to create red, orange, yellow, green, blue, and purple batter.
Fill piping bags with each color; it’s helpful to cuff the bag over a glass cup to fill easily without mess.
Twist the bag tops and set them aside until you are ready to pipe.
Step 4: Pipe and Bake the Cake
Cut the ends of the piping bags and pipe the batter diagonally across the prepared pan, following the rainbow order: red, orange, yellow, green, blue, and purple.
Begin with thin layers to ensure batter lasts throughout.
Tap the sheet on the counter to remove air bubbles and help colors spread.
Bake the cake at 325℉ for 17 minutes, or until a toothpick inserted comes out clean.
Step 5: Roll and Cool the Cake
Immediately lift the cake out with the parchment paper onto a wire rack.
Allow it to steam off for exactly 4 minutes.
Using the parchment, roll the cake from one of the 13-inch sides while still warm.
Fold excess paper to create a thick guide to help roll without damaging the cake.
Let it fully cool at room temperature, approximately 40 minutes.
Step 6: Prepare Vanilla Buttercream Frosting
With an electric mixer and paddle attachment, beat butter and salt until creamy.
Gradually add powdered sugar, mixing well between additions.
Once all the sugar is incorporated, add vanilla.
Slowly mix in heavy cream or milk, a tablespoon at a time, achieving the desired consistency.
Step 7: Fill and Roll the Cake
Carefully unroll the cooled cake, using a spatula to gently loosen any sticking sections.
Spread frosting with an offset spatula, leaving a 1/2-inch border bare at the roll’s end.
Keep the spatula’s tip in the frosting the entire time to avoid crumbs.
Roll the cake tightly again, starting by hand, then using the parchment to assist without compromising the cake’s structure.
Step 8: Chill and Serve
Wrap the cake roll in plastic wrap, leaving it on the parchment paper to help maintain its shape and prevent cracking.
Freeze for at least 1 hour or overnight until firm.
Once firm, unwrap and use a hot, clean knife to slice the cake into 3/4-inch pieces, yielding about 16 slices.
Allow slices to thaw for around 15 minutes at room temperature before serving.


