
I used to think s’mores were only for camping trips until my kids started begging for them every weekend. The whole campfire setup seemed like too much work for a Tuesday night craving.
That’s when I discovered s’mores on a stick—all the gooey goodness of traditional s’mores without needing to build a fire in the backyard. You just skewer everything together and pop it in the oven. My family can’t tell the difference, and I don’t have to worry about anyone catching their marshmallow on fire.
Why You’ll Love These S’mores on a Stick
- No campfire needed – You can enjoy that classic s’mores taste any time of year, right in your own kitchen without dealing with messy campfire cleanup.
- Quick and easy – Ready in just 15-25 minutes with minimal prep work, making them perfect for last-minute dessert cravings or unexpected guests.
- Kid-friendly activity – These are fun to make with little ones who love dipping and rolling treats, plus they’re way less messy than traditional s’mores.
- Simple ingredients – With just three basic ingredients that you can easily find at any grocery store, there’s no hunting for specialty items.
- Perfect for parties – The stick makes them easy to serve and eat at gatherings, and they look cute on dessert tables too.
What Kind of Marshmallows Should I Use?
Regular-sized marshmallows work perfectly for this recipe, and you can find them at any grocery store. You could also use jumbo marshmallows if you want bigger bites, but you might need to adjust your stick size accordingly. Fresh marshmallows will give you the best results since they’re softer and easier to work with than ones that have been sitting around for a while. If your marshmallows feel a bit stale, don’t worry – they’ll still taste great once they’re coated in chocolate and graham crackers.
Options for Substitutions
This fun treat is pretty forgiving when it comes to swaps, so here are some easy substitutions:
- Chocolate melting wafers: If you don’t have melting wafers, regular chocolate chips work great too. You might need to add a teaspoon of coconut oil or shortening to help them melt smoothly for dipping.
- Graham crackers: No graham crackers? Try crushing up digestive biscuits, vanilla wafers, or even chocolate chip cookies for a fun twist. You can also use store-bought graham cracker crumbs to save time.
- Marshmallows: Regular-sized marshmallows are perfect for this recipe, but you can use mini marshmallows if that’s what you have – just thread 3-4 minis per stick instead of one large one.
- Chocolate type: Feel free to mix up the chocolate! Try white chocolate, dark chocolate, or even peanut butter chips for different flavor combinations.
Watch Out for These Mistakes While Cooking
The biggest mistake when making s’mores on a stick is overheating your chocolate, which can cause it to seize up and become grainy – keep your melting temperature low and stir gently to maintain that smooth, dippable consistency.
Another common error is not letting the chocolate cool slightly before dipping, as chocolate that’s too hot will slide right off your marshmallows instead of creating a nice coating.
To get the graham cracker crumbs to stick properly, make sure to roll your chocolate-dipped marshmallows in the crushed crackers while the chocolate is still wet but not dripping.
For the cleanest results, use wooden skewers or popsicle sticks and have everything ready to go before you start dipping, since the chocolate will start to set quickly once it begins cooling.

What to Serve With S’mores on a Stick?
S’mores on a stick are pretty perfect on their own, but they’re amazing alongside a mug of hot chocolate or cold milk for dipping. If you’re serving these at a party or gathering, set up a little dessert station with fresh strawberries and banana slices for extra dipping options in that melted chocolate. These treats also pair nicely with vanilla ice cream if you want to make them even more indulgent, or you can serve them with some warm apple cider during fall gatherings. For outdoor events like camping or backyard fires, they’re great with roasted marshmallows or other campfire treats to keep the s’mores theme going strong.
Storage Instructions
Keep Fresh: These s’mores on a stick are best enjoyed right away while the chocolate is still set but not too hard. If you need to store them, place them in a single layer in an airtight container at room temperature for up to 2 days. Just keep them away from heat so the chocolate doesn’t melt!
Chill: Pop them in the fridge if your kitchen is warm or if you want the chocolate coating to stay nice and firm. They’ll keep in the refrigerator for up to a week, though the graham cracker coating might lose some of its crunch over time.
Make Ahead: You can definitely make these a day or two before a party or gathering. Just store them properly and they’ll be ready to go when your guests arrive. The flavors actually meld together nicely after sitting for a bit, making them taste even more like traditional s’mores!
| Preparation Time | 10-15 minutes |
| Cooking Time | 5-10 minutes |
| Total Time | 15-25 minutes |
| Level of Difficulty | Easy |
Estimated Nutrition
Estimated nutrition for the whole recipe (without optional ingredients):
- Calories: 600-700
- Protein: 5-10 g
- Fat: 25-35 g
- Carbohydrates: 90-100 g
Ingredients
- 10 to 12 marshmallows
- 5 graham cracker sheets, crushed
- 3 to 5 oz chocolate wafers for melting
Step 1: Crush the Graham Crackers
- 5 graham cracker sheets, crushed
Place the graham cracker sheets inside a resealable plastic bag and crush them using a rolling pin until they reach a fine, even consistency.
Transfer the crushed graham crackers to a small bowl and set aside.
This will be used for coating the marshmallows.
Step 2: Prepare the Marshmallow Sticks
- 10 to 12 marshmallows
Insert a cake pop stick into each marshmallow, being careful not to pierce all the way through.
Arrange the marshmallow pops on a tray or stand, making sure they are ready to be dipped.
Step 3: Melt the Chocolate Wafers
- 3 to 5 oz chocolate wafers for melting
In a small microwave-safe bowl or using a double boiler, melt the chocolate wafers according to the package instructions until smooth and fully melted.
Work quickly to prevent the chocolate from hardening before dipping.
Step 4: Coat Marshmallows with Chocolate and Graham Crackers
- marshmallows on sticks from Step 2
- melted chocolate wafers from Step 3
- crushed graham crackers from Step 1
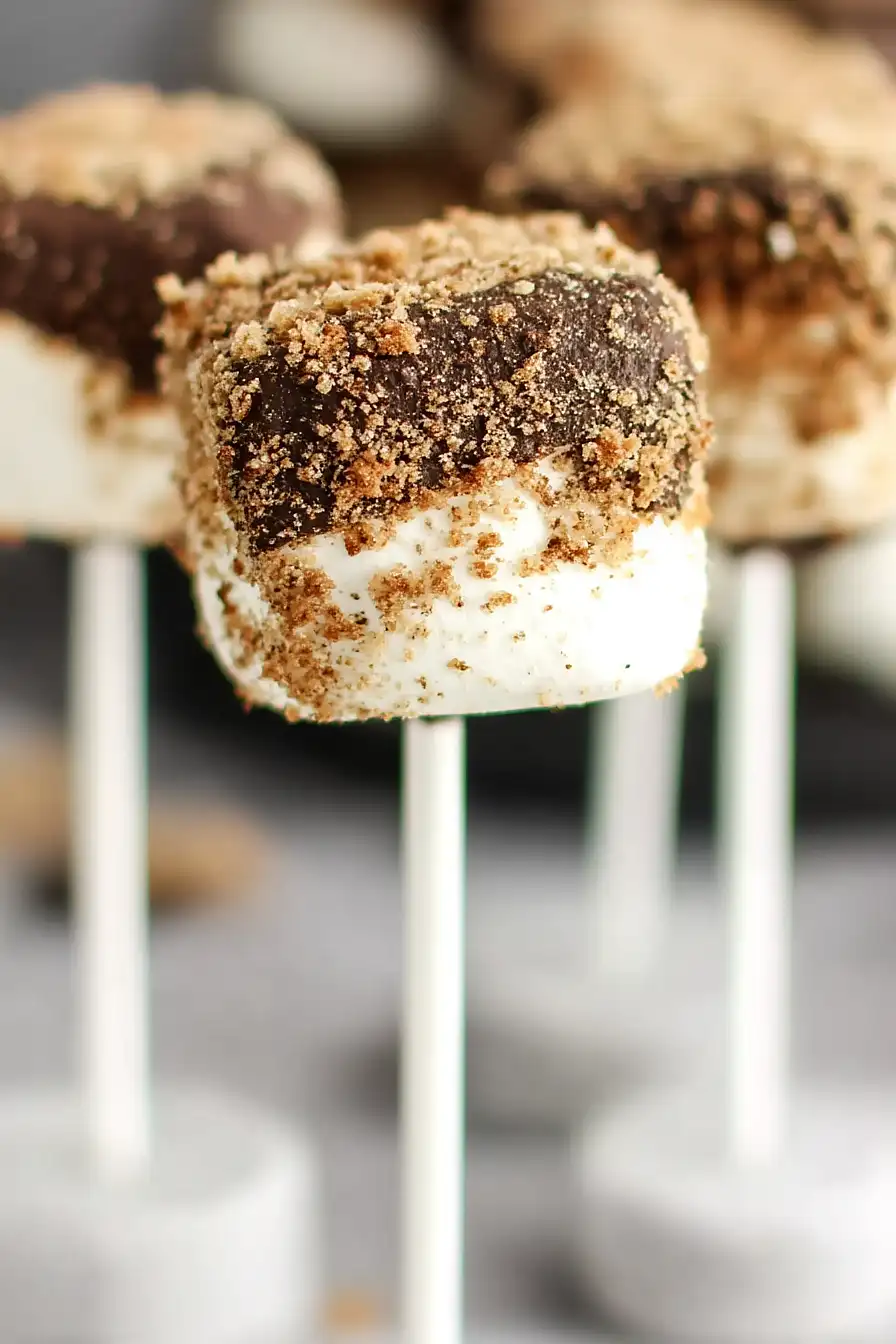
Dip the top half of each marshmallow (on a stick from Step 2) into the melted chocolate (from Step 3).
Immediately roll the chocolate-coated part in the crushed graham crackers (from Step 1) so that the chocolate is generously covered.
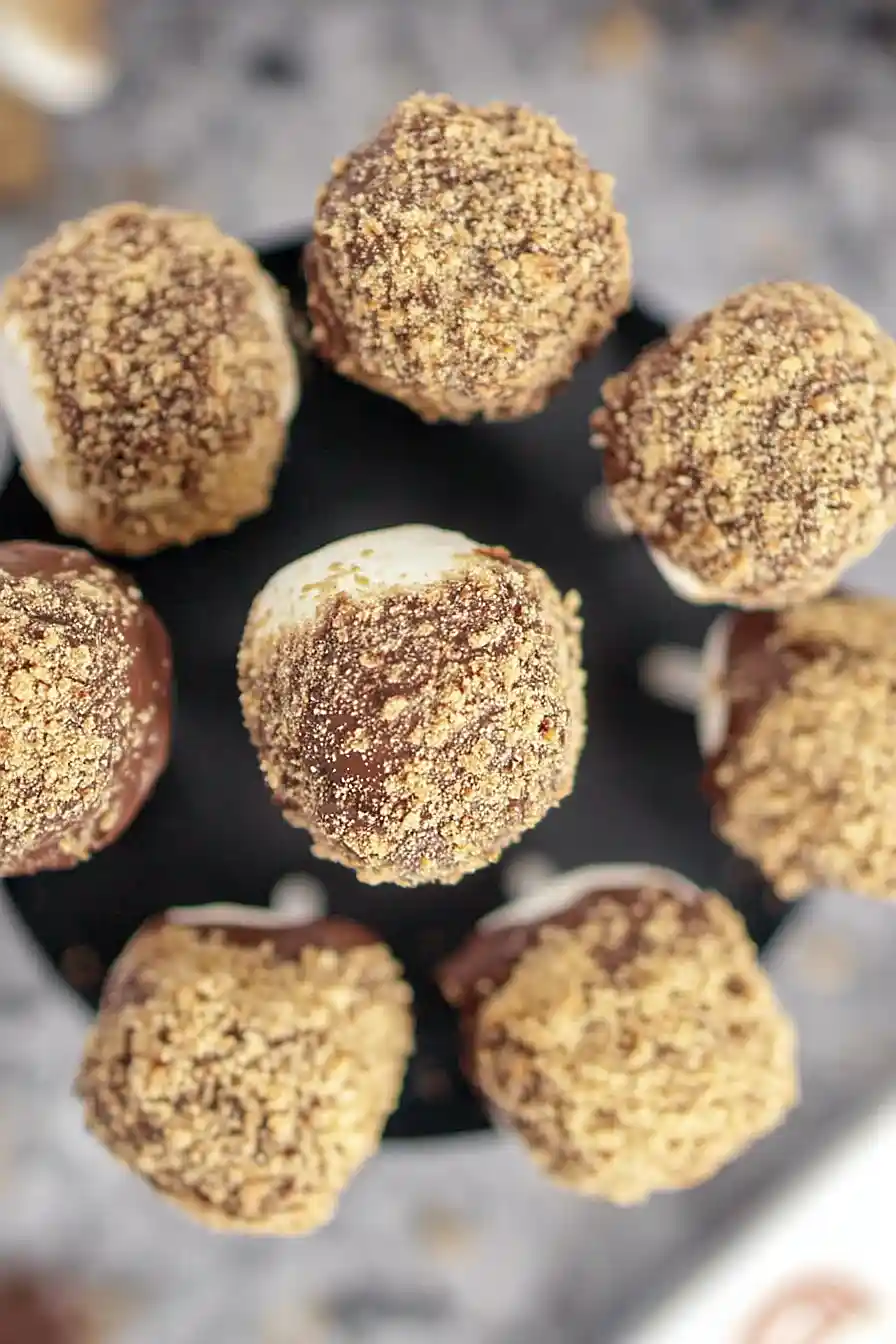
Place each assembled s’more stick into a cake pop stand or tray to let the chocolate harden.
Repeat this for all marshmallows.
I like to tap off any excess graham crackers for a cleaner look before setting them in the stand.
Step 5: Toast the Marshmallows and Serve
Once all the marshmallow s’mores have been coated, remove each from the stand one at a time and toast the bottom half of the marshmallow lightly using a torch lighter.
Return each toasted s’more pop to the stand to cool and set.
Serve immediately for the best gooey texture, or store in a sealed container for up to 3 days.
For an extra campfire touch, I like to toast them just until golden brown for a delicious caramelized flavor.


")
")
