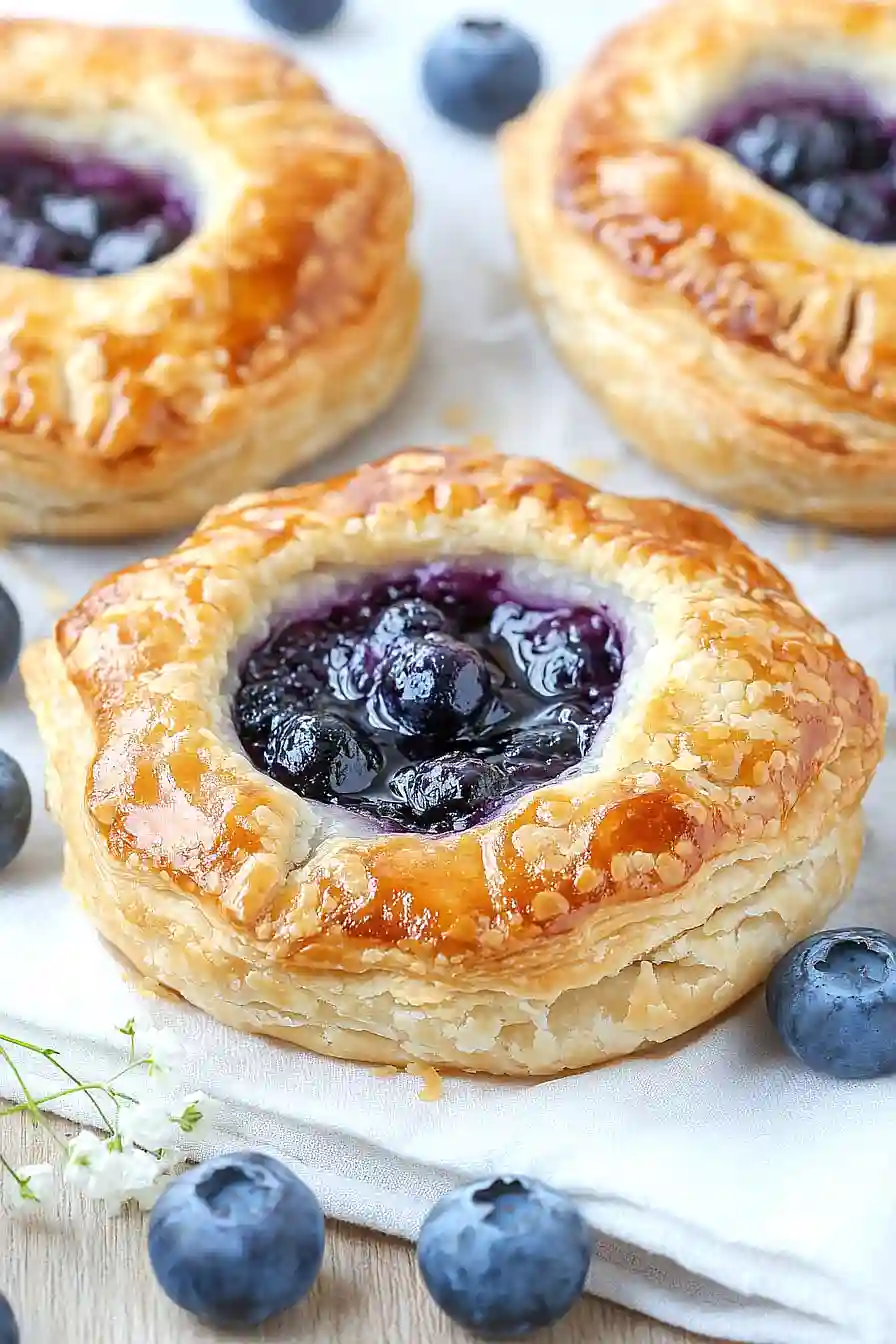
When it comes to desserts that work for both casual snacking and special occasions, hand pies are always a winning choice. Between juggling after-school activities and trying to put something sweet on the table that doesn’t take hours to make, I’ve found myself turning to these blueberry hand pies more times than I can count.
These little pastries are exactly what you need: they’re easy to make ahead, perfect for eating on the go, and filled with sweet, juicy blueberries that everyone loves. Plus, you can make a batch on Sunday and enjoy them throughout the week – if they last that long!

Why You’ll Love These Hand Pies
- Portable dessert – These handheld treats are perfect for picnics, lunch boxes, or eating on the go – no plates or forks needed!
- Buttery, flaky crust – The sour cream in the dough creates an incredibly tender pastry that’s crispy on the outside and soft inside.
- Make-ahead friendly – You can prepare these pies in advance and freeze them unbaked, making them perfect for unexpected guests or sweet cravings.
- Simple ingredients – With basic pantry staples and fresh or frozen blueberries, you can create these bakery-style treats right in your kitchen.
- Portion control – Each hand pie is perfectly portioned, giving you just the right amount of sweet, fruity filling in every bite.
What Kind of Blueberries Should I Use?
Both fresh and frozen blueberries work great in these hand pies, so use whatever’s more convenient or in season. If you’re using fresh berries, look for plump, firm ones with a deep blue color and a silvery frost-like coating – this natural coating actually helps protect the berries. When using frozen blueberries, don’t thaw them before mixing with the other filling ingredients – this helps prevent the filling from becoming too runny. Wild blueberries tend to be smaller and more flavorful than cultivated ones, but either type will make delicious hand pies. Just make sure to give fresh berries a quick rinse and pat them dry before using them in your filling.

Options for Substitutions
While some ingredients are key for these hand pies, there are several swaps you can try:
- All-purpose flour: You can use pastry flour for an even flakier crust, but avoid whole wheat flour as it will make the crust too dense.
- Sour cream: Full-fat Greek yogurt works great as a substitute – just make sure it’s cold! Don’t use low-fat options as they’ll affect the pastry’s texture.
- Blueberries: Feel free to swap these with other berries like raspberries, blackberries, or chopped strawberries. If using strawberries, you might need an extra 1/2 tablespoon of cornstarch as they’re juicier.
- Cornstarch: All-purpose flour can work as a thickener – use 2 tablespoons instead of the 1.5 tablespoons of cornstarch.
- Turbinado sugar: Regular granulated sugar or coarse sugar will work fine for the topping, or you can skip it altogether.
- Butter: This is one ingredient you shouldn’t substitute – cold butter is crucial for creating those flaky layers in the pastry.
Watch Out for These Mistakes While Baking
The success of flaky hand pies depends heavily on temperature control – using warm butter or letting your dough get too warm will result in tough, dense pastry instead of those dreamy, flaky layers you’re after. Keep your ingredients cold by placing the butter and sour cream in the freezer for 15 minutes before starting, and chill your dough whenever it starts feeling soft or sticky. Another common mistake is overfilling the pies – stick to about 2 tablespoons of filling per pie to prevent frustrating blowouts during baking. If your blueberry filling seems too watery (especially when using frozen berries), add an extra teaspoon of cornstarch to thicken it up, and don’t skip the small slits on top of each pie which allow steam to escape and prevent soggy bottoms. For the best golden-brown finish, remember to brush the egg wash over the entire surface of each pie, not just the center, and sprinkle with turbinado sugar right before baking for that perfect crunch.

What to Serve With Blueberry Hand Pies?
These sweet little hand pies are perfect for serving with a scoop of vanilla ice cream or a dollop of freshly whipped cream! For a cozy afternoon treat, pair them with a hot cup of coffee or tea – the warm drinks really bring out the blueberry flavor. If you’re serving these for dessert after dinner, try adding a small drizzle of warm caramel sauce or a sprinkle of powdered sugar on top. You can also serve them with some fresh berries on the side for an extra pop of fruit flavor.
Storage Instructions
Keep Fresh: These blueberry hand pies stay good at room temperature for up to 2 days when stored in an airtight container. If you want them to last longer, pop them in the fridge where they’ll keep for up to 5 days. Just place some parchment paper between layers to prevent them from sticking together.
Freeze: These little pies are perfect for freezing! Once they’re completely cool, wrap each pie individually in plastic wrap, then place them in a freezer bag. They’ll stay fresh for up to 3 months. It’s like having a mini pie shop in your freezer!
Warm Up: When you’re ready to enjoy a frozen hand pie, let it thaw in the fridge overnight. To get that fresh-baked taste, warm it in the oven at 350°F for about 5-10 minutes. The crust will get slightly crispy again, and the filling will be perfectly warm.
| Preparation Time | 30-45 minutes |
| Cooking Time | 20 minutes |
| Total Time | 70-85 minutes |
| Level of Difficulty | Medium |
Estimated Nutrition
Estimated nutrition for the whole recipe (without optional ingredients):
- Calories: 1800-2000
- Protein: 20-25 g
- Fat: 100-110 g
- Carbohydrates: 250-260 g
Ingredients
For the pastry dough:
- 2 cups all-purpose flour
- 1/2 tsp salt
- 3/4 tsp baking powder
- 1 1/2 tbsp granulated sugar
- 8 oz unsalted butter (2 sticks), very cold and diced
- 1/2 cup chilled full-fat sour cream
For the blueberry filling:
- 2 cups blueberries, fresh or frozen
- 1/4 cup granulated sugar
- 1 1/2 tbsp cornstarch
- 1 tbsp lemon juice, freshly squeezed
For assembling:
- 1 large egg, beaten
- Turbinado sugar, for topping (optional)
Step 1: Prepare the Dry Ingredients
- 2 cups all-purpose flour
- 1/2 tsp salt
- 3/4 tsp baking powder
- 1 1/2 tbsp granulated sugar
In a large bowl, whisk together the all-purpose flour, salt, baking powder, and granulated sugar until well combined.
This ensures the leavening and seasoning are evenly distributed in the dough.
Step 2: Cut in the Butter
- 8 oz unsalted butter (2 sticks), very cold and diced
Add the very cold, diced unsalted butter to the bowl with the dry ingredients.
Using your hands or a pastry cutter, work the butter into the mixture until it resembles a coarse meal with some pea-sized pieces remaining.
Keeping the butter cold at this stage is key for a flaky crust.
I like to use my fingertips here, working quickly so the butter doesn’t melt.
Step 3: Add Sour Cream and Form the Dough
- 1/2 cup chilled full-fat sour cream
Using a rubber spatula, gently stir the chilled sour cream into the flour and butter mixture until a shaggy dough just forms.
Turn the dough out onto a well-floured work surface and bring it together with a few quick kneads.
Handle the dough as little as possible for the flakiest texture.
Step 4: Roll, Fold, and Chill the Dough
Pat the dough into a 10-inch log, then roll it out into a 10″ x 12″ rectangle.
Lightly dust both sides with flour, then fold the dough in thirds like a letter.
Flip it over and roll it out again into a 10″ x 12″ rectangle, and fold it in thirds once more.
Wrap the dough in plastic wrap and refrigerate for 1 hour to allow the gluten to relax and the butter to re-chill.


