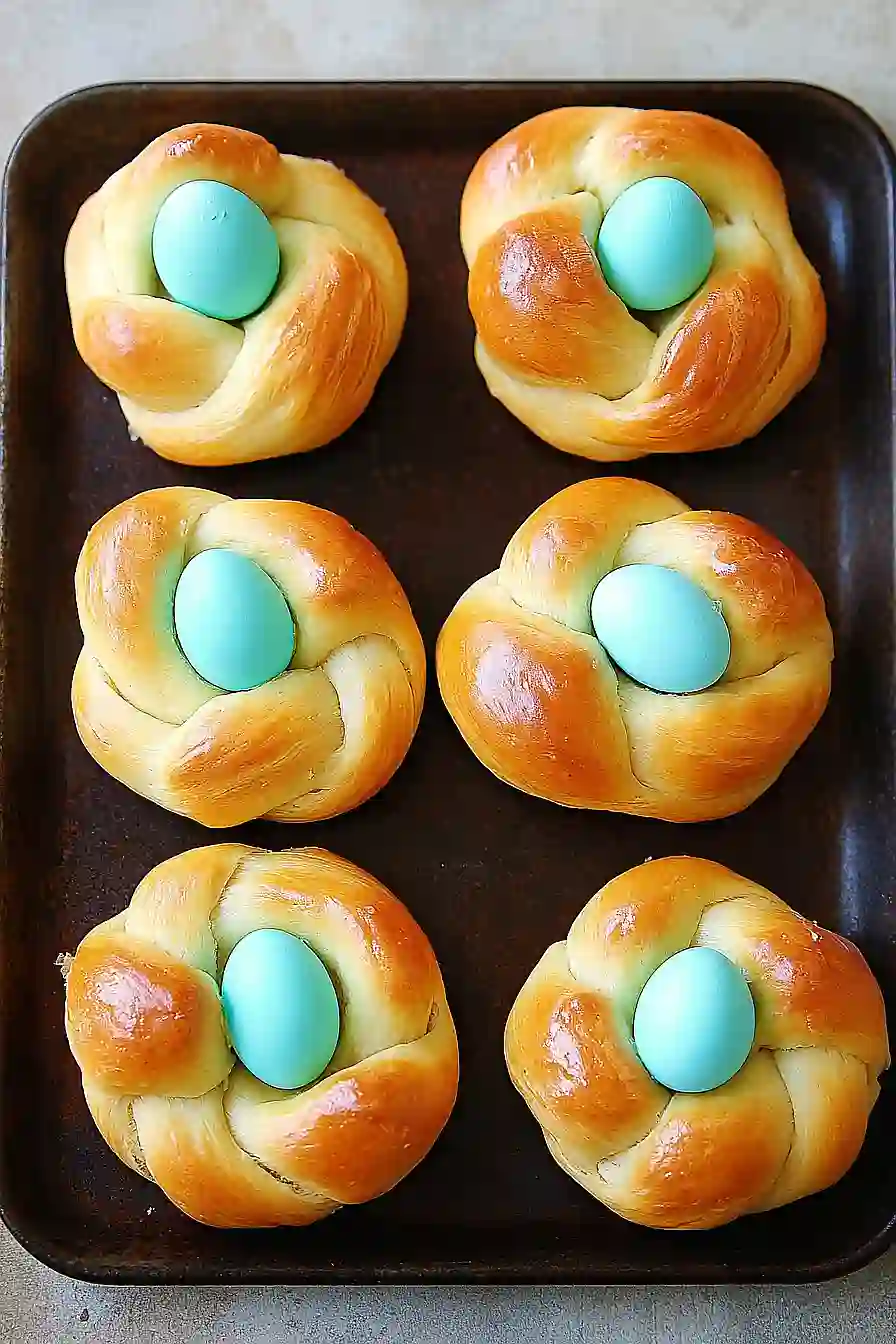
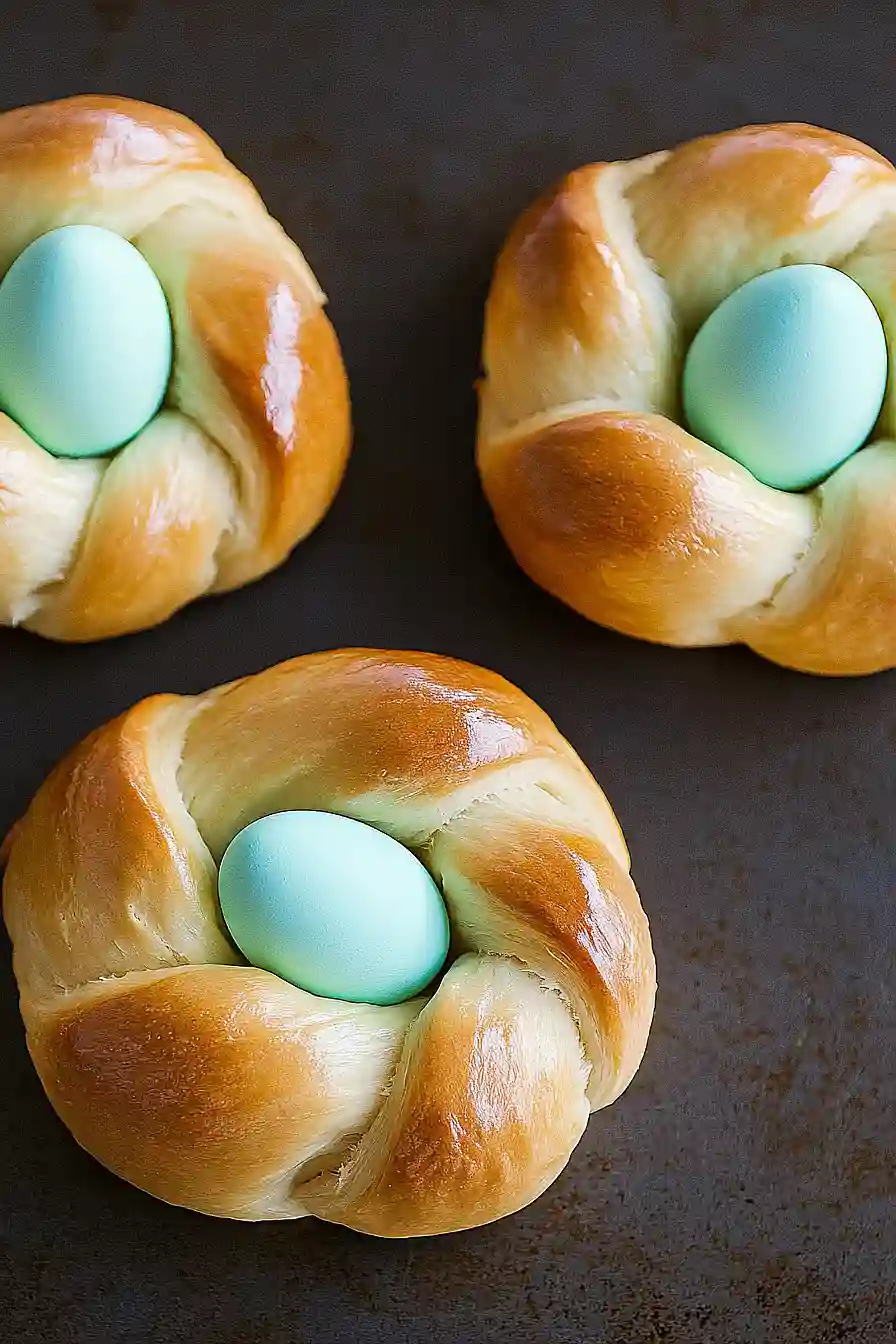
If you ask me, sweet Easter egg bread is one of those recipes that brings back the best memories.
This soft, braided bread dotted with colorful eggs has been part of Easter celebrations for generations. The slightly sweet dough carries hints of vanilla and lemon, while the eggs nestled in the braid add both decoration and meaning to this holiday tradition.
The process of making it might seem old-school, but that’s what makes it special. The dough rises twice, filling your kitchen with that wonderful yeast-bread smell that always draws everyone to the kitchen.
It’s a family-friendly baking project that’s perfect for Easter morning, and the leftovers (if there are any) make the most wonderful French toast the next day.
Why You’ll Love This Easter Egg Bread
- Perfect holiday tradition – This sweet bread isn’t just a recipe – it’s a beautiful Easter tradition that brings the whole family together, complete with colorful dyed eggs baked right into the dough.
- Wonderful aroma – The combination of anise seeds, vanilla, and citrus zest fills your kitchen with an amazing smell while baking that will make everyone gather around the oven.
- Impressive presentation – The braided design with colorful eggs makes this bread a stunning centerpiece for your Easter table – and it’s easier to make than it looks!
- Rich and flavorful – Thanks to eggs, butter, and milk in the dough, this bread has a soft, tender texture and rich taste that’s slightly sweet and perfectly balanced.
What Kind of Yeast Should I Use?
Active dry yeast is the traditional choice for this Easter bread, but instant yeast (also called rapid-rise) can work just as well if that’s what you have on hand. The main difference is that active dry yeast needs to be dissolved in warm water first to activate it, while instant yeast can be mixed directly into your dry ingredients. If you’re using instant yeast instead of active dry, you can skip the proofing step and reduce the amount by about 25% (so use about 1 3/4 teaspoons instead of 1 packet). Just make sure your yeast isn’t expired – fresh yeast should foam up nicely when proofed in warm water with a pinch of sugar. The water temperature should be around 100-110°F, which feels just slightly warm to the touch – too hot will kill the yeast, while too cool won’t activate it properly.
Options for Substitutions
This traditional Easter bread recipe can be adapted with several substitutions if needed:
- Active dry yeast: You can swap active dry yeast with instant yeast – just use about 25% less and skip the proofing step in warm water.
- Anise seeds: Not everyone loves anise! Feel free to skip it entirely, or try using cardamom seeds, fennel seeds, or even orange zest for a different flavor profile.
- Milk: Any plant-based milk (like almond, soy, or oat milk) works well here. Just make sure it’s unsweetened and at room temperature.
- Vegetable oil: You can use any neutral-flavored oil like canola, sunflower, or even melted coconut oil in place of vegetable oil.
- Butter: Margarine can work in a pinch, though butter gives the best flavor. For dairy-free options, use plant-based butter substitutes.
- All-purpose flour: Bread flour can be used for a chewier texture. Just note that whole wheat flour isn’t recommended as it would make the bread too heavy and dense.
- Colored eggs: The raw dyed eggs are traditional, but if you’re worried about food safety, you can use plastic decorative eggs instead – just remember they’re not edible!
Watch Out for These Mistakes While Baking
The success of this Easter bread heavily depends on the yeast activation – if your water is too hot (above 110°F) or too cold (below 95°F), the yeast won’t properly activate, leading to dense, flat bread instead of a light, fluffy texture. When kneading the dough, resist the urge to add too much flour even if it feels sticky at first – adding extra flour beyond what’s called for can make your bread tough and dry instead of tender and soft. Another common mistake is not giving the dough enough time to rise – rushing this step will result in a dense texture, so make sure to let it double in size in a warm, draft-free spot (about 1-1.5 hours for each rise). For the traditional raw eggs nestled in the braid, ensure they’re pressed deep enough into the dough before baking – if they’re too exposed, they might fall out during the baking process, and don’t forget to brush the entire surface with egg wash for that characteristic golden-brown shine.
What to Serve With Easter Egg Bread?
This sweet bread is perfect for Easter brunch or breakfast, and there are lots of tasty ways to serve it! Since it’s already pretty sweet and rich, I like to pair it with some savory breakfast items like scrambled eggs, crispy bacon, or breakfast sausage to balance things out. A fresh fruit salad on the side adds nice color and a light, refreshing element to the meal. For drinks, coffee or tea works great, but you could also serve it with hot chocolate for the kids or a glass of cold milk to wash down all that delicious bread.
Storage Instructions
Keep Fresh: This Easter bread stays good at room temperature for up to 2 days when wrapped well in plastic wrap or stored in an airtight container. Just remember to remove the dyed eggs if you’re planning to store it longer than a day – nobody wants those hanging around too long!
Refrigerate: If you want your bread to last a bit longer, pop it in the fridge in an airtight container for up to 5 days. Again, make sure to take out those decorated eggs first. The bread might firm up a bit in the fridge, but don’t worry – it’ll soften again when brought to room temperature.
Freeze: This sweet bread freezes really well for up to 3 months! Just wrap it tightly in plastic wrap and then in foil (without the eggs, of course). When you’re ready to enjoy it, let it thaw overnight in the fridge, then bring it to room temperature before serving.
Make Ahead: You can prepare the dough the night before and let it do its first rise in the fridge overnight. The next morning, just shape it, add the eggs, let it rise again, and bake. This is super handy when you want fresh bread for Easter morning!
| Preparation Time | 30-45 minutes |
| Cooking Time | 25-30 minutes |
| Total Time | 55-75 minutes |
| Level of Difficulty | Medium |
Estimated Nutrition
Estimated nutrition for the whole recipe (without optional ingredients):
- Calories: 2800-3200
- Protein: 60-70 g
- Fat: 140-160 g
- Carbohydrates: 400-450 g
Ingredients
- 1 packet active dry yeast
- 1/4 cup warm water (about 100°f)
- 3/4 cup granulated sugar
- 1/2 cup milk
- 4 eggs
- 1 teaspoon anise seeds
- 1 1/2 teaspoons vanilla essence
- 1 tablespoon zest from lemon or orange
- 1 teaspoon salt
- 1 1/2 tablespoons vegetable oil
- 6 tablespoons melted butter
- Around 4 1/2 cups all-purpose flour
- 3 or more raw eggs (dyed)
- 1 egg white, lightly whisked
- Optional: colored sprinkles
Step 1: Activate the Yeast
In a small bowl, combine water, yeast, and 2 teaspoons of sugar.
Stir the mixture and set it aside for several minutes until it becomes foamy.
This indicates that the yeast is active and ready to use.
Step 2: Prepare the Dough Mixture
In a large mixing bowl, or the bowl of a stand mixer, add the butter and milk; whisk briefly to combine.
Add the rest of the ingredients (except for the flour) and whisk for about 30 seconds until mixed.
Gradually stir in the flour, one cup at a time, to form a wet, sticky dough.
Step 3: Knead the Dough
If kneading by hand, turn the dough out onto a lightly floured surface and knead for about 5-7 minutes, adding more flour as needed to keep the dough from sticking.
Continue kneading until the dough is smooth.
For stand mixer users, attach the dough hook and knead for several minutes, adding extra flour as needed to prevent the dough from sticking to the sides of the bowl.
Step 4: Let the Dough Rise
Once the dough is ready, turn it out onto a lightly floured surface, form it into a ball, and rub it lightly with a little oil.
Place the dough in a greased bowl, cover the surface with plastic wrap, and place a towel over the top of the bowl.
Let it rise in a warm spot for about 2 hours until it has doubled in size.
Step 5: Shape the Dough
Once the dough has doubled in size, punch it down and turn it onto a lightly floured surface.
Divide the dough into 3 or 4 pieces and form each piece into a ball.
If baking right away, cut each piece into three strips and roll each strip to about 20 inches.
Pinch the three strands at the top and form a loose braid.
Note: If not using right away, refrigerate each piece in separate plastic ziplock bags for up to a few days or freeze them, removing them a couple of hours before use.
Step 6: Final Rise and Bake
Place the braided dough on a greased baking sheet and form a circle by pinching the braid closed.
Tuck raw, colored eggs into the little pockets formed by the braid.
Cover the dough loosely with plastic wrap and a towel, and let it rise for about another hour.
Preheat the oven to 350 degrees F.
Before baking, brush the surface of the dough with egg white and dust with sprinkles if you wish.
Bake for 25 minutes or until golden brown.
Remove from the oven and cool on wire racks.
Step 7: Serve and Enjoy
Let the bread cool slightly before serving.
Enjoy this delicious creation as part of your meal!


