
Growing up, jello salads were always part of our family gatherings. There’s something so fun about those wobbly, sweet treats that bring back memories of summer picnics and holiday dinners. My kids get excited when they see me pulling out the mixing bowls and packets of jello, knowing what’s coming next.
This berry jello salad is one of those simple recipes that makes everyone happy. It’s cool and refreshing, perfect for potlucks or an easy dessert after dinner. I like to make it the night before – it needs time to set anyway, and it’s one less thing to worry about the next day.
Whether you’re looking for a quick dessert or want to bring back those nostalgic feelings of childhood gatherings, this recipe hits all the right notes. Plus, it’s so easy to make that my little ones can help measure and mix the ingredients.
Why You’ll Love This Berry Jello Salad
- Dairy-free friendly – Made with dairy-free cream cheese and whipped topping, this classic dessert salad is perfect for those with lactose intolerance or dairy restrictions.
- Make-ahead friendly – You can prepare this jello salad the day before your gathering, making it perfect for busy hosts who want to plan ahead.
- No cooking required – This is a completely no-bake recipe – just mix, chill, and serve. Perfect for hot summer days when you don’t want to turn on the oven.
- Budget-friendly ingredients – Using simple pantry staples like jello and canned pineapple, plus frozen berries, this recipe won’t break the bank but still looks impressive.
- Crowd-pleasing dessert – The combination of fruity jello, berries, and creamy topping makes this a hit at potlucks, family gatherings, and holiday meals.
What Kind of Berries Should I Use?
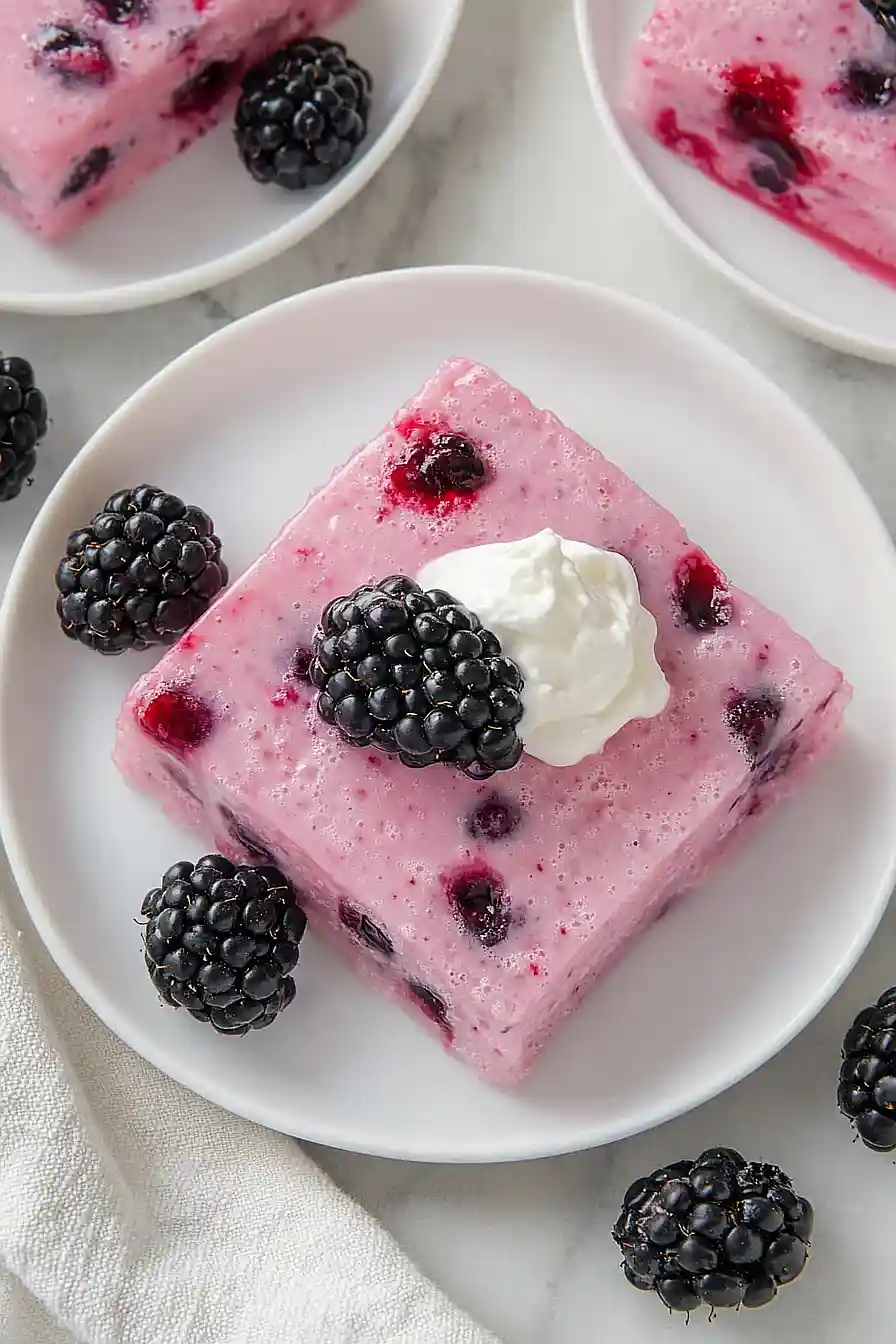
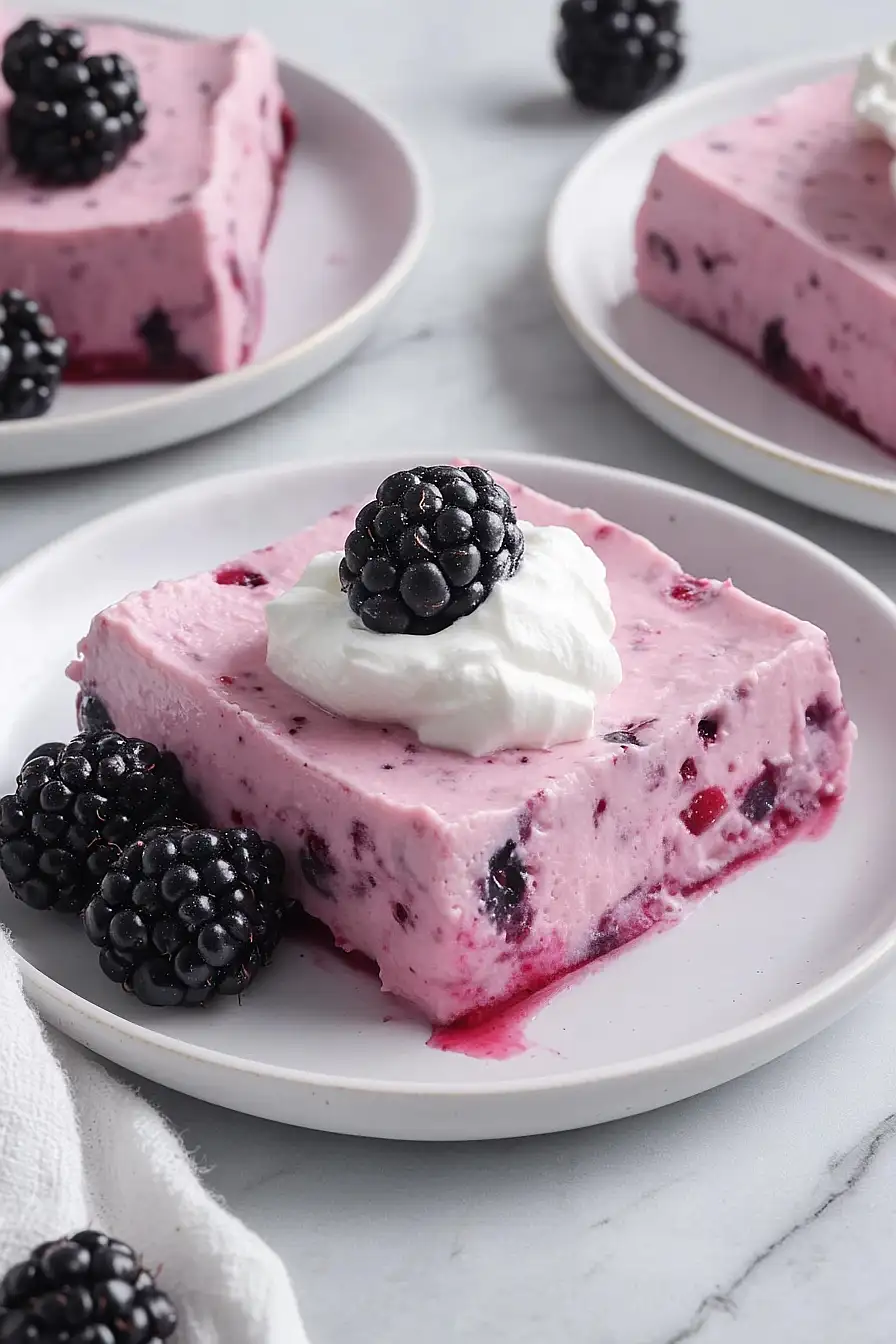
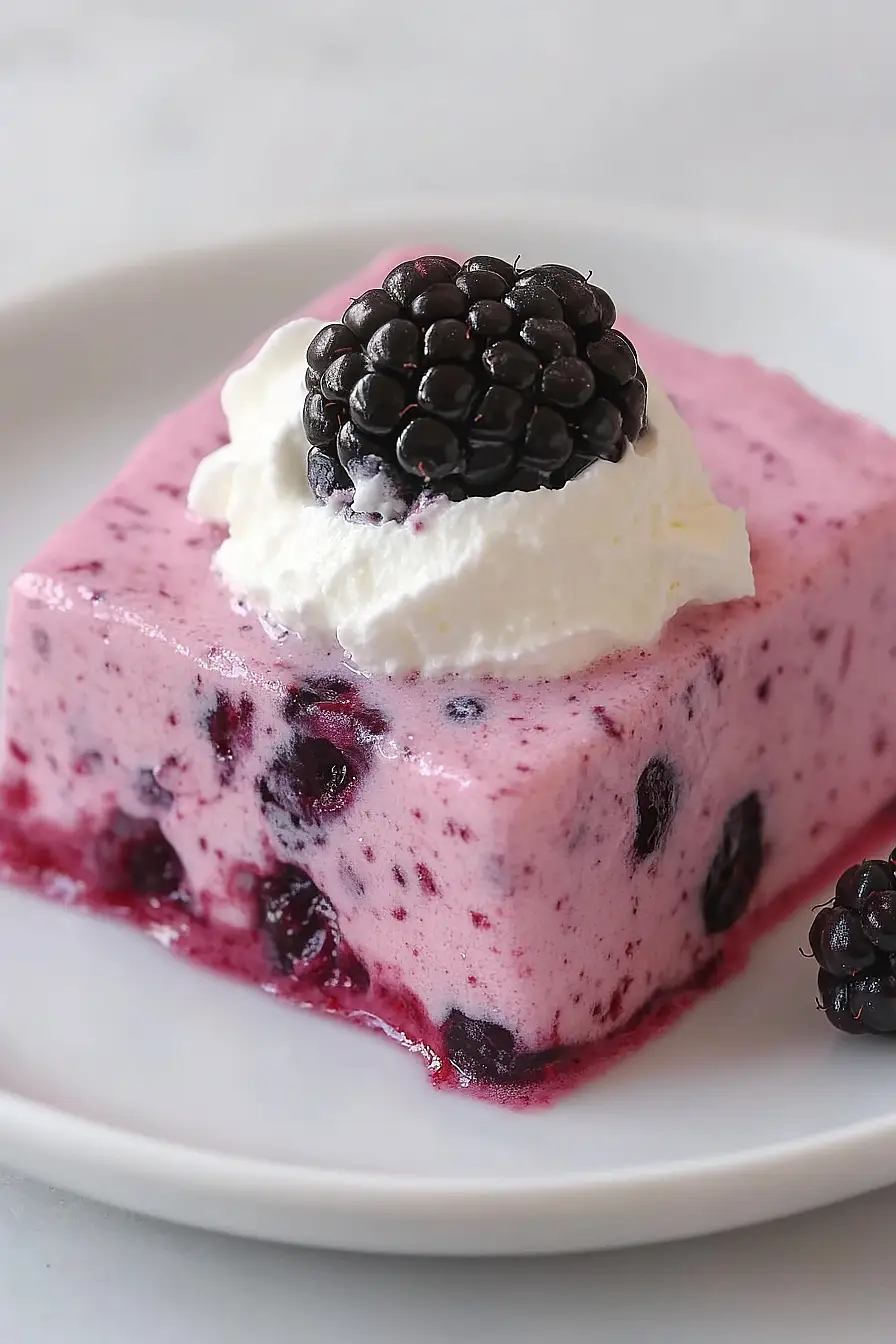
Mixed berries are the star of this retro-style dessert, and you’ve got plenty of options to work with. Most frozen mixed berry bags contain a combination of strawberries, blueberries, raspberries, and sometimes blackberries – any of these standard mixes will work great in this recipe. If you prefer to create your own mix, you can combine any berries you like, though I’d suggest including at least strawberries and blueberries for that classic flavor profile. Just remember to fully defrost and drain your berries before using them, as excess liquid can prevent your jello from setting properly. If you’re in a pinch, you can even use fresh berries instead of frozen, though frozen tend to be more economical and are picked at peak ripeness.
Options for Substitutions
This jello salad is pretty adaptable and there are several swap options you can try:
- Strawberry jello: You can use any red jello flavor like raspberry, cherry, or mixed berry. Sugar-free jello works too, just make sure to follow the package instructions for setting times.
- Crushed pineapple: If you’re not a fan of pineapple, try using mandarin oranges (well-drained) or canned peaches (crushed and drained). Just make sure to drain really well to avoid excess liquid.
- Mixed berries: Feel free to use any single berry or combination you like – strawberries, raspberries, blueberries, or blackberries all work great. Fresh berries are fine too, just cut larger ones into smaller pieces.
- Walnuts: You can swap these with pecans, almonds, or even macadamia nuts. If you need it nut-free, try using sunflower seeds or just skip them altogether.
- Dairy-free cream cheese: Regular cream cheese works if you don’t need it dairy-free. You can also try coconut cream (chilled and whipped) for a different twist.
- Dairy-free whipped topping: Regular whipped topping works fine if dairy isn’t an issue. You can also make coconut whipped cream from full-fat coconut milk (chilled overnight).
Watch Out for These Mistakes While Making
The biggest challenge when making jello salad is timing – adding ingredients before the jello has reached the right consistency can cause them to either sink to the bottom or float to the top instead of staying evenly distributed. The perfect moment to add your berries and nuts is when the jello has thickened to the consistency of unbeaten egg whites, usually after about 1-1.5 hours in the refrigerator. Another common mistake is not draining the pineapple and berries thoroughly, as excess liquid can prevent your jello from setting properly – use a fine-mesh strainer and even pat the fruit dry with paper towels if needed. To ensure the cream cheese layer blends smoothly, make sure it’s completely softened at room temperature for at least 2 hours, and whisk it well to remove any lumps before combining with the whipped topping.
What to Serve With Jello Salad?
This sweet and creamy jello salad is a perfect addition to any potluck or holiday spread! Since it’s on the sweeter side, it pairs really well with savory main dishes like baked ham, roasted turkey, or grilled chicken. I love serving it alongside other classic picnic foods like potato salad, coleslaw, or macaroni salad for a complete summer spread. If you’re bringing this to a holiday dinner, it fits right in with traditional sides like green bean casserole, mashed potatoes, and dinner rolls.
Storage Instructions
Keep Cool: This berry jello salad needs to stay chilled! Pop it in an airtight container in the fridge, where it’ll stay fresh for up to 5 days. The jello keeps its shape best when it’s nice and cold, making it perfect for making ahead for parties or gatherings.
Make Ahead: You can prepare this jello salad a day or two before your event – it actually gets better as the flavors meld together! Just keep it covered in the fridge until you’re ready to serve. The dairy-free whipped topping holds up really well, so no worries about it losing its texture.
Not Suitable for Freezing: I don’t recommend freezing this jello salad since the texture of both the jello and whipped topping would change quite a bit when thawed. It’s best enjoyed fresh from the fridge within those first 5 days.
| Preparation Time | 20-30 minutes |
| Cooking Time | 10-15 minutes |
| Total Time | 240-300 minutes |
| Level of Difficulty | Easy |
Estimated Nutrition
Estimated nutrition for the whole recipe (without optional ingredients):
- Calories: 2200-2500
- Protein: 25-30 g
- Fat: 150-170 g
- Carbohydrates: 250-270 g
Ingredients
- 1 box (3 oz) strawberry gelatin dessert
- 1 can (20 oz) pineapple in crushed form, drained
- 1 1/2 cups defrosted and drained frozen berry blend
- 1 cup chopped walnuts
- 8 oz plant-based cream cheese, at room temperature
- 8 oz non-dairy whipped topping, thawed
Step 1: Prepare the Pineapple and Juice
- 1 can (20 oz) pineapple in crushed form, drained
Drain the crushed pineapple and reserve the juice in a separate container.
You’ll need the juice for making the gelatin, so set it aside for now.
Step 2: Mix Gelatin Base
- 1 box (3 oz) strawberry gelatin dessert
- reserved pineapple juice (from Step 1)
Add enough water to the reserved pineapple juice to make up exactly 2 cups of liquid.
Combine this liquid with the strawberry gelatin dessert in a saucepan and cook according to the package instructions, usually by bringing the liquid to a boil, dissolving the gelatin, and then removing from heat.
Step 3: Set the Gelatin Mixture
- gelatin mixture (from Step 2)
Pour the prepared gelatin mixture into a glass bowl.
Refrigerate until the mixture is just beginning to set, which usually takes about 30–60 minutes.
The gelatin should be thickened but not fully firm.
I like to gently tilt the bowl to check for just the right wobble before moving on.
Step 4: Prepare and Combine Cream Cheese Mixture
- 8 oz plant-based cream cheese, at room temperature
- partially set gelatin mixture (from Step 3)
In a separate mixing bowl, beat the plant-based cream cheese with a hand mixer or spatula until it is creamy and fluffy.
Add the partially set gelatin mixture from the refrigerator and mix thoroughly until fully combined.
Step 5: Fold in Remaining Ingredients
- 8 oz non-dairy whipped topping, thawed
- 1 cup chopped walnuts
- 1 1/2 cups defrosted and drained frozen berry blend
- drained crushed pineapple (from Step 1)
Gently fold in the thawed non-dairy whipped topping, chopped walnuts, defrosted and drained frozen berry blend, and the drained crushed pineapple from Step 1.
Fold carefully to keep the mixture light and airy.
Step 6: Chill and Set the Salad
Transfer the combined mixture to a clean serving bowl or mold.
Refrigerate for at least four hours, or until firm and fully set.
For even better flavor, I enjoy letting it chill overnight so all the ingredients have time to come together.


")
")
