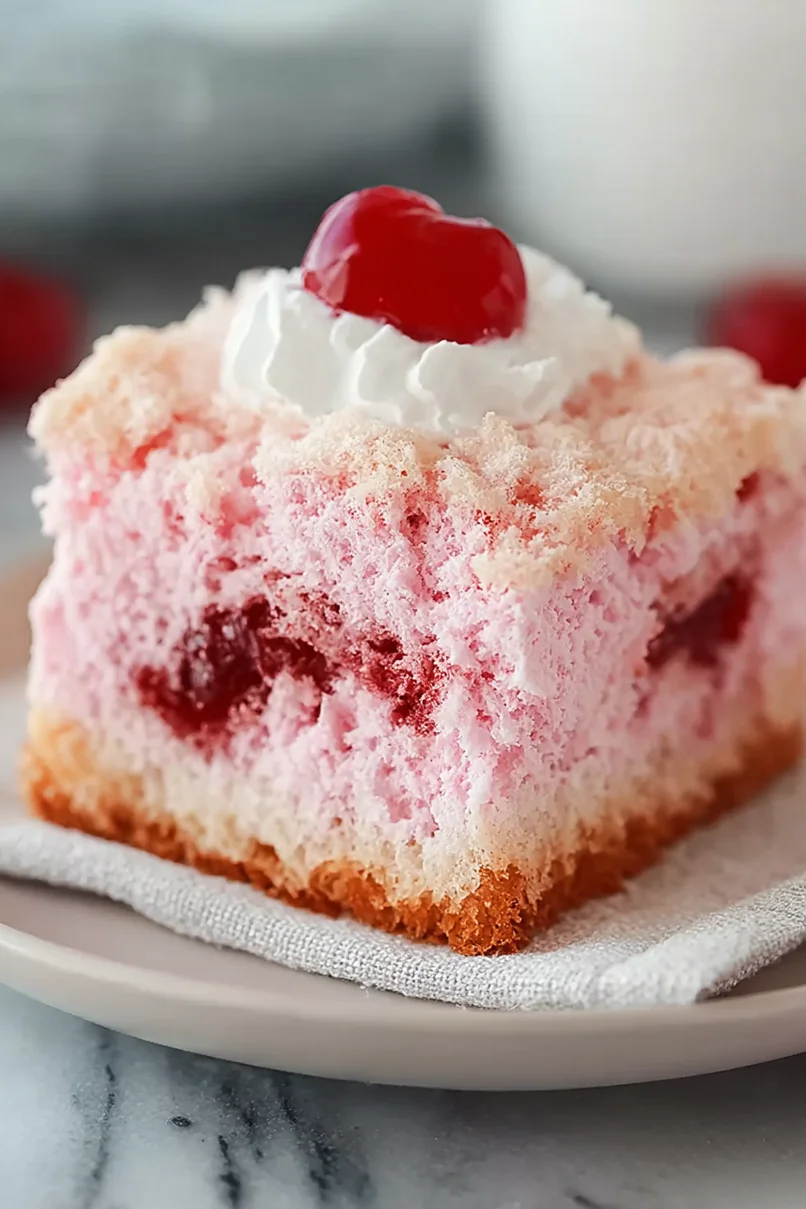
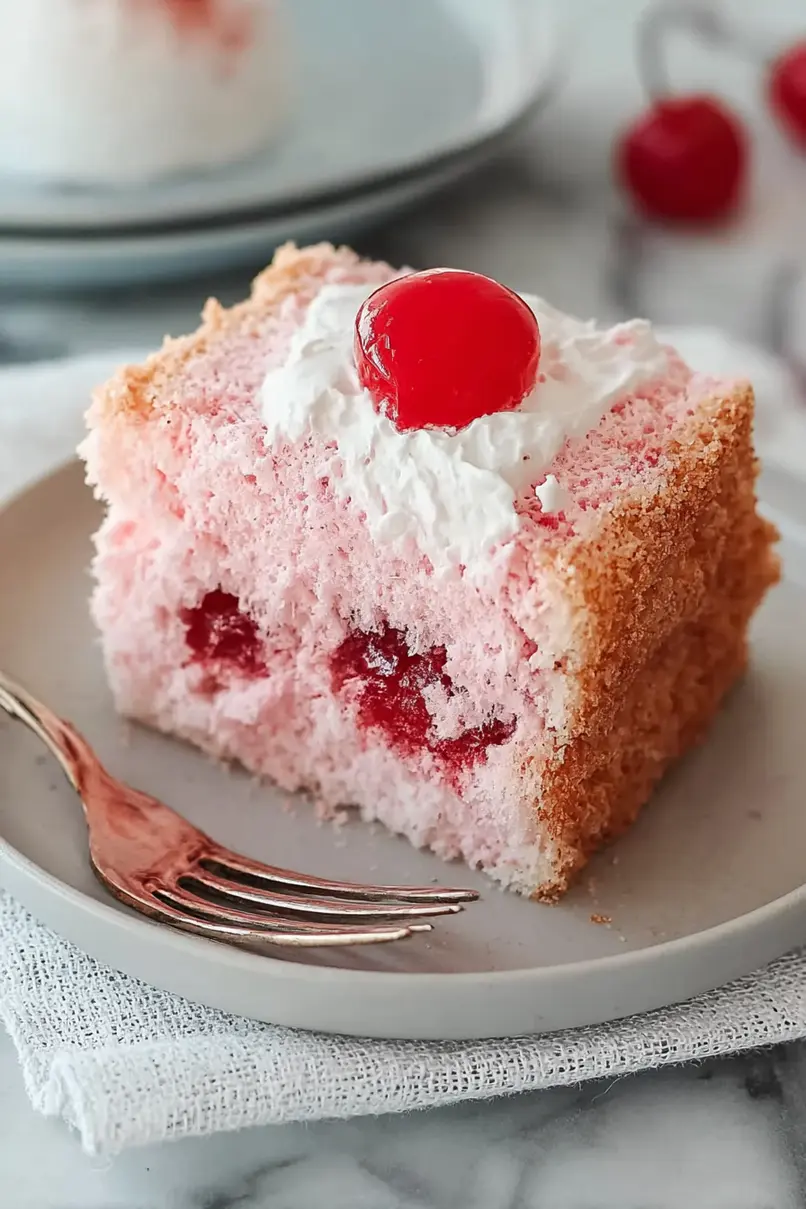
Here’s my go-to recipe for angel food cake topped with cherry pie filling – a light, airy cake paired with sweet cherries that create the perfect combination of flavors. The homemade angel food base is made with simple pantry ingredients, and the cherry topping adds just the right amount of fruity sweetness.
This dessert has become a regular at our summer gatherings, and I often make an extra one to keep in the fridge. There’s something special about enjoying a slice of this cake on a warm afternoon with a cold glass of milk, don’t you think?
Why You’ll Love This Angel Food Cake
- 2-ingredient simplicity – You only need angel food cake mix and cherry pie filling to create this delicious dessert – it doesn’t get easier than that!
- Quick preparation – With just 45 minutes from start to finish, you can whip this up even when you’re short on time or have last-minute guests.
- Light and fluffy texture – The airy angel food cake pairs perfectly with the sweet cherry topping, creating a dessert that’s not too heavy but still satisfying.
- No special skills needed – This foolproof recipe is perfect for beginner bakers or anyone who wants a stress-free dessert that turns out great every time.
What Kind of Cherry Pie Filling Should I Use?
When it comes to cherry pie filling, you’ve got a few good options at the grocery store. The most common type you’ll find is made with tart red cherries, which gives a nice balance of sweet and tangy flavors that work really well with angel food cake. While the name-brand fillings like Duncan Hines or Comstock are reliable choices, store brands can work just as well and often cost less. If you check the label, look for one where cherries are listed as the first ingredient and the sauce isn’t too thick or gummy. Just avoid the “lite” or reduced sugar versions for this recipe – they tend to be a bit watery and won’t give you that classic, rich topping you’re looking for.
Options for Substitutions
While this recipe is super simple with just two ingredients, here’s what you should know about possible swaps:
- Angel Food Cake Mix: This is the one ingredient you really can’t substitute – the specific chemistry of angel food cake mix is needed for this recipe to work. Just make sure to get the ‘just add water’ variety, not the type that comes with egg pouches.
- Cherry Pie Filling: Here’s where you can have some fun! Feel free to swap the cherry pie filling with any other canned pie filling – strawberry, blueberry, apple, or peach all work great. You can even use fresh fruit mixed with a bit of sugar and cornstarch (about 2 cups fruit + 1/4 cup sugar + 2 tablespoons cornstarch, cooked until thickened) if you prefer to make your own filling.
Watch Out for These Mistakes While Baking
The biggest mistake when making angel food cake is overmixing the batter – gentle folding is key, as vigorous stirring will deflate the air bubbles that create that signature light and fluffy texture. Another common error is not using a completely clean, grease-free bowl and beaters, since even a tiny bit of oil or egg yolk can prevent the egg whites from reaching their full volume potential. When adding the cherry pie filling, wait until the cake is completely cool – rushing this step while the cake is warm can cause the filling to seep too deeply into the cake and create a soggy texture. For the best results, use a serrated knife with a gentle sawing motion when cutting your cake, as pressing down with a regular knife will compress those airy layers you worked so hard to create.
What to Serve With Angel Food Cake?
This light and airy angel food cake topped with cherries is perfect on its own, but there are some simple ways to make it even more special! A dollop of freshly whipped cream is my go-to topping – it adds just the right amount of richness without overpowering the delicate cake. For a quick upgrade, try serving each slice with a scoop of vanilla ice cream, which pairs wonderfully with both the cake and cherry topping. If you’re serving this at a party, I like to put out some extra fresh berries on the side – strawberries, raspberries, or blueberries all work great and add a nice pop of color to the plate.
Storage Instructions
Keep Fresh: Your angel food cake with cherry topping will stay fresh in the fridge for up to 3 days when stored in an airtight container. I recommend adding the cherry pie filling just before serving each portion – this keeps the cake from getting too soggy and helps maintain that light, airy texture we all love!
Freeze: If you want to freeze this treat, it’s best to freeze the plain angel food cake without the cherry topping. Wrap it well in plastic wrap and then aluminum foil, and it’ll keep in the freezer for up to 4 months. The cherry pie filling can be stored separately in a freezer-safe container.
Thaw & Serve: When you’re ready to enjoy your frozen cake, let it thaw overnight in the refrigerator. Once it’s completely thawed, top with the cherry pie filling just before serving. This way, you’ll get that perfect combination of fluffy cake and sweet cherries every time!
| Preparation Time | 10-15 minutes |
| Cooking Time | 28-30 minutes |
| Total Time | 38-45 minutes |
| Level of Difficulty | Easy |
Estimated Nutrition
Estimated nutrition for the whole recipe (without optional ingredients):
- Calories: 1000-1200
- Protein: 10-15 g
- Fat: 0-5 g
- Carbohydrates: 240-260 g
Ingredients
- 1 box angel food cake mix (I use Duncan Hines for reliable rise)
- 1 can cherry pie filling (21 oz, or any fruit pie filling you prefer)
Step 1: Prepare Your Oven and Pan
Preheat your oven to 350°F and lightly grease a 9×13-inch baking dish or similar sized cake pan.
I prefer to use a metal baking dish here since it conducts heat evenly and helps the cake bake consistently throughout.
This step ensures your oven is at the right temperature when you’re ready to bake, so the cake rises properly from the moment it hits the heat.
Step 2: Combine Cake Mix and Cherry Filling
- 1 box angel food cake mix
- 1 can cherry pie filling
Pour the angel food cake mix and the entire can of cherry pie filling (including the liquid) into a large mixing bowl.
Using a spatula or wooden spoon, stir the mixture together until everything is well combined and the batter becomes thick and fluffy—you’ll notice it transforms from separate ingredients into a cohesive, slightly chunky batter with the fruit distributed throughout.
The cherries and their syrup actually do most of the work here, providing moisture and structure to what would normally be a very delicate cake.
Don’t overmix; stop once the dry mix is incorporated.
Step 3: Bake the Cake
- batter from Step 2
Pour the batter from Step 2 into your prepared baking dish, spreading it evenly with a spatula.
Place in the preheated 350°F oven and bake for 28-30 minutes, until the top is light golden brown and a toothpick inserted into the thickest part comes out clean or with just a few moist crumbs.
I like to check it at 28 minutes first—every oven is different, and you want to catch it at that perfect moment when it’s set but still tender.
Step 4: Cool and Serve
Remove the cake from the oven and let it cool in the baking dish for 30 minutes at room temperature.
This cooling time allows the cake to set properly so it won’t fall apart when you slice it, but it’s still warm enough to be delicious.
Once cooled, slice into squares directly in the pan and serve warm or at room temperature.
You can add a dollop of whipped cream or vanilla ice cream if you like, though it’s wonderful on its own.






Can you make it and put an airtight tap on it and put in the refrigerator for the next day?