Italian tomato pie reminds me of summer afternoons at my grandma’s house. There’s something so comforting about the way those garden-fresh tomatoes blend with herbs and cheese on a flaky crust. I’ve been making this pie for years, and it’s become one of those recipes I keep coming back to, especially when tomatoes are in season.
What I really like about this pie is how simple it is to put together. You don’t need fancy ingredients or complicated techniques – just good tomatoes and a few pantry staples. I often make it on weekends when I want something that feels special but doesn’t keep me in the kitchen all day. Sometimes I’ll prep everything the night before and just pop it in the oven when I’m ready to bake.
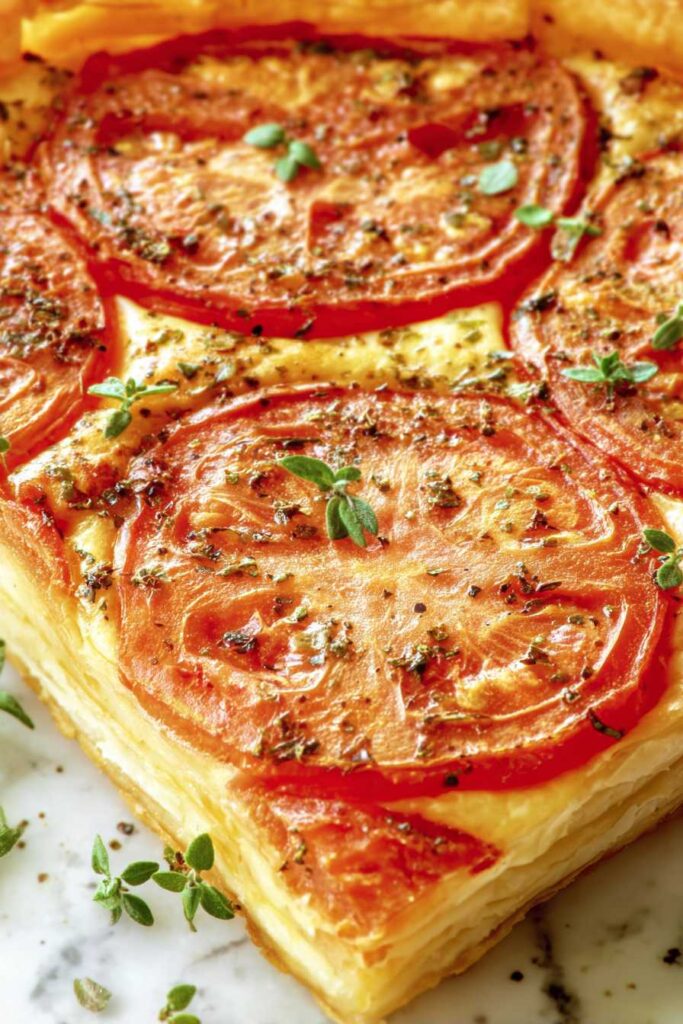
Whether you serve it warm for lunch or at room temperature for a picnic, this tomato pie always hits the spot. And if you’re like me and grow your own tomatoes, this recipe is the perfect way to show them off.
Why You’ll Love This Tomato Pie
- Quick weeknight dinner – Ready in under an hour, this tomato pie is perfect for those busy evenings when you want something homemade but don’t have hours to spend in the kitchen.
- Simple ingredients – Using basic ingredients like pre-made pie dough and fresh tomatoes, this recipe proves that delicious doesn’t have to be complicated.
- Perfect for entertaining – The combination of melty cheese and fresh tomatoes creates a dish that looks impressive enough for guests but is surprisingly easy to put together.
- Customizable cheese blend – You can mix and match your favorite cheeses to create your perfect flavor combination – the recipe is flexible and forgiving.
Selecting the Best Tomatoes
For an Italian tomato pie, you’ll want to pick tomatoes that are meaty and not too watery – Roma or plum tomatoes are perfect since they have fewer seeds and a denser flesh.
If you can find them, heirloom tomatoes like Brandywine or Cherokee Purple can add amazing flavor, though regular beefsteak tomatoes from the grocery store will work just fine too.
The key is choosing tomatoes that feel firm when gently squeezed but are still ripe enough to have developed good flavor.
Before adding them to your pie, try laying the sliced tomatoes on paper towels for about 15 minutes to remove excess moisture – this helps prevent your pie from becoming soggy.

Simple Ingredient Swaps
This tomato pie is pretty flexible and you can make several swaps based on what you have in your kitchen:
- Pre-made pie dough: You can use homemade pie crust, puff pastry, or even pizza dough as your base. Just remember that cooking times might vary – pizza dough usually needs a few extra minutes to get crispy.
- Mozzarella: Fresh or low-moisture mozzarella both work here. If you’re out of mozzarella, provolone makes a good substitute since it has a similar mild flavor and melting quality.
- Gouda/Fontal/Gruyere: Any good melting cheese works in this spot – try fontina, havarti, or even mild cheddar. Just avoid very aged hard cheeses as they won’t melt as smoothly.
- Fresh tomatoes: Roma, beefsteak, or heirloom tomatoes all work great. In a pinch, you can use cherry tomatoes (halved) or even well-drained canned tomatoes, though fresh is better for this recipe.
- Dried herbs: Feel free to use Italian seasoning instead of individual dried herbs. If using fresh herbs, triple the amount called for in dried form.
- Fresh basil: While fresh basil adds a nice touch, you can skip it if you don’t have any. Just add an extra 1/2 teaspoon of dried basil to the seasoning mix.
Key Baking Mistakes to Prevent
The biggest challenge when making tomato pie is preventing a soggy bottom crust – combat this by laying your sliced tomatoes on paper towels for 15-20 minutes before assembling to draw out excess moisture.
Another common mistake is overloading the pie with cheese right from the start – instead, add the final layer of cheese during the last 10 minutes of baking to achieve that perfect golden-brown top without burning.

Ideal Side Dishes for Italian Tomato Pie
This cheesy tomato pie is perfect for a summer lunch or dinner, and it pairs wonderfully with a few simple sides.
A crisp arugula salad dressed with lemon juice and olive oil makes a great match, cutting through the richness of the cheese and complementing the tomatoes.
If you’re serving this for dinner, try it alongside some grilled Italian sausages or a bowl of light soup like Italian wedding or minestrone.
For a casual weekend lunch, I love serving tomato pie with a side of marinated olives and some thin-sliced prosciutto – it really brings out those Italian flavors!
Storage Instructions
Keep Fresh: Your Italian tomato pie will stay good in the fridge for up to 3 days. Just let it cool completely, then wrap it well in plastic wrap or place it in an airtight container. The crust might soften a bit due to the moisture from the tomatoes, but it’s still really good!
Make Ahead: You can prep some components ahead of time to make assembly quicker. Slice your cheese and tomatoes up to a day before, keeping them separate in the fridge. The pie crust can also be rolled out and stored in the fridge overnight, wrapped in plastic wrap.
Warm Up: To bring back some of that fresh-baked magic, pop leftover slices in a 350°F oven for about 10 minutes. The microwave works too, but the crust won’t be as crispy. I like to add a few fresh basil leaves after reheating to brighten it up.
| Preparation Time | 15-20 minutes |
| Cooking Time | 35-40 minutes |
| Total Time | 50-60 minutes |
| Level of Difficulty | Easy |
Estimated Nutrition
Estimated nutrition for the whole recipe (without optional ingredients):
- Calories: 800-900
- Protein: 30-35 g
- Fat: 50-55 g
- Carbohydrates: 80-90 g
Ingredients
- 1 tsp dried basil
- 1 pre-made pie dough or puff pastry (thawed if frozen)
- 1.5 tsp dried oregano
- 3-5 fresh basil leaves (optional but adds brightness to finished pie)
- 7 oz firm mozzarella, thinly sliced (about 1/8-inch thick)
- 5.25 oz Gruyère cheese (or Gouda, shredded or thinly sliced)
- 0.25 to 0.5 tsp salt (adjust to taste)
- 2 ripe tomatoes, thinly sliced (about 1/4-inch thick, excess moisture patted dry)
- 1.25 tbsp olive oil (extra virgin for better flavor)
- 1 tbsp melted butter (I use Kerrygold unsalted)
Step 1: Prepare the Pastry and Vegetables
- 2 ripe tomatoes, thinly sliced and patted dry
Preheat your oven to 375°F.
While the oven heats, prepare your tomatoes by slicing them into thin 1/4-inch rounds and patting them dry with paper towels—this crucial step prevents a soggy crust by removing excess moisture that would otherwise release into the pie during baking.
Set the dried tomato slices aside on a clean plate, and have your mozzarella and Gruyère cheeses ready and sliced or shredded as indicated.
Step 2: Prepare the Pan and Pastry
- 1 pre-made pie dough or puff pastry
- 1 tbsp melted butter
Lightly brush a pie pan or baking sheet with a thin layer of melted butter to prevent sticking.
Unroll or fit your pie dough or puff pastry into the prepared pan, letting it settle naturally into the corners.
Brush the entire surface of the pastry with the remaining melted butter—this creates a protective layer that helps prevent sogginess and encourages even browning.
I prefer brushing the pastry rather than the filling base because it creates a better barrier against moisture from the tomatoes.
Step 3: Build the Cheese and Tomato Layers
- 7 oz firm mozzarella, thinly sliced
- 5.25 oz Gruyère cheese, shredded or thinly sliced
- tomato slices from Step 1
Begin layering by arranging half of the mozzarella slices across the butter-brushed pastry in an even layer.
Follow with half of the Gruyère cheese, then arrange half of your prepared tomato slices on top.
Repeat with the remaining mozzarella, then Gruyère, finishing with the final layer of tomato slices.
This creates a balanced distribution of flavors throughout the pie and ensures every bite has the perfect combination of creamy cheese and fresh tomato.
Step 4: Season and Finish the Top
- 1.5 tsp dried oregano
- 1 tsp dried basil
- 0.25 to 0.5 tsp salt
- 1.25 tbsp olive oil
Sprinkle the dried oregano and dried basil evenly across the top of the pie, then season with salt to taste (start with 0.25 tsp and adjust as needed based on your cheese saltiness).
Drizzle the extra virgin olive oil over the entire surface in a thin, even stream—this adds richness and helps the herbs distribute their flavors throughout the pie.
I always use good quality olive oil here because you can really taste it in the finished dish, and it makes a noticeable difference.
Step 5: Bake Until Golden and Bubbly
Place the assembled pie in your preheated 375°F oven and bake for 35 minutes, or until the pastry edges are deep golden brown and the cheese is bubbling up around the sides.
You’ll know it’s done when you see the cheese beginning to brown slightly on top and hear the gentle sizzle of bubbling cheese.
Watch the crust carefully in the final 5-10 minutes—if it’s browning too quickly, you can loosely tent it with foil to prevent burning while the cheese finishes melting.
Step 6: Cool Slightly and Finish with Fresh Basil
- 3-5 fresh basil leaves
Remove the pie from the oven and let it rest for 3-5 minutes—this allows the cheese to set slightly and makes slicing cleaner and easier.
Tear or chiffonade the fresh basil leaves and scatter them over the top of the warm pie just before serving, which brightens the flavors and adds a fresh herbal note that complements the rich, melted cheeses perfectly.


