Mouthwatering Hazelnut Linzer Cookies
Delicious Mouthwatering Hazelnut Linzer Cookies recipe with step-by-step instructions.
Ingredients
For the dough:
- 2 large eggs (room temperature)
- 1 tsp baking powder
- 3.5 oz hazelnut flour (finely ground)
- 3.5 oz brown sugar
- 1/2 tsp salt
- 8 oz unsalted butter (softened to room temperature)
- 13.4 oz all-purpose flour (I use King Arthur all-purpose flour)
- 1.75 oz granulated sugar
- 1 tsp vanilla extract
For the filling and assembly:
- powdered sugar for dusting
- 1.75 oz hazelnut spread (I use Nutella for classic flavor)
Instructions
- In a large mixing bowl, beat the softened butter, brown sugar, and granulated sugar together until the mixture is light, fluffy, and pale—this should take about 2-3 minutes. This creaming process incorporates air into the dough, which helps create tender cookies. Add the room-temperature eggs one at a time, beating well after each addition, then add the vanilla extract and mix until fully combined. The mixture should look smooth and homogeneous before moving to the next step.
- In a separate bowl, whisk together the all-purpose flour, hazelnut flour, baking powder, and salt. Whisking these dry ingredients together distributes the leavening agent evenly and prevents lumps, which ensures your cookies will have a consistent texture throughout. Set this mixture aside—you'll be combining it with the wet mixture next.
- Add the dry ingredient mixture from Step 2 to the creamed butter and egg mixture from Step 1, mixing on low speed just until combined—don't overmix, as this can develop gluten and make the cookies tough. Divide the dough in half and flatten each portion into a disc about 1 inch thick. Wrap each disc tightly in plastic wrap and refrigerate for at least 2 hours (or up to overnight). I like to chill my dough this long because it prevents excessive spreading during baking and makes the dough much easier to roll and cut without sticking.
- Preheat your oven to 350°F and line two baking sheets with parchment paper. Remove one dough disc from the refrigerator and let it sit at room temperature for 5-10 minutes to soften slightly—this makes it easier to roll without cracking. On a lightly floured surface, roll the dough to about 1/8 inch thickness, then cut out 3-inch rounds using a cookie cutter. Place the rounds on one of your prepared baking sheets and gather any scraps to re-roll for additional cookies.
- Bake the bottom cookie rounds for 10 minutes until the edges are just set but the centers are still tender. While these bake, remove the second dough disc from the refrigerator and repeat the rolling and cutting process from Step 4 on the second baking sheet. However, for the top cookies, after placing the 3-inch rounds on the baking sheet, use a small mini cookie cutter (about 1-1.5 inches) to cut out the centers of each round—this creates the signature window that will show the hazelnut spread filling. Allow the bottom cookies to cool completely on the baking sheet, then bake the top cookies for 9 minutes (they bake slightly faster since they have the center cutout and less dough mass).
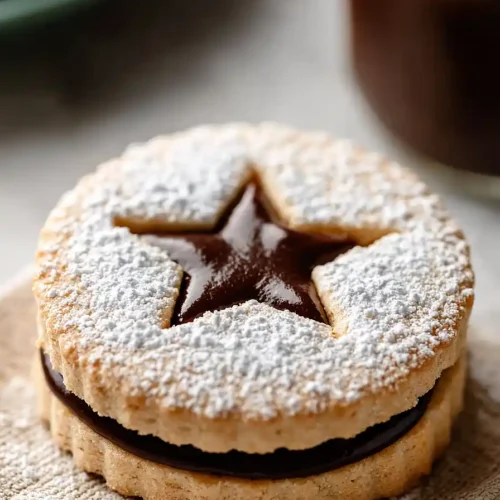
- Once all cookies have cooled completely, flip the bottom cookies over so the flat side faces up. Spread 1-2 teaspoons of hazelnut spread onto the center of each bottom cookie. Dust the top cookies generously with powdered sugar to create a beautiful snowy finish and to offset the richness of the filling. Carefully press the top cookie (sugar-side up) onto the hazelnut spread, creating a sandwich with the filling visible through the cutout window. I find that dusting the top cookies with powdered sugar before assembly not only looks more beautiful, but it also helps distinguish the top from the bottom, making assembly less confusing.