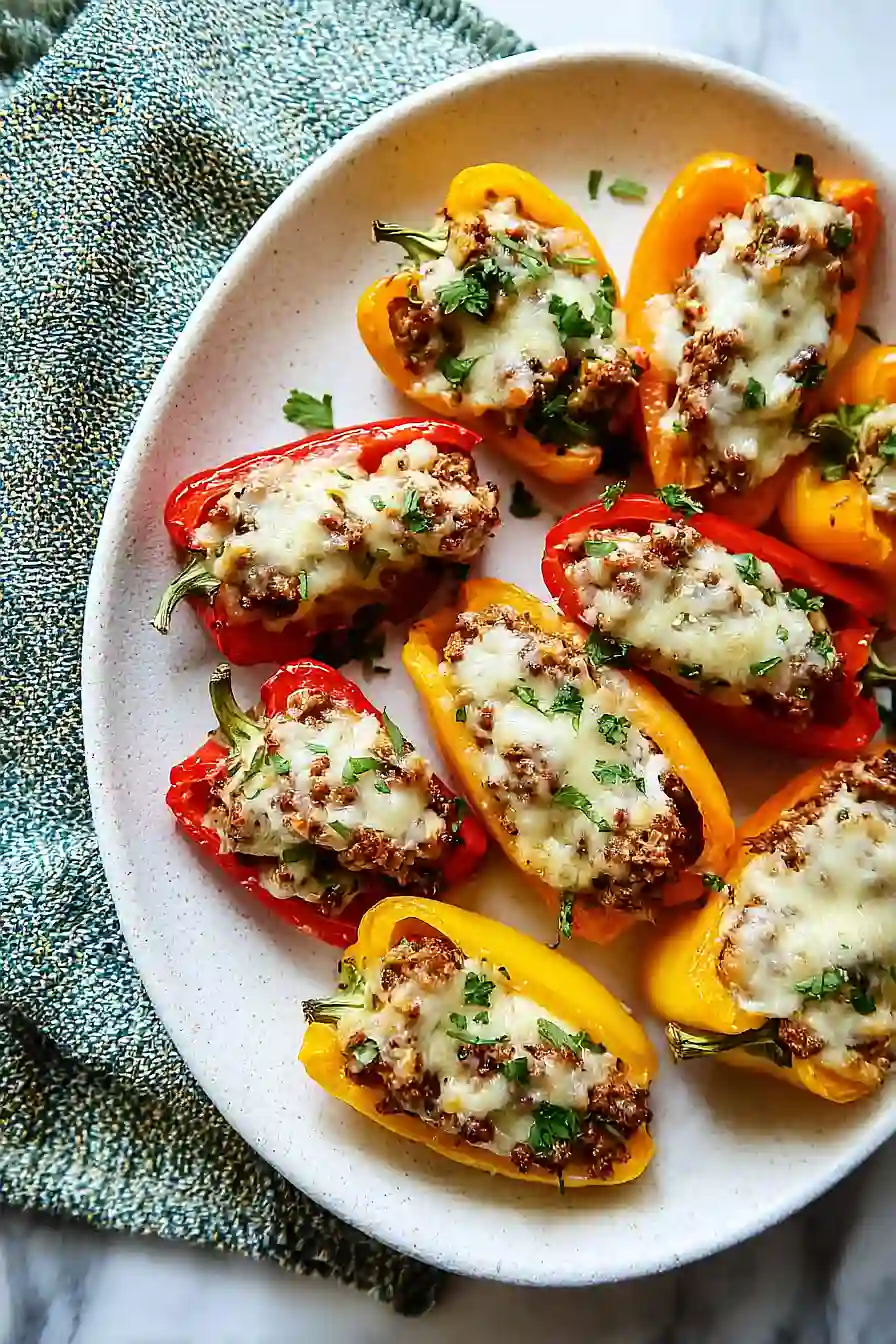
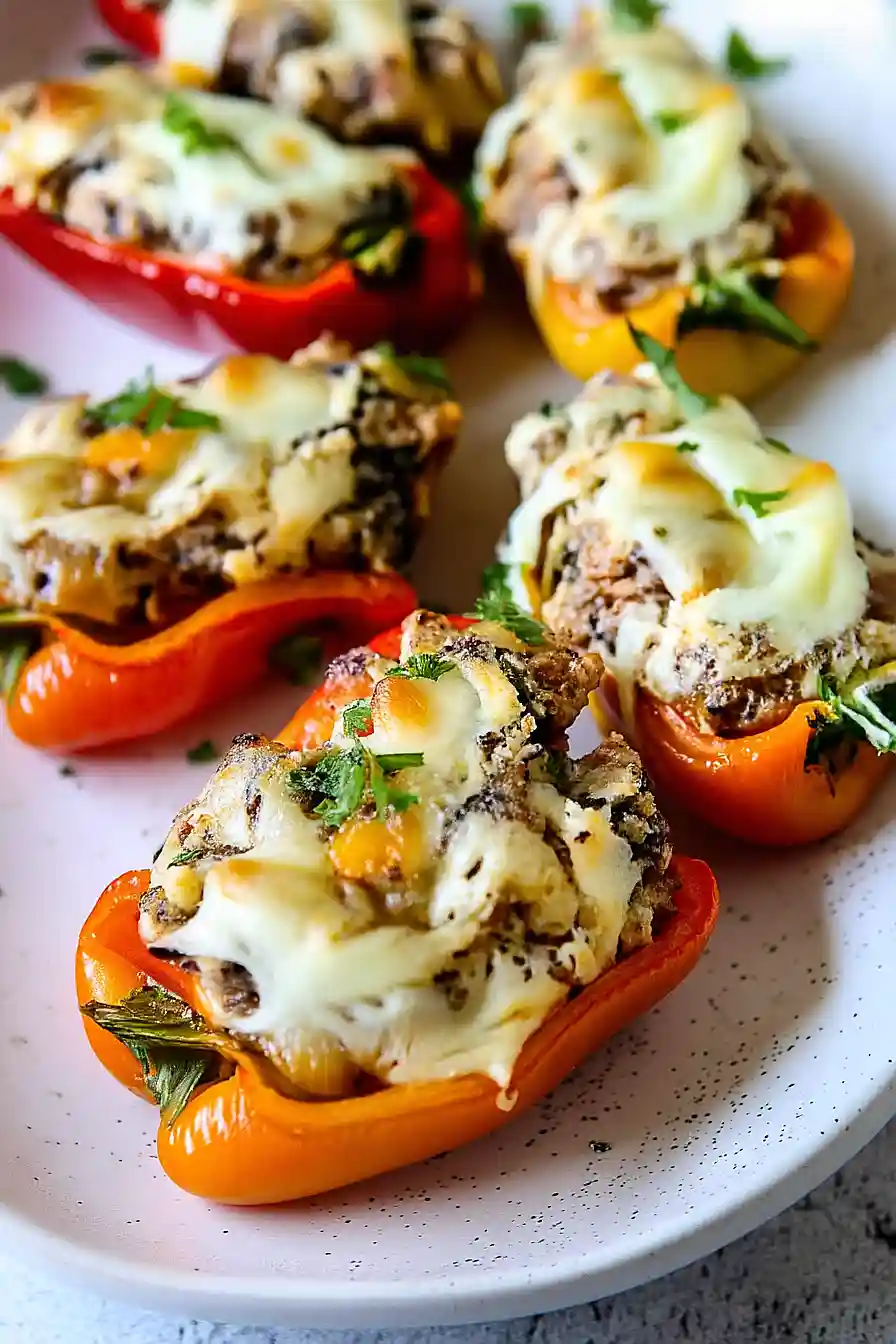
I’m always looking for appetizers that don’t keep me stuck in the kitchen while my guests are having fun. That’s where these sausage stuffed mini peppers come in. They look like you spent hours on them, but they’re actually pretty simple to throw together.
I started making these a few years ago when I needed something I could prep ahead. You can stuff the peppers in the afternoon and just pop them in the oven when people arrive. They come out hot and melty, and everyone thinks you’re some kind of entertaining genius.
The best part? You probably have most of what you need already. Sausage, cream cheese, and mini peppers. That’s basically it. I like to make a double batch because they disappear fast. Trust me, make extras.

Why You’ll Love These Sausage Stuffed Mini Peppers
- Ready in 30-40 minutes – These stuffed peppers come together quickly, making them perfect for busy weeknights or when you need an appetizer in a pinch.
- Simple ingredients – You only need a handful of everyday ingredients to make these tasty bites, and most of them are probably already in your fridge.
- Perfect party appetizer – These mini peppers are bite-sized and easy to eat with your hands, making them ideal for game day, potlucks, or any gathering.
- Packed with flavor – The combination of savory Italian sausage, creamy cheese, and fresh chives creates a satisfying taste in every bite.
- Low-carb friendly – If you’re watching your carbs or following a keto diet, these peppers make a filling snack or side dish without the guilt.
What Kind of Mini Peppers Should I Use?
You’ll find mini peppers in most grocery stores year-round, usually sold in bags in the produce section. They come in a mix of red, yellow, and orange colors, and honestly, any combination will work great for this recipe. Red peppers tend to be the sweetest, while yellow and orange fall somewhere in the middle, but they all have a mild, slightly sweet flavor that pairs perfectly with the savory sausage filling. Look for peppers that are firm and glossy without any soft spots or wrinkles, and try to pick ones that are similar in size so they cook evenly.
Options for Substitutions
This recipe is pretty forgiving when it comes to swaps, so feel free to work with what you have:
- Italian sausage: You can use mild, sweet, or hot Italian sausage depending on your preference. Ground turkey or chicken sausage works too if you want a lighter option. Regular ground beef seasoned with Italian herbs is another solid choice.
- Cream cheese: Ricotta cheese makes a great substitute and gives the filling a slightly different texture. You could also use mascarpone for something richer, or even sour cream mixed with a bit of mayo if you’re in a bind.
- Mozzarella cheese: Monterey Jack, provolone, or a Mexican cheese blend all melt nicely and taste great here. Parmesan adds a sharper flavor if that’s more your style.
- Chives: Green onions work perfectly as a substitute. You can also use fresh parsley or basil if that’s what you have on hand.
- Mini peppers: These are really the star of the show, so try to stick with them. If you absolutely can’t find them, you could use jalapeños (seeded for less heat) or small bell peppers cut in half, though the presentation won’t be quite the same.
Watch Out for These Mistakes While Cooking
The biggest mistake when making stuffed mini peppers is not removing all the seeds and membranes, which can make your appetizer unexpectedly spicy and bitter – take an extra minute to scrape them out completely with a small spoon.
Another common error is undercooking the sausage before stuffing the peppers, so make sure to brown it thoroughly and break it into small crumbles to ensure it’s fully cooked and easy to mix with the cheese.
To prevent watery stuffed peppers, drain any excess grease from the cooked sausage and pat the peppers dry after cutting them, which helps the filling stay creamy instead of runny.
If your peppers are browning too quickly on the outside while the filling stays cold, try covering them with foil for the first half of baking, then removing it to let the cheese get golden and bubbly.
What to Serve With Sausage Stuffed Mini Peppers?
These stuffed peppers work great as an appetizer for parties, but they’re hearty enough to be a main dish too. If you’re serving them as a meal, pair them with a simple side salad dressed with olive oil and lemon, or some roasted vegetables like zucchini and asparagus. They also go really well alongside pasta with marinara sauce, or you can serve them with crusty bread and a dipping bowl of extra marinara for anyone who wants more sauce. For a lighter option, try them with some garlic-roasted green beans or a cucumber tomato salad.
Storage Instructions
Store: These stuffed peppers keep really well in the fridge for up to 4 days in an airtight container. They make a great grab-and-go snack or appetizer throughout the week, and honestly taste just as good cold as they do warm!
Freeze: You can freeze these either before or after baking, which is super handy for party prep. If freezing unbaked, arrange them on a baking sheet until solid, then transfer to a freezer bag for up to 3 months. Already baked ones freeze just as well using the same method.
Reheat: Pop refrigerated peppers in a 350°F oven for about 10 minutes until warmed through, or microwave them for 30-45 seconds. If baking from frozen, add an extra 5-10 minutes to the original baking time, and you’re good to go.
| Preparation Time | 15-20 minutes |
| Cooking Time | 15-20 minutes |
| Total Time | 30-40 minutes |
| Level of Difficulty | Easy |
Estimated Nutrition
Estimated nutrition for the whole recipe (without optional ingredients):
- Calories: 1700-1900
- Protein: 70-80 g
- Fat: 140-155 g
- Carbohydrates: 35-45 g
Ingredients
For the filling:
- 8 oz italian sausage meat
- 2 garlic cloves, minced
- 8 oz cream cheese, softened
- 2 tbsp chopped chives
For the peppers:
- 1 lb mini sweet peppers (about 12)
For the topping:
- 1 cup shredded mozzarella cheese
Step 1: Prepare the Oven and Baking Sheet
Preheat your oven to 400°F.
Line a baking sheet with parchment paper to prevent sticking and to make cleanup easier.
Step 2: Prepare the Mini Peppers
- 1 lb mini sweet peppers (about 12)
Cut the mini sweet peppers in half lengthwise.
Using a small spoon or your fingers, scoop out the seeds and white membranes to make space for the filling.
Step 3: Cook the Sausage and Garlic
- 8 oz Italian sausage meat
- 2 garlic cloves, minced
In a large skillet over medium-high heat, break up the Italian sausage meat and cook until browned and no longer pink, about 10 minutes.
Add the minced garlic and stir for another minute until fragrant.
Drain off any excess fat before proceeding.
I find that taking a moment to drain the fat keeps the filling from getting greasy.
Step 4: Make the Sausage and Cream Cheese Filling
- cooked sausage and garlic from Step 3
- 8 oz cream cheese, softened
- 2 tbsp chopped chives
Transfer the cooked sausage and garlic mixture from Step 3 to a large bowl.
Add the softened cream cheese and chopped chives.
Stir thoroughly until everything is well combined and creamy, making sure the mixture is evenly blended.
Step 5: Stuff and Top the Peppers
- pepper halves from Step 2
- sausage and cream cheese mixture from Step 4
- 1 cup shredded mozzarella cheese
Using a spoon, fill each prepared pepper half (from Step 2) with the sausage and cream cheese mixture from Step 4.
Arrange the filled peppers on the prepared baking sheet.
Sprinkle the shredded mozzarella cheese evenly over the tops of all the peppers.
For extra flavor, you could also sprinkle a little black pepper or smoked paprika before baking.
Step 6: Bake the Stuffed Peppers
Place the baking sheet with the stuffed peppers into the preheated oven.
Bake for about 15 minutes, or until the cheese is melted and just starting to brown.
Once done, let them cool for a few minutes before serving.
I like to garnish with a few extra chives for a pop of color and freshness.

30-Minute Sausage Stuffed Mini Peppers
Ingredients
For the filling:
- 8 oz Italian sausage meat
- 2 garlic cloves, minced
- 8 oz cream cheese, softened
- 2 tbsp chopped chives
For the peppers:
- 1 lb mini sweet peppers (about 12)
For the topping:
- 1 cup shredded mozzarella cheese
Instructions
- Preheat your oven to 400°F. Line a baking sheet with parchment paper to prevent sticking and to make cleanup easier.
- Cut the mini sweet peppers in half lengthwise. Using a small spoon or your fingers, scoop out the seeds and white membranes to make space for the filling.
- In a large skillet over medium-high heat, break up the Italian sausage meat and cook until browned and no longer pink, about 10 minutes. Add the minced garlic and stir for another minute until fragrant. Drain off any excess fat before proceeding. I find that taking a moment to drain the fat keeps the filling from getting greasy.
- Transfer the cooked sausage and garlic mixture from Step 3 to a large bowl. Add the softened cream cheese and chopped chives. Stir thoroughly until everything is well combined and creamy, making sure the mixture is evenly blended.
- Using a spoon, fill each prepared pepper half (from Step 2) with the sausage and cream cheese mixture from Step 4. Arrange the filled peppers on the prepared baking sheet. Sprinkle the shredded mozzarella cheese evenly over the tops of all the peppers. For extra flavor, you could also sprinkle a little black pepper or smoked paprika before baking.
- Place the baking sheet with the stuffed peppers into the preheated oven. Bake for about 15 minutes, or until the cheese is melted and just starting to brown. Once done, let them cool for a few minutes before serving. I like to garnish with a few extra chives for a pop of color and freshness.

