I was skeptical the first time someone told me to throw leftover kimchi into fried rice. Growing up, fried rice meant soy sauce, scrambled eggs, and maybe some frozen peas if we were feeling fancy. Kimchi seemed too spicy and funky for something so simple.
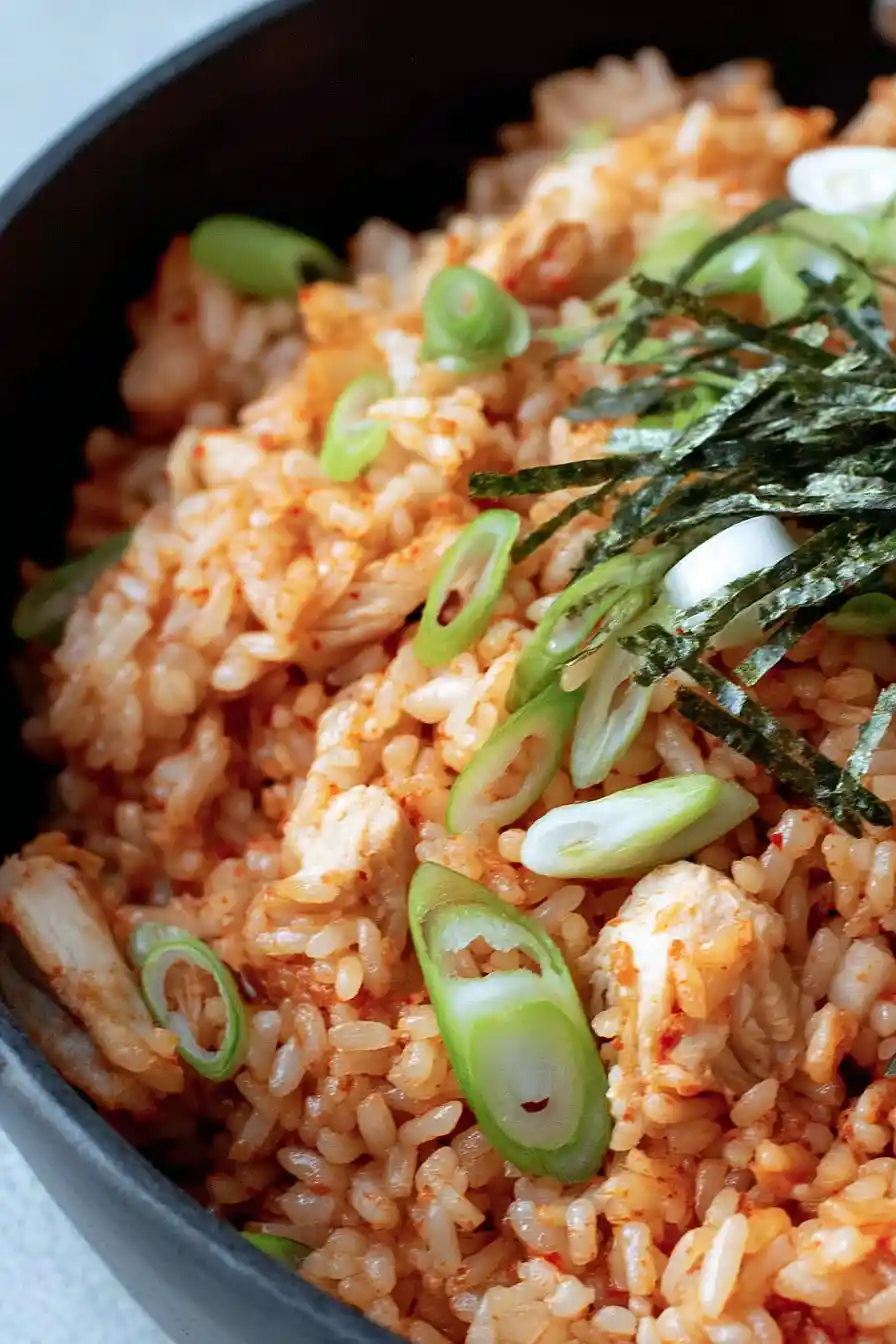
But here’s what I learned after trying it—kimchi fried rice is actually easier than regular fried rice. The kimchi brings all the flavor, so you don’t need to worry about getting the seasoning just right. Plus, it’s the perfect way to use up that jar of kimchi that’s been sitting in your fridge. Add some chicken, and you’ve got a complete meal that takes less time than ordering takeout.
Why You’ll Love This Kimchi Fried Rice
- Quick weeknight dinner – Ready in just 30-45 minutes, this one-pan meal is perfect when you want something satisfying without spending hours in the kitchen.
- Bold, exciting flavors – The tangy kimchi and spicy gochujang create an addictive combination that’s way more interesting than regular fried rice.
- Great way to use leftovers – This recipe works perfectly with leftover rice and any kimchi sitting in your fridge, turning simple ingredients into something special.
- Complete meal in one pan – With protein from chicken and eggs, plus plenty of vegetables, you get everything you need for a balanced dinner without multiple dishes to wash.
- Customizable heat level – You can easily adjust the spiciness by using more or less gochujang and kimchi to suit your taste preferences.
What Kind of Kimchi Should I Use?
For the best kimchi fried rice, you’ll want to use well-fermented kimchi that’s been sitting in your fridge for at least a week or two. The older, more sour kimchi actually works better than fresh kimchi because it has more developed flavors and won’t add too much moisture to your rice. You can find kimchi at most grocery stores these days, usually in the refrigerated section near other fermented foods, or at any Asian market. Don’t throw away that kimchi juice either – it’s liquid gold for this recipe and adds an extra punch of fermented flavor that really makes the dish shine.
Options for Substitutions
This fried rice is pretty forgiving when it comes to swaps, so here’s what you can change up:
- Sushi rice: Day-old jasmine rice or any short-grain rice works great here. The key is using rice that’s been refrigerated overnight – it fries up better and doesn’t get mushy.
- Chicken thighs: You can easily swap these for chicken breast, pork belly, or even leave out the meat entirely for a vegetarian version. If using breast meat, cook it a bit less to avoid drying out.
- Gochujang: If you can’t find gochujang, try sriracha mixed with a little tomato paste, or use sambal oelek with a pinch of sugar. The heat level will be different, so start with less and adjust to taste.
- Kimchi: This is really the star of the dish, so I wouldn’t recommend skipping it. But if yours isn’t very sour, add a splash of rice vinegar to make up for missing kimchi juice.
- Red pepper: Bell peppers of any color work fine, or you can use snap peas, broccoli, or whatever vegetables you have on hand.
- Nori: If you don’t have nori sheets, you can skip this garnish or sprinkle some toasted sesame seeds on top instead for extra crunch.
Watch Out for These Mistakes While Cooking
The biggest mistake when making kimchi fried rice is using freshly cooked, hot rice instead of day-old rice – warm rice will turn mushy and clump together, so always use rice that’s been refrigerated overnight or let fresh rice cool completely before frying.
Don’t overcrowd your pan with all the ingredients at once, as this will steam everything instead of getting that nice crispy texture you want – cook the chicken first until golden, then remove it and add it back at the end.
Another common error is not draining your kimchi properly, which can make your fried rice watery and bland, so give it a good squeeze before adding it to the pan and save that flavorful juice to add back in controlled amounts.
Finally, resist the urge to keep stirring constantly – let the rice sit undisturbed for a minute or two between stirs to develop those crispy, caramelized bits that make fried rice so good.
What to Serve With Kimchi Fried Rice?
This kimchi fried rice is pretty much a complete meal on its own, but I love serving it with some crispy Korean side dishes to make it feel like a proper feast. A simple cucumber salad dressed with rice vinegar and a pinch of sugar helps cool down the spicy heat from the gochujang and kimchi. You could also add some steamed or sautéed bok choy on the side for extra greens, or even some pickled radishes if you can find them at your local Asian market. For something a bit heartier, try serving it alongside some miso soup or a light vegetable broth to round out the meal.
Storage Instructions
Refrigerate: Leftover kimchi fried rice keeps really well in the fridge for up to 4 days in an airtight container. The flavors actually get even better after sitting overnight, so don’t worry if you have extras! Just make sure to let it cool completely before putting it away.
Freeze: This fried rice freezes nicely for up to 3 months in freezer-safe containers or bags. I like to portion it out into individual servings so I can grab just what I need for a quick meal. The texture of the vegetables might be slightly softer after freezing, but it’s still delicious.
Reheat: To warm it up, just toss it in a pan with a splash of oil over medium heat for a few minutes, stirring occasionally. You can also microwave it, but I find the stovetop gives you that nice crispy texture again. Add a drizzle of sesame oil or extra soy sauce if it seems a bit dry.
| Preparation Time | 10-15 minutes |
| Cooking Time | 20-30 minutes |
| Total Time | 30-45 minutes |
| Level of Difficulty | Medium |
Estimated Nutrition
Estimated nutrition for the whole recipe (without optional ingredients):
- Calories: 1150-1300
- Protein: 45-55 g
- Fat: 40-50 g
- Carbohydrates: 140-160 g
Ingredients
For the fried rice:
- 1 1/4 cups sushi rice
- 1 1/2 tbsp vegetable or groundnut oil, divided
- 1/2 onion, minced
- 2 tsp fresh gingerroot, chopped
- 2 boneless chicken thighs, cubed
- 2/3 cup chopped kimchi
- 1 large carrot, grated
- 1 red bell pepper, diced
- 2 garlic cloves, crushed
- 3 large eggs
For the sauce:
- 1 tbsp gochujang (korean chili paste)
- 3 tbsp soy sauce
- 2 tbsp kimchi brine
For serving:
- 2 tsp sesame seeds
- 2 scallions, finely sliced
- Nori sheets, cut into thin 1.5 inch (4 cm) strips
Step 1: Cook the Sushi Rice
- 1 1/4 cups sushi rice
Cook the sushi rice according to the packet instructions.
For best results, prepare the rice the night before to allow it to cool and dry slightly.
If you haven’t done this in advance, cook the rice before you start preparing the rest of the dish and allow it to cool while you continue with the other steps.
Step 2: Prepare the Sauce
- 1 tbsp gochujang (Korean chili paste)
- 3 tbsp soy sauce
- 2 tbsp kimchi brine
In a small bowl or jug, whisk together the gochujang, soy sauce, and kimchi brine until smooth and well combined.
Ensure there are no lumps and set the sauce aside for later.
I like to taste the sauce at this stage and adjust the spice by adding a touch more gochujang if I’m feeling bold.
Step 3: Cook the Aromatics and Chicken
- 1 tbsp vegetable or groundnut oil
- 1/2 onion, minced
- 2 tsp fresh gingerroot, chopped
- 2 boneless chicken thighs, cubed
Heat 1 tablespoon of vegetable or groundnut oil in a wok or large frying pan over high heat.
Add the minced onion and chopped gingerroot, stirring for a few minutes until the onion becomes soft and translucent.
Next, add the cubed chicken thighs and cook on high heat, stirring frequently, until the outside is no longer pink.
Step 4: Add Vegetables and Make the Kimchi Fried Chicken Mixture
- 2/3 cup chopped kimchi
- 1 large carrot, grated
- 1 red bell pepper, diced
- 2 garlic cloves, crushed
Add the chopped kimchi, grated carrot, and diced red bell pepper to the pan with the chicken.
Continue to cook on high heat for a few more minutes until the chicken is fully cooked through and the vegetables are tender.
Reduce the heat to medium, stir in the crushed garlic, and cook for an additional 1-2 minutes until fragrant.
Step 5: Combine with Rice and Sauce
- cooked sushi rice (from Step 1)
- prepared sauce (from Step 2)
Add the cooked sushi rice (from Step 1) to the pan with the chicken and vegetables.
Mix everything thoroughly over medium heat until all the rice is hot and well combined with the rest of the ingredients.
Pour the prepared sauce (from Step 2) over the mixture and stir to coat the rice evenly.
Keep the pan on low heat to keep everything warm while you prepare the eggs.
Step 6: Fry the Eggs
- 1/2 tbsp vegetable or groundnut oil
- 3 large eggs
In a separate frying pan, heat the remaining 1/2 tablespoon of vegetable or groundnut oil over medium-high heat.
Crack in the eggs and fry until the whites are set, the yolks are cooked to your preference, and the edges of the eggs begin to turn golden brown.
I make sure the oil is hot before adding the eggs to get beautifully crisp edges.
Step 7: Assemble and Serve with Toppings
- 2 tsp sesame seeds
- 2 scallions, finely sliced
- nori sheets, cut into thin 1.5 inch (4 cm) strips
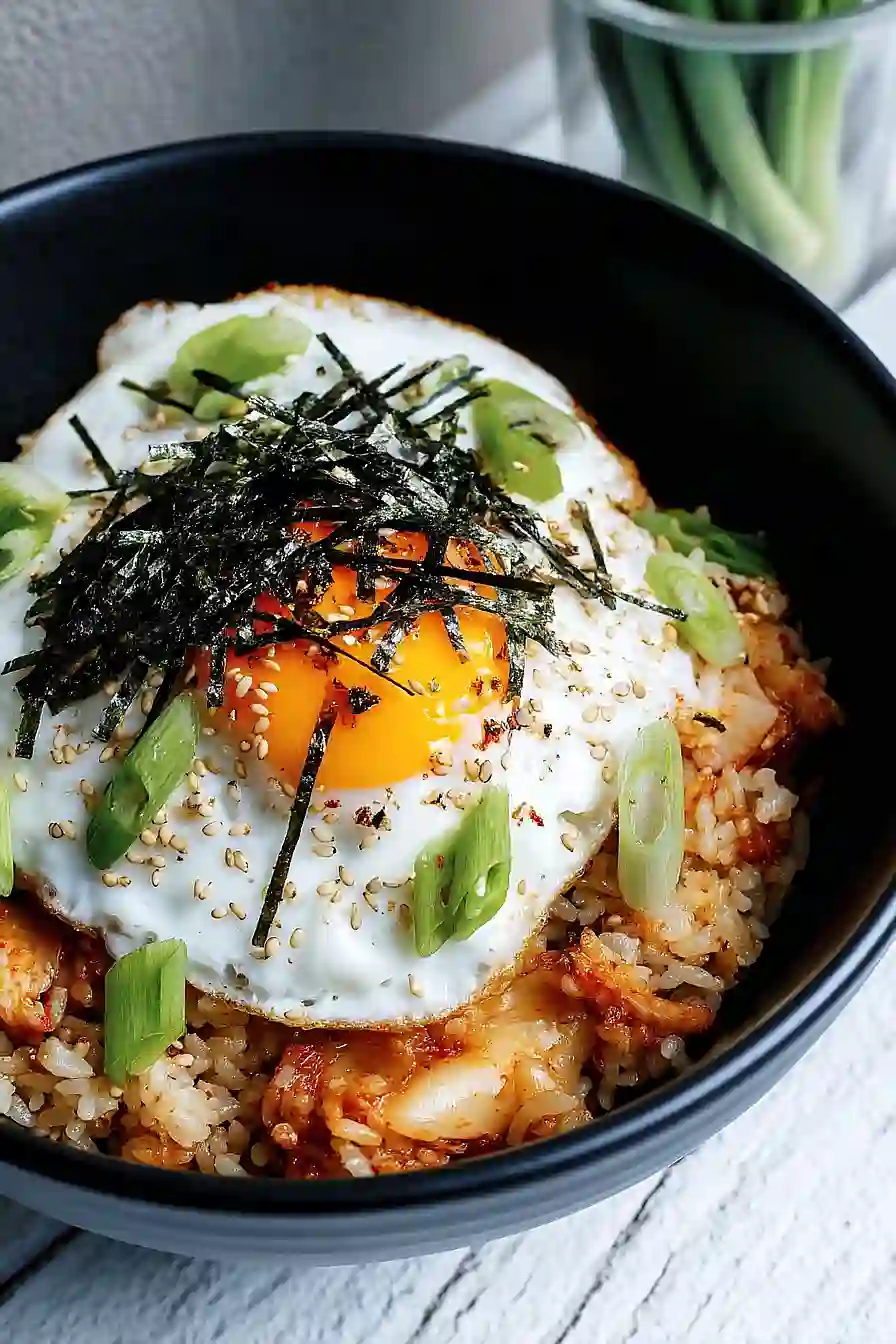
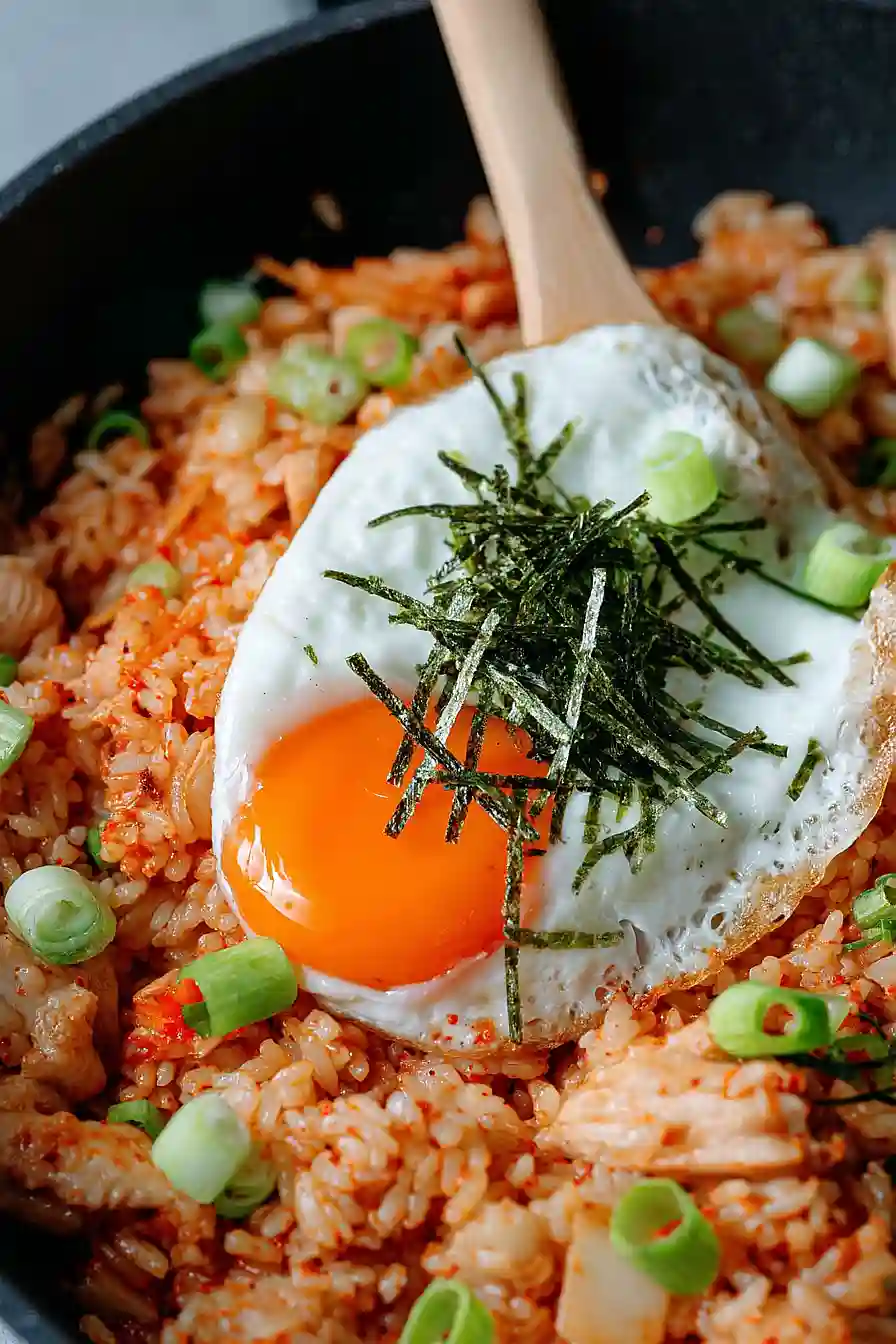
Spoon the hot kimchi chicken fried rice onto plates or bowls.
Top each serving with a freshly fried egg.
Garnish generously with sliced scallions, sesame seeds, and strips of nori before serving.

Homemade Kimchi Fried Rice with Chicken
Ingredients
For the fried rice:
- 1 1/4 cups sushi rice
- 1 1/2 tbsp vegetable or groundnut oil, divided
- 1/2 onion, minced
- 2 tsp fresh gingerroot, chopped
- 2 boneless chicken thighs, cubed
- 2/3 cup chopped kimchi
- 1 large carrot, grated
- 1 red bell pepper, diced
- 2 garlic cloves, crushed
- 3 large eggs
For the sauce:
- 1 tbsp gochujang (Korean chili paste)
- 3 tbsp soy sauce
- 2 tbsp kimchi brine
For serving:
- 2 tsp sesame seeds
- 2 scallions, finely sliced
- nori sheets, cut into thin 1.5 inch (4 cm) strips
Instructions
- Cook the sushi rice according to the packet instructions. For best results, prepare the rice the night before to allow it to cool and dry slightly. If you haven't done this in advance, cook the rice before you start preparing the rest of the dish and allow it to cool while you continue with the other steps.
- In a small bowl or jug, whisk together the gochujang, soy sauce, and kimchi brine until smooth and well combined. Ensure there are no lumps and set the sauce aside for later. I like to taste the sauce at this stage and adjust the spice by adding a touch more gochujang if I’m feeling bold.
- Heat 1 tablespoon of vegetable or groundnut oil in a wok or large frying pan over high heat. Add the minced onion and chopped gingerroot, stirring for a few minutes until the onion becomes soft and translucent. Next, add the cubed chicken thighs and cook on high heat, stirring frequently, until the outside is no longer pink.
- Add the chopped kimchi, grated carrot, and diced red bell pepper to the pan with the chicken. Continue to cook on high heat for a few more minutes until the chicken is fully cooked through and the vegetables are tender. Reduce the heat to medium, stir in the crushed garlic, and cook for an additional 1-2 minutes until fragrant.
- Add the cooked sushi rice (from Step 1) to the pan with the chicken and vegetables. Mix everything thoroughly over medium heat until all the rice is hot and well combined with the rest of the ingredients. Pour the prepared sauce (from Step 2) over the mixture and stir to coat the rice evenly. Keep the pan on low heat to keep everything warm while you prepare the eggs.
- In a separate frying pan, heat the remaining 1/2 tablespoon of vegetable or groundnut oil over medium-high heat. Crack in the eggs and fry until the whites are set, the yolks are cooked to your preference, and the edges of the eggs begin to turn golden brown. I make sure the oil is hot before adding the eggs to get beautifully crisp edges.
- Spoon the hot kimchi chicken fried rice onto plates or bowls. Top each serving with a freshly fried egg. Garnish generously with sliced scallions, sesame seeds, and strips of nori before serving.

