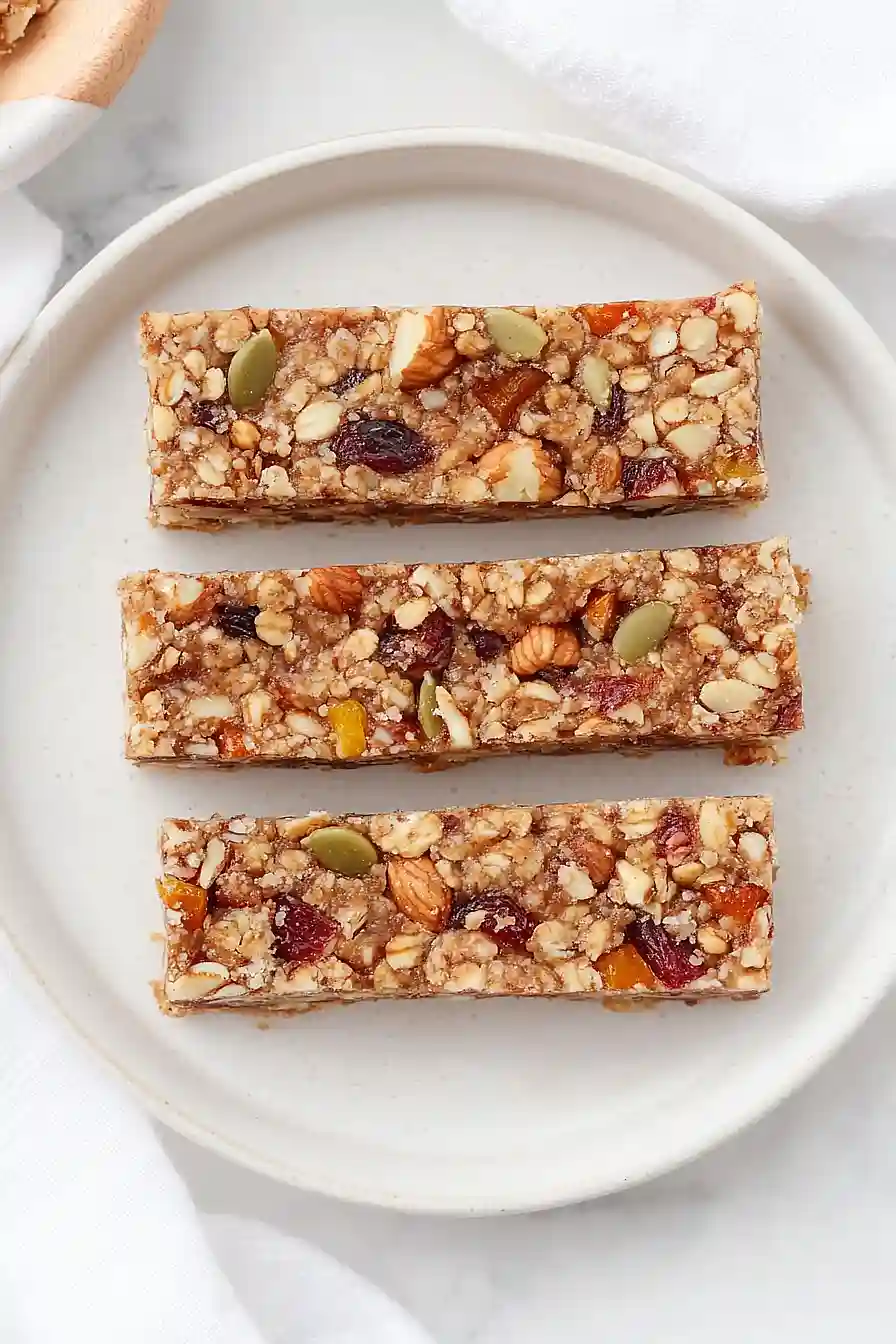
Here is my favorite fruit and nut bar recipe, with a chewy oat base, dried fruits, mixed nuts, and a touch of honey that holds everything together perfectly.
These fruit and nut bars are my go-to snack when my kids need something healthy but still tasty. I always keep a batch in the pantry because they’re perfect for lunch boxes, after-school snacks, or when I need a quick energy boost myself.
Why You’ll Love These Fruit and Nut Bars
- Healthy snack option – Made with wholesome ingredients like dates, nuts, and dried fruit, these bars give you natural energy without any processed junk.
- No-bake convenience – You don’t need to turn on your oven for these bars – just mix, press, and chill for an easy treat that’s ready in under an hour.
- Customizable ingredients – Swap out the dried fruit or nuts for whatever you have on hand, making this recipe work with your pantry staples and personal preferences.
- Perfect grab-and-go snack – These bars are ideal for busy mornings, lunch boxes, or post-workout fuel when you need something satisfying and portable.
- Naturally sweetened – The dates and honey provide all the sweetness you need, making these bars a guilt-free treat that both kids and adults will love.
What Kind of Dates Should I Use?
For these fruit and nut bars, you’ll want to use soft, pitted dates like Medjool or Deglet Noor varieties. Medjool dates are larger and naturally softer, which makes them easier to blend into a smooth paste, while Deglet Noor dates are smaller but work just as well if they’re fresh and pliable. If your dates feel a bit dry or hard, you can soak them in warm water for about 10 minutes to soften them up before using. Make sure to remove any pits if you’re buying unpitted dates, and give them a quick chop before processing to help your food processor or blender work more efficiently.

Options for Substitutions
These bars are super forgiving when it comes to swapping ingredients – here’s what you can change up:
- Dates: If your dates are too dry, soak them in warm water for 10 minutes before using. You can also substitute with dried figs or prunes, though the flavor will be slightly different.
- Peanut or almond butter: Any nut or seed butter works here – try cashew butter, sunflower seed butter, or even tahini for different flavors. Just make sure it’s the same consistency as what’s called for.
- Honey: Maple syrup or agave nectar work perfectly as substitutes. Use the same amount, but your bars might be slightly less sticky.
- Almonds: Feel free to use any nuts you have on hand – walnuts, pecans, cashews, or pistachios all work great. You can even use a mix of different nuts.
- Rolled oats: Quick oats can work in a pinch, but the texture will be less chewy. You could also try crushed cereal or granola for extra crunch.
- Dried fruit: This is where you can really get creative! Try dried cherries, chopped dried mango, raisins, or even mini chocolate chips if you want something sweeter.
- Pumpkin seeds: Sunflower seeds, chopped walnuts, or even coconut flakes make good substitutes. You can skip them entirely if you don’t have anything similar.
Watch Out for These Mistakes While Making
The biggest mistake when making fruit and nut bars is not processing the dates enough – they need to be completely smooth and paste-like, or your bars will crumble apart instead of holding together properly.
Another common error is using dates that are too dry or hard, which won’t bind the ingredients no matter how much you process them – if your dates feel tough, soak them in warm water for 10 minutes before using.
Don’t skip pressing the mixture firmly into your pan with the back of a spoon or your hands, as loose packing will result in bars that fall apart when you try to cut them.
For the cleanest cuts, chill your bars in the refrigerator for at least 2 hours before slicing, and use a sharp knife wiped clean between cuts to prevent the sticky mixture from dragging.
What to Serve With Fruit and Nut Bars?
These bars are perfect on their own as a grab-and-go snack, but they’re also great paired with a hot cup of coffee or tea for an afternoon pick-me-up. I love packing them in lunch boxes alongside some fresh fruit like apple slices or grapes for a balanced snack that keeps you satisfied. They also work really well as a pre-workout energy boost or post-workout recovery snack when you need something that’s both filling and nutritious. For a more indulgent treat, try serving them with a glass of cold milk or even crumbled over some vanilla yogurt for a crunchy topping.
Storage Instructions
Keep Fresh: These fruit and nut bars stay perfectly chewy when wrapped individually in plastic wrap or stored in an airtight container at room temperature. They’ll keep for up to a week, making them perfect for grab-and-go snacks or lunch box treats.
Refrigerate: If you want your bars to last even longer, pop them in the fridge where they’ll stay fresh for up to 2 weeks. The cold storage makes them a bit firmer, which some people actually prefer for a more satisfying bite.
Freeze: You can freeze these bars for up to 3 months by wrapping them individually and placing in a freezer bag. Just thaw at room temperature for about 20 minutes before eating, or enjoy them straight from the freezer if you like them extra firm and cold.
| Preparation Time | 10-15 minutes |
| Cooking Time | 1-5 minutes |
| Total Time | 40-45 minutes |
| Level of Difficulty | Easy |
Estimated Nutrition
Estimated nutrition for the whole recipe (without optional ingredients):
- Calories: 1600-1750
- Protein: 35-40 g
- Fat: 55-65 g
- Carbohydrates: 250-270 g
Ingredients
For the wet mixture:
- 1/4 cup almond butter (natural, unsweetened preferred)
- 1 cup pitted dates (Medjool dates work best for sweetness and texture)
- 1/4 cup honey (raw honey adds better flavor)
- 1 tsp vanilla extract
For the dry mixture:
- 3/4 cup dried mixed fruit (cranberries, apricots, and raisins work well)
- 1 cup roasted almonds, chopped (or use raw almonds if you prefer)
- 1/4 cup raw pumpkin seeds (adds nice crunch and nutrition)
- 1/2 cup old-fashioned oats (I use Bob’s Red Mill)
Step 1: Prepare the Pan and Process the Dates
- 1 cup pitted dates
- foil for lining
Line an 8-inch square pan with foil, leaving some overhang on the sides so you can easily lift out the finished bars later.
While the pan is ready, pulse the pitted Medjool dates in a food processor until they break down into a sticky, chunky paste—you want some texture remaining, not a completely smooth puree.
Transfer the processed dates to a medium bowl and set aside.
Step 2: Warm the Binding Ingredients
- 1/4 cup almond butter
- 1/4 cup honey
- 1 tsp vanilla extract
In a small pot over low heat, combine the almond butter, honey, and vanilla extract.
Stir constantly for about 1 minute until the mixture is warm and fully blended—this helps the almond butter incorporate smoothly and makes it easier to distribute throughout the bars.
I find that warming these ingredients creates a more cohesive binding agent than mixing them cold, which helps the bars hold together better when cut.
Step 3: Combine the Wet and Dry Components
- warm almond butter mixture from Step 2
- processed dates from Step 1
- 1 cup roasted almonds, chopped
- 1/2 cup old-fashioned oats
- 3/4 cup dried mixed fruit
- 1/4 cup raw pumpkin seeds
Pour the warm almond butter mixture from Step 2 over the processed dates in the bowl and stir well to coat them evenly.
The warmth will help everything bind together.
Now add the chopped roasted almonds, oats, dried mixed fruit, and pumpkin seeds, stirring until everything is thoroughly combined and no dry pockets remain.
I like to use a sturdy spoon or my hands to mix—sometimes hands work better to ensure the sticky date mixture distributes evenly throughout all the add-ins.
Step 4: Press and Set the Bars
- combined mixture from Step 3
Transfer the combined mixture from Step 3 into the foil-lined pan, pressing it down firmly and evenly with the back of a spoon or your hands until it forms a compact, even layer.
Don’t be shy about the pressure—this helps the bars hold together when cut.
Place the pan in the freezer for 30 minutes until the mixture is completely firm and holds its shape.
Step 5: Cut and Serve
Remove the pan from the freezer and use the foil overhang to lift the entire bar slab out onto a cutting board.
Cut the bars into 12 equal pieces—I find that wiping my knife between cuts with a slightly damp cloth prevents the sticky mixture from clinging to the blade.
Store the bars in an airtight container in the refrigerator or freezer; they’ll keep for up to two weeks frozen.


Wow!!! I made those and they are bomb!!! It’s like eating a cake it’s so good!! I used apricots and wild blueberries, never buying from store again!