If you ask me, homemade pickles are one of life’s simple pleasures.
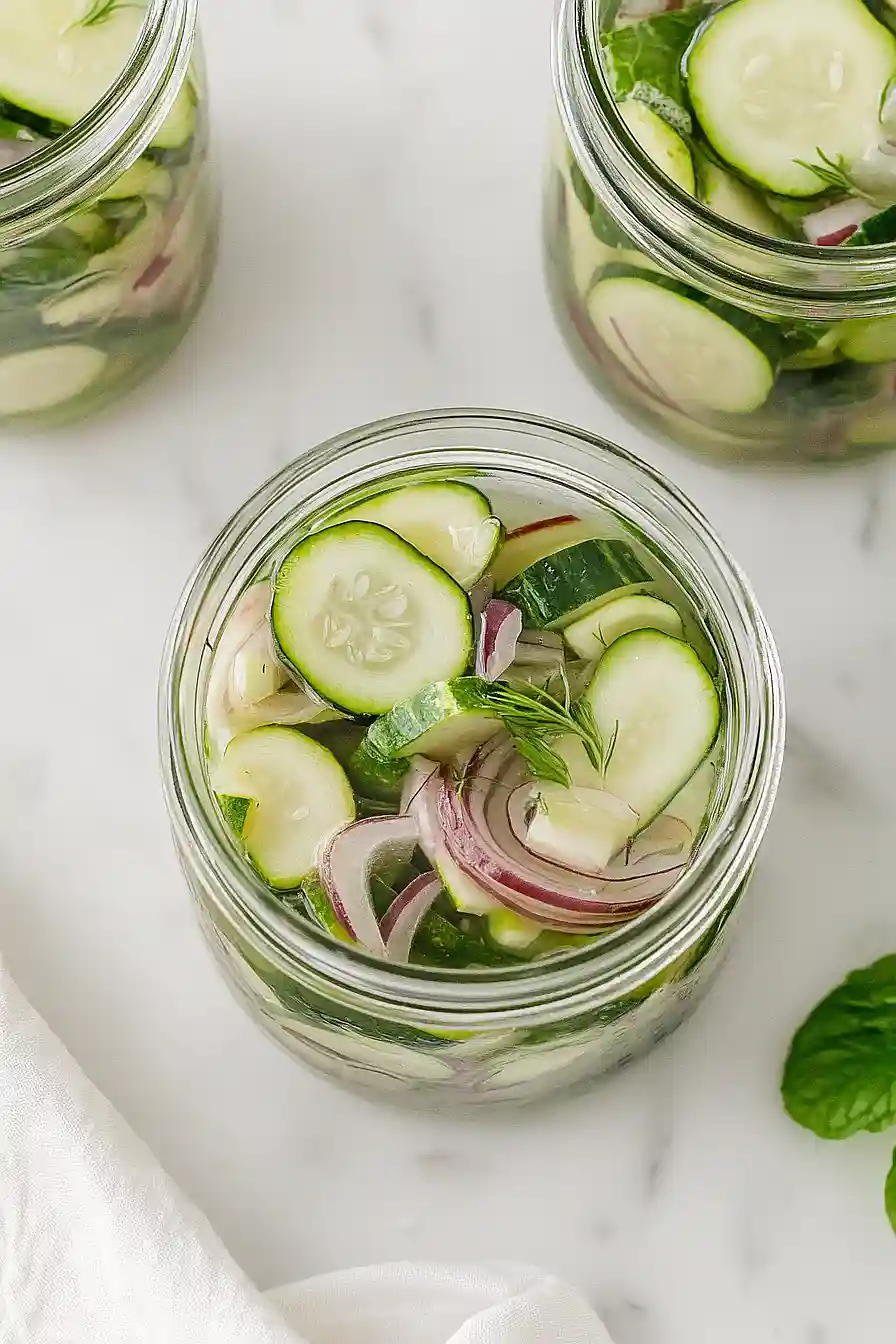
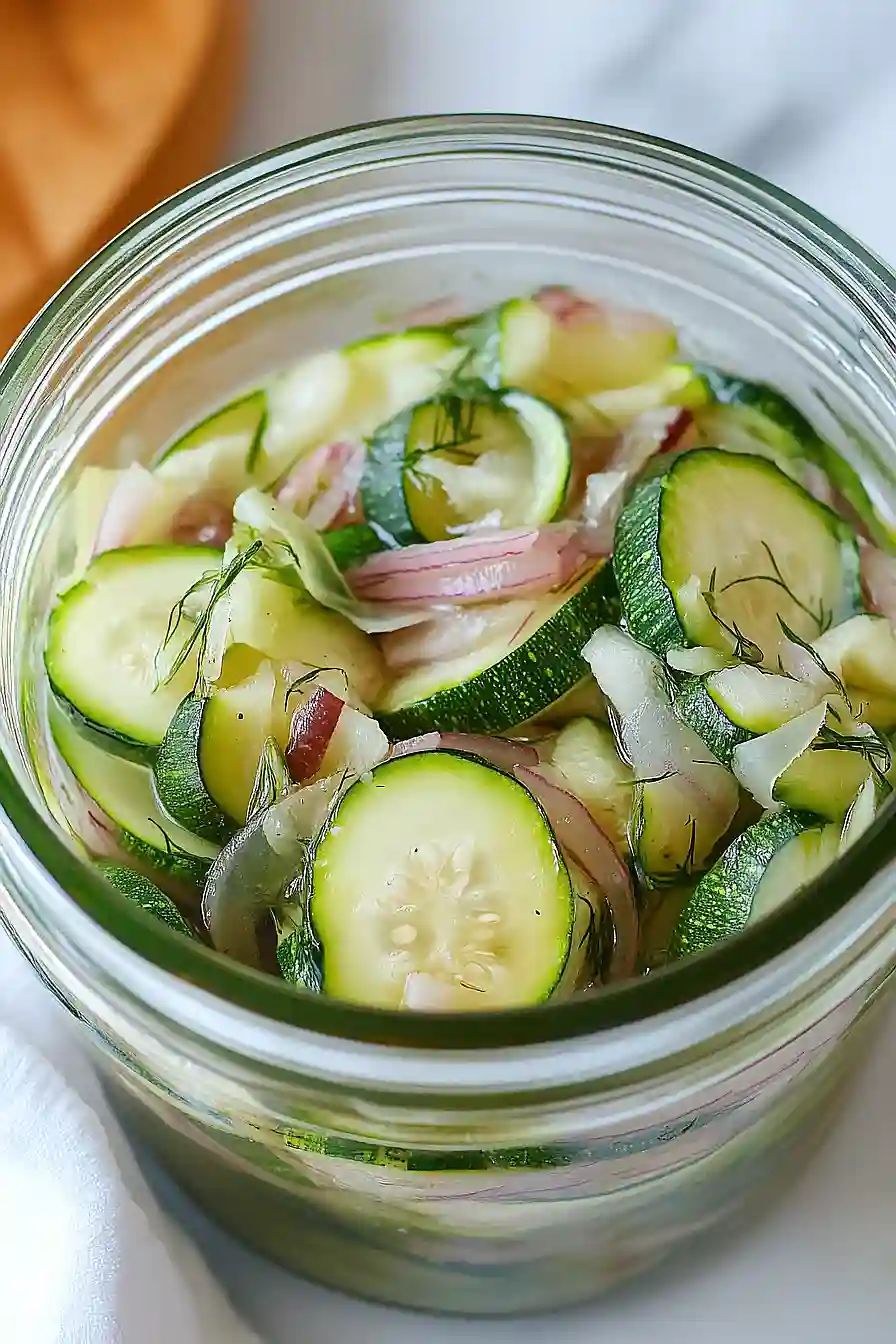
These zucchini dill pickles turn your garden’s summer bounty into something tangy and refreshing. Fresh zucchini gets a crisp bite from a classic brine, while dill adds that familiar pickle flavor we all love.
They’re way easier to make than you might think – just slice, brine, and wait. The result is a crunchy snack that’s perfect for sandwiches, burgers, or eating straight from the jar.
It’s a great way to use up extra zucchini and have homemade pickles ready whenever you want them.
Why You’ll Love This Zucchini Dill Pickle
- Perfect way to use up garden zucchini – If you’re drowning in zucchini from your garden or found a great deal at the farmers market, this recipe turns them into something completely different and delicious.
- Quick pickle method – Unlike traditional canning, these pickles are ready in just a few hours and don’t require any special equipment or water bath processing.
- Fresh, tangy flavor – The combination of dill, caraway seeds, and a hint of chili creates a bright, zesty pickle that’s perfect as a side dish or sandwich topping.
- Simple pantry ingredients – You probably already have most of these ingredients at home, making this an easy recipe to whip up whenever you want homemade pickles.
- Healthy snack option – These pickles are low in calories and make a great crunchy snack or addition to your charcuterie board without any guilt.
What Kind of Zucchini Should I Use?
For the best pickles, you’ll want to choose medium-sized zucchini that feel firm and heavy for their size. Avoid really large zucchini since they tend to have more seeds and can get mushy when pickled – stick with ones that are about 6-8 inches long. The skin should be smooth and free of soft spots or blemishes, and when you press gently on the zucchini, it should feel solid rather than spongy. If you can only find larger zucchini, just scoop out the seedy center before slicing to prevent your pickles from getting watery.
Options for Substitutions
This pickle recipe is pretty forgiving when it comes to swaps and substitutions:
- Zucchini: You can easily swap zucchini for cucumber, yellow squash, or even green beans. Just keep the weight around 700g and slice them to similar thickness for even pickling.
- Red onion: White or yellow onions work just fine if that’s what you have on hand. You could also try shallots for a milder flavor.
- Fresh dill: Dried dill works in a pinch – use about 2 teaspoons instead of the fresh sprigs. You could also experiment with fresh thyme or oregano for a different flavor profile.
- White wine vinegar: Apple cider vinegar is a great substitute and adds a slightly fruity note. Regular white vinegar works too, though it’s a bit sharper in taste.
- Caraway seeds: If you’re not a fan of caraway, try fennel seeds, coriander seeds, or even mustard seeds. Each will give your pickles a unique twist.
- Red chilli: Skip the chilli entirely for mild pickles, or use jalapeño, serrano, or dried red pepper flakes to control the heat level to your liking.
Watch Out for These Mistakes While Cooking
The biggest mistake when making zucchini dill pickles is skipping the salting step, which draws out excess moisture and prevents your pickles from becoming watery and bland – make sure to let the salted zucchini sit for at least 30 minutes, then rinse and pat completely dry.
Another common error is cutting the zucchini too thick, as pieces over ¼ inch won’t pickle properly and will stay crunchy in an unpleasant way, so aim for thin, even slices using a mandoline or sharp knife.
Don’t rush the cooling process by putting hot pickles straight into the fridge – let the vinegar mixture cool to room temperature first to avoid condensation that can dilute the brine and make your pickles mushy.
Finally, resist the urge to taste them right away since these pickles need at least 24 hours in the fridge to develop their full tangy flavor and proper texture.
What to Serve With Zucchini Dill Pickles?
These tangy pickles are perfect alongside grilled meats like burgers, bratwurst, or barbecue chicken where their bright acidity cuts through all that rich, smoky flavor. I love adding them to charcuterie boards with some aged cheeses, crackers, and sliced salami – they add just the right pop of flavor and crunch. They’re also great tucked into sandwiches, especially anything with deli meats or even a simple grilled cheese for an extra zing. For a lighter option, toss them into grain salads or serve them alongside roasted vegetables where their pickled bite balances out heartier flavors.
Storage Instructions
Refrigerate: Your zucchini dill pickles will keep perfectly in the fridge for up to 2 weeks in their pickling liquid. Make sure they’re stored in a clean glass jar or airtight container, and always use a clean fork to grab them out. The flavors actually get better after a day or two, so don’t worry if they taste a bit sharp at first!
Make Ahead: These pickles are actually better when made ahead of time. Let them sit in the fridge for at least 4 hours before eating, but overnight is even better. The zucchini will absorb all those lovely dill and vinegar flavors, and they’ll have that perfect pickle crunch you’re looking for.
Serve: Keep your pickles chilled and serve them straight from the fridge. They’re perfect as a side dish, on sandwiches, or just as a crunchy snack. The pickling liquid is totally edible too, so don’t toss it – some people love sipping it or using it in salad dressings!
| Preparation Time | 20-30 minutes |
| Cooking Time | 10-15 minutes |
| Total Time | 3-6 hours (including draining time) |
| Level of Difficulty | Medium |
Estimated Nutrition
Estimated nutrition for the whole recipe (without optional ingredients):
- Calories: 250-300
- Protein: 4-6 g
- Fat: 0-2 g
- Carbohydrates: 60-70 g
Ingredients
For the vegetables:
- 3 to 4 medium zucchini (about 1.5 lb), sliced thin
- 1 medium red onion (about 5 oz), thinly sliced
- 1 tbsp salt
- 2 to 3 sprigs fresh dill, chopped (or 2 tsp dried dill)
- 1 red chili pepper, sliced
For the pickling brine:
- 1 1/2 cups white wine vinegar or apple cider vinegar
- 1/4 cup sugar (about 2 oz)
- 1 tsp caraway seeds
Step 1: Prep and Salt the Zucchini and Onion
- 3 to 4 medium zucchini (about 1.5 lb), sliced thin
- 1 medium red onion (about 5 oz), thinly sliced
- 1 tbsp salt
Using a mandolin or sharp knife, thinly slice the zucchini into rounds or ribbons about 1–2mm thick.
Place the sliced zucchini into a colander as you go.
Thinly slice the red onion and add it to the colander with the zucchini.
Sprinkle the salt over the vegetables and toss thoroughly to combine.
Place a plate over the vegetables to weigh them down slightly, then set the colander over a bowl to catch the liquid released.
Let the vegetables drain in a cool place, or the fridge if you prefer, for 3–4 hours or overnight.
This process draws out excess moisture, resulting in crisper pickles.
I like to give the vegetables a gentle toss halfway through draining for even brining.
Step 2: Sterilise the Jars
While the vegetables are draining, sterilise two 600ml jars and their lids.
You can do this by placing them in a preheated oven, boiling them in a large pot of water, or running them through a dishwasher cycle.
Keep the jars warm until ready to use, as this helps prevent them from cracking when filled with hot liquid.
Step 3: Add Dill and Chili to the Drained Vegetables
- drained zucchini and onion from Step 1
- 2 to 3 sprigs fresh dill, chopped (or 2 tsp dried dill)
- 1 red chili pepper, sliced
Once the zucchini and onions have drained, transfer them to a mixing bowl.
Add the chopped fresh dill (or dried dill) and the sliced red chili pepper to the vegetables.
Toss well to evenly distribute the dill and chili throughout the mixture.
Step 4: Make the Pickling Brine
- 1 1/2 cups white wine vinegar or apple cider vinegar
- 1/4 cup sugar (about 2 oz)
- 1 tsp caraway seeds
In a small non-reactive saucepan, combine the white wine vinegar (or apple cider vinegar), sugar, and caraway seeds.
Bring to a gentle simmer over medium heat, stirring to dissolve the sugar completely.
Once the mixture is hot and the sugar is fully dissolved, remove from the heat.
I always recommend letting the brine cool for about a minute before pouring, as a sudden temperature shock can sometimes dull the flavors of delicate ingredients.
Step 5: Pack the Jars and Add Brine
- zucchini, onion, dill, and chili mixture from Step 3
- pickling liquid from Step 4
Firmly pack the zucchini, onion, dill, and chili mixture from Step 3 into the still-warm sterilised jars.
Press down as you fill to eliminate air gaps and fit as much as possible.
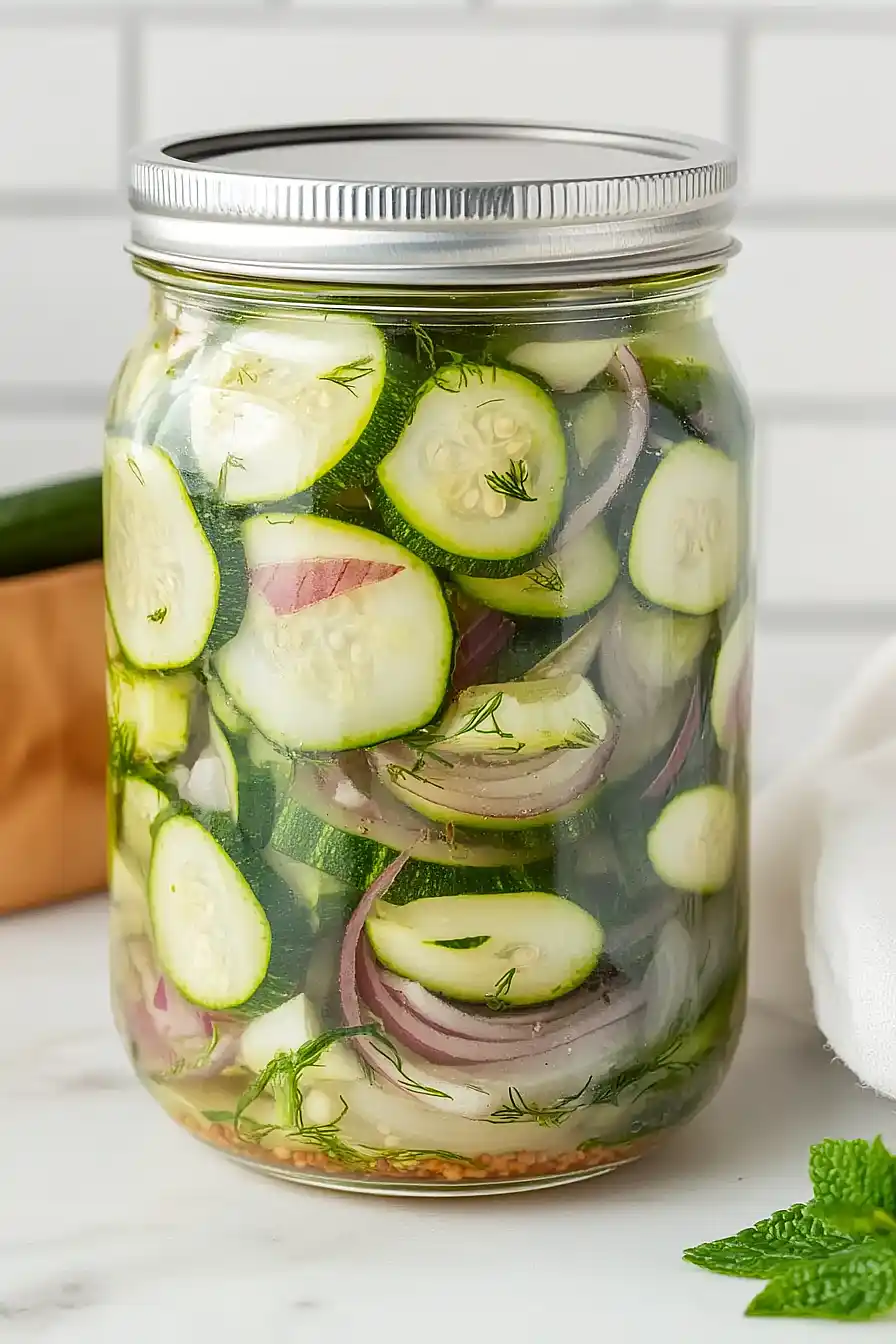
Pour the hot pickling liquid from Step 4 over the packed vegetables until fully submerged.
Use a clean knife to gently remove any air bubbles from the jars.
If needed, top up with more pickling liquid to ensure all produce is covered.
Secure the lids, making sure they seal tightly.
Step 6: Cool, Seal, and Store
Allow the sealed jars to cool at room temperature on a wooden board to prevent thermal shock.
Once completely cool, check the lids to ensure a vacuum seal has formed (the lid should be slightly inverted inwards and not flex when pressed).
Label the jars with the date and contents.
Store in a cool, dark place for up to 3 months.
Once opened, refrigerate and consume within 3 weeks.
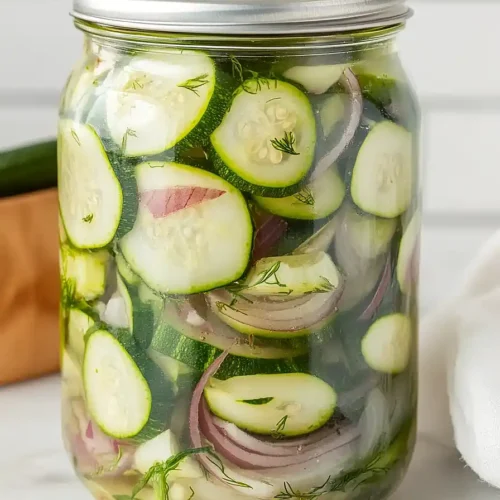
Pickled Zucchini with Dill
Ingredients
For the vegetables:
- 3 to 4 medium zucchini (about 1.5 lb), sliced thin
- 1 medium red onion (about 5 oz), thinly sliced
- 1 tbsp salt
- 2 to 3 sprigs fresh dill, chopped (or 2 tsp dried dill)
- 1 red chili pepper, sliced
For the pickling brine:
- 1 1/2 cups white wine vinegar or apple cider vinegar
- 1/4 cup sugar (about 2 oz)
- 1 tsp caraway seeds
Instructions
- Using a mandolin or sharp knife, thinly slice the zucchini into rounds or ribbons about 1–2mm thick. Place the sliced zucchini into a colander as you go. Thinly slice the red onion and add it to the colander with the zucchini. Sprinkle the salt over the vegetables and toss thoroughly to combine. Place a plate over the vegetables to weigh them down slightly, then set the colander over a bowl to catch the liquid released. Let the vegetables drain in a cool place, or the fridge if you prefer, for 3–4 hours or overnight. This process draws out excess moisture, resulting in crisper pickles. I like to give the vegetables a gentle toss halfway through draining for even brining.
- While the vegetables are draining, sterilise two 600ml jars and their lids. You can do this by placing them in a preheated oven, boiling them in a large pot of water, or running them through a dishwasher cycle. Keep the jars warm until ready to use, as this helps prevent them from cracking when filled with hot liquid.
- Once the zucchini and onions have drained, transfer them to a mixing bowl. Add the chopped fresh dill (or dried dill) and the sliced red chili pepper to the vegetables. Toss well to evenly distribute the dill and chili throughout the mixture.
- In a small non-reactive saucepan, combine the white wine vinegar (or apple cider vinegar), sugar, and caraway seeds. Bring to a gentle simmer over medium heat, stirring to dissolve the sugar completely. Once the mixture is hot and the sugar is fully dissolved, remove from the heat. I always recommend letting the brine cool for about a minute before pouring, as a sudden temperature shock can sometimes dull the flavors of delicate ingredients.
- Firmly pack the zucchini, onion, dill, and chili mixture from Step 3 into the still-warm sterilised jars. Press down as you fill to eliminate air gaps and fit as much as possible. Pour the hot pickling liquid from Step 4 over the packed vegetables until fully submerged. Use a clean knife to gently remove any air bubbles from the jars. If needed, top up with more pickling liquid to ensure all produce is covered. Secure the lids, making sure they seal tightly.
- Allow the sealed jars to cool at room temperature on a wooden board to prevent thermal shock. Once completely cool, check the lids to ensure a vacuum seal has formed (the lid should be slightly inverted inwards and not flex when pressed). Label the jars with the date and contents. Store in a cool, dark place for up to 3 months. Once opened, refrigerate and consume within 3 weeks.

