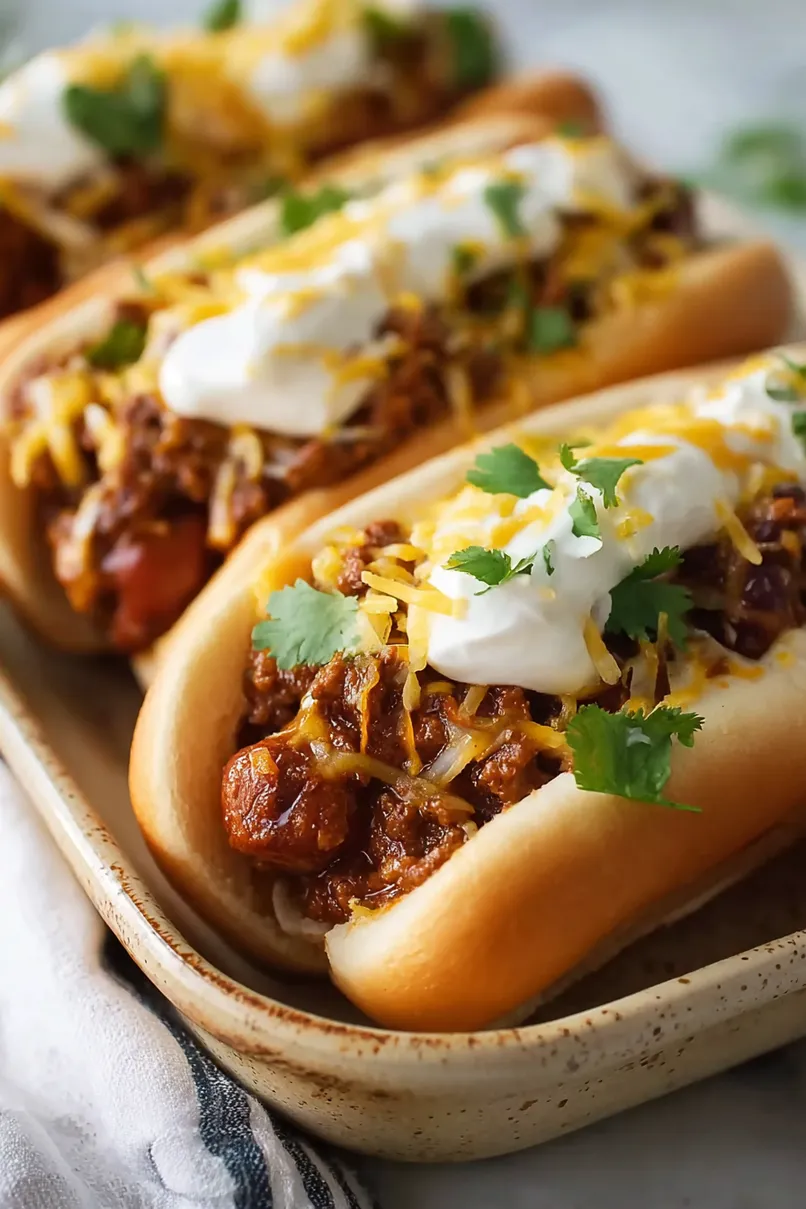
Here is my go-to chili con carne hot dogs recipe, with hearty beef chili loaded with beans, tomatoes, and warm spices, all piled high on soft hot dog buns for the perfect comfort food meal.
These chili dogs are a huge hit with my kids on busy weeknight dinners. I like to make extra chili so we can use it for nachos or baked potatoes later in the week. There’s something so satisfying about eating with your hands, don’t you think?
Why You’ll Love These Chili Con Carne Hot Dogs
- Perfect for feeding a crowd – This recipe makes enough chili to top 10-12 hot dogs, making it ideal for game day parties, family gatherings, or backyard barbecues.
- Rich, from-scratch chili – Using beef chuck roast instead of ground beef creates an incredibly tender, flavorful chili that’s way better than anything from a can.
- Make-ahead friendly – The chili actually tastes better the next day, so you can prepare it in advance and just reheat when you’re ready to serve.
- Customizable toppings – With sour cream, cheese, and cilantro, everyone can dress their chili dog exactly how they like it.
- Comfort food at its best – There’s something special about the combination of smoky, spicy chili piled high on a grilled hot dog that just hits different.
What Kind of Hot Dogs Should I Use?
For this chili con carne hot dog recipe, you’ll want to pick hot dogs that can stand up to all that hearty chili without getting lost in the mix. All-beef hot dogs are your best bet here since they have a more robust flavor and firmer texture that pairs perfectly with the rich, meaty chili. You can go with regular-sized hot dogs or even jumbo ones if you want to make this dish feel extra indulgent. Whether you choose natural casing or skinless is really up to your preference – natural casing will give you that satisfying snap when you bite into it, while skinless hot dogs are easier for kids to eat. Just make sure to grill them until they get those nice char marks, as that smoky flavor will complement the chili beautifully.

Options for Substitutions
This hearty chili is pretty forgiving when it comes to swaps, so here are some easy substitutions you can make:
- Beef chuck roast: Ground beef (2 pounds) works great if you want a quicker cook time – just brown it and skip the long braising. You could also use ground turkey or even a mix of ground beef and pork.
- Stubb’s Bar-B-Q Spice Rub: Any barbecue seasoning blend will work, or make your own with brown sugar, chili powder, paprika, and a pinch of cayenne. Start with 3 tablespoons and adjust to taste.
- Red kidney beans: Pinto beans, black beans, or a mix of different beans all work well. You can even use dried beans if you soak and cook them ahead of time.
- Bell pepper: Any color bell pepper works, or try poblano peppers for a bit more heat and smoky flavor.
- Hot dogs: Use whatever hot dogs you prefer – beef, turkey, chicken, or even plant-based versions. Bratwurst or Italian sausages make a fun twist too.
- Beef broth: Chicken broth or vegetable broth work fine, or even just water with an extra bouillon cube if that’s what you have on hand.
Watch Out for These Mistakes While Cooking
The biggest mistake when making chili con carne is rushing the beef chuck roast – this tough cut needs low and slow cooking to break down properly, so don’t crank up the heat or you’ll end up with chewy, tough meat instead of tender, shreddable goodness. Make sure to sear the beef well on all sides before adding liquids, as this browning step creates the deep, rich flavor that makes great chili stand out from the ordinary. Another common error is adding the beans too early in the cooking process, which can cause them to break apart and turn mushy – stir them in during the last 30 minutes of cooking time. Finally, don’t forget to taste and adjust your seasonings at the end, since the long cooking time can mellow out spices, and consider letting the chili rest for 15-20 minutes before serving to allow the flavors to come together.
What to Serve With Chili Con Carne Hot Dogs?
These loaded chili dogs are pretty filling on their own, but a side of crispy french fries or onion rings makes them feel like a complete meal. I love serving them with a simple coleslaw – the cool, crunchy texture is a nice contrast to all that hearty, spicy chili. For something lighter, try some corn on the cob or a fresh garden salad with ranch dressing. Don’t forget to have plenty of napkins on hand because these babies can get messy, and that’s half the fun!
Storage Instructions
Refrigerate: The chili con carne keeps really well in the fridge for up to 5 days in an airtight container. I actually think it tastes even better the next day after all those flavors have had time to meld together. Just store the chili separately from the hot dogs and buns to keep everything fresh.
Freeze: This chili is perfect for freezing! Let it cool completely, then portion it into freezer bags or containers and freeze for up to 3 months. I like to freeze it in family-sized portions so I can pull out just what I need for dinner.
Warm Up: Heat the chili on the stovetop over medium-low heat, stirring occasionally until warmed through. If it’s frozen, let it thaw overnight in the fridge first. You might need to add a splash of beef broth if it seems too thick after reheating.
| Preparation Time | 30-45 minutes |
| Cooking Time | 480 minutes |
| Total Time | 510-525 minutes |
| Level of Difficulty | Medium |
Estimated Nutrition
Estimated nutrition for the whole recipe (without optional ingredients):
- Calories: 8200-9000
- Protein: 380-420 g
- Fat: 450-500 g
- Carbohydrates: 620-700 g
Ingredients
For the chili con carne:
- 1 tbsp smoked paprika (for deep, smoky flavor)
- 1 tbsp onion powder
- 1 tsp salt
- 1 can (28 oz) diced tomatoes (San Marzano preferred for better flavor)
- 2 tbsp vegetable oil
- 1 tbsp dried oregano
- 1 cup beef broth
- 2 cans kidney beans, rinsed and drained (I use Bush’s brand)
- 1 1/2 sweet yellow onions, chopped (about 1/2-inch pieces)
- 8 garlic cloves, minced (about 2 heaping tbsp, freshly minced for best flavor)
- 1 bell pepper, seeded and finely chopped (about 1/4-inch pieces)
- 3 lb beef chuck roast (cut into 1-inch chunks)
- 1 tbsp garlic powder
- 1 tbsp ground cumin
- 4 to 5 tbsp Stubb’s Bar-B-Q spice rub
- 1 tsp ground black pepper (freshly ground preferred)
For the hot dogs:
- 10 to 12 hot dogs
- 10 to 12 hot dog buns
For serving:
- Cilantro, for garnish (optional, adds fresh brightness)
- Shredded cheese, for garnish (cheddar works best)
- 1 pint sour cream (for cool, creamy topping)
Step 1: Prepare the Beef and Build Flavor with Spice Rub
- 3 lb beef chuck roast
- 4 to 5 tbsp Stubb’s Bar-B-Q spice rub
- 1 tbsp smoked paprika
- 1 tbsp ground cumin
- 1 tbsp onion powder
- 1 tbsp garlic powder
- 1 tbsp dried oregano
Cut the beef chuck roast into 1-inch chunks and pat them dry with paper towels—this helps them brown better.
In a small bowl, combine the Stubb’s Bar-B-Q spice rub with the smoked paprika, ground cumin, onion powder, garlic powder, and dried oregano.
Toss the beef chunks generously with this spice mixture, making sure all pieces are well coated.
Let the seasoned beef stand at room temperature for 30 minutes while you prep the vegetables; this allows the flavors to penetrate the meat.
Step 2: Prepare Mise en Place and Sear the Beef
- 2 tbsp vegetable oil
- 8 garlic cloves, minced
- 1 1/2 sweet yellow onions, chopped
- 1 bell pepper, seeded and finely chopped
- Seasoned beef chunks from Step 1
While the beef rests, mince the garlic cloves, chop the sweet onions into 1/2-inch pieces, seed and finely chop the bell pepper into 1/4-inch pieces, and set everything aside.
Heat the vegetable oil in a large skillet over medium-high heat until it shimmers.
Working in batches to avoid overcrowding, sear the spice-rubbed beef chunks for about 3 minutes per side until they develop a rich brown crust.
I prefer to sear in batches rather than crowd the pan because it creates better browning and deeper flavor through the Maillard reaction.
Transfer the seared beef to a plate and set aside.
Step 3: Soften the Aromatic Vegetables
- 1 1/2 sweet yellow onions, chopped
- 1 bell pepper, finely chopped
- 8 garlic cloves, minced
In the same skillet with the rendered beef fat, add the chopped onions and bell pepper.
Sauté over medium heat for 5 to 7 minutes, stirring occasionally, until the vegetables are softened and slightly translucent.
Add the minced garlic in the last minute of cooking and stir constantly to prevent burning.
This technique develops the flavor base by allowing the onions to caramelize slightly and the garlic to infuse the oil with its aromatics.
Step 4: Build the Chili Base in the Slow Cooker
- Sautéed vegetables from Step 3
- 2 cans kidney beans, rinsed and drained
- 1 can diced tomatoes
- 1 cup beef broth
- 1 tsp salt
- 1 tsp ground black pepper
- Seared beef from Step 2
Transfer the softened vegetables from the skillet to your slow cooker.
Add the rinsed and drained kidney beans, diced tomatoes with their juices, and beef broth.
Stir in the salt and freshly ground black pepper.
Finally, nestle the seared beef chunks into the mixture, pressing them down gently so they’re mostly submerged in the liquid.
I like to use freshly ground black pepper here rather than pre-ground because it has a more vibrant, punchy flavor that cuts through the rich beef.
Step 5: Slow-Cook and Shred the Beef
- Chili mixture from Step 4
Cover the slow cooker and cook on low for 8 hours.
The beef should be completely tender and easily pull apart with a fork.
Using tongs or a slotted spoon, carefully remove the shredded beef pieces from the slow cooker and set them aside on a cutting board.
Using two forks, shred the beef into bite-sized pieces, then return the shredded beef to the slow cooker and stir it back into the chili.
This creates a more cohesive texture where the shredded beef absorbs the flavors while maintaining its tender, melt-in-your-mouth quality.
Step 6: Cook the Hot Dogs and Toast the Buns
- 10 to 12 hot dogs
- 10 to 12 hot dog buns
About 10 minutes before serving, grill the hot dogs over medium-high heat for 3 to 4 minutes, turning occasionally, until they’re heated through and lightly charred on the outside.
Toast the hot dog buns on the grill for about 1 to 2 minutes until they’re warm and lightly golden.
This timing ensures everything finishes cooking together while the chili stays hot in the slow cooker.
Step 7: Assemble and Serve the Chili Con Carne Hot Dogs
- Grilled hot dogs from Step 6
- Toasted buns from Step 6
- Shredded beef chili from Step 5
- 1 pint sour cream
- Shredded cheese
- Cilantro
Place each grilled hot dog in a toasted bun.
Generously ladle the shredded beef chili over each hot dog, allowing some of the sauce to soak into the bun.
Top each with a dollop of sour cream for a cool, creamy contrast, followed by a handful of shredded cheddar cheese and a sprinkle of fresh cilantro if desired.
Serve immediately while the hot dogs are warm and the chili is hot.







