I’ll be honest—roasted turkey used to stress me out. I thought you had to stuff it to make it taste good, and that meant dealing with soggy bread, wondering if it cooked through, and adding at least an hour to the whole process. Then one year, I decided to skip the stuffing entirely and just roast the bird.
Best decision ever. Without stuffing taking up space inside, the turkey cooks faster and more evenly. The meat stays juicy, and I don’t have to worry about whether the center of the stuffing hit the right temperature. Plus, I can make my dressing separately in a casserole dish, which means it actually gets crispy on top.
Want a simple turkey that doesn’t require wrestling with stuffing? This is the recipe for you. It’s straightforward, reliable, and leaves you with more time to make the sides everyone actually remembers.
Why You’ll Love This Roasted Turkey
- No stuffing required – This recipe skips the stuffing step, which means faster, more even cooking and less stress on turkey day.
- Incredibly flavorful and moist – The herb butter rub and aromatic vegetables inside the cavity infuse the turkey with amazing flavor while keeping the meat juicy.
- Simple ingredients – You probably already have most of these items on hand, and the fresh herbs make all the difference without being complicated.
- Perfect for holidays or Sunday dinner – Whether you’re cooking for Thanksgiving or just want a special family meal, this roasted turkey delivers impressive results without requiring expert cooking skills.
What Kind of Turkey Should I Use?
For this recipe, you can use either a fresh or frozen turkey, though fresh tends to be a bit easier to work with since there’s no thawing time involved. If you’re going with frozen, just make sure to give yourself enough time to thaw it properly in the fridge – usually about 24 hours for every 4-5 pounds of turkey. Whether you choose a standard turkey or a free-range, organic bird is totally up to your preference and budget, as both will turn out great with this roasting method. Just avoid pre-basted or self-basting turkeys since we’re making our own herb butter, and those turkeys already have added solutions that can affect the flavor.
Options for Substitutions
While turkey is the star here and can’t really be swapped, there’s plenty of room to play around with the other ingredients:
- Fresh herbs: If fresh rosemary, thyme, or sage aren’t available, you can use dried herbs instead. Use about 1 tablespoon of each dried herb to replace the fresh containers, but keep in mind the flavor will be a bit more concentrated.
- Unsalted butter: You can use salted butter if that’s what you have – just reduce or skip the added salt in the recipe to avoid over-salting your bird.
- Lemon: An orange works great as a substitute and adds a slightly sweeter citrus note to the turkey. You can also use a combination of both.
- Apple: Try pears or even additional onion if you don’t have apples on hand. These aromatics are mainly for flavoring the cavity, so most firm fruits or vegetables work fine.
- Garlic cloves: In a pinch, you can use 2-3 teaspoons of garlic powder mixed into the butter, though fresh garlic does give better flavor.
Watch Out for These Mistakes While Roasting
The biggest mistake when roasting turkey is not letting it come to room temperature before cooking, which can add an extra hour to your cooking time and result in unevenly cooked meat – take the bird out of the fridge about an hour before it goes in the oven.
Skipping the step of drying the skin thoroughly with paper towels will prevent you from getting that crispy, golden skin everyone loves, so make sure to pat it completely dry before applying your herb butter.
Another common error is not using a meat thermometer and relying on cooking time alone – your turkey is done when the thickest part of the thigh reaches 165°F, not when the timer goes off.
Finally, cutting into the turkey right away is tempting, but letting it rest for at least 20-30 minutes allows the juices to redistribute throughout the meat, keeping it moist instead of spilling out onto your cutting board.
What to Serve With Roasted Turkey?
A roasted turkey is the star of the show, so you’ll want to build a spread of classic sides around it. Mashed potatoes are pretty much a must-have, along with some good gravy made from the turkey drippings, and don’t forget the cranberry sauce for that sweet-tart contrast. Green bean casserole, roasted Brussels sprouts, or glazed carrots add some color to the plate, while warm dinner rolls give everyone something to mop up all those delicious juices. For a complete meal, add a simple salad and maybe some sweet potato casserole or stuffing on the side, and you’ve got yourself a proper feast.
Storage Instructions
Store: Once your turkey has cooled down, carve off the meat and store it in airtight containers in the fridge for up to 4 days. I like to separate the white and dark meat into different containers so everyone can grab their favorite. Don’t forget to save those bones for making turkey stock!
Freeze: Turkey freezes really well for up to 3 months. I usually portion it out into meal-sized amounts in freezer bags, pressing out as much air as possible. Label them with the date so you know when you froze it, and you’ll have delicious turkey ready for sandwiches, soups, or casseroles whenever you need it.
Reheat: To keep your leftover turkey moist when reheating, add a splash of chicken broth to the container and warm it gently in the oven at 325°F covered with foil. You can also reheat individual portions in the microwave with a damp paper towel over the top to prevent it from drying out.
| Preparation Time | 30-60 minutes |
| Cooking Time | 180-240 minutes |
| Total Time | 210-300 minutes |
| Level of Difficulty | Medium |
Estimated Nutrition
Estimated nutrition for the whole recipe (without optional ingredients):
- Calories: 7300-12100
- Protein: 960-1600 g
- Fat: 430-700 g
- Carbohydrates: 55-80 g
Ingredients
For the turkey:
- Salt, to season cavity
- 0.75 oz fresh rosemary (about 3-4 sprigs)
- 1 onion, peeled and quartered
- Black pepper, to season cavity
- 0.75 oz fresh thyme (about 4-5 sprigs)
- 0.75 oz fresh sage (about 8-10 leaves)
- 1 lemon, quartered
- 1 apple, quartered (any variety)
- Fresh herbs, chopped, for garnish (reserved from herb butter prep)
- 1 turkey (12 to 20 lb, thawed if frozen)
For the herb butter:
- 1/2 tsp ground black pepper
- 1 tbsp fresh rosemary, finely chopped (stems removed)
- 1/2 tbsp fresh sage, finely chopped (about 4-5 leaves)
- 1 tbsp fresh thyme, finely chopped (leaves only)
- 1 cup unsalted butter, at room temperature (I use Kerrygold for rich flavor)
- 6 to 8 garlic cloves, finely minced (about 2-3 tbsp)
- 1 tsp salt
Step 1: Prepare the Herb Butter and Mise en Place
- 1 cup unsalted butter, at room temperature
- 6 to 8 garlic cloves, finely minced
- 1 tsp salt
- 1/2 tsp ground black pepper
- 1 tbsp fresh rosemary, finely chopped
- 1 tbsp fresh thyme, finely chopped
- 1/2 tbsp fresh sage, finely chopped
Start by making the herb butter, which will be the flavor foundation for your turkey.
In a bowl, combine the room-temperature unsalted butter with the finely minced garlic, salt, black pepper, chopped rosemary, chopped thyme, and chopped sage.
Mix until fully incorporated and well combined—this should take about 2-3 minutes of stirring.
Set the herb butter aside at room temperature.
While this sets, peel and quarter your onion and lemon, quarter your apple, and gather your fresh herb sprigs (whole rosemary, thyme, and sage branches) for the cavity.
Having everything prepped and ready before you start working with the turkey will make the next steps much smoother.
I like to reserve a few extra chopped herbs from this step to use as a final garnish on the carved turkey—it adds a beautiful fresh touch.
Step 2: Prepare the Turkey and Preheat Oven
- 1 turkey
- 1 onion, peeled and quartered
- 1 lemon, quartered
- 1 apple, quartered
- 0.75 oz fresh rosemary
- 0.75 oz fresh thyme
- 0.75 oz fresh sage
- Salt, to season cavity
- Black pepper, to season cavity
If your turkey is frozen, ensure it’s fully thawed before beginning.
Preheat your oven to 325°F so it’s ready when you need it.
Remove the giblets and neck from the turkey cavity and discard them (or save for stock if desired).
Pat the turkey dry inside and out with paper towels—this helps the skin brown better during roasting.
Season the inside of the cavity generously with salt and pepper, then stuff it with the quartered onion, lemon, and apple along with the whole herb sprigs (rosemary, thyme, and sage branches).
This creates an aromatic cavity that will infuse the turkey from the inside as it cooks.
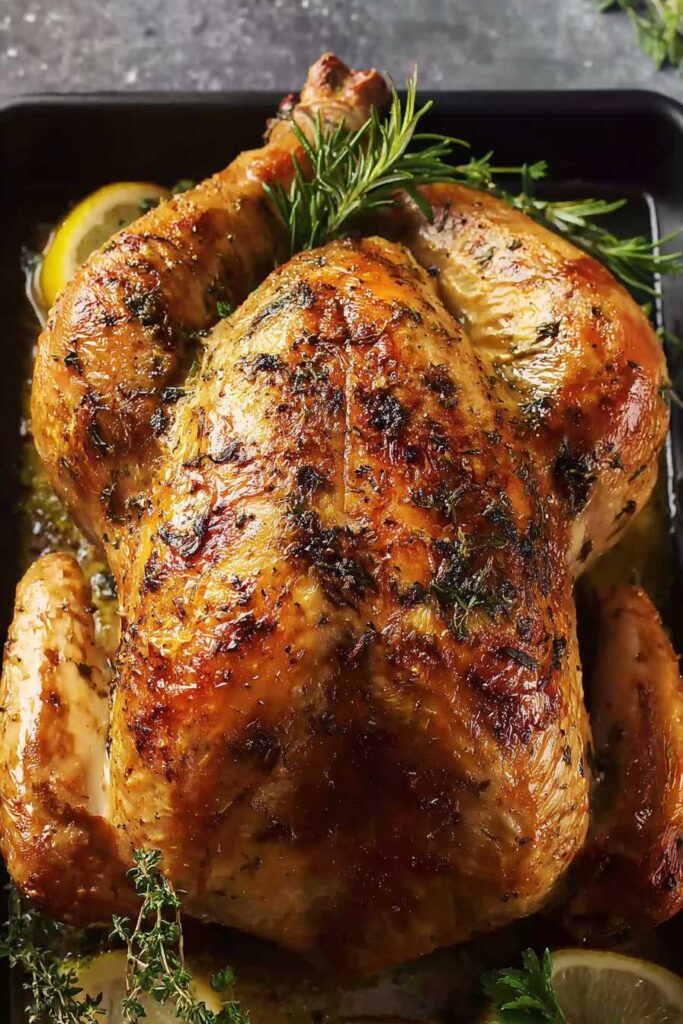
Step 3: Apply Herb Butter Under and Over the Skin
- herb butter mixture from Step 1
Place the turkey on a roasting rack set in a roasting pan.
Using your fingers, carefully loosen the skin on the turkey’s breast and thighs, working from the neck opening and being gentle so you don’t tear the skin.
Spread about half of the herb butter from Step 1 under the skin, distributing it evenly across the breast meat and thighs—this is where the magic happens, as the butter will baste the meat from inside as it cooks.
Rub the remaining herb butter all over the outside of the turkey, making sure to coat the legs, wings, and all exposed areas.
I find this two-stage butter application creates incredibly moist, flavorful meat while giving you that beautiful golden-brown skin everyone loves.
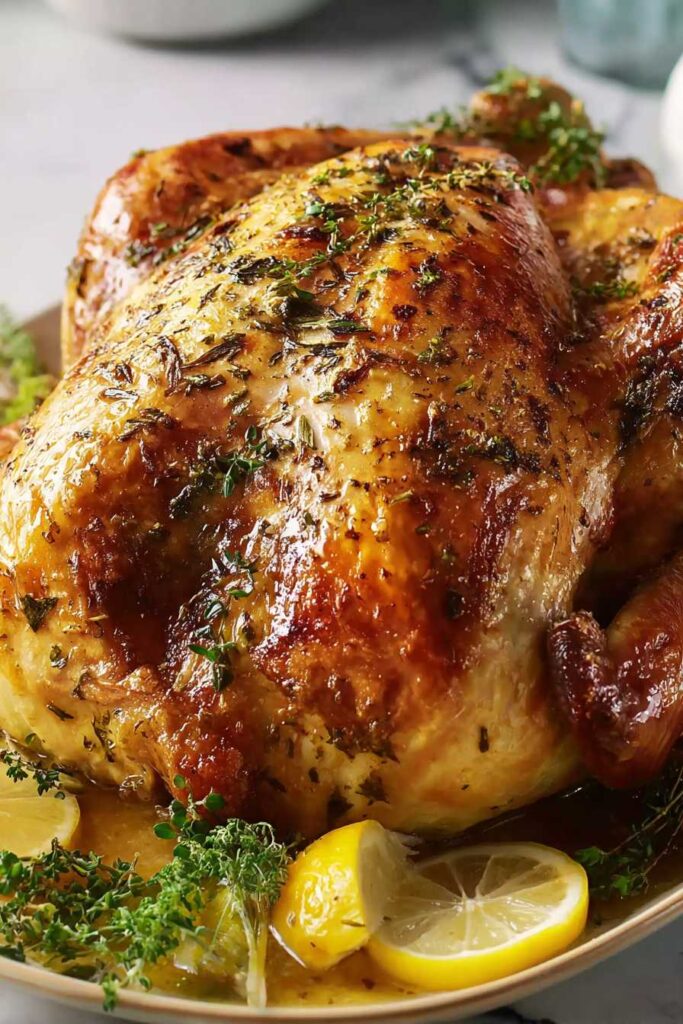
Step 4: Roast the Turkey Until Golden and Cooked Through
Place the turkey in the preheated 325°F oven.
Roast for 13 to 15 minutes per pound, checking the internal temperature with a meat thermometer inserted into the thickest part of the thigh (without touching bone)—aim for 165°F.
If the skin begins to brown too quickly before the turkey is fully cooked through, loosely tent it with foil to prevent over-browning while the meat continues to cook.
The turkey is done when it reaches 165°F in the thigh.
The total cooking time will depend on your turkey’s weight: a 12-pound bird will take roughly 2.5 to 3 hours, while a 20-pound bird may take 4.5 to 5 hours.
Plan accordingly and start checking temperature around the 2-hour mark.
Step 5: Rest and Carve the Turkey
Once the turkey reaches 165°F internal temperature, carefully remove it from the oven and place it on a clean cutting board.
Cover it loosely with foil and let it rest for 20 to 30 minutes—this is crucial, as resting allows the juices to redistribute throughout the meat, keeping it moist and tender when you carve.
Don’t skip this step; it makes a real difference in texture.
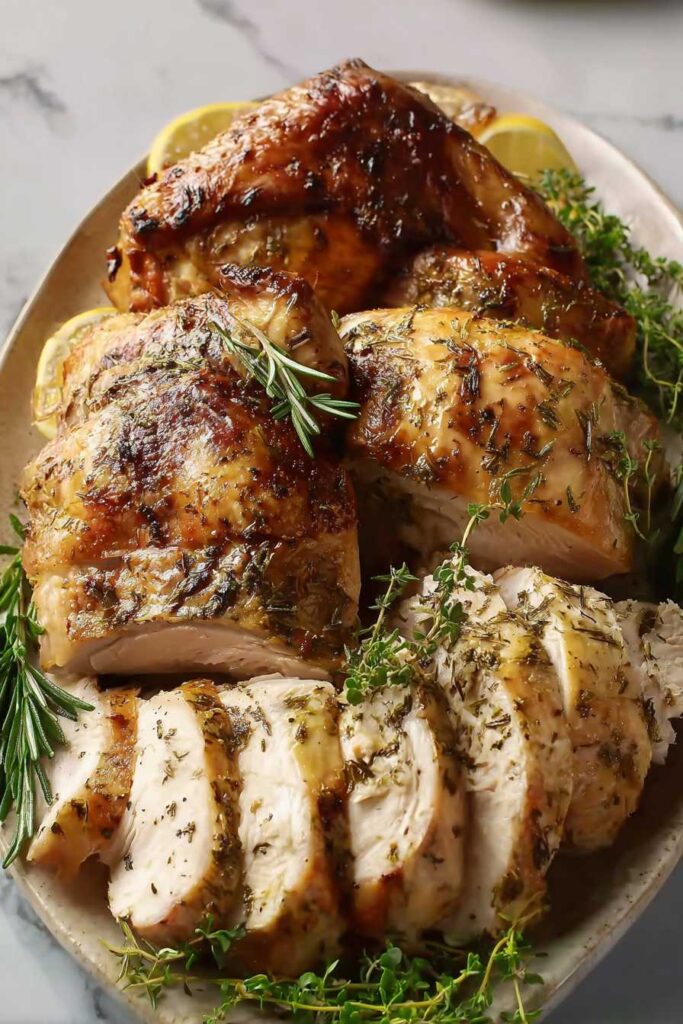
After resting, carefully carve the turkey into breasts, thighs, drumsticks, and wings using a sharp carving knife, arranging the pieces on your serving platter.
Step 6: Plate and Garnish
- Fresh herbs, chopped, for garnish
Arrange the carved turkey on your serving platter and sprinkle with the fresh chopped herbs you reserved from Step 1 for a bright, herbaceous finishing touch.
Serve immediately while the turkey is still warm.


