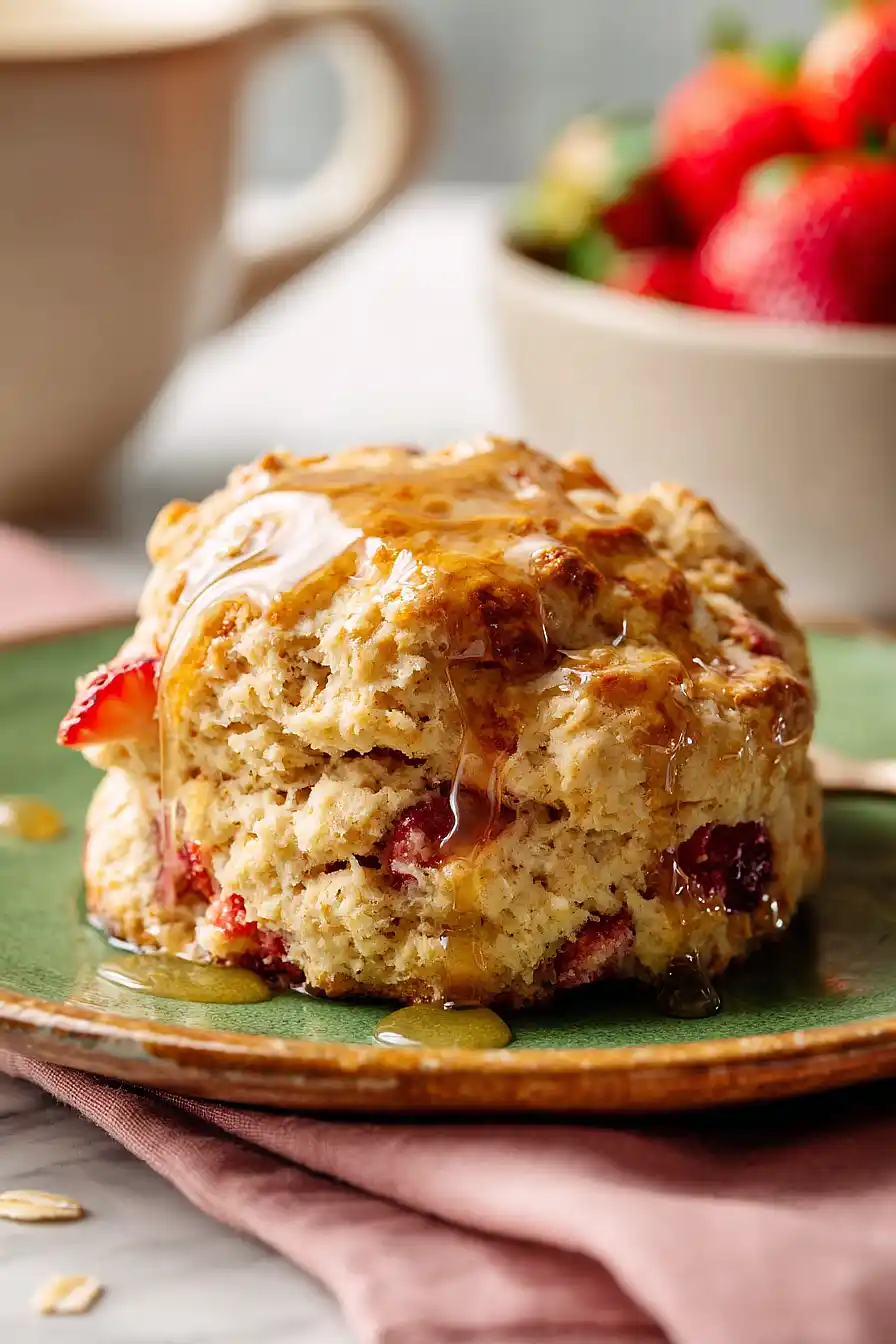
Here are my strawberry honey scones, with sweet buttermilk dough, plenty of fresh strawberries, and a touch of honey that makes them taste like spring in every bite.
These scones are what I make when strawberries are in season and I want something special for weekend breakfast. They’re tender, not too sweet, and way better than anything you’d find at a coffee shop.

Why You’ll Love These Strawberry Honey Scones
- Quick and easy – These scones come together in under an hour, making them perfect for weekend brunch or a special weekday breakfast treat.
- Simple ingredients – You probably have most of these pantry staples on hand already, and fresh strawberries are easy to find year-round.
- Naturally sweetened – The honey adds a gentle sweetness that lets the fresh strawberry flavor shine through without being overly sugary.
- Bakery-style results at home – These tender, flaky scones taste like they came from your favorite coffee shop, but you made them yourself for a fraction of the cost.
What Kind of Strawberries Should I Use?
Fresh strawberries are your best bet for these scones, and you’ll want to look for berries that are firm and bright red without any mushy spots. If fresh strawberries aren’t in season, frozen strawberries can work in a pinch – just make sure to thaw them completely and pat them dry with paper towels to remove excess moisture. When prepping your strawberries, cut them into small pieces, about the size of a blueberry, so they distribute evenly throughout the dough and don’t create big pockets of moisture. Avoid using overly ripe or soft strawberries since they’ll release too much liquid and can make your scones soggy instead of flaky.

Options for Substitutions
These scones are pretty forgiving when it comes to swapping ingredients:
- Buttermilk: Don’t have buttermilk? Mix 1 cup of regular milk with 1 tablespoon of lemon juice or white vinegar and let it sit for 5 minutes. You can also use plain yogurt thinned with a bit of milk.
- Butter: Cold butter is really important for flaky scones, so don’t skip it. But if you need a dairy-free option, use cold coconut oil or vegan butter sticks – just make sure they’re well chilled before using.
- Strawberries: Fresh strawberries work best, but frozen ones are fine too. Just thaw them first and pat dry with paper towels to remove excess moisture. You could also try blueberries, raspberries, or diced peaches.
- Honey: Maple syrup or agave nectar can replace the honey in equal amounts. Keep in mind this will slightly change the flavor profile.
- Oats: If you’re out of oats, you can use all flour instead – just increase the flour to 3 cups total. Quick oats and old-fashioned oats both work fine here.
- Cream: The cream is just for brushing on top, so you can use milk, half-and-half, or even an egg wash (1 beaten egg) instead.
Watch Out for These Mistakes While Baking
The biggest mistake when making scones is overworking the dough, which develops too much gluten and turns your scones tough and dense instead of light and flaky – mix just until the ingredients come together and stop.
Another common error is using warm or softened butter, so make sure your butter is cold (straight from the fridge) and cut it into small pieces that stay visible in the dough, creating those pockets of steam that give scones their signature texture.
To keep your strawberries from turning the dough pink and mushy, pat them dry with paper towels before folding them in, and don’t skip brushing the tops with cream since this creates that golden, slightly crispy exterior.
Finally, resist the urge to flatten your dough thinner than 1 inch – thicker scones have more room to rise and develop that perfect contrast between a crispy outside and tender inside.
What to Serve With Strawberry Honey Scones?
These scones are perfect for breakfast or brunch alongside a hot cup of coffee or tea. I love serving them with extra honey or strawberry jam on the side, plus some softened butter for spreading. They also pair really well with fresh fruit like sliced strawberries, blueberries, or raspberries, and a dollop of whipped cream or clotted cream if you’re feeling fancy. For a complete brunch spread, add some scrambled eggs and crispy bacon to round out the meal.
Storage Instructions
Store: Keep your scones in an airtight container at room temperature for up to 2 days, or in the fridge for up to 5 days. The strawberries make them a bit more moist than regular scones, so they’re best enjoyed within the first couple days when they’re at their peak freshness.
Freeze: These scones freeze really well for up to 3 months. Wrap each one individually in plastic wrap, then place them all in a freezer bag. You can also freeze the unbaked scones on a baking sheet, then transfer to a bag once frozen solid, and bake them straight from the freezer when you’re ready.
Reheat: To bring back that fresh-baked taste, warm them in a 300°F oven for about 5-7 minutes. If they’re frozen, let them thaw at room temperature first, or add a few extra minutes to the warming time. A quick zap in the microwave for 15-20 seconds works too if you’re in a hurry.
| Preparation Time | 15-20 minutes |
| Cooking Time | 25-30 minutes |
| Total Time | 40-50 minutes |
| Level of Difficulty | Easy |
| Servings | 8 scones |
Estimated Nutrition
Estimated nutrition for the whole recipe (without optional ingredients):
- Calories: 2000-2200
- Protein: 30-35 g
- Fat: 60-70 g
- Carbohydrates: 340-370 g
Ingredients
For the scone dough:
- 2.75 cups flour (I always use King Arthur all-purpose flour)
- 1/2 cup oats
- 2 tsp baking powder
- 1 tsp baking soda
- 1.75 tsp salt
- 10 tbsp butter (cold and cut into 1/2-inch cubes)
- 1 cup buttermilk
- 1/4 cup honey (I prefer Nature Nate’s raw honey)
- 1 tsp vanilla extract
- 1 cup strawberries (hulled and diced into 1/4-inch pieces)
For the topping:
- 2 tbsp heavy cream
Step 1: Prepare Mise en Place and Heat Oven
- 10 tbsp butter
- 1 cup strawberries
Preheat your oven to 400°F.
While it heats, cut the cold butter into 1/2-inch cubes and set aside on a plate (keeping it cold is crucial for flaky scones).
Hull and dice the strawberries into 1/4-inch pieces, then place them on a paper towel to absorb excess moisture—this prevents the dough from becoming soggy.
Have all your ingredients measured and ready before you begin mixing.
Step 2: Mix Dry Ingredients
- 2.75 cups flour
- 1/2 cup oats
- 2 tsp baking powder
- 1 tsp baking soda
- 1.75 tsp salt
In a large bowl, whisk together the flour, oats, baking powder, baking soda, and salt.
This combines the leavening agents evenly throughout and prevents lumps in the final scones.
Use a whisk rather than just stirring to incorporate air into the dry mixture.
Step 3: Cut Butter Into Flour Until Crumbly
- dry ingredient mixture from Step 2
- 10 tbsp butter
Add the cold butter cubes to the dry ingredients.
Using a pastry cutter, two knives, or your fingertips, work the butter into the flour mixture until it resembles coarse breadcrumbs with pea-sized pieces of butter still visible.
I like to use my fingertips and work quickly—the cold butter creates steam pockets during baking that give scones their light, flaky texture, so it’s important not to overwork or warm the mixture.
Step 4: Combine Wet Ingredients and Bring Dough Together
- 1 cup buttermilk
- 1/4 cup honey
- 1 tsp vanilla extract
- dry ingredient mixture from Step 3
In a small bowl, whisk together the buttermilk, honey, and vanilla extract until smooth.
Pour this wet mixture into the crumbly flour mixture and gently fold together with a rubber spatula or wooden spoon until just combined—do not overmix, as this will make the scones tough.
The dough should come together with some visible streaks of flour still remaining.
Step 5: Fold in Strawberries and Shape Dough
- diced strawberries from Step 1
- scone dough from Step 4
Gently fold the diced strawberries (from Step 1) into the dough using minimal strokes to keep them distributed without breaking them apart.
On a lightly floured surface, gently press or pat the dough into a 1-inch thick round or rectangle.
Cut into 8-12 wedges or use a biscuit cutter for uniform shapes, then transfer the scones to a parchment-lined baking sheet, spacing them about 2 inches apart.
Step 6: Finish and Bake
- 2 tbsp heavy cream
- shaped scones from Step 5
Brush the tops of each scone lightly with heavy cream for a golden finish.
Bake for 22-25 minutes until the tops are light golden brown.
I find that checking at 22 minutes helps prevent overbaking, especially if your oven runs hot.
The scones are done when a toothpick inserted into the center comes out with a few moist crumbs.
Step 7: Cool and Serve
- baked scones from Step 6
- honey for serving
Let the scones cool on the baking sheet for 5 minutes, then transfer to a wire rack to cool slightly.
Serve warm or at room temperature with additional honey drizzled on top or served on the side for dipping.
These scones are best enjoyed fresh but can be stored in an airtight container for up to 2 days.

Buttery Strawberry Honey Scones
Ingredients
For the scone dough::
- 2.75 cups flour (I always use King Arthur all-purpose flour)
- 1/2 cup oats
- 2 tsp baking powder
- 1 tsp baking soda
- 1.75 tsp salt
- 10 tbsp butter (cold and cut into 1/2-inch cubes)
- 1 cup buttermilk
- 1/4 cup honey (I prefer Nature Nate's raw honey)
- 1 tsp vanilla extract
- 1 cup strawberries (hulled and diced into 1/4-inch pieces)
For the topping::
- 2 tbsp heavy cream
Instructions
- Preheat your oven to 400°F. While it heats, cut the cold butter into 1/2-inch cubes and set aside on a plate (keeping it cold is crucial for flaky scones). Hull and dice the strawberries into 1/4-inch pieces, then place them on a paper towel to absorb excess moisture—this prevents the dough from becoming soggy. Have all your ingredients measured and ready before you begin mixing.
- In a large bowl, whisk together the flour, oats, baking powder, baking soda, and salt. This combines the leavening agents evenly throughout and prevents lumps in the final scones. Use a whisk rather than just stirring to incorporate air into the dry mixture.
- Add the cold butter cubes to the dry ingredients. Using a pastry cutter, two knives, or your fingertips, work the butter into the flour mixture until it resembles coarse breadcrumbs with pea-sized pieces of butter still visible. I like to use my fingertips and work quickly—the cold butter creates steam pockets during baking that give scones their light, flaky texture, so it's important not to overwork or warm the mixture.
- In a small bowl, whisk together the buttermilk, honey, and vanilla extract until smooth. Pour this wet mixture into the crumbly flour mixture and gently fold together with a rubber spatula or wooden spoon until just combined—do not overmix, as this will make the scones tough. The dough should come together with some visible streaks of flour still remaining.
- Gently fold the diced strawberries (from Step 1) into the dough using minimal strokes to keep them distributed without breaking them apart. On a lightly floured surface, gently press or pat the dough into a 1-inch thick round or rectangle. Cut into 8-12 wedges or use a biscuit cutter for uniform shapes, then transfer the scones to a parchment-lined baking sheet, spacing them about 2 inches apart.
- Brush the tops of each scone lightly with heavy cream for a golden finish. Bake for 22-25 minutes until the tops are light golden brown. I find that checking at 22 minutes helps prevent overbaking, especially if your oven runs hot. The scones are done when a toothpick inserted into the center comes out with a few moist crumbs.
- Let the scones cool on the baking sheet for 5 minutes, then transfer to a wire rack to cool slightly. Serve warm or at room temperature with additional honey drizzled on top or served on the side for dipping. These scones are best enjoyed fresh but can be stored in an airtight container for up to 2 days.


