I didn’t think much about gluten free baking until a few years ago when my daughter’s friend came over and couldn’t eat the brownies I’d made. I felt terrible. That’s when I started figuring out how to make treats that everyone could enjoy.
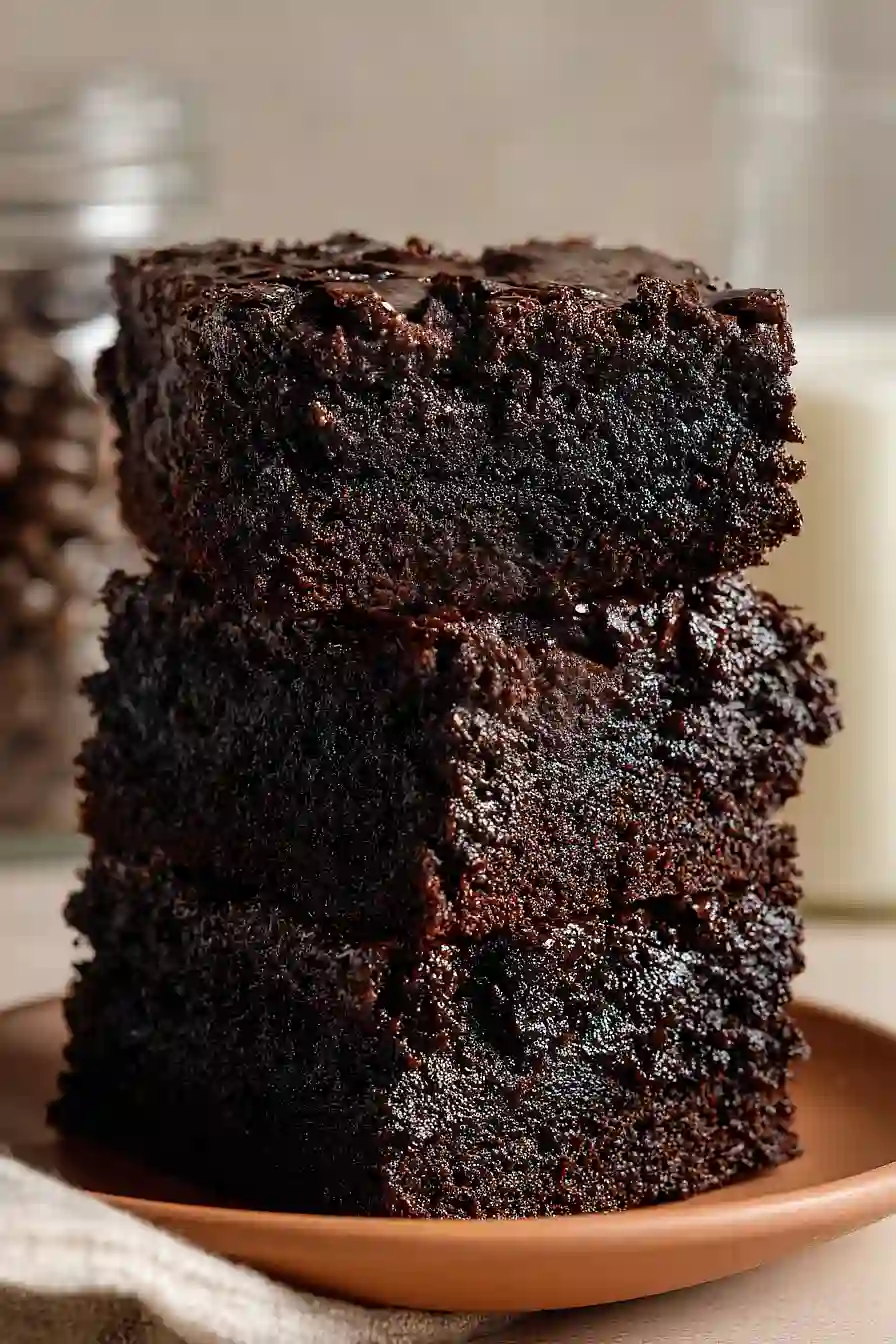
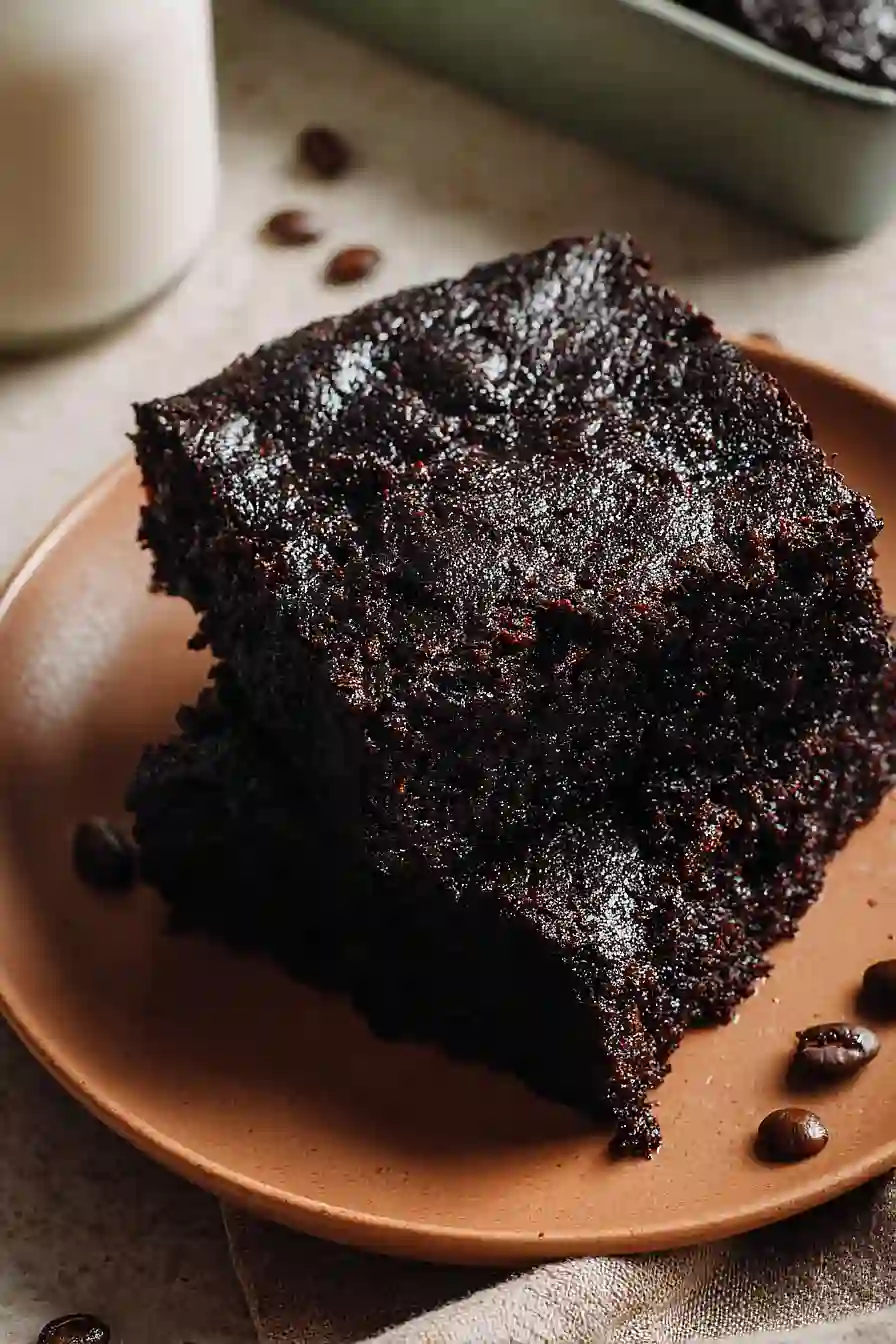
Turns out, gluten free brownies can be just as good as regular ones—you just need the right flour blend. These espresso brownies are proof of that. The coffee flavor makes the chocolate taste even deeper and richer, and honestly, most people can’t tell they’re gluten free at all. Plus, they’re pretty simple to throw together on a weekend afternoon when you need something sweet.

Why You’ll Love These Espresso Brownies
- Rich coffee-chocolate flavor – The espresso powder takes these brownies to the next level, giving them a deep, sophisticated taste that coffee lovers will go crazy for.
- Gluten-free friendly – Just use your favorite gluten-free flour blend, and you’ve got a treat that everyone can enjoy without feeling left out.
- Quick and easy – These brownies come together in under an hour, making them perfect for last-minute dessert cravings or when you need to bring something to a gathering.
- Fudgy texture – With chocolate chips melted throughout and a moist crumb, these brownies have that perfect chewy consistency that makes them hard to resist.
- Simple pantry ingredients – You probably have most of these items in your kitchen already, so no special shopping trip required.
What Kind of Flour Should I Use?
Since this is a gluten-free recipe, you’ll want to use a good quality gluten-free flour blend for the best results. Most store-bought gluten-free all-purpose flour blends work great – look for ones that contain a mix of rice flour, tapioca starch, and potato starch, as these tend to give you the closest texture to regular brownies. Brands like Bob’s Red Mill 1-to-1 Baking Flour or King Arthur Measure for Measure are reliable choices that you can swap in cup-for-cup. Avoid using single-ingredient flours like almond flour or coconut flour on their own, as they won’t give you that fudgy brownie texture you’re looking for.
Options for Substitutions
These brownies are pretty forgiving when it comes to swaps, so here’s what you can change up:
- Gluten-free flour: Any gluten-free all-purpose flour blend works great here – just make sure it includes xanthan gum. If yours doesn’t, add 1/2 teaspoon to help bind everything together.
- Espresso powder: No espresso powder? Use instant coffee granules instead – they work just as well. You can also leave it out completely if you prefer plain chocolate brownies, though the coffee really brings out the chocolate flavor.
- Oil: Melted butter or coconut oil make good substitutes for vegetable oil. Butter will give you a richer flavor, while coconut oil keeps them dairy-free if that matters to you.
- Milk: Any milk works here – dairy, almond, oat, or soy. Pick whatever you have in the fridge.
- Brown sugar: If you’re out of brown sugar, use all white sugar instead. Your brownies will be slightly less chewy but still delicious.
- Chocolate chips: Chopped chocolate bars, dark chocolate chunks, or even white chocolate chips can replace regular chocolate chips. Just make sure they’re labeled gluten-free if that’s important for your diet.
Watch Out for These Mistakes While Baking
The biggest mistake you can make with brownies is overbaking them, which turns fudgy squares into dry, cake-like disappointments – pull them out when a toothpick inserted in the center comes out with a few moist crumbs, not completely clean.
Skipping the 15-minute rest before baking is another common error, as this time allows the espresso powder to fully dissolve and the batter to thicken slightly for better texture.
When melting your chocolate chips, be careful not to overheat them or they’ll seize up and become grainy – stop microwaving once they’re mostly melted and stir until smooth.
Finally, resist the urge to cut into these brownies right away, as letting them cool completely in the pan helps them set properly and makes slicing much cleaner and easier.
What to Serve With Espresso Brownies?
These espresso brownies are perfect on their own, but they’re even better with a scoop of vanilla ice cream on top – the cold creaminess is a great contrast to the rich chocolate and coffee flavors. If you’re serving them for a party or gathering, try pairing them with fresh whipped cream and some raspberries or strawberries for a little brightness. A hot cup of coffee or a cold glass of milk are both classic choices that work really well with the espresso kick in these brownies. For something a bit fancier, you could drizzle some caramel or chocolate sauce over the top and add a sprinkle of flaky sea salt.
Storage Instructions
Store: These espresso brownies stay moist and fudgy when kept in an airtight container at room temperature for up to 4 days. If you want them to last a bit longer, store them in the fridge for up to a week, though I think they taste best at room temperature.
Freeze: Brownies are one of those things that freeze really well! Cut them into squares and wrap each one individually in plastic wrap, then store in a freezer bag for up to 3 months. This way you can grab just one or two whenever a chocolate craving hits.
Thaw: Just leave the brownies on the counter for about 30 minutes to come to room temperature. If you’re impatient like me, you can microwave them for about 15-20 seconds for that fresh-from-the-oven warmth and gooey chocolate chips.
| Preparation Time | 15-20 minutes |
| Cooking Time | 30-35 minutes |
| Total Time | 45-55 minutes |
| Level of Difficulty | Easy |
| Servings | 16 pieces |
Estimated Nutrition
Estimated nutrition for the whole recipe (without optional ingredients):
- Calories: 3200-3500
- Protein: 40-48 g
- Fat: 150-165 g
- Carbohydrates: 410-440 g
Ingredients
For the dry mix:
- 1 1/4 cups gluten free flour blend (King Arthur Measure for Measure)
- 3/4 cup cocoa powder
- 3.5 tsp espresso powder
- 1/2 cup brown sugar
- 1 cup sugar
- 1 tsp baking powder
- 1/2 tsp salt
- 1/4 tsp ground cinnamon
For the wet mix:
- 3 large eggs (room temperature)
- 1/2 cup light oil
- 1/2 cup non-dairy milk
- 2 tsp pure vanilla extract
- 6 oz chocolate chips
Step 1: Prepare the Mise en Place and Preheat
- 3 large eggs
- baking dish and cooking spray or parchment paper
Preheat your oven to 350°F and prepare a 9×13 inch baking dish by greasing it or lining it with parchment paper.
Bring your eggs to room temperature if they aren’t already—this helps them incorporate smoothly into the batter.
Measure out all your ingredients and have them ready before you begin mixing, which helps you move efficiently through the next steps.
Step 2: Combine Dry Ingredients
- 1 1/4 cups gluten free flour blend
- 3/4 cup cocoa powder
- 3.5 tsp espresso powder
- 1/2 cup brown sugar
- 1 cup sugar
- 1 tsp baking powder
- 1/2 tsp salt
- 1/4 tsp ground cinnamon
In a large bowl, whisk together the gluten-free flour blend, cocoa powder, espresso powder, brown sugar, granulated sugar, baking powder, salt, and cinnamon.
Whisking thoroughly ensures the leavening agents and espresso powder are evenly distributed throughout, which prevents pockets of bitter espresso flavor and gives you consistent texture in every bite.
I like to sift the cocoa powder into the mixture rather than just whisking it—cocoa can clump easily and sifting ensures it’s fully incorporated.
Step 3: Melt Chocolate and Combine Wet Ingredients
- 6 oz chocolate chips
- 3 large eggs
- 1/2 cup light oil
- 1/2 cup non-dairy milk
- 2 tsp pure vanilla extract
While working on the dry ingredients, melt the chocolate chips in the microwave in 20-second intervals, stirring between each interval until fully melted and smooth—this prevents scorching.
In a separate bowl, whisk together the room temperature eggs, light oil, non-dairy milk, and vanilla extract until well combined.
Add the melted chocolate to the wet mixture and stir until fully incorporated and uniform in color.
Step 4: Combine Wet and Dry, Then Rest the Batter
- dry ingredient mixture from Step 2
- wet ingredient mixture from Step 3
Pour the wet ingredient mixture from Step 3 into the bowl of dry ingredients from Step 2 and fold together gently using a spatula or wooden spoon until just combined—don’t overmix, as this can lead to dense brownies.
Let the batter sit at room temperature for 15 minutes.
This rest period allows the gluten-free flour blend to fully hydrate and helps the batter set slightly, which results in a more fudgy texture and better structure.
Step 5: Bake the Brownies
- batter from Step 4
- prepared baking dish from Step 1
Pour the rested batter into your prepared baking dish from Step 1, spreading it evenly into the corners.
Bake at 350°F for 30-35 minutes—the brownies are done when a toothpick inserted in the center comes out with just a few moist crumbs still clinging to it, not completely clean.
I prefer my brownies slightly underbaked because gluten-free batters continue to set as they cool, and this keeps them fudgy rather than cake-like.
Step 6: Cool and Serve
- baked brownies from Step 5
Allow the brownies to cool completely in the baking dish on a wire rack or cool surface—this typically takes at least 1-2 hours.
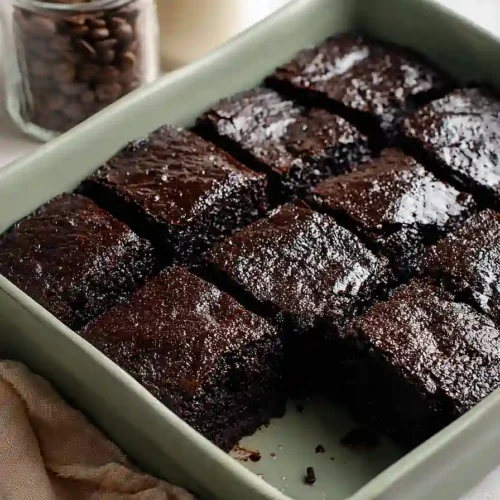
Once cooled, slice into squares and serve.
The cooling time is essential because the brownies continue to firm up slightly, making them easier to cut cleanly.
Decadent Gluten Free Espresso Brownies
Ingredients
For the dry mix
- 1 1/4 cups gluten free flour blend (King Arthur Measure for Measure)
- 3/4 cup cocoa powder
- 3.5 tsp espresso powder
- 1/2 cup brown sugar
- 1 cup sugar
- 1 tsp baking powder
- 1/2 tsp salt
- 1/4 tsp ground cinnamon
For the wet mix
- 3 large eggs (room temperature)
- 1/2 cup light oil
- 1/2 cup non-dairy milk
- 2 tsp pure vanilla extract
- 6 oz chocolate chips
Instructions
- Preheat your oven to 350°F and prepare a 9x13 inch baking dish by greasing it or lining it with parchment paper. Bring your eggs to room temperature if they aren't already—this helps them incorporate smoothly into the batter. Measure out all your ingredients and have them ready before you begin mixing, which helps you move efficiently through the next steps.
- In a large bowl, whisk together the gluten-free flour blend, cocoa powder, espresso powder, brown sugar, granulated sugar, baking powder, salt, and cinnamon. Whisking thoroughly ensures the leavening agents and espresso powder are evenly distributed throughout, which prevents pockets of bitter espresso flavor and gives you consistent texture in every bite. I like to sift the cocoa powder into the mixture rather than just whisking it—cocoa can clump easily and sifting ensures it's fully incorporated.
- While working on the dry ingredients, melt the chocolate chips in the microwave in 20-second intervals, stirring between each interval until fully melted and smooth—this prevents scorching. In a separate bowl, whisk together the room temperature eggs, light oil, non-dairy milk, and vanilla extract until well combined. Add the melted chocolate to the wet mixture and stir until fully incorporated and uniform in color.
- Pour the wet ingredient mixture from Step 3 into the bowl of dry ingredients from Step 2 and fold together gently using a spatula or wooden spoon until just combined—don't overmix, as this can lead to dense brownies. Let the batter sit at room temperature for 15 minutes. This rest period allows the gluten-free flour blend to fully hydrate and helps the batter set slightly, which results in a more fudgy texture and better structure.
- Pour the rested batter into your prepared baking dish from Step 1, spreading it evenly into the corners. Bake at 350°F for 30-35 minutes—the brownies are done when a toothpick inserted in the center comes out with just a few moist crumbs still clinging to it, not completely clean. I prefer my brownies slightly underbaked because gluten-free batters continue to set as they cool, and this keeps them fudgy rather than cake-like.
- Allow the brownies to cool completely in the baking dish on a wire rack or cool surface—this typically takes at least 1-2 hours. Once cooled, slice into squares and serve. The cooling time is essential because the brownies continue to firm up slightly, making them easier to cut cleanly.


