Coconut cake reminds me why I keep baking after all these years. There’s something about that sweet coconut flavor mixed with soft, fluffy cake that just makes people happy. It’s the kind of dessert that shows up at birthdays, potlucks, and Sunday dinners—and disappears fast.
The best part about this recipe is the buttercream frosting. It’s rich and creamy without being too sweet, and it pairs perfectly with the coconut in the cake. I use real coconut essence and cream of coconut to get that tropical flavor in every bite. No shortcuts here.
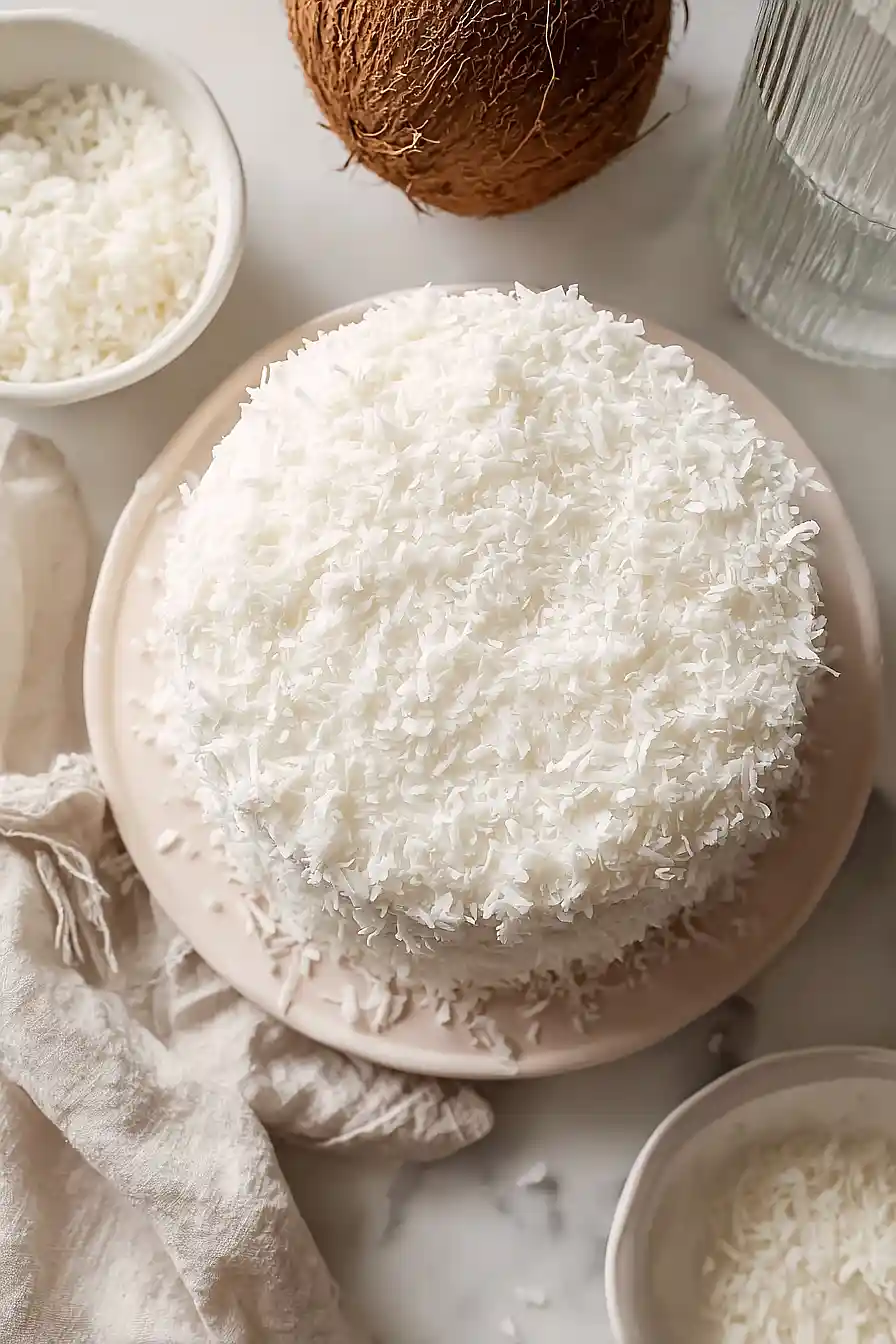
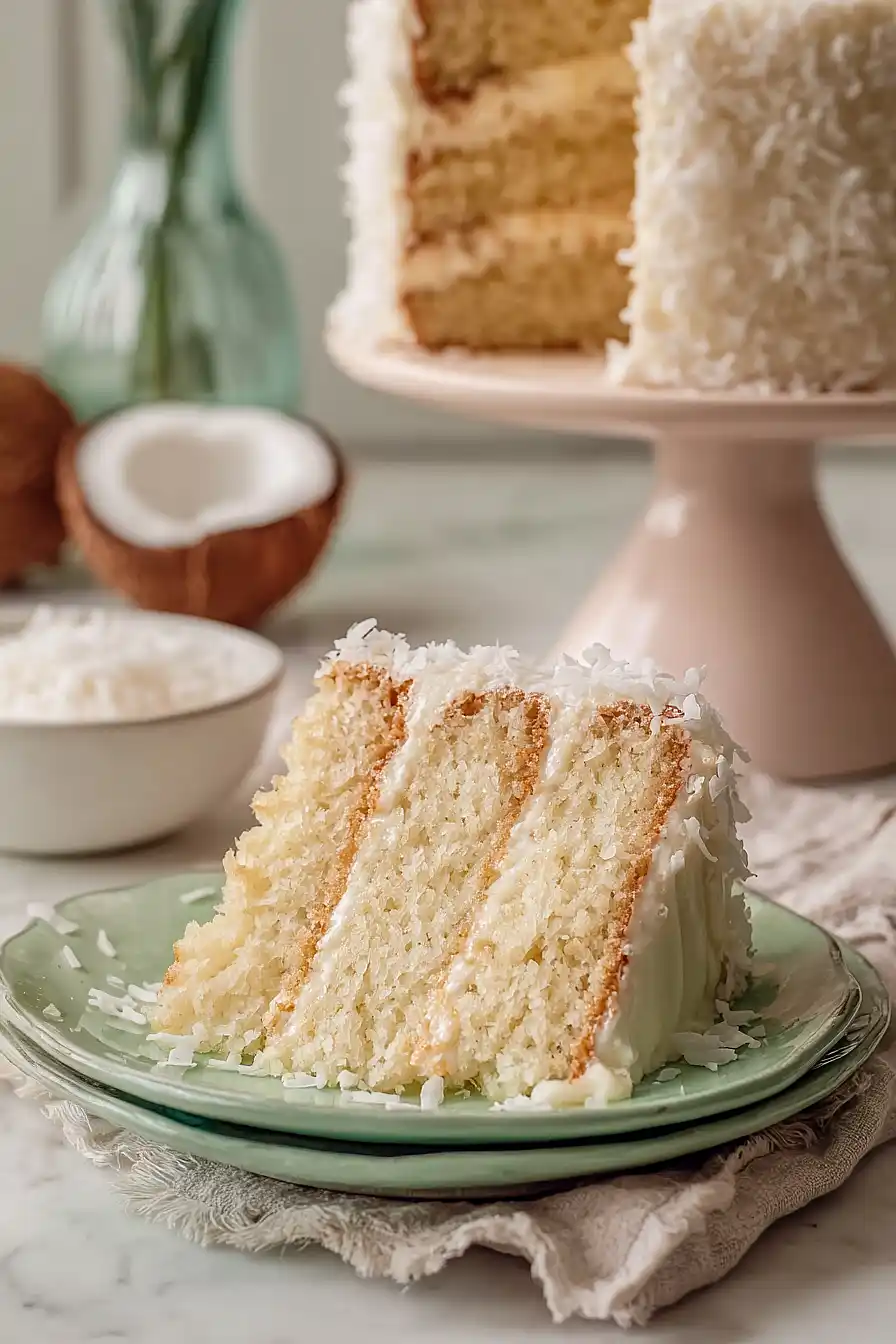
This isn’t a quick weeknight dessert, but it’s worth the extra time. The cake itself is moist and tender, and once you frost it and cover it with shredded coconut, it looks like something from a bakery. Your family will think you’re a baking genius.
Why You’ll Love This Coconut Cake
- Rich coconut flavor – With coconut baked into the cake, coconut essence in both the cake and frosting, and shredded coconut on top, this dessert delivers that tropical taste in every bite.
- Perfect for celebrations – This impressive layer cake makes any occasion feel special, whether it’s a birthday party, holiday gathering, or weekend treat.
- Made from scratch – Using simple pantry ingredients, you can create a homemade cake that tastes way better than anything from a box or bakery.
- Ready in about an hour – From mixing the batter to pulling it out of the oven, this cake comes together quickly so you can have fresh-baked dessert without spending all day in the kitchen.
What Kind of Coconut Should I Use?
For this cake, you’ll want to use sweetened shredded coconut, which you can find in the baking aisle of most grocery stores. The sweetened variety adds a nice touch of extra sweetness and has a softer texture that works well in both the cake batter and as a topping. If you only have unsweetened coconut on hand, that’ll work too, though your cake will be slightly less sweet overall. Make sure to check that your coconut is fresh and hasn’t been sitting in your pantry for too long – stale coconut can taste a bit off and won’t give you that fresh, tropical flavor you’re looking for.

Options for Substitutions
This coconut cake is pretty forgiving when it comes to swaps, so here are some options if you need them:
- Buttermilk: Don’t have buttermilk? Make your own by adding 1 tablespoon of lemon juice or white vinegar to regular milk and letting it sit for 5 minutes before using.
- Coconut essence: If you can’t find coconut essence or extract, you can use imitation coconut flavoring or even add an extra tablespoon of cream of coconut to boost that coconut taste.
- Cream of coconut: This is different from coconut milk – it’s sweetened and thicker. If you don’t have it, you can use coconut milk mixed with a tablespoon of sugar, though the flavor won’t be quite as rich.
- Shredded coconut: You can use sweetened or unsweetened coconut depending on your preference. Both work fine in the cake and as decoration, though sweetened will add a bit more sugar to the recipe.
- Butter: For the cake, you can substitute margarine or vegetable shortening, but stick with real butter for the frosting – it really makes a difference in taste and texture.
- Confectioners sugar: Also called powdered sugar or icing sugar – these are all the same thing. Don’t substitute with regular granulated sugar as your frosting won’t have the right consistency.
Watch Out for These Mistakes While Baking
The biggest mistake when baking layer cakes is not letting them cool completely before frosting – warm cake layers will melt your buttercream and cause it to slide right off, so give them at least an hour to cool on wire racks.
Another common error is overmixing the batter once you add the flour, which develops too much gluten and creates a tough, dense cake instead of a light, fluffy one – mix just until the ingredients are combined and you can’t see any more flour streaks.
To keep your cake layers level and prevent doming in the middle, try wrapping damp towel strips around the outside of your pans before baking, and use a toothpick to test doneness in several spots rather than just the center.
For the smoothest frosting, make sure your butter is at room temperature (not melted or cold), and if your buttercream seems too thick or too thin, adjust with a tablespoon of milk or powdered sugar at a time until you get a spreadable consistency.
What to Serve With Coconut Cake?
This coconut cake is rich and sweet, so I like to serve it with a hot cup of coffee or tea to balance out the sweetness. Fresh berries like strawberries or raspberries make a great side since their tartness cuts through the buttercream frosting nicely. You could also serve it with a scoop of vanilla ice cream or some lightly sweetened whipped cream if you’re feeling extra indulgent. For a tropical twist, try pairing it with fresh pineapple chunks or a fruit salad with mango and kiwi.
Storage Instructions
Store: Keep your coconut cake covered at room temperature for up to 2 days, or in the fridge for up to 5 days if you want it to last longer. The buttercream frosting holds up really well in the fridge, just make sure to cover it with a cake dome or plastic wrap so it doesn’t pick up any funky fridge smells.
Freeze: This cake freezes great for up to 3 months. You can freeze it whole or in slices, just wrap it tightly in plastic wrap and then in foil. I like to freeze individual slices so I can grab one whenever I’m craving something sweet without defrosting the whole thing.
Serve: If you stored it in the fridge, let the cake sit at room temperature for about 30 minutes before serving so the frosting softens up and tastes its best. Frozen slices can thaw in the fridge overnight or at room temperature for a couple hours.
| Preparation Time | 30-40 minutes |
| Cooking Time | 28-30 minutes |
| Total Time | 60-70 minutes |
| Level of Difficulty | Medium |
| Servings | 14 slices |
Estimated Nutrition
Estimated nutrition for the whole recipe (without optional ingredients):
- Calories: 6900-7500
- Protein: 60-70 g
- Fat: 340-380 g
- Carbohydrates: 900-960 g
Ingredients
For the cake:
- 3 1/4 cups flour (I always use King Arthur all-purpose flour)
- 4 1/2 tsp baking powder
- 1 cup coconut (shredded and unsweetened)
- 1 cup butter (room temperature, about 70°F)
- 2 1/4 cups sugar
- 4 eggs
- 1 tsp coconut essence
- 1 tsp vanilla
- 1 cup buttermilk
For the frosting and assembly:
- 1 cup butter (I like Kerrygold unsalted butter for this)
- 2 lb confectioners sugar (sifted to remove lumps)
- 1/2 cup milk
- 1 tsp coconut essence
- 1 tsp vanilla essence
- 2 1/2 tbsp cream of coconut (I use Coco Lopez for a richer flavor)
- 7 oz coconut
Step 1: Prepare Pans and Mix Dry Ingredients
- 3 1/4 cups flour
- 4 1/2 tsp baking powder
- 1 cup coconut
Preheat your oven to 350°F and grease three 8-inch round cake pans with butter or cooking spray.
In a medium bowl, whisk together the flour, baking powder, and shredded unsweetened coconut until well combined and any lumps are broken up.
Set this dry mixture aside—this is your mise en place for the batter.
Step 2: Cream Butter and Sugar
- 1 cup butter
- 2 1/4 cups sugar
In a stand mixer or with an electric mixer, beat the room-temperature butter on medium speed for about 2-3 minutes until it’s pale and fluffy.
Gradually add the sugar while continuing to beat, scraping down the bowl as needed.
This creaming process incorporates air into the batter, which helps your cake rise and achieve a tender crumb.
Beat for another 2-3 minutes until the mixture is light and airy.
Step 3: Incorporate Eggs and Extracts
- 4 eggs
- 1 tsp coconut essence
- 1 tsp vanilla
Add the eggs one at a time to the creamed butter and sugar mixture, beating well after each addition to fully incorporate.
Once all eggs are added, mix in the coconut essence and vanilla extract.
The batter should look smooth and well-combined.
I like to use real vanilla and coconut essences rather than imitation extracts—they make a noticeable difference in the final flavor.
Step 4: Build the Batter with Alternating Wet and Dry
- dry ingredient mixture from Step 1
- 1 cup buttermilk
Reduce mixer speed to low and add the dry ingredient mixture from Step 1 and buttermilk in alternating batches, starting and ending with the dry mixture.
The pattern is: dry, wet, dry, wet, dry.
Mix just until combined after each addition—overmixing develops gluten and can result in a tough cake.
Divide the batter evenly among the three prepared pans and smooth the tops with a spatula.
Step 5: Bake the Cake Layers
Bake the three pans in a preheated 350°F oven for 28-30 minutes, until a toothpick inserted in the center comes out clean or with just a few moist crumbs.
The tops should be light golden brown.
Remove from the oven and let the cakes cool in their pans for about 10 minutes, then turn them out onto wire racks to cool completely.
This cooling time prevents the frosting from melting when applied.
Step 6: Prepare the Buttercream Frosting
- 1 cup butter
- 2 lb confectioners sugar
- 1/2 cup milk
- 1 tsp coconut essence
- 1 tsp vanilla essence
- 2 1/2 tbsp cream of coconut
In a clean stand mixer bowl, beat the unsalted butter on medium speed for 2-3 minutes until creamy and pale.
I use Kerrygold for this frosting because it creates a richer, more flavorful result than standard butter.
Sift the confectioners sugar to remove lumps, then gradually add it to the butter along with the milk, beating on medium speed.
Once combined, add the coconut essence, vanilla essence, and cream of coconut.
Increase the mixer speed to high and beat for 3 minutes until the frosting is light, fluffy, and spreadable.
The prolonged beating incorporates air and creates a silky texture.
Step 7: Assemble and Decorate the Cake
- baked cake layers from Step 5
- buttercream frosting from Step 6
- 7 oz coconut
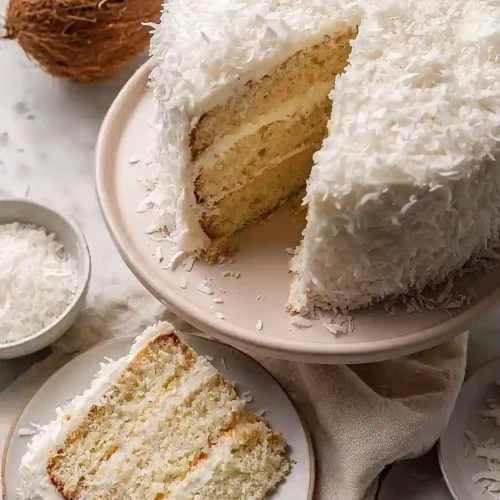
Place the first cooled cake layer on a serving plate or cake board and spread a generous layer of frosting from Step 6 over the top.
Add the second cake layer and repeat.
Top with the third layer and frost the top and sides of the entire cake with the remaining frosting.
Work quickly but smoothly, using an offset spatula for an even finish.
Press the shredded coconut onto the top and sides of the frosted cake, covering as much surface as possible for a beautiful presentation.
Homemade Coconut Cake with Buttercream Frosting
Ingredients
For the cake::
- 3 1/4 cups flour (I always use King Arthur all-purpose flour)
- 4 1/2 tsp baking powder
- 1 cup coconut (shredded and unsweetened)
- 1 cup butter (room temperature, about 70°F)
- 2 1/4 cups sugar
- 4 eggs
- 1 tsp coconut essence
- 1 tsp vanilla
- 1 cup buttermilk
For the frosting and assembly::
- 1 cup butter (I like Kerrygold unsalted butter for this)
- 2 lb confectioners sugar (sifted to remove lumps)
- 1/2 cup milk
- 1 tsp coconut essence
- 1 tsp vanilla essence
- 2 1/2 tbsp cream of coconut (I use Coco Lopez for a richer flavor)
- 7 oz coconut
Instructions
- Preheat your oven to 350°F and grease three 8-inch round cake pans with butter or cooking spray. In a medium bowl, whisk together the flour, baking powder, and shredded unsweetened coconut until well combined and any lumps are broken up. Set this dry mixture aside—this is your mise en place for the batter.
- In a stand mixer or with an electric mixer, beat the room-temperature butter on medium speed for about 2-3 minutes until it's pale and fluffy. Gradually add the sugar while continuing to beat, scraping down the bowl as needed. This creaming process incorporates air into the batter, which helps your cake rise and achieve a tender crumb. Beat for another 2-3 minutes until the mixture is light and airy.
- Add the eggs one at a time to the creamed butter and sugar mixture, beating well after each addition to fully incorporate. Once all eggs are added, mix in the coconut essence and vanilla extract. The batter should look smooth and well-combined. I like to use real vanilla and coconut essences rather than imitation extracts—they make a noticeable difference in the final flavor.
- Reduce mixer speed to low and add the dry ingredient mixture from Step 1 and buttermilk in alternating batches, starting and ending with the dry mixture. The pattern is: dry, wet, dry, wet, dry. Mix just until combined after each addition—overmixing develops gluten and can result in a tough cake. Divide the batter evenly among the three prepared pans and smooth the tops with a spatula.
- Bake the three pans in a preheated 350°F oven for 28-30 minutes, until a toothpick inserted in the center comes out clean or with just a few moist crumbs. The tops should be light golden brown. Remove from the oven and let the cakes cool in their pans for about 10 minutes, then turn them out onto wire racks to cool completely. This cooling time prevents the frosting from melting when applied.
- In a clean stand mixer bowl, beat the unsalted butter on medium speed for 2-3 minutes until creamy and pale. I use Kerrygold for this frosting because it creates a richer, more flavorful result than standard butter. Sift the confectioners sugar to remove lumps, then gradually add it to the butter along with the milk, beating on medium speed. Once combined, add the coconut essence, vanilla essence, and cream of coconut. Increase the mixer speed to high and beat for 3 minutes until the frosting is light, fluffy, and spreadable. The prolonged beating incorporates air and creates a silky texture.
- Place the first cooled cake layer on a serving plate or cake board and spread a generous layer of frosting from Step 6 over the top. Add the second cake layer and repeat. Top with the third layer and frost the top and sides of the entire cake with the remaining frosting. Work quickly but smoothly, using an offset spatula for an even finish. Press the shredded coconut onto the top and sides of the frosted cake, covering as much surface as possible for a beautiful presentation.


