I didn’t know you could actually can soup at home until a few years back. I always thought pressure canning was some complicated thing only my grandma’s generation knew how to do. Turns out, it’s way easier than I expected.
Ham and bean soup is one of those recipes that makes perfect sense for canning. You make a big batch, process the jars, and then you’ve got ready-to-eat soup sitting in your pantry for months. No need to stand over the stove on a busy weeknight. Just open a jar, heat it up, and dinner’s done. Plus, navy beans and ham are naturally good friends—they’ve been showing up together in soup pots for as long as anyone can remember.
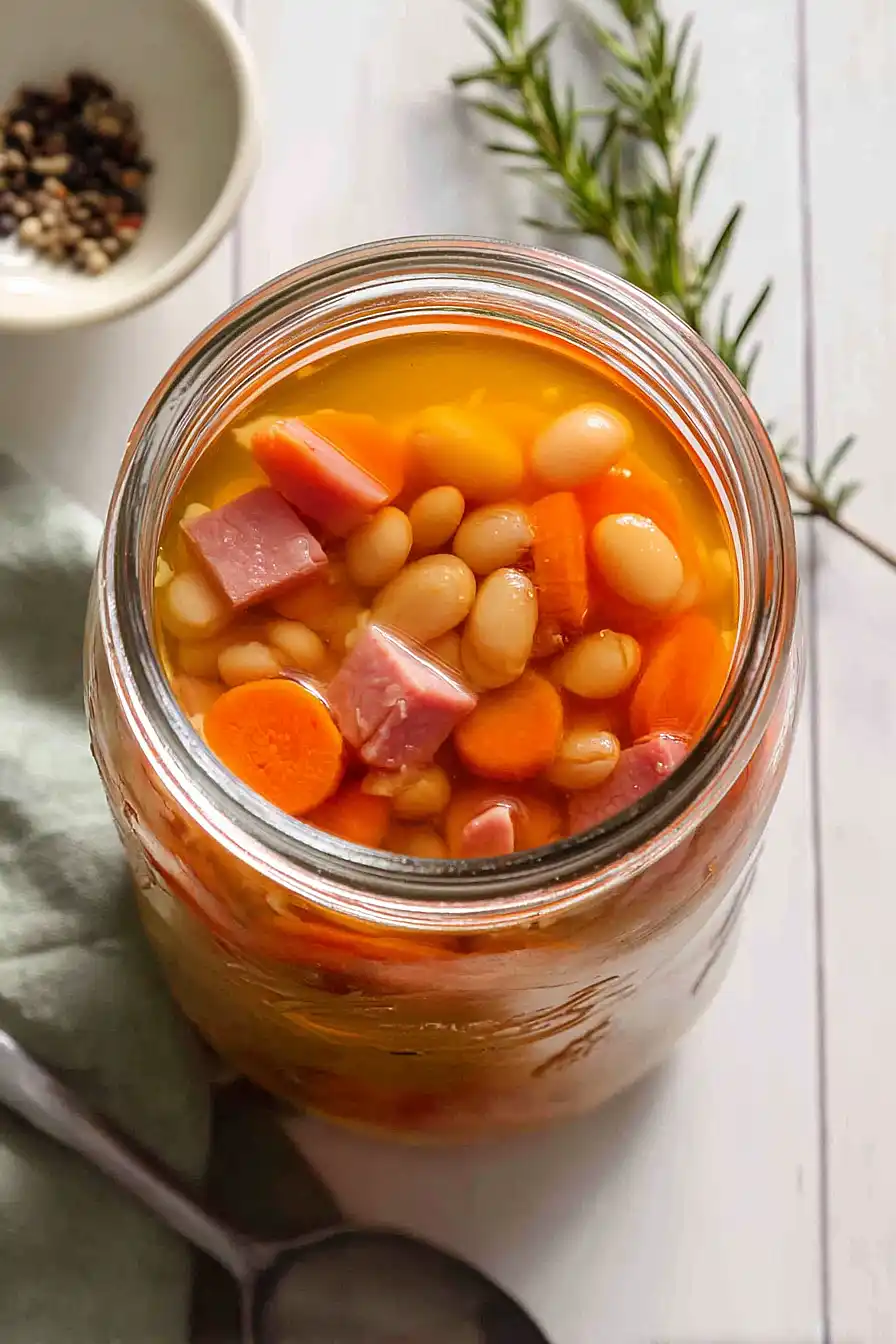
Why You’ll Love This Ham and Bean Soup
- Perfect for meal prep – Canning this soup means you’ll have ready-to-eat homemade meals sitting on your shelf for months, making busy weeknights so much easier.
- Budget-friendly ingredients – Navy beans, leftover ham, and carrots are inexpensive staples that come together to create a filling, satisfying soup without breaking the bank.
- Hearty and nutritious – Packed with protein from the beans and ham, plus vitamins from the carrots, this soup is a wholesome meal that will keep you full for hours.
- Simple, classic flavors – This is the kind of comforting, no-fuss soup that reminds you of home cooking at its best, with just four main ingredients working together perfectly.
What Kind of Ham Should I Use?
For canning ham and bean soup, you’ll want to use a good quality cooked ham that’s been diced into bite-sized pieces. Leftover ham from a holiday dinner works perfectly, or you can grab a ham steak from the deli section and cube it up yourself. Smoked ham adds a nice depth of flavor to the soup, but regular deli ham will work just fine too. Just avoid using honey-glazed or heavily seasoned hams, as those flavors can become too intense during the canning process and might overpower your soup.
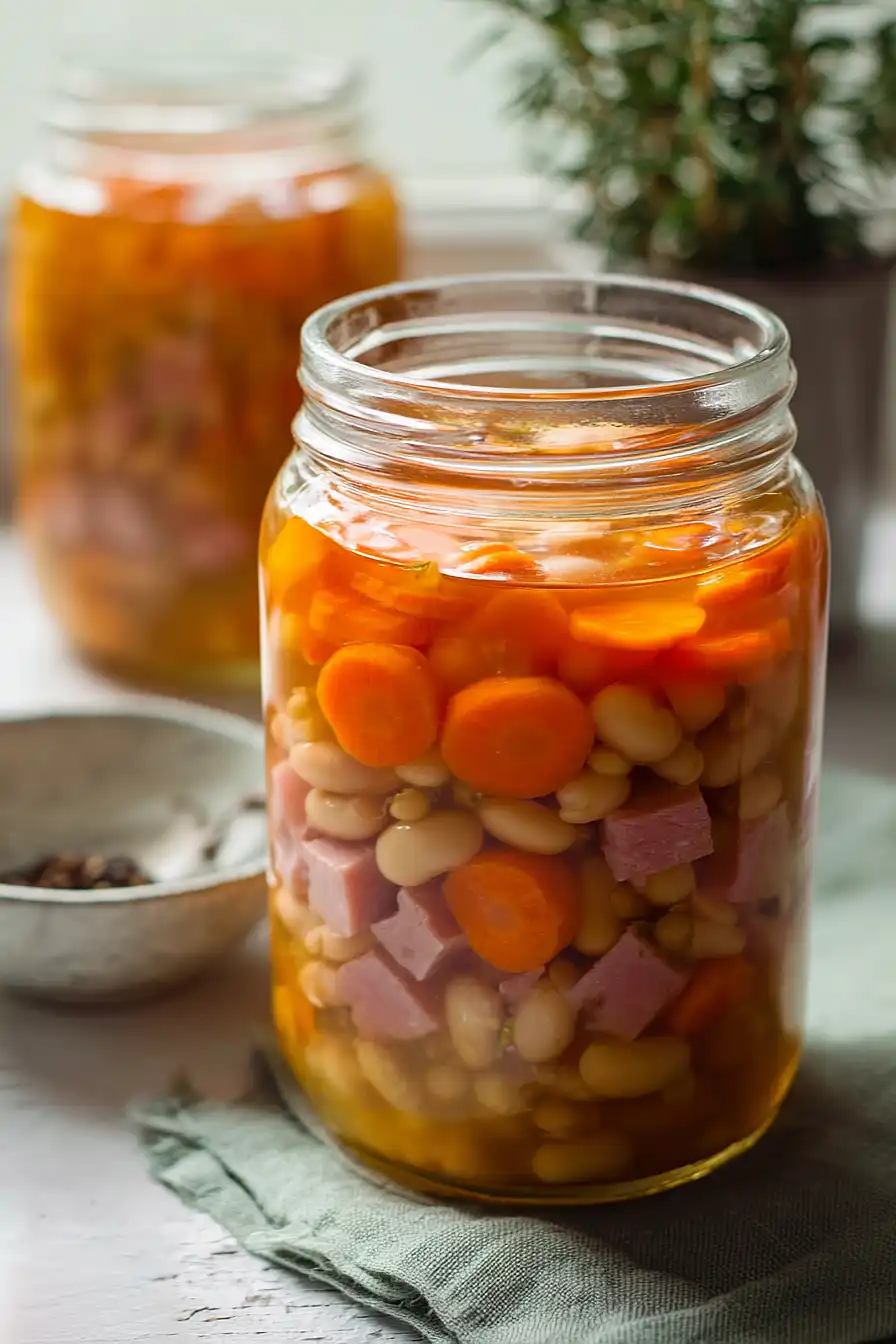
Options for Substitutions
This simple soup recipe works well with a few different ingredients you might have on hand:
- Navy beans: Great northern beans, cannellini beans, or pinto beans all work nicely in place of navy beans. They have similar cooking times and textures, so no adjustments needed to the recipe.
- Ham: If you don’t have ham, try using cooked bacon, smoked turkey, or even a ham hock for extra flavor. A ham hock will need to simmer longer – just remove it before canning, shred the meat, and add it back to the soup.
- Broth: Chicken broth, vegetable broth, or even water with a bouillon cube will work fine. The ham adds plenty of flavor, so don’t worry too much about the broth type.
- Carrot: You can swap carrots with celery, parsnips, or turnips. Just keep the pieces roughly the same size so everything cooks evenly during the canning process.
Watch Out for These Mistakes While Canning
The biggest danger when canning soup is not following proper pressure canning guidelines, which can lead to botulism – never use a water bath canner for low-acid foods like ham and bean soup, as only a pressure canner reaches the temperatures needed to kill harmful bacteria.
Another critical error is overfilling your jars, so make sure to leave that full inch of headspace at the top, which allows for proper sealing and prevents jars from breaking during processing.
To avoid mushy vegetables, undercook your beans during the initial simmer since they’ll continue cooking during the 75-90 minute pressure canning process, and always check that your pressure gauge is accurate before you start.
Finally, resist the urge to open those jars right away – let them cool naturally on the counter for 12-24 hours, and don’t tighten the bands if they seem loose, as this can actually break the seal you just worked so hard to create.
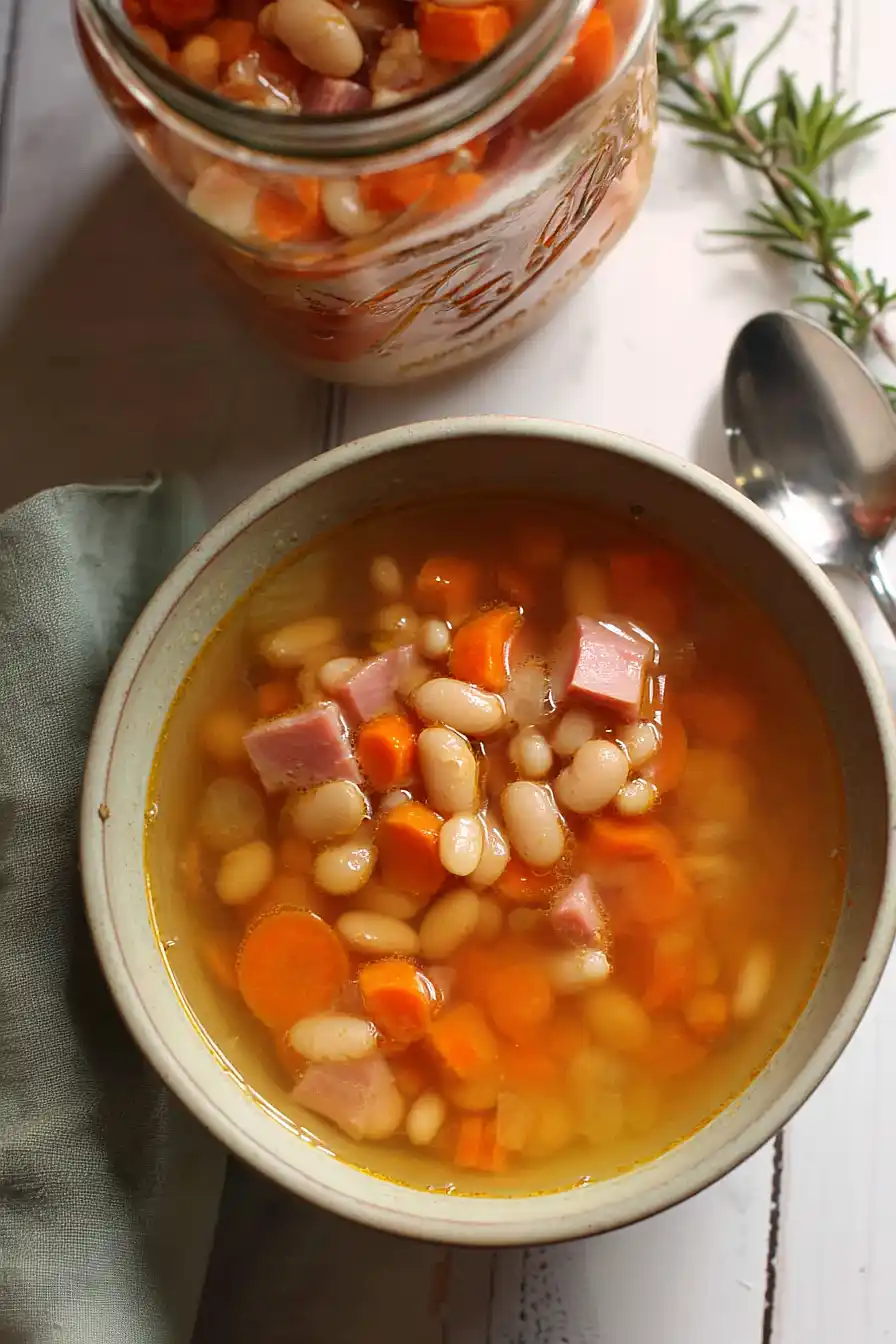
What to Serve With Ham and Bean Soup?
This hearty soup is pretty filling on its own, but I love serving it with warm cornbread or buttermilk biscuits on the side for soaking up all that good broth. A simple coleslaw or crisp green salad adds a nice fresh crunch that balances out the richness of the beans and ham. If you want to make it even more of a complete meal, some crusty dinner rolls with butter are always a hit, and they’re perfect for mopping up your bowl when you’re almost done.
Storage Instructions
Refrigerate: This soup keeps really well in the fridge for about 4-5 days in an airtight container. The flavors actually get better as it sits, so it’s perfect for making on Sunday and eating throughout the week.
Can: Since this is a canning recipe, you can process your jars according to proper canning guidelines and they’ll be shelf-stable for up to a year. Just make sure to follow safe canning practices with a pressure canner since this contains meat and low-acid vegetables.
Reheat: Warm it up on the stovetop over medium heat, stirring occasionally until heated through. You might need to add a splash of broth or water since the beans tend to soak up liquid as they sit.
| Preparation Time | 60-70 minutes |
| Cooking Time | 75-90 minutes |
| Total Time | 135-160 minutes |
| Level of Difficulty | Medium |
| Servings | 4 servings |
Estimated Nutrition
Estimated nutrition for the whole recipe (without optional ingredients):
- Calories: 550-650
- Protein: 38-46 g
- Fat: 8-14 g
- Carbohydrates: 70-80 g
Ingredients
- 1 1/4 cups navy beans (I always use Goya brand for consistent size)
- 4 cups broth (I prefer Kitchen Basics for a deeper profile)
- 1 1/4 cups ham (cut into 1/2-inch cubes)
- 1 1/2 cups carrot (sliced into 1/4-inch rounds)
- 1/2 cup chopped celery
- 1/2 cup chopped onion
Step 1: Prepare Beans and Begin Cooking
- 1 1/4 cups navy beans
Soak the navy beans in water overnight to soften them and reduce cooking time.
The next day, drain the beans and rinse them well.
Place the drained beans in a large pot, cover with fresh water, and bring to a boil.
Then reduce heat and simmer for 30 minutes until the beans are partially cooked but still firm—they should not be fully tender since they’ll continue cooking during canning.
This partial cooking ensures even texture throughout the final product and prevents mushy beans in the finished soup.
Step 2: Prepare All Ingredients for Canning
- 1 1/4 cups ham
- 1 1/2 cups carrot
- 1/2 cup celery
- 1/2 cup onion
While the beans cook, prepare your mise en place: cut the ham into 1/2-inch cubes, slice the carrots into 1/4-inch rounds, chop the celery into small pieces, and chop the onion finely.
I find it helpful to keep each ingredient in its own small bowl so you can work quickly during the jar-filling process.
Also, prepare your canning jars, lids, and pressure canner according to manufacturer instructions, ensuring jars are clean and sterilized.
Step 3: Heat Broth and Assemble Jars
- partially cooked beans from Step 1
- 1 1/4 cups ham
- 1 1/2 cups carrot
- 1/2 cup celery
- 1/2 cup onion
- 4 cups broth
Bring the broth to a boil in a separate pot and keep it at a gentle simmer.
Working quickly, fill your hot sterilized jars with equal portions of the partially cooked beans from Step 1, the ham cubes, carrots, celery, and onion.
I like to layer them evenly so each jar has balanced flavors.
Leave about 2 inches of headspace at the top of each jar—this is important for the soup to expand safely during pressure canning.
Step 4: Fill Jars with Broth and Prepare for Canning
- filled jars from Step 3
- hot broth from Step 3
Carefully pour the hot broth from Step 3 over the ingredients in each jar, leaving exactly 1 inch of headspace from the top of the jar.
This space is crucial for proper seal formation.
Use a nonmetallic spatula or bubble remover to gently work around the inside of each jar to release any air pockets trapped in the soup.
Wipe the rim of each jar clean with a damp cloth to ensure a proper seal, then place the hot lid on top and secure it with the screw band until finger-tight—not overly tight, as steam needs to escape during processing.
Step 5: Process Jars in Pressure Canner
- prepared jars from Step 4
Place the filled jars on the rack inside your pressure canner following the manufacturer’s guidelines for your specific canner model.
Add the recommended amount of water to the canner base.
Put the lid on the canner and follow your canner’s instructions to vent steam for 10 minutes, then close the vent and bring pressure to 10 pounds (adjusted for your altitude if necessary).
Once at pressure, process for 90 minutes for quart-sized jars or 75 minutes for pint-sized jars.
Allow the canner to cool naturally until pressure returns to zero before opening the lid.
Step 6: Cool and Store
Carefully remove the jars from the canner and place them on a clean kitchen towel or cooling rack, spacing them so air can circulate around each jar.
As the jars cool, you’ll hear the satisfying ‘pop’ of the lids sealing.
Leave them undisturbed for 12-24 hours to cool completely.
Once cool, check that each lid has sealed by pressing the center—it should be concave and not flex.
Remove the screw bands, label your jars with the date and contents, and store in a cool, dark place for up to one year.
Classic Canning Ham and Bean Soup
Ingredients
- 1 1/4 cups navy beans (I always use Goya brand for consistent size)
- 4 cups broth (I prefer Kitchen Basics for a deeper profile)
- 1 1/4 cups ham (cut into 1/2-inch cubes)
- 1 1/2 cups carrot (sliced into 1/4-inch rounds)
- 1/2 cup chopped celery
- 1/2 cup chopped onion
Instructions
- Soak the navy beans in water overnight to soften them and reduce cooking time. The next day, drain the beans and rinse them well. Place the drained beans in a large pot, cover with fresh water, and bring to a boil. Then reduce heat and simmer for 30 minutes until the beans are partially cooked but still firm—they should not be fully tender since they'll continue cooking during canning. This partial cooking ensures even texture throughout the final product and prevents mushy beans in the finished soup.
- While the beans cook, prepare your mise en place: cut the ham into 1/2-inch cubes, slice the carrots into 1/4-inch rounds, chop the celery into small pieces, and chop the onion finely. I find it helpful to keep each ingredient in its own small bowl so you can work quickly during the jar-filling process. Also, prepare your canning jars, lids, and pressure canner according to manufacturer instructions, ensuring jars are clean and sterilized.
- Bring the broth to a boil in a separate pot and keep it at a gentle simmer. Working quickly, fill your hot sterilized jars with equal portions of the partially cooked beans from Step 1, the ham cubes, carrots, celery, and onion. I like to layer them evenly so each jar has balanced flavors. Leave about 2 inches of headspace at the top of each jar—this is important for the soup to expand safely during pressure canning.
- Carefully pour the hot broth from Step 3 over the ingredients in each jar, leaving exactly 1 inch of headspace from the top of the jar. This space is crucial for proper seal formation. Use a nonmetallic spatula or bubble remover to gently work around the inside of each jar to release any air pockets trapped in the soup. Wipe the rim of each jar clean with a damp cloth to ensure a proper seal, then place the hot lid on top and secure it with the screw band until finger-tight—not overly tight, as steam needs to escape during processing.
- Place the filled jars on the rack inside your pressure canner following the manufacturer's guidelines for your specific canner model. Add the recommended amount of water to the canner base. Put the lid on the canner and follow your canner's instructions to vent steam for 10 minutes, then close the vent and bring pressure to 10 pounds (adjusted for your altitude if necessary). Once at pressure, process for 90 minutes for quart-sized jars or 75 minutes for pint-sized jars. Allow the canner to cool naturally until pressure returns to zero before opening the lid.
- Carefully remove the jars from the canner and place them on a clean kitchen towel or cooling rack, spacing them so air can circulate around each jar. As the jars cool, you'll hear the satisfying 'pop' of the lids sealing. Leave them undisturbed for 12-24 hours to cool completely. Once cool, check that each lid has sealed by pressing the center—it should be concave and not flex. Remove the screw bands, label your jars with the date and contents, and store in a cool, dark place for up to one year.







