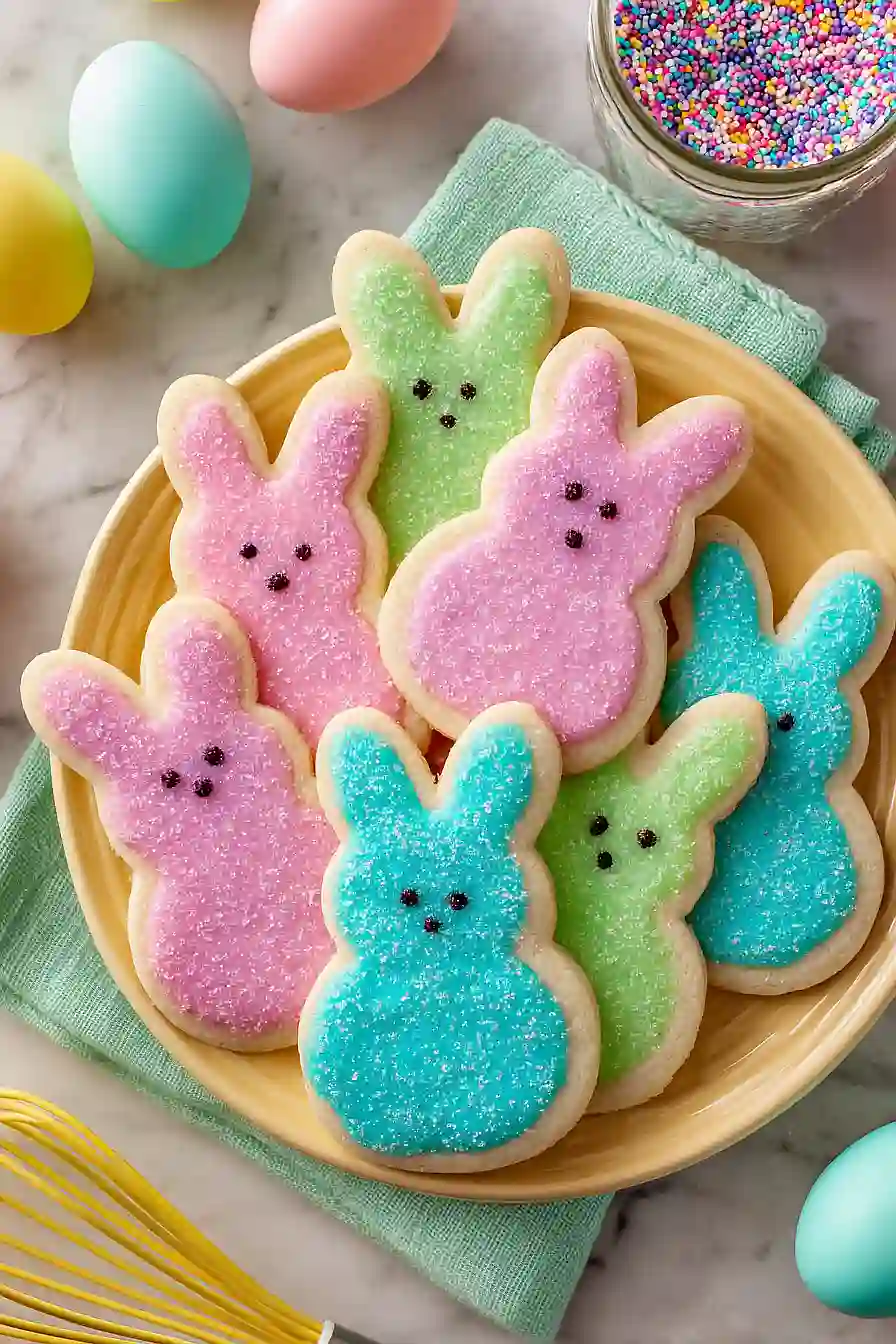
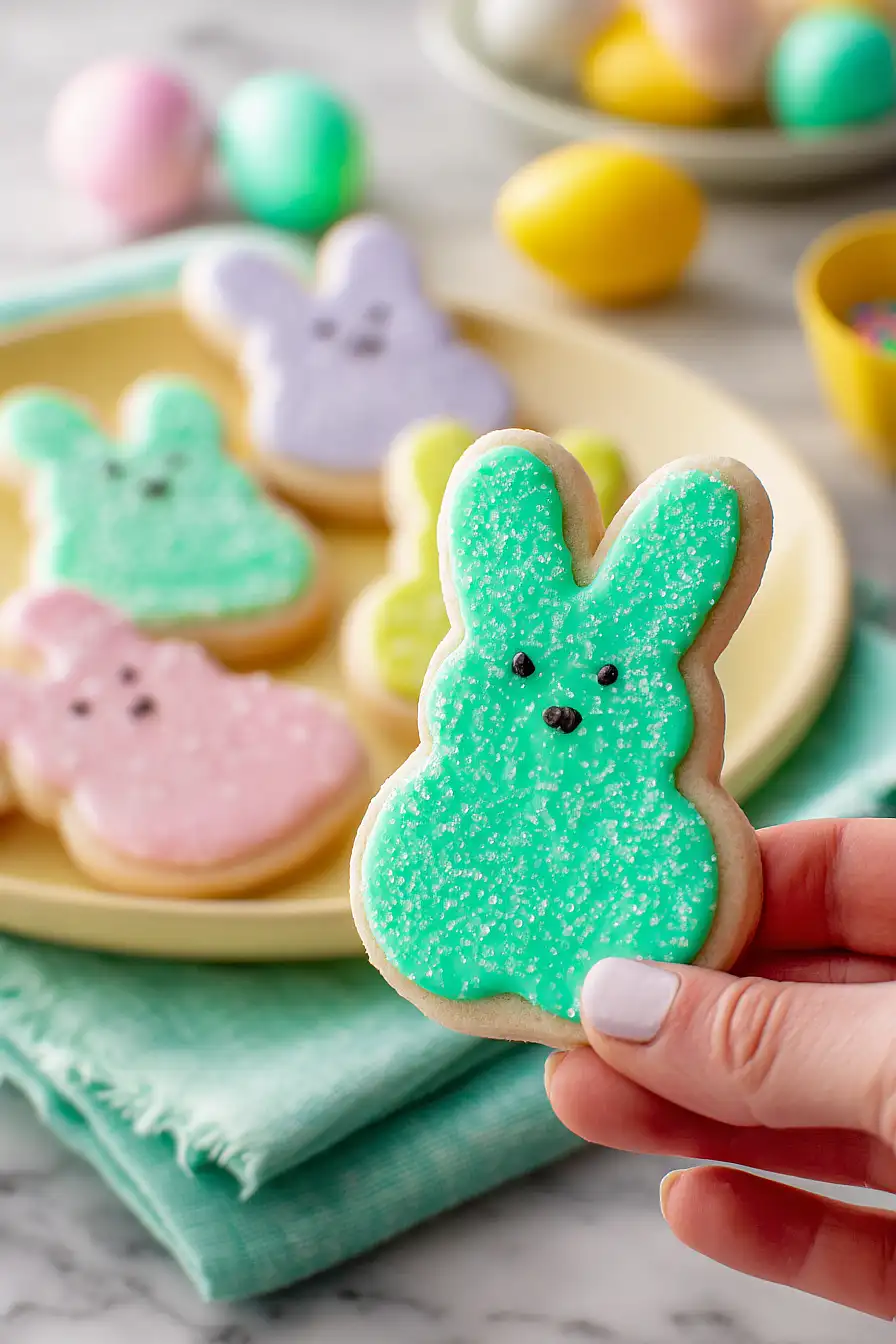
If you ask me, bunny cookies are one of the best ways to celebrate spring.
These soft sugar cookies are cut into adorable bunny shapes and decorated with smooth royal icing. The cookie itself is buttery and not too sweet, giving you a good base for the icing on top.
The royal icing dries hard and smooth, making these cookies easy to stack and share. You can color the icing however you like, add some sparkly sanding sugar for texture, and pipe on chocolate details for the faces.
They’re a fun project to make with kids and always get smiles when you set them out on a plate.
Why You’ll Love These Bunny Cookies
- Fun activity for kids – Decorating these adorable bunny cookies is a great way to spend quality time with your little ones, especially around Easter or spring celebrations.
- Simple cookie base – The sugar cookie dough comes together with basic pantry staples you likely already have on hand, making it easy to whip up whenever the craving strikes.
- Customizable decorations – You can get creative with different colors of royal icing and sanding sugar to make each bunny unique and match any party theme.
- Perfect for gifting – These cookies look impressive and taste delicious, making them ideal for Easter baskets, bake sales, or sharing with friends and neighbors.
What Kind of Butter Should I Use?
For these bunny cookies, regular unsalted butter is your best bet since it gives you better control over the salt level in your dough. Make sure your butter is at room temperature before you start – it should be soft enough to leave an indent when you press it, but not melted or greasy. If you only have salted butter on hand, you can still use it, just reduce or skip the additional salt called for in the recipe. Some bakers swear by European-style butter for a richer flavor, but honestly, standard supermarket butter works perfectly fine for sugar cookies like these.
Options for Substitutions
These bunny cookies are pretty forgiving when it comes to swaps, so here are some options if you need them:
- Butter: You can use margarine or shortening instead, though butter gives the best flavor. If using salted butter, reduce the added salt to 1/4 teaspoon.
- Vanilla essence: Almond extract works nicely for a different flavor profile, or you can use vanilla extract if that’s what you have. Use the same amount.
- Meringue powder: This is pretty important for royal icing as it helps it dry properly and gives it that smooth finish. If you absolutely can’t find it, you can make a simple glaze with powdered sugar and milk instead, but it won’t have the same crisp texture.
- Food coloring: Gel food coloring works best for royal icing since it won’t thin it out, but liquid food coloring is fine – just add it drop by drop and use less water in your icing to compensate.
- Sanding sugar: Regular granulated sugar works in a pinch, or you can skip the sugar coating entirely and just use the royal icing for decoration.
- Dark chocolate: Semi-sweet or milk chocolate chips work just as well for decorating. You can also use a food-safe marker to draw details if you prefer.
Watch Out for These Mistakes While Baking
The biggest mistake when making decorated sugar cookies is skipping the chilling step after cutting your shapes – if you bake the cookies immediately, they’ll spread and lose their bunny shape, so pop them in the fridge for 15-20 minutes before baking.
Another common error is making your royal icing too thick or too thin, which makes decorating frustrating – you want a consistency that flows smoothly but holds its shape, so add water one teaspoon at a time until it looks like thick glue.
Don’t try to add the sanding sugar or pipe the chocolate details while the icing is still wet, as this will cause smudging and messy edges – wait until the base layer has formed a dry crust (about 30 minutes) before moving on to the next step.
Finally, resist the urge to stack or package your cookies before they’ve fully set for at least 2 hours, or you’ll end up with a sticky, smeared mess instead of cute bunnies.

What to Serve With Bunny Cookies?
These bunny cookies are perfect for Easter celebrations or spring gatherings, and they pair wonderfully with a cold glass of milk or a cup of hot cocoa for the kids. If you’re serving them at a party, set out a platter alongside fresh strawberries, carrot sticks with ranch dip (to keep the bunny theme going!), and some pastel-colored candies in small bowls. For adults, these cookies go great with coffee or tea during an afternoon get-together. You can also package them up in clear cellophane bags tied with ribbon to give as sweet homemade gifts to friends and neighbors.
Storage Instructions
Store: Once the royal icing is completely dry and set (usually after 6-8 hours), you can stack these bunny cookies in an airtight container with parchment paper between the layers. They’ll stay fresh at room temperature for up to 2 weeks, which makes them perfect for making ahead for Easter gatherings or bake sales.
Freeze: You can freeze the baked cookies before decorating them for up to 3 months. Just wrap them well in plastic wrap and place in a freezer bag. Thaw at room temperature before adding your royal icing, and they’ll taste just as fresh as the day you baked them.
Make Ahead: I always bake and decorate these cookies a few days before I need them. The royal icing actually helps keep the cookies fresh, and the flavors have time to settle. Just make sure the icing is totally dry before you store them, or they might stick together.
| Preparation Time | 90-120 minutes |
| Cooking Time | 20-30 minutes |
| Total Time | 110-150 minutes |
| Level of Difficulty | Medium |
| Servings | 36 cookies |
Estimated Nutrition
Estimated nutrition for the whole recipe (without optional ingredients):
- Calories: 4250-4500
- Protein: 36-42 g
- Fat: 150-170 g
- Carbohydrates: 690-740 g
Ingredients
For the dough:
- 1 cup butter (I like Kerrygold unsalted butter for this)
- 1 cup sugar
- 1.5 tsp vanilla extract
- 1 egg (room temperature, about 70°F)
- 3.75 cups flour (I always use King Arthur all-purpose flour)
- 1.25 tsp baking powder
- 0.5 tsp salt
For the icing:
- 3 cups powdered sugar (sifted to remove lumps)
- 2.5 tbsp meringue powder (I use Wilton for a stable set)
- 7 tbsp water
- 0.5 tsp vanilla extract
For the decoration:
- food coloring
- 0.75 cup sanding sugar (optional, adds a nice crunch)
- dark chocolate (melted and cooled to room temperature)
Step 1: Prepare mise en place and preheat oven
- 3.75 cups flour
- 1.25 tsp baking powder
- 0.5 tsp salt
- 3 cups powdered sugar
Preheat your oven to 350°F and line baking sheets with parchment paper.
Measure out all dry ingredients (flour, baking powder, and salt) into one bowl, and sift the powdered sugar for the royal icing into another bowl to remove any lumps.
Bring your egg to room temperature if needed—this helps it incorporate smoothly into the butter mixture.
Having everything ready before you start mixing ensures a smooth, efficient baking process.
Step 2: Make the cookie dough
- 1 cup butter
- 1 cup sugar
- 1.5 tsp vanilla extract
- 1 egg
- dry ingredient mixture from Step 1
In a large mixing bowl, cream together the butter and sugar for 2-3 minutes until the mixture is light and fluffy—this incorporates air and helps create tender cookies.
Add the vanilla extract and room-temperature egg, mixing until fully combined.
Pour in the dry ingredient mixture from Step 1 and mix until just combined; be careful not to overwork the dough, as this can make the cookies tough.
I like to use quality butter like Kerrygold because it adds a subtle richness that really elevates the final cookie.
Step 3: Cut and bake cookies
- cookie dough from Step 2
On a lightly floured surface, roll the dough to a 1/4-inch thickness.
Cut out bunny shapes using a cookie cutter and place them on your prepared baking sheets, spacing them about an inch apart.
Bake for 8-10 minutes, until the edges are light golden but the centers are still soft—the cookies will continue to firm up as they cool.
Remove from the oven and let cool on the baking sheet for 2-3 minutes before transferring to a wire rack to cool completely.
Step 4: Prepare royal icing
- 3 cups powdered sugar
- 2.5 tbsp meringue powder
- 7 tbsp water
- 0.5 tsp vanilla extract
- food coloring
While the cookies cool, combine the sifted powdered sugar, meringue powder, and water in a medium bowl.
Whisk vigorously for 3-5 minutes until the icing reaches stiff peaks—it should look glossy and hold its shape.
Divide the icing into smaller bowls if you want to use multiple colors, then add food coloring drops one at a time, stirring until you reach your desired shade.
I always use Wilton meringue powder because it creates a stable, smooth finish that sets beautifully.
Step 5: Decorate cookies with icing and toppings
- royal icing from Step 4
- 0.75 cup sanding sugar
Transfer the royal icing into piping bags fitted with round or flat tips for easier application.
Ice each cooled cookie by piping or spreading a thin layer of icing over the surface.
While the icing is still wet, immediately sprinkle sanding sugar over the top if using—this adds a nice crunch and sparkle.
Work in small batches so the icing stays wet enough for the sanding sugar to adhere properly.
Step 6: Add chocolate details and final set
- dark chocolate
- iced cookies from Step 5
Melt the dark chocolate and let it cool to room temperature.
Transfer it to a small piping bag with a fine tip, then carefully pipe two dots for eyes and a small dot or line for the nose on each bunny cookie.
Place all decorated cookies on a flat surface or wire rack and let them set undisturbed for 2 hours—the royal icing will harden to a beautiful, smooth finish that’s ready to eat or gift.

Colorful Bunny Cookies With Royal Icing
Ingredients
For the dough
- 1 cup butter (I like Kerrygold unsalted butter for this)
- 1 cup sugar
- 1.5 tsp vanilla extract
- 1 egg (room temperature, about 70°F)
- 3.75 cups flour (I always use King Arthur all-purpose flour)
- 1.25 tsp baking powder
- 0.5 tsp salt
For the icing
- 3 cups powdered sugar (sifted to remove lumps)
- 2.5 tbsp meringue powder (I use Wilton for a stable set)
- 7 tbsp water
- 0.5 tsp vanilla extract
For the decoration
- food coloring
- 0.75 cup sanding sugar (optional, adds a nice crunch)
- dark chocolate (melted and cooled to room temperature)
Instructions
- Preheat your oven to 350°F and line baking sheets with parchment paper. Measure out all dry ingredients (flour, baking powder, and salt) into one bowl, and sift the powdered sugar for the royal icing into another bowl to remove any lumps. Bring your egg to room temperature if needed—this helps it incorporate smoothly into the butter mixture. Having everything ready before you start mixing ensures a smooth, efficient baking process.
- In a large mixing bowl, cream together the butter and sugar for 2-3 minutes until the mixture is light and fluffy—this incorporates air and helps create tender cookies. Add the vanilla extract and room-temperature egg, mixing until fully combined. Pour in the dry ingredient mixture from Step 1 and mix until just combined; be careful not to overwork the dough, as this can make the cookies tough. I like to use quality butter like Kerrygold because it adds a subtle richness that really elevates the final cookie.
- On a lightly floured surface, roll the dough to a 1/4-inch thickness. Cut out bunny shapes using a cookie cutter and place them on your prepared baking sheets, spacing them about an inch apart. Bake for 8-10 minutes, until the edges are light golden but the centers are still soft—the cookies will continue to firm up as they cool. Remove from the oven and let cool on the baking sheet for 2-3 minutes before transferring to a wire rack to cool completely.
- While the cookies cool, combine the sifted powdered sugar, meringue powder, and water in a medium bowl. Whisk vigorously for 3-5 minutes until the icing reaches stiff peaks—it should look glossy and hold its shape. Divide the icing into smaller bowls if you want to use multiple colors, then add food coloring drops one at a time, stirring until you reach your desired shade. I always use Wilton meringue powder because it creates a stable, smooth finish that sets beautifully.
- Transfer the royal icing into piping bags fitted with round or flat tips for easier application. Ice each cooled cookie by piping or spreading a thin layer of icing over the surface. While the icing is still wet, immediately sprinkle sanding sugar over the top if using—this adds a nice crunch and sparkle. Work in small batches so the icing stays wet enough for the sanding sugar to adhere properly.
- Melt the dark chocolate and let it cool to room temperature. Transfer it to a small piping bag with a fine tip, then carefully pipe two dots for eyes and a small dot or line for the nose on each bunny cookie. Place all decorated cookies on a flat surface or wire rack and let them set undisturbed for 2 hours—the royal icing will harden to a beautiful, smooth finish that's ready to eat or gift.


