I didn’t try my first hot cross bun until I was in my twenties, and honestly, I thought they were kind of boring. That’s because I was eating the plain British version—lightly spiced and subtle. Then a coworker from Guyana brought some to our potluck, and I finally understood what all the fuss was about.
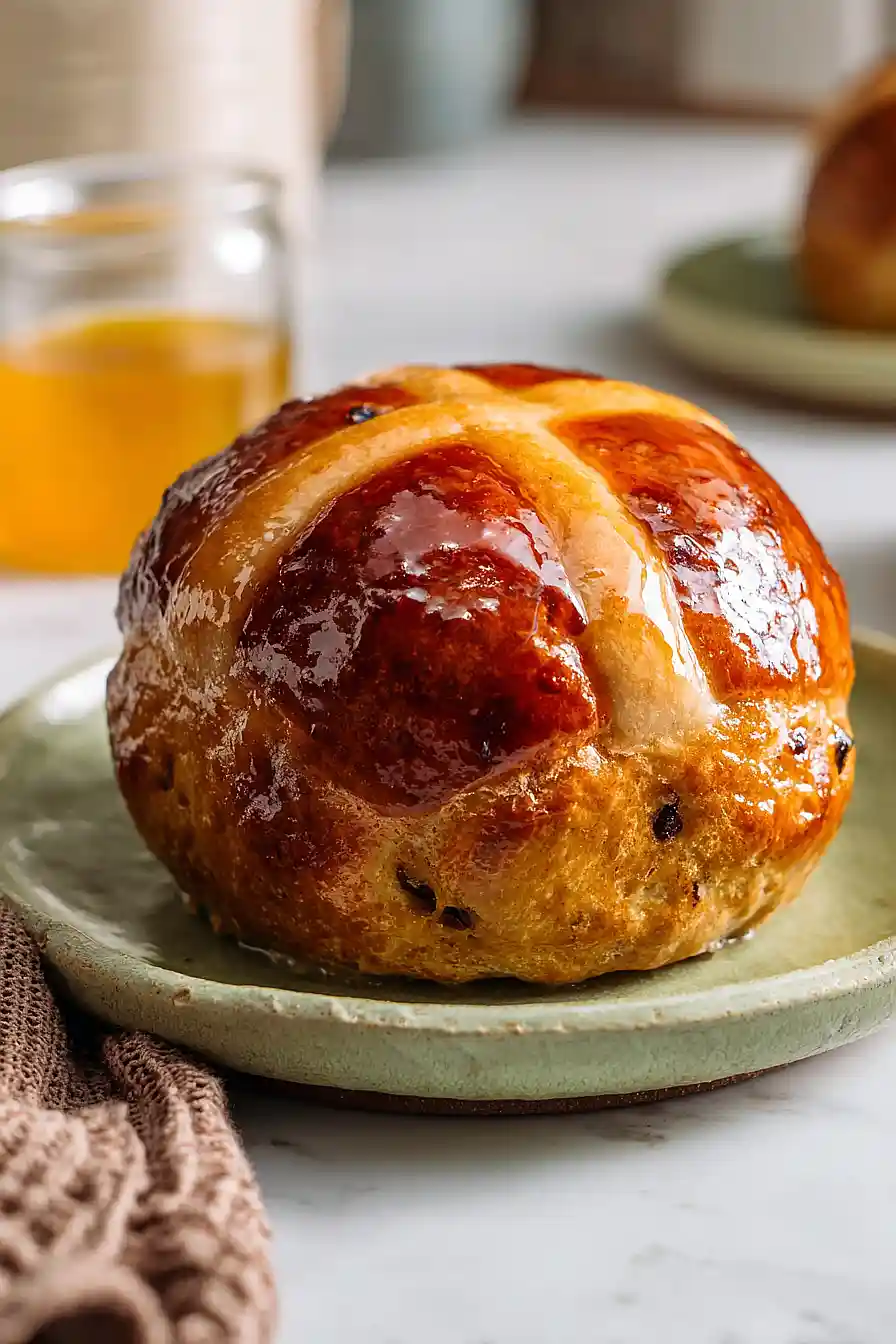
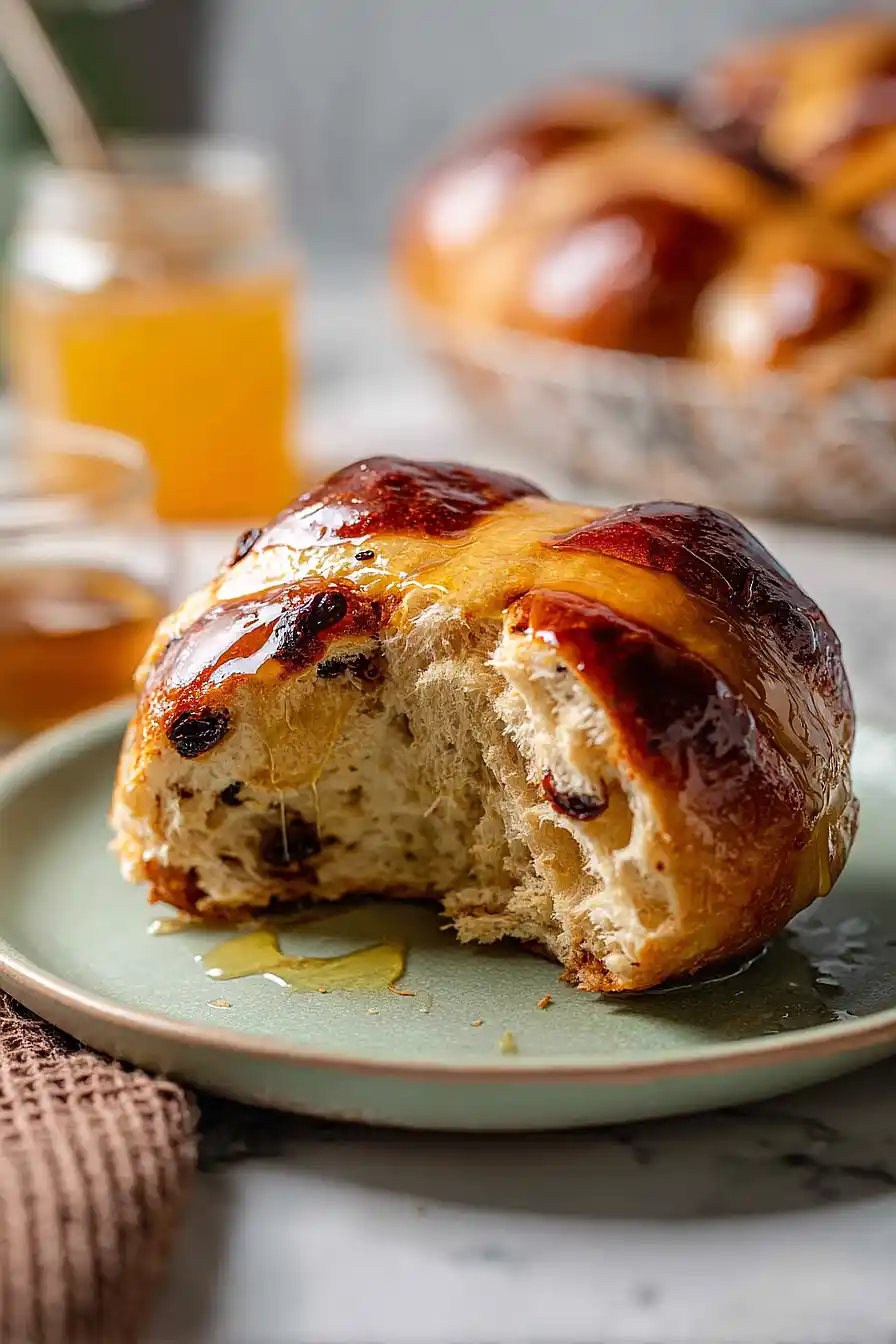
Guyanese hot cross buns are a different beast entirely. They’re packed with warm spices like cinnamon, nutmeg, and allspice, loaded with mixed fruits, and have this soft, slightly sweet texture that makes them way more interesting than their European cousins. These aren’t just for Easter morning—they’re good enough to eat any day of the year. Once you try this version, you won’t want to go back to the plain ones.
Why You’ll Love These Guyanese Hot Cross Buns
- Perfect for Easter or any special occasion – These traditional Guyanese buns bring a taste of the Caribbean to your table, making holidays feel extra special with their warm spices and sweet fruit.
- Soft and fluffy texture – The combination of milk, butter, and eggs creates buns that are pillowy soft inside with a slightly sweet glaze on top.
- Warm spices throughout – Cinnamon and nutmeg give these buns a cozy, aromatic flavor that fills your kitchen with an amazing smell while they bake.
- Great for sharing – This recipe makes enough buns to feed a crowd, perfect for family gatherings or bringing to potlucks where they’ll disappear fast.
- Made with everyday ingredients – You probably have most of these pantry staples on hand already, making it easy to whip up a batch whenever the craving hits.
What Kind of Mixed Fruits Should I Use?
For Guyanese hot cross buns, you’ll want to use dried mixed fruits, which you can typically find pre-packaged in the baking aisle of most grocery stores. These mixes usually contain raisins, currants, and candied citrus peel, though you can also make your own combination if you prefer. If you like a specific dried fruit more than others, feel free to customize the mix – some people love extra raisins while others prefer more candied peel for that citrus kick. Just make sure whatever fruits you choose are soft and pliable, not hard and dried out, so they blend nicely into the dough and give you those sweet little pockets of flavor in every bite.
Options for Substitutions
While traditional hot cross buns have specific flavors, there’s some room to make this recipe work with what you have:
- Mixed fruits: You can use raisins, currants, dried cranberries, or chopped dried apricots. If you only have one type of dried fruit on hand, that works too – just use 1/4 cup of whatever you prefer.
- Milk: Dairy-free milk like almond, oat, or coconut milk can replace regular milk without any changes to the recipe. Just make sure it’s unsweetened or lightly sweetened.
- Butter: You can swap butter with coconut oil or vegetable oil in the same amount. The texture will be slightly different but still tasty.
- Spices: Don’t have both cinnamon and nutmeg? You can use 1 teaspoon of just cinnamon, or try adding 1/4 teaspoon of allspice or ginger for a similar warm flavor profile.
- Yeast: This ingredient is essential for hot cross buns – don’t substitute it. The yeast is what gives these buns their soft, fluffy texture and helps them rise properly.
- Brown sugar: White sugar works in a pinch, though you’ll lose some of that molasses flavor. You can also use coconut sugar for a similar taste.
Watch Out for These Mistakes While Baking
The biggest mistake when making hot cross buns is adding the flour too quickly, which can lead to a dense, heavy texture instead of the soft, fluffy buns you’re after – add it gradually while mixing on low speed to give the dough time to come together properly.
Another common error is not letting the yeast mixture get foamy enough in step one, so make sure you see bubbles forming before moving on, otherwise your buns won’t rise properly.
Skipping the second rise after shaping the buns is tempting when you’re short on time, but this 30 to 45 minute rest is what gives the buns their light, airy texture, so don’t rush it.
Finally, brushing the syrup on lukewarm buns instead of hot ones means it won’t soak in as well, so apply it immediately after they come out of the oven for that signature glossy, sweet finish.
What to Serve With Guyanese Hot Cross Buns?
These sweet, spiced buns are perfect for breakfast or an afternoon snack with a hot cup of tea or coffee. I love slicing them in half and spreading on some salted butter while they’re still warm – the butter melts right into all those little pockets and makes them even more delicious. You can also toast them up the next day and serve with jam, honey, or even cream cheese for a simple treat. If you’re making them for Easter brunch, they go really well alongside scrambled eggs, fresh fruit, and maybe some crispy bacon to balance out the sweetness.
Storage Instructions
Store: Keep your hot cross buns in an airtight container or zip-top bag at room temperature for up to 3 days. They’ll stay soft and delicious, especially if you toss in a slice of bread to help maintain moisture. If you want them to last a bit longer, pop them in the fridge for up to a week.
Freeze: These buns freeze really well for up to 3 months. Just wrap each one individually in plastic wrap, then place them all in a freezer bag. This way you can grab one or two whenever you’re craving them without thawing the whole batch.
Warm Up: To bring back that fresh-baked taste, warm them in the oven at 300°F for about 5-10 minutes, or microwave for 15-20 seconds. If they’re frozen, let them thaw at room temperature for about an hour first, then warm them up. A little butter on top while they’re still warm is always a good idea!
| Preparation Time | 90-120 minutes |
| Cooking Time | 20-30 minutes |
| Total Time | 110-150 minutes |
| Level of Difficulty | Medium |
| Servings | 12 buns |
Estimated Nutrition
Estimated nutrition for the whole recipe (without optional ingredients):
- Calories: 2400-2650
- Protein: 50-60 g
- Fat: 55-65 g
- Carbohydrates: 440-490 g
Ingredients
For the dough:
- 1 tbsp active dry yeast
- 6 tbsp brown sugar
- 1/4 cup warm water (110°F)
- 1/3 cup mixed fruits
- 1 cup milk
- 2 large eggs (room temperature)
- 1/4 cup unsalted butter
- 4 1/4 cups all-purpose flour
- 3/4 tsp salt
- 3/4 tsp cinnamon
- 3/4 tsp freshly grated nutmeg
- 1/4 tsp allspice
- 1 egg white
For the syrup:
- 1/2 cup water
- 1/4 cup sugar
- 1 1/2 tsp vanilla essence
Step 1: Activate Yeast and Prepare Mise en Place
- 1 tbsp brown sugar
- 1/4 cup warm water
- 1 tbsp active dry yeast
- 4 1/4 cups all-purpose flour
- 3/4 tsp cinnamon
- 3/4 tsp freshly grated nutmeg
- 1/4 tsp allspice
- 3/4 tsp salt
In a small bowl, combine 1 tablespoon of the brown sugar with 1/4 cup warm water (around 110°F) and sprinkle the active dry yeast over top.
Let it sit for 5 minutes until foamy—this proves the yeast is alive and active.
While the yeast activates, sift together the flour, cinnamon, nutmeg, allspice, and salt in a separate bowl.
I like to sift the spices with the flour rather than adding them later, as it distributes them more evenly throughout the dough and prevents clumpy spice pockets.
Step 2: Create the Wet Dough Base
- 1 cup milk
- 5 tbsp brown sugar
- 2 large eggs
- 1/4 cup unsalted butter
- yeast mixture from Step 1
In a large mixer bowl, combine the milk with the remaining 5 tablespoons brown sugar and stir until the sugar dissolves.
Add the room-temperature eggs and melted butter to the milk mixture, stirring well to combine.
Pour in the foamy yeast mixture from Step 1, and stir to combine all wet ingredients.
This creates a smooth, enriched base that will develop into a tender, slightly sweet dough.
Step 3: Mix and Knead the Dough
- dry flour mixture from Step 1
- wet dough base from Step 2
- 1/3 cup mixed fruits
Add the sifted flour mixture from Step 1 to the wet ingredients in the mixer bowl, stirring with the dough hook on low speed until a shaggy dough forms.
Once the flour is incorporated, increase speed to medium and knead for 8 to 10 minutes until the dough becomes smooth and elastic.
The dough should be slightly sticky but hold together; if it’s too wet, add a tablespoon of flour at a time.
Fold in the 1/3 cup mixed fruits by hand after kneading, distributing them evenly throughout.
Step 4: First Rise
- dough from Step 3
Form the kneaded dough into a ball and place it in a lightly oiled bowl, turning it to coat all sides.
Cover with a damp towel or plastic wrap and let rise in a warm place for 1 hour, or until roughly doubled in size.
I find that placing the bowl near a sunny window or in a turned-off oven with the light on provides consistent, gentle warmth for rising.
Step 5: Shape Buns and Prepare Crosses
- risen dough from Step 4
Preheat your oven to 350°F.
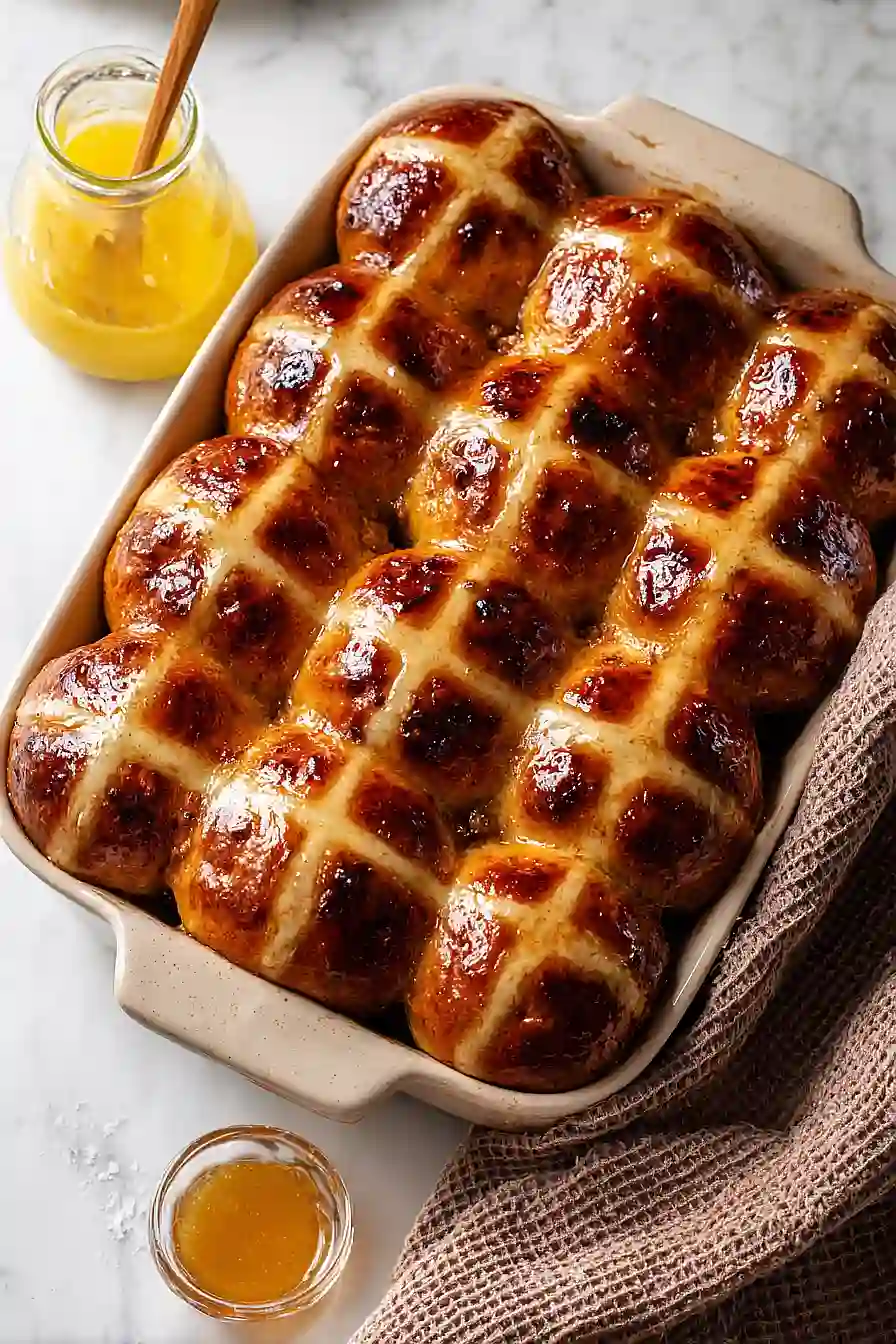
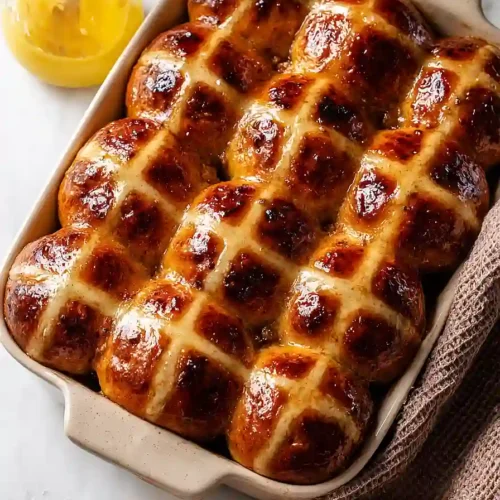
Punch down the risen dough to release excess gas, then divide it into 12 equal pieces and shape each into a tight ball, placing them on a parchment-lined baking sheet.
Divide any remaining small pieces of dough into thin strips to create crosses for the top of each bun.
Press one strip horizontally and one vertically across the top of each bun, sealing the ends with slight pressure.
Step 6: Second Rise and Egg Wash
- shaped buns from Step 5
- 1 egg white
Cover the shaped buns loosely with plastic wrap or a damp towel and let them rise for 30 to 45 minutes in a warm place until puffy and nearly doubled.
Just before baking, brush the tops and sides of each bun with the egg white mixed with a splash of water—this creates a light, glossy finish.
Bake at 350°F for 20 to 30 minutes, until the buns are golden brown and sound hollow when tapped on the bottom.
Step 7: Make Glaze and Finish Buns
- 1/4 cup sugar
- 1/2 cup water
- 1 1/2 tsp vanilla essence
- baked buns from Step 6
While the buns bake, combine 1/4 cup sugar, 1/2 cup water, and 1 1/2 teaspoons vanilla essence in a small saucepan.
Bring to a boil and simmer for 3 to 5 minutes until slightly thickened and syrupy.
As soon as the buns come out of the oven, brush them generously with the hot glaze, which will seep into the warm buns and add a subtle sweetness.
Let the buns cool for 10 minutes before serving—this allows the glaze to set and makes them easier to handle.
Soft Guyanese Hot Cross Buns
Ingredients
For the dough
- 1 tbsp active dry yeast
- 6 tbsp brown sugar
- 1/4 cup warm water (110°F)
- 1/3 cup mixed fruits
- 1 cup milk
- 2 large eggs (room temperature)
- 1/4 cup unsalted butter
- 4 1/4 cups all-purpose flour
- 3/4 tsp salt
- 3/4 tsp cinnamon
- 3/4 tsp freshly grated nutmeg
- 1/4 tsp allspice
- 1 egg white
For the syrup
- 1/2 cup water
- 1/4 cup sugar
- 1 1/2 tsp vanilla essence
Instructions
- In a small bowl, combine 1 tablespoon of the brown sugar with 1/4 cup warm water (around 110°F) and sprinkle the active dry yeast over top. Let it sit for 5 minutes until foamy—this proves the yeast is alive and active. While the yeast activates, sift together the flour, cinnamon, nutmeg, allspice, and salt in a separate bowl. I like to sift the spices with the flour rather than adding them later, as it distributes them more evenly throughout the dough and prevents clumpy spice pockets.
- In a large mixer bowl, combine the milk with the remaining 5 tablespoons brown sugar and stir until the sugar dissolves. Add the room-temperature eggs and melted butter to the milk mixture, stirring well to combine. Pour in the foamy yeast mixture from Step 1, and stir to combine all wet ingredients. This creates a smooth, enriched base that will develop into a tender, slightly sweet dough.
- Add the sifted flour mixture from Step 1 to the wet ingredients in the mixer bowl, stirring with the dough hook on low speed until a shaggy dough forms. Once the flour is incorporated, increase speed to medium and knead for 8 to 10 minutes until the dough becomes smooth and elastic. The dough should be slightly sticky but hold together; if it's too wet, add a tablespoon of flour at a time. Fold in the 1/3 cup mixed fruits by hand after kneading, distributing them evenly throughout.
- Form the kneaded dough into a ball and place it in a lightly oiled bowl, turning it to coat all sides. Cover with a damp towel or plastic wrap and let rise in a warm place for 1 hour, or until roughly doubled in size. I find that placing the bowl near a sunny window or in a turned-off oven with the light on provides consistent, gentle warmth for rising.
- Preheat your oven to 350°F. Punch down the risen dough to release excess gas, then divide it into 12 equal pieces and shape each into a tight ball, placing them on a parchment-lined baking sheet. Divide any remaining small pieces of dough into thin strips to create crosses for the top of each bun. Press one strip horizontally and one vertically across the top of each bun, sealing the ends with slight pressure.
- Cover the shaped buns loosely with plastic wrap or a damp towel and let them rise for 30 to 45 minutes in a warm place until puffy and nearly doubled. Just before baking, brush the tops and sides of each bun with the egg white mixed with a splash of water—this creates a light, glossy finish. Bake at 350°F for 20 to 30 minutes, until the buns are golden brown and sound hollow when tapped on the bottom.
- While the buns bake, combine 1/4 cup sugar, 1/2 cup water, and 1 1/2 teaspoons vanilla essence in a small saucepan. Bring to a boil and simmer for 3 to 5 minutes until slightly thickened and syrupy. As soon as the buns come out of the oven, brush them generously with the hot glaze, which will seep into the warm buns and add a subtle sweetness. Let the buns cool for 10 minutes before serving—this allows the glaze to set and makes them easier to handle.


