Weeknight dinners can feel like a puzzle sometimes. I’m always trying to find something that will make everyone happy while still being easy enough to pull together on a Tuesday night. That’s where baked spaghetti comes in to save the day.
This isn’t your regular spaghetti and meatballs. It’s more like a casserole that you can prep ahead, toss in the oven, and forget about while you help with homework or fold laundry. The pasta gets tender, the cheese gets bubbly, and everything comes together in one dish. Plus, leftovers taste even better the next day.
I love making this when I know we’ll have a busy week ahead. I can assemble it on Sunday, stick it in the fridge, and just pop it in the oven when dinner time rolls around. The kids love it because it’s cheesy and comforting. I love it because it’s simple and feeds a crowd.

Why You’ll Love This Baked Spaghetti
- Make-ahead friendly – You can assemble this casserole earlier in the day and just pop it in the oven when you’re ready to eat, making dinner prep so much easier.
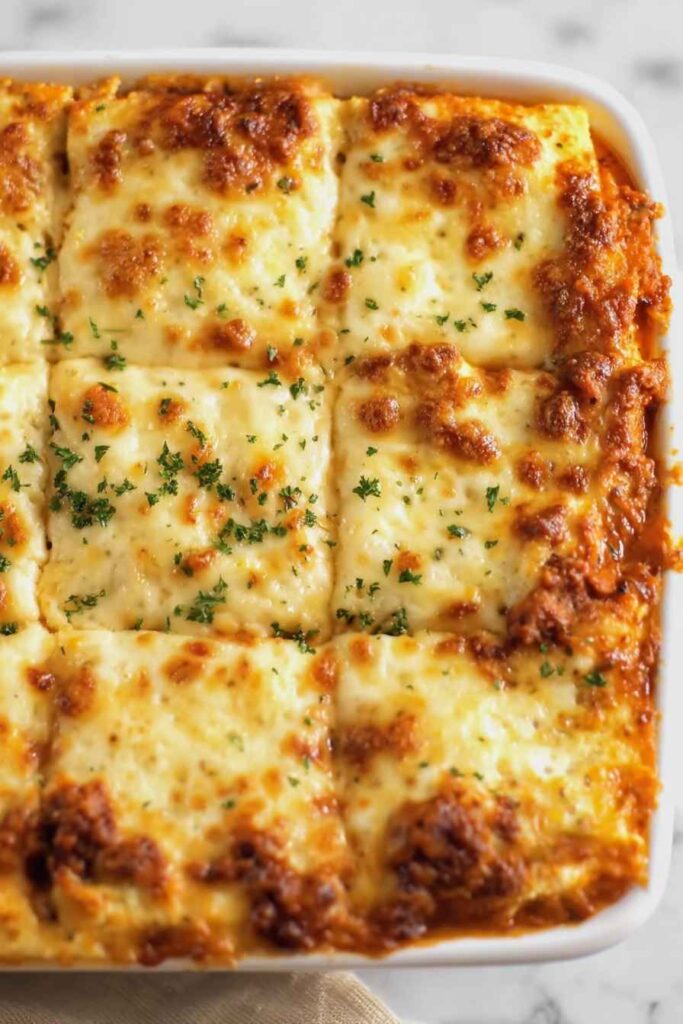
- Creamy, cheesy layers – The combination of cream cheese, sour cream, and melted mozzarella creates the most satisfying, rich texture that’s way better than regular spaghetti.
- Family crowd-pleaser – Kids and adults both love this comforting casserole – it’s like getting the best of spaghetti and lasagna in one dish.
- Simple ingredients – Most of these items are probably already in your kitchen, and you can easily swap the Italian sausage for ground beef if that’s what you have on hand.
- Perfect for leftovers – This baked spaghetti tastes even better the next day and reheats beautifully, so you’ll have easy lunches or dinners ready to go.
What Kind of Spaghetti Should I Use?
For baked spaghetti, thin spaghetti works perfectly because it cooks evenly and holds up well to the baking process without getting mushy. Regular spaghetti will also work just fine if that’s what you have on hand – the cooking time might just be a minute or two longer. I’d recommend sticking with traditional wheat pasta rather than whole wheat for this recipe, as it gives you that classic comfort food texture everyone loves. Make sure to cook your pasta just until al dente since it will continue cooking in the oven, and you don’t want it to turn out overcooked and soft.
Options for Substitutions
This baked spaghetti is pretty forgiving when it comes to swaps – here are some easy substitutions:
- Thin spaghetti: Regular spaghetti, angel hair, or even penne pasta work great here. Just cook according to package directions and you’re good to go.
- Italian sausage: Ground beef, turkey, or chicken are perfect substitutes. You can even use a mix of both sausage and ground beef for extra flavor.
- Cream cheese: If you don’t have cream cheese, try ricotta cheese instead – it gives a similar creamy texture with a slightly different taste.
- Sour cream: Plain Greek yogurt works as a great substitute and adds a bit more protein. Use the same amount as you would sour cream.
- Mozzarella cheese: Feel free to use any melting cheese you have on hand – cheddar, Italian blend, or even provolone will work nicely.
- Parmesan cheese: Romano cheese or even asiago can step in for parmesan if that’s what you have in your fridge.
- Butter: Olive oil works just fine as a substitute – use about 4 tablespoons instead of the 5 tablespoons of melted butter.
Watch Out for These Mistakes While Baking
The biggest mistake with baked spaghetti is overcooking the pasta during the initial boiling – cook it just until al dente since it will continue cooking in the oven and you don’t want mushy noodles in your final dish.
Another common error is not letting the cream cheese mixture reach room temperature before combining it with the hot pasta, which can cause lumpy, uneven layers that won’t spread smoothly.
Make sure to drain your cooked meat thoroughly and let any excess grease cool slightly before mixing with the sauce, as too much oil will make your casserole greasy and prevent the flavors from melding properly.
Finally, resist the urge to skip covering the dish with foil during the first part of baking – this prevents the top from browning too quickly while the inside heats through, then remove the foil for the last 10-15 minutes to get that golden, bubbly cheese top.
What to Serve With Baked Spaghetti?
A crisp Caesar salad or simple mixed greens with Italian dressing is my go-to side for baked spaghetti since it cuts through all that cheesy richness perfectly. Garlic bread is another must-have – you’ll want something to soak up any extra sauce on your plate, and the buttery garlic flavor pairs so well with the Italian sausage and herbs. I also love serving steamed broccoli or green beans on the side to add some color and freshness to the meal. For a complete Italian feast, try adding some roasted zucchini or bell peppers that you can prep in the oven alongside the casserole.
Storage Instructions
Refrigerate: This baked spaghetti is actually one of those dishes that tastes even better the next day! Store any leftovers covered in the fridge for up to 4 days. The flavors really meld together nicely overnight, making it perfect for easy weeknight dinners.
Freeze: You can definitely freeze this casserole for busy weeks ahead. Wrap it tightly in plastic wrap and foil, or store in a freezer-safe container for up to 3 months. I like to freeze individual portions in smaller containers so I can just grab what I need for lunch.
Reheat: To warm up your baked spaghetti, cover it with foil and bake at 350°F for about 20-30 minutes until heated through. If it’s frozen, let it thaw in the fridge overnight first. You can also microwave individual portions, but the oven keeps that nice cheesy top better.
| Preparation Time | 15-20 minutes |
| Cooking Time | 45 minutes |
| Total Time | 60-65 minutes |
| Level of Difficulty | Medium |
Estimated Nutrition
Estimated nutrition for the whole recipe (without optional ingredients):
- Calories: 3800-4200
- Protein: 150-170 g
- Fat: 210-230 g
- Carbohydrates: 300-340 g
Ingredients
For the pasta base:
- 2 eggs
- 1/3 cup parmesan, grated (freshly grated for best flavor)
- 5 tbsp unsalted butter, melted (I use Kerrygold for richness)
- 16 oz thin spaghetti noodles
For the creamy layer:
- 8 oz cream cheese, softened (cut into cubes for even mixing)
- 1 cup sour cream (room temperature)
- 1 tsp italian herb blend
- 1 clove garlic, minced
For the meat sauce:
- 24 oz jarred spaghetti sauce (I prefer Rao’s)
- 1 lb italian sausage or ground beef, cooked (browned and drained)
For the topping:
- 2 cups mozzarella, shredded (low-moisture for best results)
Step 1: Prepare the Oven and Cook the Pasta
- 16 oz thin spaghetti noodles
- Salt for pasta water
Preheat your oven to 350°F.
While it’s heating, bring a large pot of salted water to a boil and cook the spaghetti until al dente—this usually takes about 8-10 minutes depending on your brand.
You want the pasta slightly firm since it will continue cooking in the oven.
Drain the pasta well and set aside in a large mixing bowl.
I find that cooking the pasta first allows you to layer all your components while the oven finishes preheating, which streamlines the whole assembly process.
Step 2: Create the Buttered Pasta Coating
- 2 eggs
- 1/3 cup parmesan, grated
- 5 tbsp unsalted butter, melted
- cooked spaghetti from Step 1
In a small bowl, whisk together the eggs and freshly grated parmesan cheese, then pour in the melted butter and mix until well combined.
Add this mixture to the cooked spaghetti from Step 1 and toss thoroughly until every strand is evenly coated.
This creates a protective layer that prevents the pasta from becoming mushy and adds richness to each bite.
I use Kerrygold butter because its higher butterfat content creates a noticeably richer coating.
Step 3: Assemble the First Two Layers
- buttered spaghetti from Step 2
- 8 oz cream cheese, softened
- 1 cup sour cream
- 1 clove garlic, minced
- 1 tsp italian herb blend
Spread the buttered spaghetti from Step 2 into a 9×13-inch baking dish, pressing it into an even layer.
In a separate bowl, combine the softened cream cheese (cut into small cubes to incorporate smoothly), room-temperature sour cream, minced garlic, and Italian herb blend.
Mix until you have a smooth, creamy sauce with no lumps.
Spread this cream cheese mixture evenly over the pasta layer, using an offset spatula or the back of a spoon to distribute it uniformly.
Step 4: Layer the Meat Sauce
- 1 lb italian sausage or ground beef
- 24 oz jarred spaghetti sauce
If you haven’t already, cook and drain the Italian sausage or ground beef in a skillet over medium-high heat, breaking it into small pieces as it browns (this should take about 8-10 minutes).
Stir in the jarred spaghetti sauce and combine thoroughly.
Spread this meat sauce evenly over the cream cheese layer from Step 3, making sure to cover it completely.
Step 5: Top and Bake
- 2 cups mozzarella, shredded
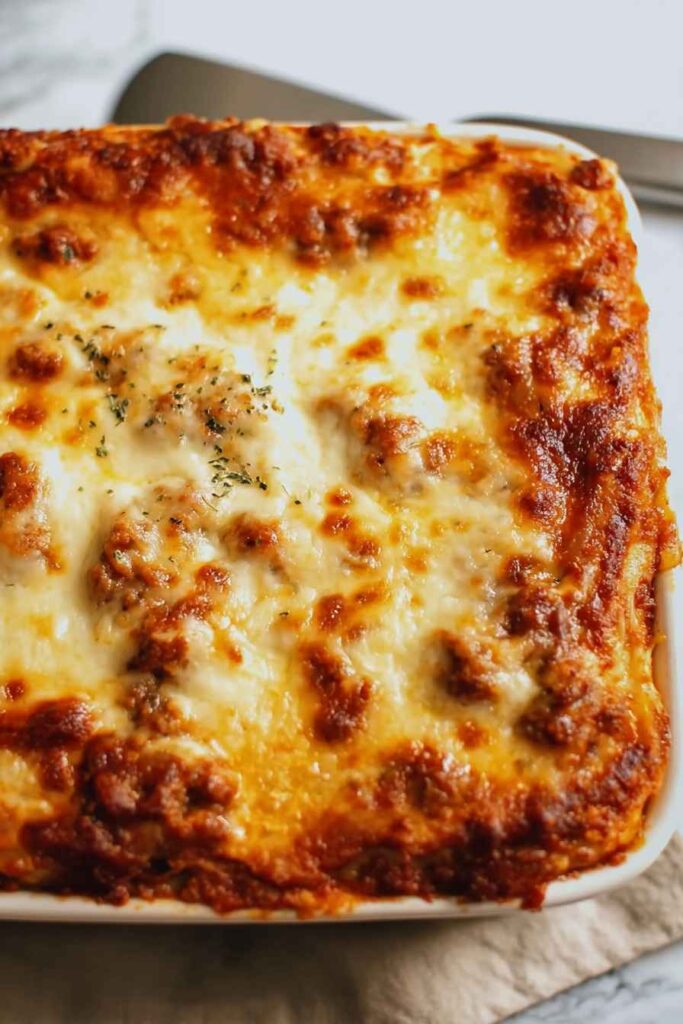
Sprinkle the shredded mozzarella cheese evenly over the meat sauce layer.
Use low-moisture mozzarella if possible, as it will brown better and won’t release excess water that can make the dish watery.
Place the baking dish in your preheated 350°F oven and bake for 45 minutes, or until the cheese on top is bubbly and begins to turn golden brown.
The casserole is done when you can see the sauce bubbling at the edges.
Let it rest for 5 minutes before serving—this allows the layers to set slightly, making it easier to portion and preventing the cheese from sliding around on your plate.


Can I use a different pasta