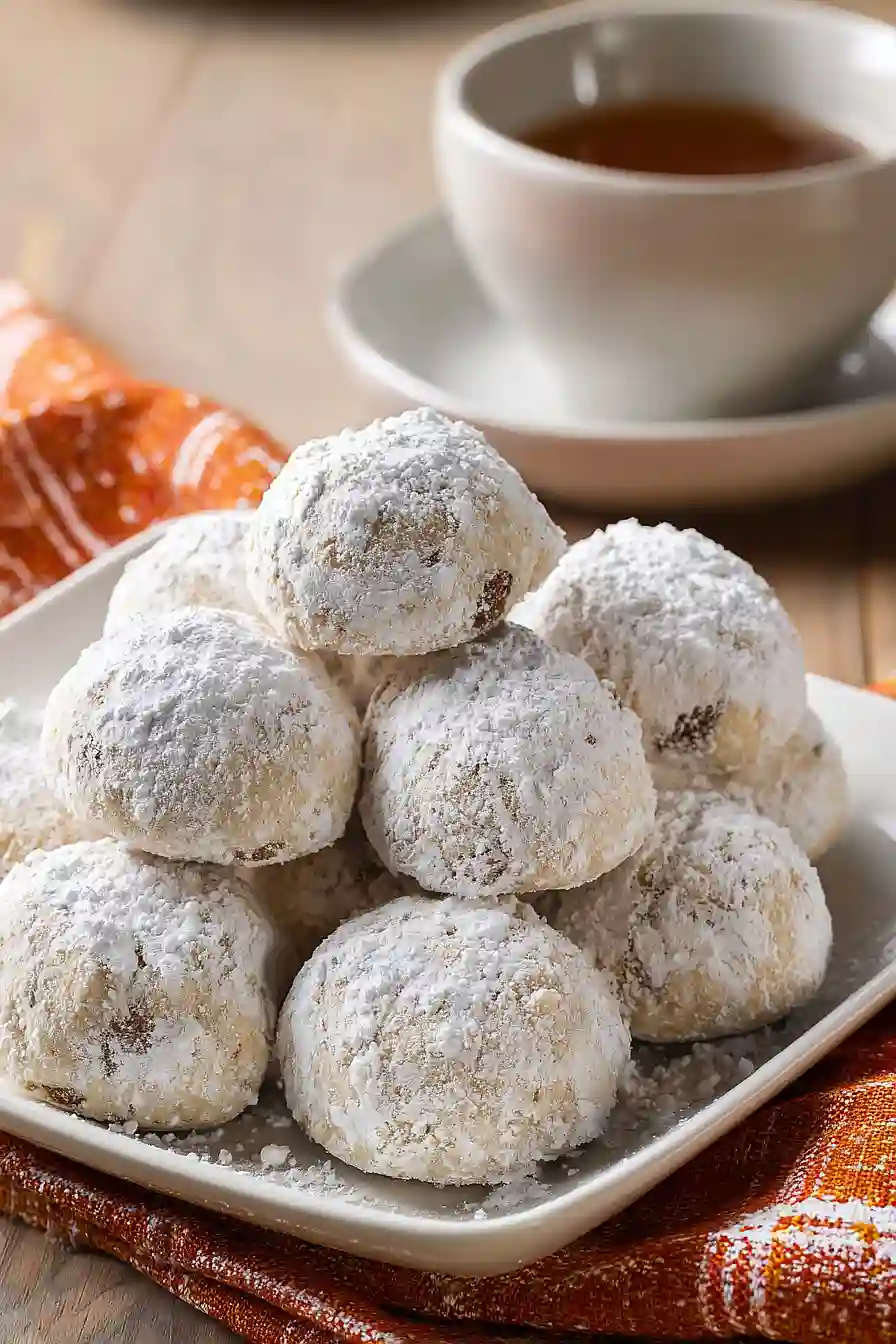
Here is my favorite paleo Russian tea cakes recipe, with finely ground almond flour, chopped walnuts, grass-fed butter, and a touch of maple syrup for sweetness instead of refined sugar.
These cookies are perfect for anyone following a paleo lifestyle but still wanting to enjoy a classic holiday treat. I love making a big batch because they freeze really well, and honestly, they disappear fast in my house!

Why You’ll Love These Russian Tea Cakes
- Paleo-friendly treat – These cookies are made with almond flour and maple syrup instead of regular flour and refined sugar, so you can enjoy a sweet treat that fits your paleo lifestyle.
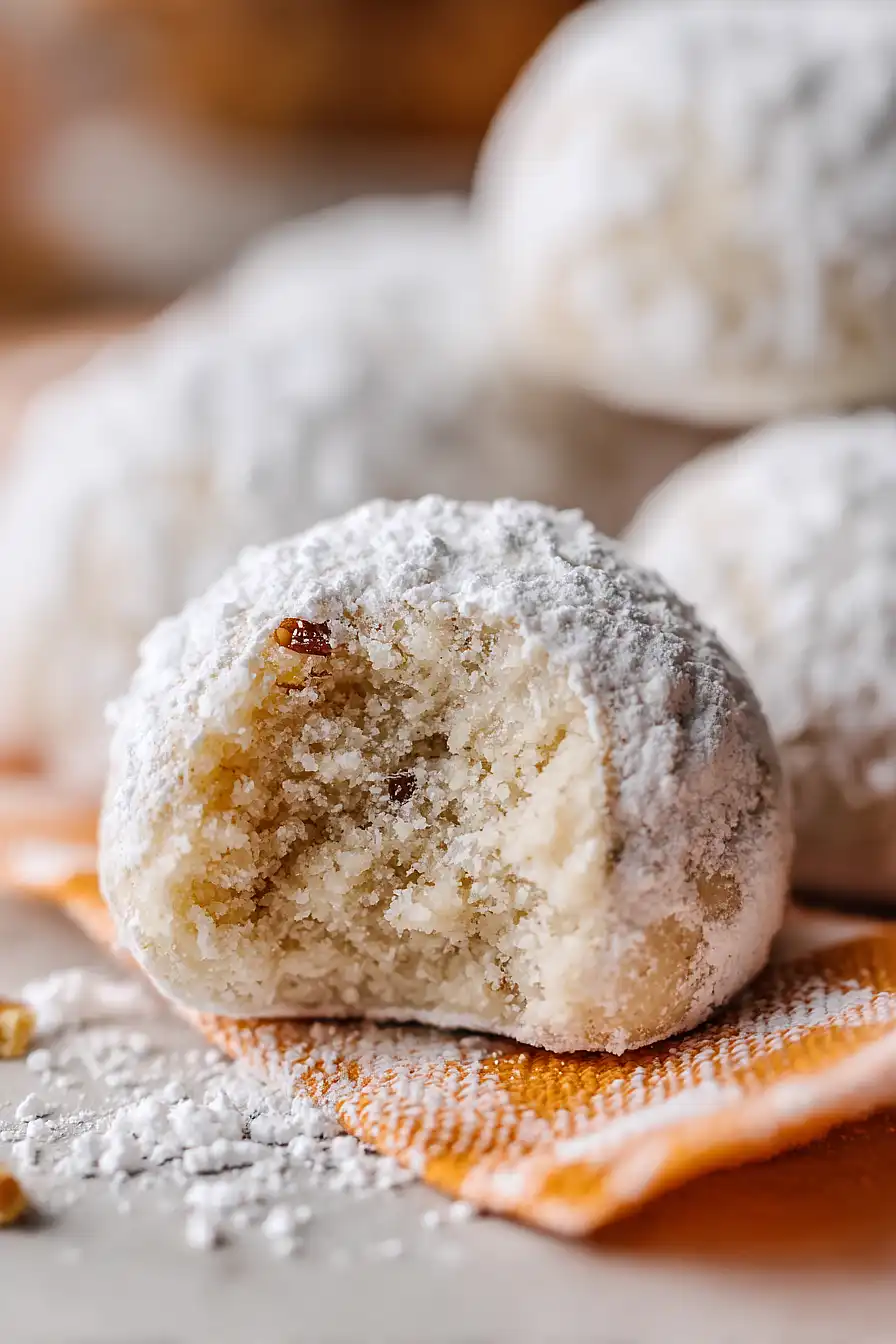
- Melt-in-your-mouth texture – The combination of almond flour and butter creates these delicate, crumbly cookies that practically dissolve on your tongue.
- Simple ingredients – You probably have most of these pantry staples on hand already, and there’s nothing complicated or hard to find on this list.
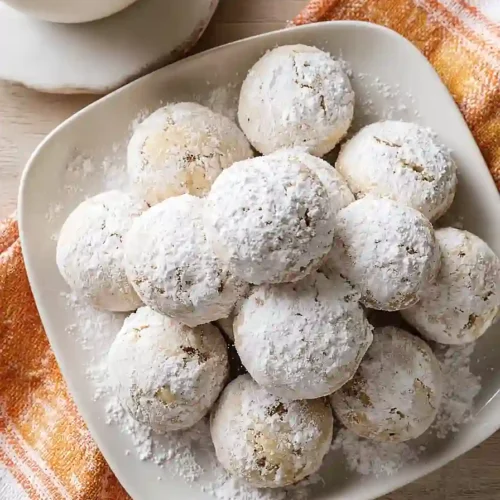
- Perfect for holidays and gifting – These classic cookies look fancy dusted with confectioners sugar, making them ideal for cookie exchanges, holiday parties, or wrapping up as homemade gifts.
What Kind of Almond Flour Should I Use?
For these Russian tea cakes, you’ll want to use superfine almond flour, which is sometimes called blanched almond flour. This type is made from almonds with the skins removed and ground into a very fine texture, which gives your cookies a lighter color and smoother consistency. Regular almond meal, which includes the skins and has a coarser grind, can make your cookies a bit grainier and denser than you want. You can find superfine almond flour at most grocery stores these days, or you can order it online if your local store doesn’t carry it. Make sure to store your almond flour in the fridge or freezer to keep it fresh, since it can go rancid more quickly than regular wheat flour.
Options for Substitutions
These paleo-friendly cookies are pretty adaptable, so here are some swaps you can make:
- Grass-fed butter: Regular butter works just fine if you don’t have grass-fed on hand. For a dairy-free version, try using palm shortening or coconut oil (though coconut oil will give a slight coconut flavor).
- Maple syrup: Honey is a great substitute here and will give you similar results. Use the same amount and your cookies will turn out just as good.
- Almond flour: This is one ingredient you shouldn’t swap out. Almond flour is what gives these cookies their texture, and other nut flours or coconut flour won’t work the same way.
- Tapioca flour: Arrowroot powder works as a 1:1 substitute for tapioca flour. Both help bind the cookies together since there’s no gluten.
- Walnuts: Pecans are the classic swap here and actually traditional in many Russian tea cake recipes. You can also use almonds or hazelnuts if that’s what you have.
- Sugar-free confectioners sugar: Maple sugar works great, or you can make your own by blending coconut sugar in a high-speed blender until powdery. Regular powdered sugar is fine too if you’re not strictly paleo.
Watch Out for These Mistakes While Baking
The biggest mistake when making paleo Russian tea cakes is over-mixing the dough once you add the almond flour, which can make the cookies dense and tough instead of light and crumbly – mix just until the ingredients come together.
Another common error is rolling the cookies in confectioners sugar while they’re still hot from the oven, which causes the sugar to melt and disappear – let them cool for about 5 minutes first, then roll them while they’re still warm for the best coating.
Since almond flour browns faster than regular flour, keep a close eye on your cookies after the 10-minute mark and remove them when the bottoms are just lightly golden, not brown.
For extra insurance against flat cookies, chill your dough for 15-20 minutes before rolling if your kitchen is warm, as the butter in paleo baking can soften quickly and cause spreading.
What to Serve With Paleo Russian Tea Cakes?
These buttery cookies are perfect alongside a hot cup of coffee or tea for an afternoon treat or dessert. I love serving them on a platter with fresh berries like strawberries or raspberries, which add a nice pop of tartness that balances out the sweetness of the cookies. They’re also great as part of a holiday cookie spread alongside other treats like chocolate chip cookies or shortbread. If you’re hosting a brunch, these pair wonderfully with a fruit salad or even a simple bowl of whipped coconut cream for dipping.
Storage Instructions
Store: These paleo Russian tea cakes keep really well in an airtight container at room temperature for about 5 days. Just make sure they’re completely cooled before storing, and you might want to dust them with a little extra confectioners sugar before serving since it can absorb into the cookies over time.
Freeze: Russian tea cakes are perfect for freezing! Layer them between parchment paper in a freezer-safe container and they’ll stay fresh for up to 3 months. You can freeze them before or after rolling in the confectioners sugar, whatever works best for you.
Thaw: When you’re ready to eat your frozen cookies, just let them sit at room temperature for about 30 minutes. If you froze them without the sugar coating, give them a fresh roll in confectioners sugar once they’ve thawed for that classic snowy look.
| Preparation Time | 120-150 minutes |
| Cooking Time | 12-15 minutes |
| Total Time | 132-165 minutes |
| Level of Difficulty | Medium |
Estimated Nutrition
Estimated nutrition for the whole recipe (without optional ingredients):
- Calories: 2700-3000
- Protein: 40-50 g
- Fat: 230-250 g
- Carbohydrates: 130-160 g
Ingredients
For the dough:
- 1 tsp vanilla extract (for best flavor)
- 1/4 tsp sea salt
- 1/4 cup pure maple syrup
- 1/2 cup tapioca flour
- 3.5 cups superfine almond flour (blanched and finely ground)
- 2/3 cup raw walnuts (finely chopped, about 1/4-inch pieces)
- 1 cup grass-fed butter (I use Kerrygold, softened to room temperature)
For the coating:
- 1/3 cup sugar-free confectioners sugar (optional but recommended for traditional appearance)
Step 1: Prepare Mise en Place and Toast the Walnuts
- 2/3 cup raw walnuts, finely chopped
- 3.5 cups superfine almond flour
- 1/2 cup tapioca flour
- 1/4 tsp sea salt
Start by toasting the chopped walnuts in a dry skillet over medium heat for about 3-4 minutes, stirring frequently until fragrant and lightly golden.
This step brings out their natural oils and deepens their flavor, which is crucial for these delicate tea cakes.
While the walnuts cool slightly, measure out all your dry ingredients (almond flour, tapioca flour, sea salt) and set them aside.
Ensure your butter is softened to room temperature by leaving it on the counter for 20-30 minutes—this is essential for proper creaming and aeration.
Step 2: Cream Butter and Sweetener, Then Mix the Dough
- 1 cup grass-fed butter, softened to room temperature
- 1/4 cup pure maple syrup
- 1 tsp vanilla extract
- dry ingredient mixture from Step 1
- toasted walnuts from Step 1
In a stand mixer or with a hand mixer, beat the softened butter and maple syrup together for 2-3 minutes until light, fluffy, and pale—this aerates the dough and creates the tender crumb these cakes are known for.
Add the vanilla extract and mix until just combined.
Pour in the dry ingredient mixture from Step 1 along with the cooled toasted walnuts, and mix on low speed until the dough just comes together.
I like to finish mixing by hand with a spatula to avoid overworking the dough, which can make the final texture tough.
Step 3: Chill and Shape the Dough
- dough from Step 2
Cover the dough and refrigerate for 2 hours until it firms up enough to hold its shape when rolled into balls.
This chilling time allows the flavors to meld and prevents the dough from spreading too much during baking.
Once chilled, use a small cookie scoop or your hands (lightly dampened to prevent sticking) to roll the dough into 1 to 1.5-inch balls.
Arrange the balls on a parchment-lined baking sheet with about an inch of space between them.
Step 4: Freeze the Balls and Preheat the Oven
- shaped dough balls from Step 3
Place the shaped dough balls in the freezer for 15 minutes while you preheat your oven to 350°F.
Freezing the balls before baking ensures they hold their round shape and don’t spread too much on the baking sheet.
This brief freeze is the difference between a perfectly spherical tea cake and a puddle-like cookie.
Step 5: Coat and Bake the Tea Cakes
- frozen dough balls from Step 4
- 1/3 cup sugar-free confectioners sugar
Remove the frozen dough balls from the freezer and working quickly, roll each one in the confectioners sugar until evenly coated, then place back on the baking sheet.
Bake for 12 to 15 minutes until the edges are light golden but the centers still look slightly underdone—they will continue cooking slightly as they cool.
The confectioners sugar will create that iconic snowy, crackled exterior that makes these cakes so visually appealing.
Step 6: Cool and Serve
Allow the baked tea cakes to cool on the baking sheet for 5 minutes, then transfer them to a wire rack to cool completely.
They will firm up as they cool and develop their characteristic tender, crumbly texture.
Once cooled, you can store them in an airtight container for up to 5 days.
Buttery Paleo Russian Tea Cakes
Ingredients
For the dough:
- 1 tsp vanilla extract (for best flavor)
- 1/4 tsp sea salt
- 1/4 cup pure maple syrup
- 1/2 cup tapioca flour
- 3.5 cups superfine almond flour (blanched and finely ground)
- 2/3 cup raw walnuts (finely chopped, about 1/4-inch pieces)
- 1 cup grass-fed butter (I use Kerrygold, softened to room temperature)
For the coating:
- 1/3 cup sugar-free confectioners sugar (optional but recommended for traditional appearance)
Instructions
- Start by toasting the chopped walnuts in a dry skillet over medium heat for about 3-4 minutes, stirring frequently until fragrant and lightly golden. This step brings out their natural oils and deepens their flavor, which is crucial for these delicate tea cakes. While the walnuts cool slightly, measure out all your dry ingredients (almond flour, tapioca flour, sea salt) and set them aside. Ensure your butter is softened to room temperature by leaving it on the counter for 20-30 minutes—this is essential for proper creaming and aeration.
- In a stand mixer or with a hand mixer, beat the softened butter and maple syrup together for 2-3 minutes until light, fluffy, and pale—this aerates the dough and creates the tender crumb these cakes are known for. Add the vanilla extract and mix until just combined. Pour in the dry ingredient mixture from Step 1 along with the cooled toasted walnuts, and mix on low speed until the dough just comes together. I like to finish mixing by hand with a spatula to avoid overworking the dough, which can make the final texture tough.
- Cover the dough and refrigerate for 2 hours until it firms up enough to hold its shape when rolled into balls. This chilling time allows the flavors to meld and prevents the dough from spreading too much during baking. Once chilled, use a small cookie scoop or your hands (lightly dampened to prevent sticking) to roll the dough into 1 to 1.5-inch balls. Arrange the balls on a parchment-lined baking sheet with about an inch of space between them.
- Place the shaped dough balls in the freezer for 15 minutes while you preheat your oven to 350°F. Freezing the balls before baking ensures they hold their round shape and don't spread too much on the baking sheet. This brief freeze is the difference between a perfectly spherical tea cake and a puddle-like cookie.
- Remove the frozen dough balls from the freezer and working quickly, roll each one in the confectioners sugar until evenly coated, then place back on the baking sheet. Bake for 12 to 15 minutes until the edges are light golden but the centers still look slightly underdone—they will continue cooking slightly as they cool. The confectioners sugar will create that iconic snowy, crackled exterior that makes these cakes so visually appealing.
- Allow the baked tea cakes to cool on the baking sheet for 5 minutes, then transfer them to a wire rack to cool completely. They will firm up as they cool and develop their characteristic tender, crumbly texture. Once cooled, you can store them in an airtight container for up to 5 days.


