I’ll be honest—I never thought about putting Nutella in hot cross buns until my daughter suggested it last Easter. She was helping me roll out the dough for traditional ones when she looked up and said, “Mom, what if we added Nutella?” At first I thought it was kind of a weird combo, but the more I thought about it, the more it made sense.
Hot cross buns are already a little sweet and spiced, so why not kick things up with some chocolate hazelnut spread? Turns out, the Nutella melts into these warm pockets of goodness that pair really well with the soft, pillowy dough. And honestly? They’re way easier than the dried fruit version because you don’t have to worry about soaking anything or whether the raisins will distribute evenly. You just spread, roll, and bake.
Why You’ll Love These Nutella Hot Cross Buns
- Fun twist on a classic – These buns take the traditional Easter treat and give it a chocolate-hazelnut upgrade that makes them perfect for any time of year, not just the holidays.
- Soft, pillowy texture – The combination of milk, butter, and honey creates incredibly tender buns that stay fresh and fluffy for days.
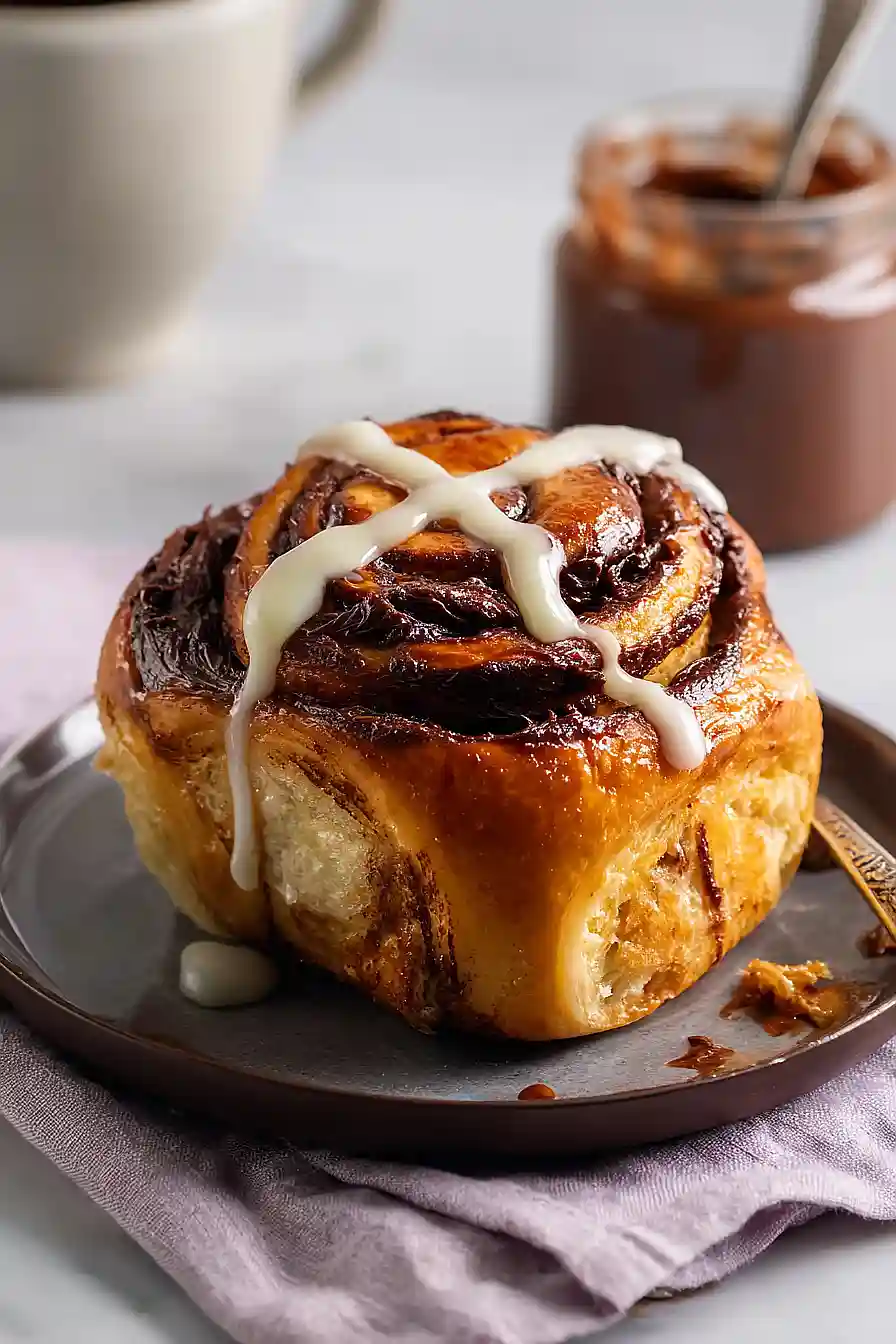
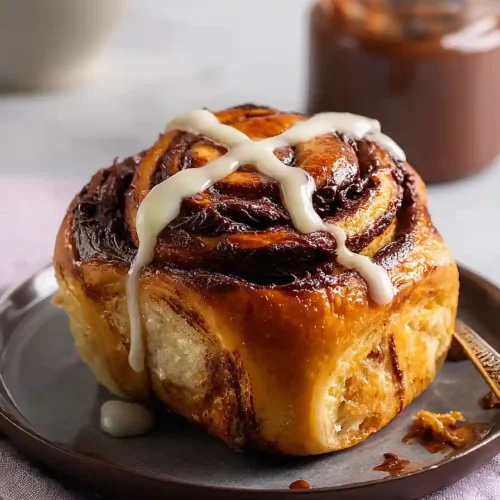
- Chocolatey surprise inside – Every bite reveals a swirl of creamy Nutella that melts into the warm dough, making these way more exciting than regular hot cross buns.
- Great for sharing – This recipe makes a whole batch of buns that are perfect for breakfast gatherings, brunch with friends, or treating your family to something special on the weekend.
What Kind of Flour Should I Use?
For hot cross buns, all-purpose flour is your best bet and will give you that soft, pillowy texture you’re looking for. Bread flour can also work if that’s what you have on hand, though it’ll make your buns slightly chewier due to the higher protein content. I’d steer clear of cake flour or self-rising flour for this recipe, as they won’t give you the right structure. Make sure your flour is fresh and stored properly – old flour can affect how your dough rises and the overall taste of your buns.
Options for Substitutions
While some ingredients are pretty important for these buns, there’s still room to work with what you have:
- Nutella: You can swap Nutella with any chocolate hazelnut spread, or try cookie butter, peanut butter, or even jam for a different flavor. Just make sure whatever you use has a similar thick, spreadable consistency.
- Honey: Maple syrup or agave nectar work great as replacements. You can also use regular sugar (about 3 tablespoons) dissolved in the warm milk.
- Milk: Any milk works here – whole, 2%, almond, oat, or soy milk will all get the job done. Just keep it at room temperature or slightly warm to help activate the yeast.
- Butter: You can substitute with margarine or coconut oil in the same amount. The texture might be slightly different, but your buns will still turn out tasty.
- Yeast: Don’t substitute the yeast – it’s what makes these buns rise and get that fluffy texture. If you only have active dry yeast instead of instant, just dissolve it in the warm milk first and let it sit for 5 minutes before adding.
- Flour: Stick with all-purpose flour for this recipe. Bread flour could work, but other types like whole wheat or gluten-free won’t give you the right texture without major adjustments to the recipe.
Watch Out for These Mistakes While Baking
The biggest mistake with hot cross buns is adding the butter too early, which can prevent the dough from developing properly – make sure your dough is already elastic before working in the butter, then knead for the full 9-12 minutes to get that soft, pillowy texture.
Another common issue is skipping the temperature checks when making the flour mixture, as adding yeast to liquid that’s too hot (above 120°F) will kill it, while liquid that’s too cool won’t activate it properly.
Don’t rush the rising times either – your buns need to truly double in size during that final rise before baking, or they’ll end up dense instead of fluffy.
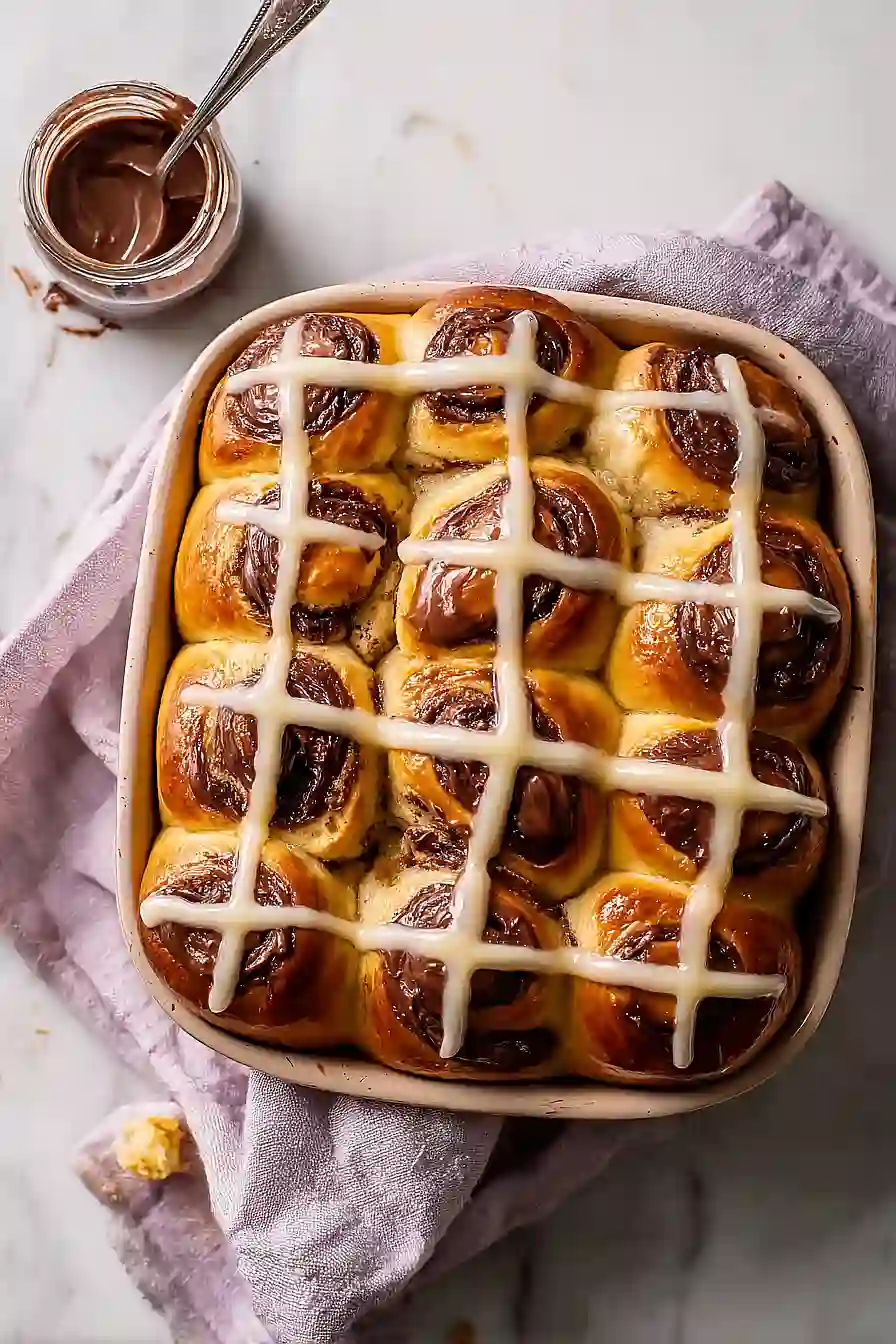
Finally, wait until the buns are completely cool before piping the chocolate crosses, otherwise the chocolate will melt and run off the sides instead of staying in neat lines.
What to Serve With Hot Cross Buns?
Hot cross buns are perfect for Easter brunch or a cozy weekend breakfast, and they’re honestly delicious enough to eat on their own while they’re still warm. I love serving them with a big pot of coffee or tea – the sweetness of the Nutella filling pairs really nicely with a strong cup of coffee. You can also set out some extra butter or cream cheese for spreading, though with the chocolate already inside, they definitely don’t need much. These buns also work great as part of a bigger brunch spread alongside scrambled eggs, fresh fruit, and maybe some crispy bacon to balance out the sweetness.
Storage Instructions
Store: Keep your Nutella hot cross buns in an airtight container at room temperature for up to 3 days. They’re best enjoyed within the first couple of days when they’re still soft and fresh. If you want to keep them a bit longer, the fridge works too, but they might dry out a little faster.
Freeze: These buns freeze really well for up to 2 months. Just make sure they’re completely cooled, then wrap them individually in plastic wrap and store in a freezer bag. This way you can grab one or two whenever you’re craving something sweet without thawing the whole batch.
Warm Up: To bring your buns back to life, let frozen ones thaw at room temperature for about an hour. Then pop them in a 300°F oven for 5-7 minutes or microwave for 15-20 seconds until they’re warm and soft again. They’ll taste almost as good as fresh from the oven!
| Preparation Time | 90-120 minutes |
| Cooking Time | 25-30 minutes |
| Total Time | 115-150 minutes |
| Level of Difficulty | Medium |
| Servings | 16 buns |
Estimated Nutrition
Estimated nutrition for the whole recipe (without optional ingredients):
- Calories: 3150-3400
- Protein: 56-64 g
- Fat: 110-125 g
- Carbohydrates: 470-500 g
Ingredients
For the dough:
- 4 cups all-purpose flour
- 1/2 cup water
- 1/3 cup honey
- 2 large eggs (room temperature)
- 1 cup milk
- 1.5 tablespoons instant yeast
- 2.5 oz unsalted butter, cubed and softened
- 1.25 teaspoons salt
- 1 teaspoon vanilla extract
For the filling:
- 2/3 cup Nutella
For the glaze:
- 1 large egg, beaten
- 1/2 teaspoon ground cinnamon
For the decoration:
- 2 oz white chocolate (melted and cooled to room temperature)
Step 1: Create the Tangzhong (Flour Roux Base) and Prepare the Wet Ingredients
- 1/6 cup all-purpose flour
- 1/2 cup water
- 1 cup milk
- 1/3 cup honey
- 2 large eggs
- 1 teaspoon vanilla extract
In a small saucepan, whisk together 1/6 cup of the flour with the water over medium heat, stirring constantly until the mixture reaches 65°C (149°F) and becomes a thick paste—this takes about 5 minutes.
This tangzhong technique creates a more tender, moist crumb by pre-gelatinizing some of the flour.
Remove from heat and let cool slightly, then stir in the milk and honey until smooth.
Once the mixture cools to 45°C (113°F), whisk in the 2 room temperature eggs and vanilla extract.
Set this wet mixture aside.
Step 2: Combine Dry Ingredients and Mix the Dough
- 3 2/3 cups all-purpose flour
- 1.5 tablespoons instant yeast
- 1/2 teaspoon salt
- wet ingredient mixture from Step 1
In a large bowl, whisk together the remaining 3 2/3 cups flour, instant yeast, and 1/2 teaspoon of the salt (we’ll add the remaining salt later for better gluten development).
Pour the wet ingredient mixture from Step 1 into the dry ingredients and stir with a wooden spoon or dough hook until all flour is incorporated and a shaggy dough forms.
This initial mixing hydrates the flour evenly.
Step 3: Knead and Incorporate Butter
- dough from Step 2
- 2.5 oz unsalted butter, cubed and softened
- 0.75 teaspoon salt
Knead the dough by hand or with a stand mixer on medium speed for 3-4 minutes until it becomes smooth and elastic, then gradually add the softened butter cubes one at a time, allowing each piece to fully incorporate before adding the next.
This takes about 6-8 minutes total.
Once all butter is incorporated, add the remaining 0.75 teaspoon salt and continue kneading for another 1-2 minutes until the dough is silky, smooth, and springs back when poked—this indicates proper gluten development.
The dough should be slightly tacky but not sticky.
Step 4: First Rise and Cold Fermentation
- dough from Step 3
Place the dough in a lightly oiled bowl, cover with plastic wrap, and let it rise at room temperature for 40 minutes until it increases by about 50 percent.
Then punch down the dough gently to release excess gas, cover again, and refrigerate for at least 2 hours (or up to overnight)—this cold fermentation develops flavor and makes the dough easier to shape.
I find that overnight chilling gives these buns an incredible depth of flavor that you simply can’t rush.
Step 5: Laminate Dough and Incorporate Nutella Filling
- dough from Step 4
- 2/3 cup Nutella
Remove the dough from the fridge and divide it into two equal parts.
Working with one portion at a time on a lightly floured surface, roll it into a 12×8 inch rectangle.
Fold the dough into thirds like a letter (fold one short end to the middle, then fold the other short end over it), give it a quarter turn, and roll it out again to a 12×8 inch rectangle.
Repeat this folding and rolling process one more time—this lamination creates beautiful layers.
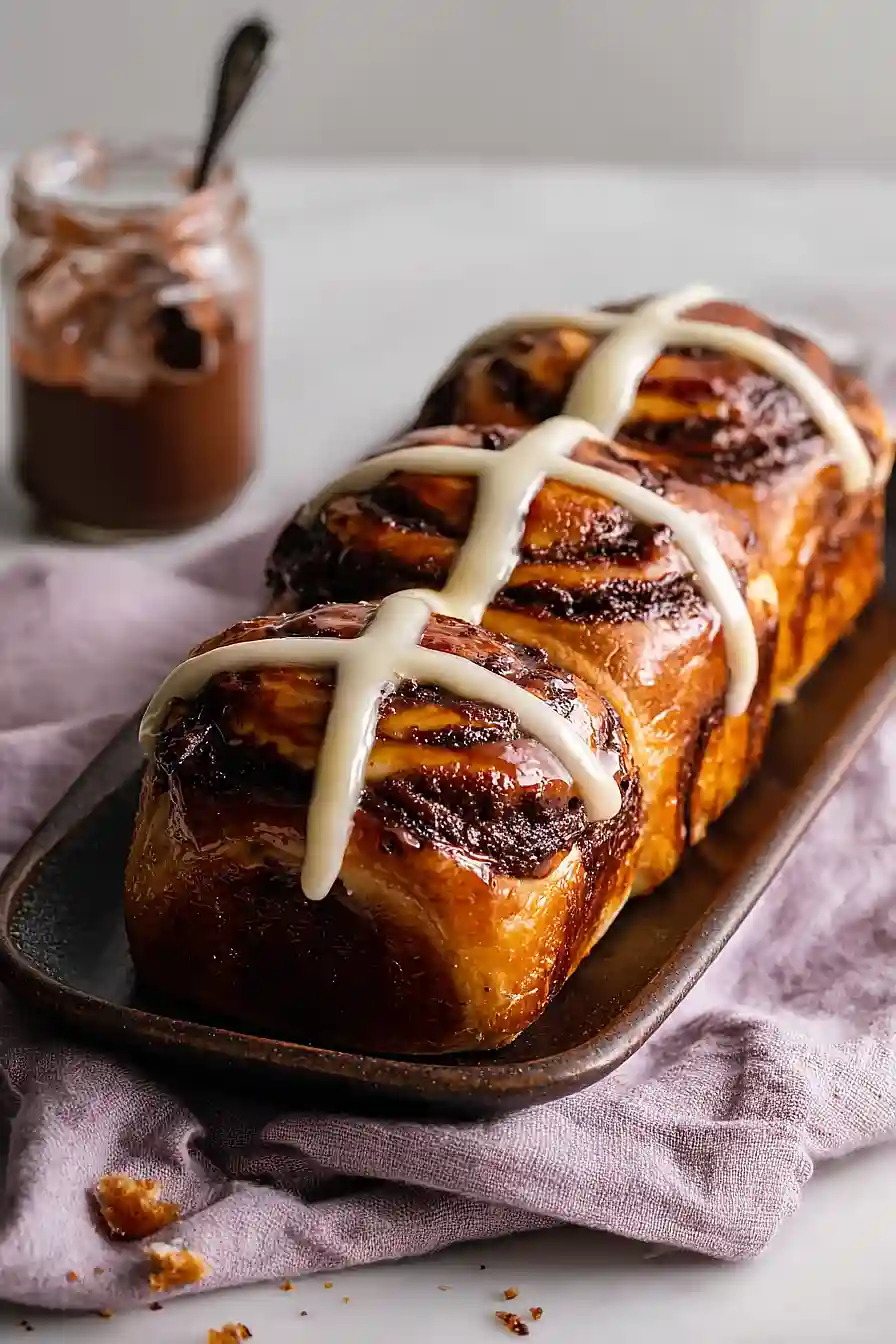
On the final roll, spread 1/3 cup of Nutella evenly over the dough, then roll it up tightly from the long side into a log.
Repeat this process with the second portion of dough.
Step 6: Shape, Proof, and Bake the Buns
- dough logs from Step 5
- 1 large egg, beaten
Cut each log into 1-inch thick slices and place them cut-side up in a greased muffin tin or on a parchment-lined baking sheet, spacing them about 1 inch apart.
Cover loosely with plastic wrap and let them rise at room temperature for 45 minutes to 1 hour until they’re puffy and nearly doubled in size.
Meanwhile, preheat your oven to 180°C (350°F).
Once proofed, brush the tops generously with the beaten egg, then bake for 22-25 minutes until golden brown and cooked through.
The buns should spring back when lightly pressed.
I always rotate my pan halfway through baking to ensure even browning.
Step 7: Cool and Finish with Chocolate Crosses
- baked buns from Step 6
- 2 oz white chocolate
Let the buns cool in the tin for 5-10 minutes, then transfer them to a wire rack to cool completely for about 20 minutes.
Once cooled, transfer the melted white chocolate to a piping bag fitted with a small round tip and pipe crosses on top of each bun in a thin, even line.
Let the chocolate set at room temperature for about 10 minutes before serving.
Classic Nutella Hot Cross Buns
Ingredients
For the dough
- 4 cups all-purpose flour
- 1/2 cup water
- 1/3 cup honey
- 2 large eggs (room temperature)
- 1 cup milk
- 1.5 tablespoons instant yeast
- 2.5 oz unsalted butter, cubed and softened
- 1.25 teaspoons salt
- 1 teaspoon vanilla extract
For the filling
- 2/3 cup Nutella
For the glaze
- 1 large egg, beaten
- 1/2 teaspoon ground cinnamon
For the decoration
- 2 oz white chocolate (melted and cooled to room temperature)
Instructions
- In a small saucepan, whisk together 1/6 cup of the flour with the water over medium heat, stirring constantly until the mixture reaches 65°C (149°F) and becomes a thick paste—this takes about 5 minutes. This tangzhong technique creates a more tender, moist crumb by pre-gelatinizing some of the flour. Remove from heat and let cool slightly, then stir in the milk and honey until smooth. Once the mixture cools to 45°C (113°F), whisk in the 2 room temperature eggs and vanilla extract. Set this wet mixture aside.
- In a large bowl, whisk together the remaining 3 2/3 cups flour, instant yeast, and 1/2 teaspoon of the salt (we'll add the remaining salt later for better gluten development). Pour the wet ingredient mixture from Step 1 into the dry ingredients and stir with a wooden spoon or dough hook until all flour is incorporated and a shaggy dough forms. This initial mixing hydrates the flour evenly.
- Knead the dough by hand or with a stand mixer on medium speed for 3-4 minutes until it becomes smooth and elastic, then gradually add the softened butter cubes one at a time, allowing each piece to fully incorporate before adding the next. This takes about 6-8 minutes total. Once all butter is incorporated, add the remaining 0.75 teaspoon salt and continue kneading for another 1-2 minutes until the dough is silky, smooth, and springs back when poked—this indicates proper gluten development. The dough should be slightly tacky but not sticky.
- Place the dough in a lightly oiled bowl, cover with plastic wrap, and let it rise at room temperature for 40 minutes until it increases by about 50 percent. Then punch down the dough gently to release excess gas, cover again, and refrigerate for at least 2 hours (or up to overnight)—this cold fermentation develops flavor and makes the dough easier to shape. I find that overnight chilling gives these buns an incredible depth of flavor that you simply can't rush.
- Remove the dough from the fridge and divide it into two equal parts. Working with one portion at a time on a lightly floured surface, roll it into a 12x8 inch rectangle. Fold the dough into thirds like a letter (fold one short end to the middle, then fold the other short end over it), give it a quarter turn, and roll it out again to a 12x8 inch rectangle. Repeat this folding and rolling process one more time—this lamination creates beautiful layers. On the final roll, spread 1/3 cup of Nutella evenly over the dough, then roll it up tightly from the long side into a log. Repeat this process with the second portion of dough.
- Cut each log into 1-inch thick slices and place them cut-side up in a greased muffin tin or on a parchment-lined baking sheet, spacing them about 1 inch apart. Cover loosely with plastic wrap and let them rise at room temperature for 45 minutes to 1 hour until they're puffy and nearly doubled in size. Meanwhile, preheat your oven to 180°C (350°F). Once proofed, brush the tops generously with the beaten egg, then bake for 22-25 minutes until golden brown and cooked through. The buns should spring back when lightly pressed. I always rotate my pan halfway through baking to ensure even browning.
- Let the buns cool in the tin for 5-10 minutes, then transfer them to a wire rack to cool completely for about 20 minutes. Once cooled, transfer the melted white chocolate to a piping bag fitted with a small round tip and pipe crosses on top of each bun in a thin, even line. Let the chocolate set at room temperature for about 10 minutes before serving.


