If you ask me, keto dinner rolls are a total game changer.
These soft, fluffy rolls give you all the comfort of traditional bread without the carbs. They’re made with almond flour and cream cheese, creating a tender texture that’s perfect for soaking up gravy or butter.
The dough comes together quickly in one bowl and bakes up golden brown in about 20 minutes. A hint of garlic powder and herbs makes them taste like the real deal.
They’re a satisfying side dish that fits perfectly into your low-carb lifestyle, ideal for family dinners or special occasions.
Why You’ll Love These Keto Dinner Rolls
- Keto-friendly and low-carb – These rolls let you enjoy bread again while staying in ketosis, using coconut flour and cheese instead of traditional wheat flour.
- Quick and easy – Ready in just 30-40 minutes from start to finish, so you can have fresh, warm rolls on the table without spending hours in the kitchen.
- Cheesy and flavorful – The combination of melted cheddar, garlic, and herbs creates rolls that are packed with savory flavor in every bite.
- High in protein – With cheese, eggs, and protein powder, these rolls give you a satisfying protein boost that regular bread just can’t match.
- Perfect bread substitute – These rolls have that soft, fluffy texture you’ve been missing on keto, making them great for sopping up sauces or enjoying alongside any meal.
What Kind of Cheese Should I Use?
For these keto dinner rolls, you can use either grated cheddar or mozzarella cheese, and both will give you great results. Cheddar will provide a sharper, more pronounced flavor that really comes through in the finished rolls, while mozzarella creates a milder taste and tends to melt more smoothly. I’d recommend buying a block of cheese and grating it yourself rather than using pre-shredded cheese, since the anti-caking agents in bagged cheese can affect how well it melts and binds the dough together. If you’re feeling adventurous, you could even try a mix of both cheeses to get the best of both worlds – the flavor of cheddar with the melting qualities of mozzarella.

Options for Substitutions
These keto rolls are pretty adaptable, but there are a few key ingredients you’ll want to stick with:
- Cheddar cheese: Mozzarella works great as mentioned, but you can also try Monterey Jack or Colby. Just make sure to use a cheese that melts well – avoid pre-shredded if possible since it has anti-caking agents that can affect texture.
- Coconut flour: This one’s tricky to substitute since coconut flour is super absorbent. If you must swap it, try almond flour but use about 1 cup instead of 1/2 cup, and you might need an extra egg to bind everything.
- Whey protein powder: Egg white protein powder works as noted, or you can try unflavored collagen powder. Avoid flavored protein powders since they’ll mess with the savory taste.
- Fresh garlic and parsley: Dried herbs work fine here – use about 1 tsp dried parsley and stick with garlic powder if you don’t have fresh cloves. You could also try dried rosemary or thyme for different flavors.
- Eggs: The eggs are pretty important for structure in keto baking, so I wouldn’t recommend substituting these. They help bind everything together when you don’t have regular flour.
Watch Out for These Mistakes While Baking
The biggest mistake with keto dinner rolls is overmixing the dough once you add the dry ingredients, which can make your rolls dense and heavy instead of light and fluffy – mix just until everything comes together.
Another common error is not letting the cheese cool enough before adding the eggs, as hot cheese will scramble the eggs and ruin your dough texture, so wait until the melted cheese mixture is just warm to the touch.
Make sure to measure your coconut flour carefully since it’s much more absorbent than regular flour – too much will make your rolls dry and crumbly, while too little will leave them too wet to hold their shape.
Finally, don’t skip the resting time after shaping your rolls, as letting them sit for 10-15 minutes before baking helps them rise better and develop a nicer texture.
What to Serve With Keto Dinner Rolls?
These cheesy keto dinner rolls are perfect alongside any low-carb main dish where you’d normally want bread to soak up sauces or round out the meal. I love serving them with grilled chicken, steak, or pork chops, especially when there’s a rich pan sauce or gravy involved. They’re also great with keto-friendly soups like broccoli cheddar or cauliflower soup, giving you that satisfying bread-dipping experience without the carbs. For a complete keto dinner, pair them with a big Caesar salad or roasted vegetables like asparagus or Brussels sprouts.
Storage Instructions
Store: These keto dinner rolls taste amazing fresh, but they’ll keep nicely in an airtight container at room temperature for 2-3 days. If you want them to last longer, pop them in the fridge for up to a week. I like to wrap them individually in plastic wrap first to keep them from drying out.
Freeze: You can absolutely freeze these rolls for up to 3 months! Just let them cool completely, then wrap each one in plastic wrap and store in a freezer bag. This is great for meal prep – I love having a stash ready for busy weeknights when I need bread on the table fast.
Warm Up: To bring back that fresh-baked taste, warm the rolls in a 300°F oven for about 5-8 minutes if they’re at room temperature, or 10-12 minutes if frozen. You can also microwave them for 15-20 seconds, but the oven gives you that nice crispy outside again.
| Preparation Time | 10-15 minutes |
| Cooking Time | 20-25 minutes |
| Total Time | 30-40 minutes |
| Level of Difficulty | Easy |
Estimated Nutrition
Estimated nutrition for the whole recipe (without optional ingredients):
- Calories: 1350-1500
- Protein: 70-80 g
- Fat: 95-105 g
- Carbohydrates: 35-45 g
Ingredients
For the dough:
- 2 tbsp butter (softened to room temperature)
- 1 large egg white (room temperature, helps bind the dough)
- 1/2 cup coconut flour (finely ground, sifted to remove lumps)
- 1/4 cup whey protein powder (plain, unflavored)
- 8 oz shredded cheddar cheese (I use Kraft for consistent melting)
- 4 tsp baking powder (for proper rise and texture)
- 1/4 tsp salt
- 1 tsp garlic powder (freshly ground preferred)
- 2 large eggs (room temperature)
For the garlic topping:
- 2 tbsp butter (melted and cooled slightly)
- 2 garlic cloves (finely minced into 1/8-inch pieces)
- 1/2 tsp coarse salt (adds nice texture and flavor)
- 1 tbsp parsley (freshly chopped for best flavor)
Step 1: Prepare mise en place and preheat oven
- 8-inch baking pan
- parchment paper
- 2 large eggs
- 1 large egg white
- 1/2 cup coconut flour
- 2 garlic cloves
- 1 tbsp parsley
Preheat your oven to 350°F and line an 8-inch baking pan with parchment paper.
While the oven heats, take all your eggs out of the refrigerator to bring them to room temperature—this helps them incorporate smoothly into the dough and creates a better texture.
Measure out your coconut flour and sift it through a fine-mesh strainer to remove any lumps, as lumpy flour can create dense pockets in your rolls.
Mince your garlic cloves into small, uniform 1/8-inch pieces and finely chop your fresh parsley.
Set all prepped ingredients aside in small bowls.
Step 2: Melt cheese and butter for the dough
- 8 oz shredded cheddar cheese
- 2 tbsp butter
Combine the 8 oz shredded cheddar cheese and 2 tablespoons of softened butter in a microwave-safe bowl.
Microwave in 30-second intervals, stirring between each interval, until completely melted and smooth—this typically takes 1-2 minutes total.
The melted cheese and butter create a rich, cohesive base that binds your keto dough together.
Be careful not to overheat, as this can cause the cheese to separate.
Step 3: Build the dough by combining dry ingredients and wet mixture
- melted cheese and butter mixture from Step 2
- 1/2 cup coconut flour
- 1/4 cup whey protein powder
- 4 tsp baking powder
- 1 tsp garlic powder
- 1/4 tsp salt
- 2 large eggs
- 1 large egg white
Pour the melted cheese and butter into a medium mixing bowl.
Add the sifted coconut flour, whey protein powder, baking powder, garlic powder, and salt.
Stir these dry ingredients into the cheese mixture until well combined and there are no visible streaks of flour.
The mixture should look relatively uniform at this point.
Now add your room-temperature eggs and egg white, and mix vigorously with a wooden spoon or spatula until a thick, cohesive dough forms.
I like to use my hands at the end to bring everything together—the dough should hold together easily and feel slightly tacky but not sticky.
Step 4: Shape dough into rolls and arrange in pan
- dough from Step 3
- neutral oil for hands
Lightly oil your hands with a neutral oil to prevent sticking.
Divide the dough from Step 3 into 8 equal portions—I find it helpful to roughly divide the dough in half, then each half into halves again, then each quarter into two pieces.
Roll each portion between your palms into a smooth ball, applying gentle but consistent pressure.
Arrange all 8 balls in a single layer in your prepared 8-inch pan, spacing them so they’re touching but not crammed together.
They’ll expand slightly as they bake.
Step 5: Apply garlic butter topping and bake
- 2 tbsp butter
- 2 garlic cloves
- 1 tbsp parsley
- 1/2 tsp coarse salt
- rolls from Step 4
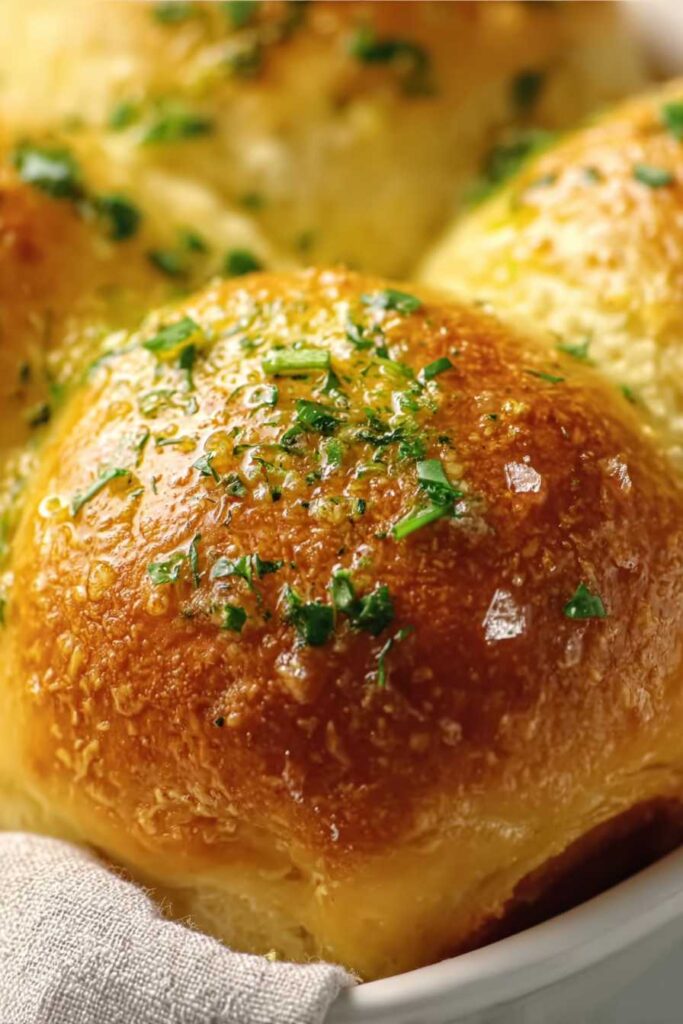
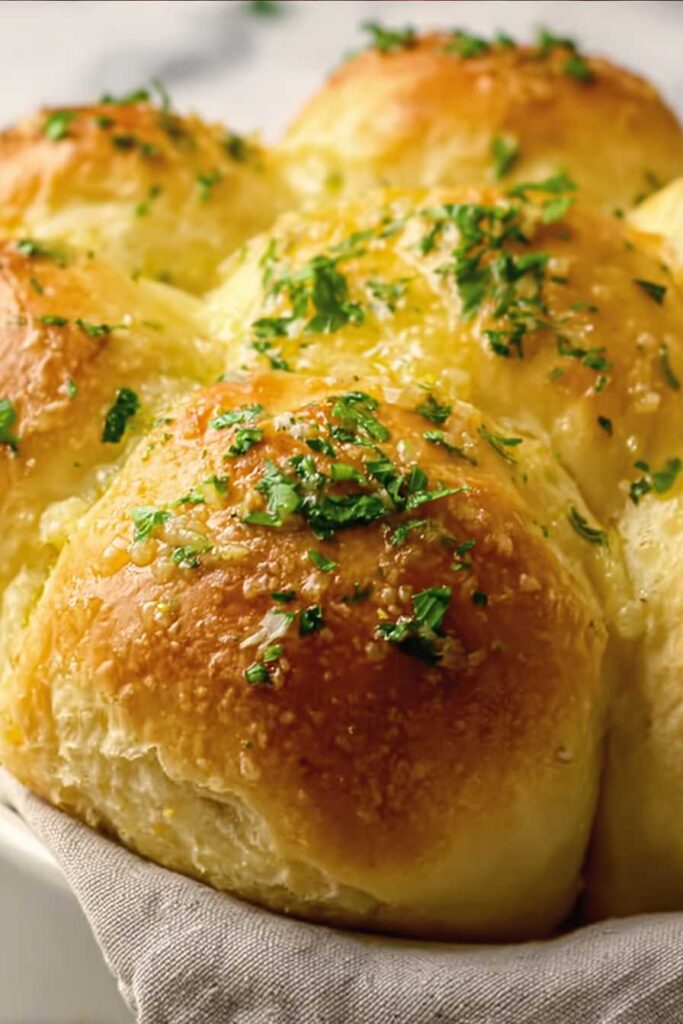
In a small bowl, combine the 2 tablespoons of melted and cooled butter with the minced garlic, chopped parsley, and coarse salt.
Stir well to distribute the garlic and parsley evenly throughout the butter.
Using a pastry brush, apply half of this garlic butter mixture generously over the rolls, brushing each one so they’re evenly coated.
Place the pan in your preheated 350°F oven and bake for 20-25 minutes, until the rolls are golden brown on top and a toothpick inserted into the center comes out clean.
Step 6: Cool and finish with remaining garlic butter
- baked rolls from Step 5
- reserved garlic butter mixture from Step 5
Remove the pan from the oven and let the rolls cool in the pan for 15 minutes—this resting time allows them to set properly and makes them easier to handle.
Using your pastry brush, apply the reserved half of the garlic butter mixture over the warm rolls.
The residual heat will help the butter soak in and infuse more flavor.
Serve the rolls warm, and enjoy their tender, cheesy texture with that delicious garlic herb finish.


