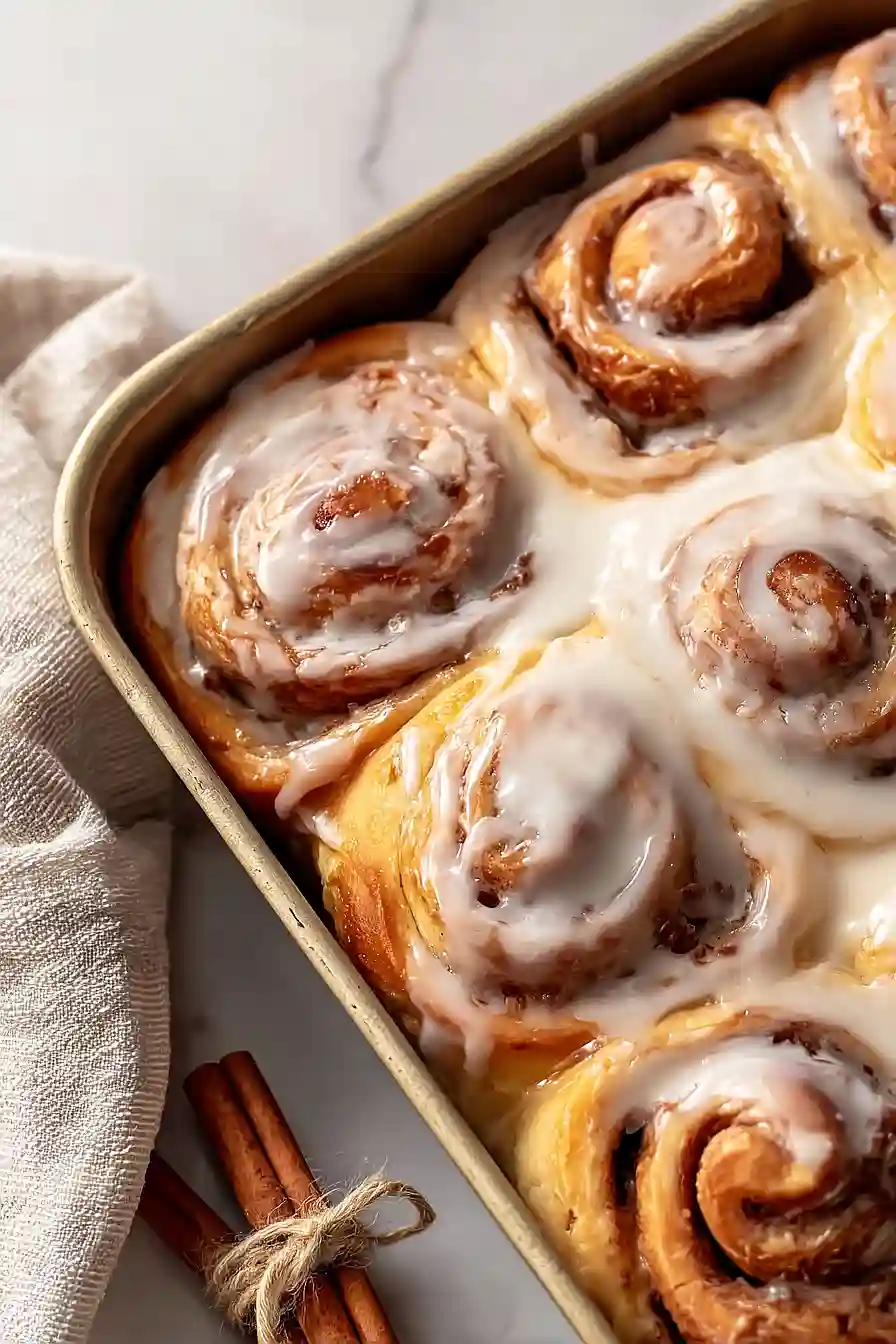
Let’s be honest – croissants are amazing, and cinnamon rolls are amazing, so why not combine them into one seriously good breakfast treat? I know what you’re thinking: making croissants from scratch sounds like a whole day project, and you’re not wrong. But here’s the thing – these croissant cinnamon rolls are totally worth the effort, and they’re actually more approachable than you might think.
The beauty of this recipe is that you get all those buttery, flaky layers of a croissant with the sweet, cinnamon-sugar swirl of a classic cinnamon roll. They take some time, sure, but most of it is hands-off waiting while the dough does its thing. Plus, imagine pulling these out of the oven on a lazy weekend morning – your kitchen will smell incredible, and you’ll feel like a baking rockstar.
Why You’ll Love These Croissant Cinnamon Rolls
- Best of both worlds – These rolls combine the flaky, buttery layers of a croissant with the sweet, cinnamon-sugar goodness of classic cinnamon rolls for a breakfast treat that’s truly special.
- Impressive homemade pastry – While they look and taste like something from a fancy bakery, you can make them right in your own kitchen with straightforward ingredients.
- Perfect for special occasions – Whether it’s a holiday morning, weekend brunch, or just because you’re craving something indulgent, these rolls make any day feel like a celebration.
- Make-ahead friendly – You can prepare these the night before and bake them fresh in the morning, so you wake up to the smell of warm cinnamon rolls without all the early morning work.
What Kind of Butter Should I Use?
For croissant cinnamon rolls, the quality of your butter really matters since it’s a key ingredient in both the dough and the filling. I recommend using unsalted butter so you have better control over the salt content in your recipe, plus it tends to have a fresher, cleaner taste. European-style butter with a higher fat content (around 82-84%) will give you the richest, most authentic croissant flavor and the flakiest layers, but regular American butter (around 80% fat) will still work just fine. Make sure your butter is cold when you’re working it into the dough for those laminated layers, but softened to room temperature when you’re making the cinnamon filling so it spreads easily.
Options for Substitutions
This recipe has some room for flexibility, though a few ingredients are pretty important to keep as-is:
- Butter: You can substitute with margarine if needed, but butter really gives these rolls their rich, flaky texture. I’d recommend sticking with butter if possible for the best results.
- Milk: Any type of milk works here – whole, 2%, or even non-dairy options like almond or oat milk. Just make sure it’s at room temperature or slightly warm when activating the yeast.
- Yeast: Active dry yeast is what you need here – don’t skip it or substitute with baking powder, as the yeast is what makes these rolls rise and get that nice texture.
- Canola oil: Feel free to swap this with vegetable oil, melted coconut oil, or even melted butter if that’s what you have on hand.
- Brown sugar: If you’re out of brown sugar for the filling, you can mix white sugar with a tablespoon of molasses, or just use regular white sugar – the flavor will be slightly less rich but still tasty.
- Vanilla essence: Vanilla extract works just as well as essence. You can also try almond extract for a different flavor profile, but use half the amount as it’s stronger.
Watch Out for These Mistakes While Baking
The biggest mistake with croissant cinnamon rolls is letting your butter get too warm during the lamination process, which causes it to blend into the dough instead of creating those flaky layers – keep everything cold and work quickly, popping the dough back in the fridge if the butter starts to soften.
Another common error is skipping the resting times between folds, as these chilling periods allow the gluten to relax and prevent the dough from shrinking back when you roll it out.
When rolling your dough into a log, roll it tightly but not so tight that the filling squeezes out the sides, and use unflavored dental floss or a sharp knife to slice the rolls cleanly without squashing them.
Finally, don’t rush the final proof after removing the rolls from the fridge – giving them a full 30 minutes to warm up and puff slightly ensures they bake up light and tender rather than dense.

What to Serve With Croissant Cinnamon Rolls?
These croissant cinnamon rolls are pretty rich and sweet on their own, so I like to keep the sides simple and let them be the star of the breakfast table. A hot cup of coffee or a cold glass of milk is really all you need to balance out the buttery, cinnamon-sugar goodness. If you’re serving these for brunch, fresh fruit like berries or sliced oranges adds a nice refreshing contrast without competing with the rolls. You could also set out some scrambled eggs and crispy bacon on the side if you want to make it a more complete meal, but honestly, these rolls are so satisfying that they work perfectly as a standalone treat.
Storage Instructions
Store: Keep your croissant cinnamon rolls in an airtight container at room temperature for up to 2 days, or in the fridge for up to 5 days. They’re honestly best enjoyed within the first day or two when they’re still soft and tender.
Freeze: These freeze really well for up to 2 months. You can freeze them before or after adding the icing – I usually freeze them without icing and add it fresh when I’m ready to eat. Just wrap them individually in plastic wrap, then place in a freezer bag.
Warm Up: To bring back that fresh-baked taste, warm them in the microwave for about 15-20 seconds, or in a 300°F oven for 5-7 minutes. If they’re frozen, let them thaw at room temperature first, then warm them up. The icing will get a little melty, which honestly makes them even better!
| Preparation Time | 180-240 minutes |
| Cooking Time | 40-50 minutes |
| Total Time | 220-290 minutes |
| Level of Difficulty | Hard |
| Servings | 14 rolls |
Estimated Nutrition
Estimated nutrition for the whole recipe (without optional ingredients):
- Calories: 4700-5000
- Protein: 60-70 g
- Fat: 200-220 g
- Carbohydrates: 680-720 g
Ingredients
For the flour paste:
- 1/2 cup flour (I always use King Arthur all-purpose flour)
- 1 1/4 cups milk
For the dough:
- 1/4 cup water (warmed to 105-115°F to bloom the yeast)
- 1 packet yeast
- 4 1/4 cups flour
- 1/2 cup sugar
- 2 eggs (room temperature, about 70°F for better emulsion)
- 1/4 cup canola oil
- 3/4 tsp salt
For the butter layer:
- 1/2 cup butter (I like Kerrygold unsalted butter for this)
For the filling:
- 3/4 cup butter (softened to a spreadable consistency)
- 1 cup brown sugar
- 1 1/2 tbsp cinnamon
For the glaze:
- 1 1/2 cups powdered sugar (sifted to remove lumps)
- 2 tsp vanilla
- 1 pinch salt
- 3 tbsp milk
Step 1: Create the Tangzhong Base and Activate the Yeast
- 1/2 cup flour
- 1 1/4 cups milk
- 1/4 cup water
- 1 packet yeast
- 1/2 cup sugar
In a small saucepan, combine 1/2 cup flour with 1 1/4 cups milk over medium heat, stirring constantly until the mixture thickens into a paste (about 3-5 minutes).
This tangzhong base will add moisture and richness to your dough.
Transfer to a bowl and let cool to room temperature.
In a separate bowl, combine 1 packet yeast with 1/4 cup warm water (105-115°F) and 1/2 cup sugar, stirring gently.
Let sit for 3 minutes until foamy—this confirms your yeast is active and ready to work.
Step 2: Mix and Knead the Dough
- tangzhong base from Step 1
- yeast mixture from Step 1
- 4 1/4 cups flour
- 2 eggs
- 1/4 cup canola oil
- 3/4 tsp salt
Combine the cooled tangzhong base with the yeast mixture in a large bowl.
Add 4 1/4 cups flour, 2 room-temperature eggs, 1/4 cup canola oil, and 3/4 tsp salt.
Mix until shaggy, then knead for 5-7 minutes until the dough becomes smooth and elastic.
I like to use a stand mixer with a dough hook for this step—it saves time and gives consistent results.
The dough should be slightly sticky but hold together when pressed.
Step 3: Bulk Ferment the Dough
- dough from Step 2
- 1/2 cup butter
Place the kneaded dough from Step 2 in a lightly oiled bowl, cover with plastic wrap or a damp towel, and let rise at room temperature for 2 hours until roughly doubled in size.
While the dough rises, prepare your lamination butter by placing 1/2 cup cold butter between two sheets of parchment paper and gently pound and roll it into a 9×12-inch rectangle using a rolling pin or meat mallet.
Chill this butter block in the refrigerator for at least 20 minutes—it should be cold but still pliable, not rock hard.
Step 4: Laminate the Dough with Butter (First Fold)
- dough from Step 3
- butter block from Step 3
Turn the risen dough from Step 3 onto a lightly floured surface and gently roll into a 13×18-inch rectangle.
Remove the chilled butter block from its parchment and place it on the lower two-thirds of the dough rectangle.
Fold the top third of dough down over the butter, then fold the bottom third up to create a letter-fold (like folding a business letter).
Press the edges gently to seal the butter inside.
Fold the dough in half lengthwise and wrap in plastic wrap, then refrigerate for 30 minutes.
Step 5: Complete the Lamination Process
- dough from Step 4
Remove the dough from the refrigerator and roll it out again into a rectangle, then fold it into a square shape (folding as if sealing an envelope from all sides).
This second fold develops the croissant layers.
Wrap the dough and refrigerate for 45 minutes.
This resting period is crucial—it allows the gluten to relax and the butter to stay separate from the dough, which creates those beautiful flaky layers.
Step 6: Shape and Fill the Rolls
- dough from Step 5
- 3/4 cup butter
- 1 cup brown sugar
- 1 1/2 tbsp cinnamon
Remove the laminated dough from the refrigerator and roll it into a large rectangle (approximately 12×18 inches).
While the dough rests, prepare your cinnamon filling by mixing 3/4 cup softened butter with 1 cup brown sugar and 1 1/2 tbsp cinnamon until well combined.
Spread this filling evenly over the entire dough surface, leaving a small border on one long edge.
Starting from the opposite long edge, tightly roll the dough into a log, then slice into 1-inch thick pieces using a sharp knife (I like to use a serrated knife and let it do the work rather than sawing).
Place the rolls cut-side up in a parchment-lined 9×13-inch baking dish, cover loosely with plastic wrap, and refrigerate for 12 hours or overnight.
Step 7: Proof, Bake, and Frost
- rolls from Step 6
- 1 1/2 cups powdered sugar
- 2 tsp vanilla
- 1 pinch salt
- 3 tbsp milk
Remove the rolls from the refrigerator and let them sit at room temperature for 30 minutes to allow them to proof slightly and come closer to room temperature.
Preheat your oven to 350°F.
Bake the rolls for 40 minutes until golden brown and cooked through.
While they bake, prepare the cream cheese frosting by whisking together 1 1/2 cups sifted powdered sugar, 2 tsp vanilla, 1 pinch salt, and 3 tbsp milk until smooth and spreadable.
Once the rolls are out of the oven and still warm, spread the frosting generously over the top of each roll, allowing it to melt slightly into the crevices.
Let cool for a few minutes before serving.
Perfect Croissant Cinnamon Rolls
Ingredients
For the flour paste::
- 1/2 cup flour (I always use King Arthur all-purpose flour)
- 1 1/4 cups milk
For the dough::
- 1/4 cup water (warmed to 105-115°F to bloom the yeast)
- 1 packet yeast
- 4 1/4 cups flour
- 1/2 cup sugar
- 2 eggs (room temperature, about 70°F for better emulsion)
- 1/4 cup canola oil
- 3/4 tsp salt
For the butter layer::
- 1/2 cup butter (I like Kerrygold unsalted butter for this)
For the filling::
- 3/4 cup butter (softened to a spreadable consistency)
- 1 cup brown sugar
- 1 1/2 tbsp cinnamon
For the glaze::
- 1 1/2 cups powdered sugar (sifted to remove lumps)
- 2 tsp vanilla
- 1 pinch salt
- 3 tbsp milk
Instructions
- In a small saucepan, combine 1/2 cup flour with 1 1/4 cups milk over medium heat, stirring constantly until the mixture thickens into a paste (about 3-5 minutes). This tangzhong base will add moisture and richness to your dough. Transfer to a bowl and let cool to room temperature. In a separate bowl, combine 1 packet yeast with 1/4 cup warm water (105-115°F) and 1/2 cup sugar, stirring gently. Let sit for 3 minutes until foamy—this confirms your yeast is active and ready to work.
- Combine the cooled tangzhong base with the yeast mixture in a large bowl. Add 4 1/4 cups flour, 2 room-temperature eggs, 1/4 cup canola oil, and 3/4 tsp salt. Mix until shaggy, then knead for 5-7 minutes until the dough becomes smooth and elastic. I like to use a stand mixer with a dough hook for this step—it saves time and gives consistent results. The dough should be slightly sticky but hold together when pressed.
- Place the kneaded dough from Step 2 in a lightly oiled bowl, cover with plastic wrap or a damp towel, and let rise at room temperature for 2 hours until roughly doubled in size. While the dough rises, prepare your lamination butter by placing 1/2 cup cold butter between two sheets of parchment paper and gently pound and roll it into a 9x12-inch rectangle using a rolling pin or meat mallet. Chill this butter block in the refrigerator for at least 20 minutes—it should be cold but still pliable, not rock hard.
- Turn the risen dough from Step 3 onto a lightly floured surface and gently roll into a 13x18-inch rectangle. Remove the chilled butter block from its parchment and place it on the lower two-thirds of the dough rectangle. Fold the top third of dough down over the butter, then fold the bottom third up to create a letter-fold (like folding a business letter). Press the edges gently to seal the butter inside. Fold the dough in half lengthwise and wrap in plastic wrap, then refrigerate for 30 minutes.
- Remove the dough from the refrigerator and roll it out again into a rectangle, then fold it into a square shape (folding as if sealing an envelope from all sides). This second fold develops the croissant layers. Wrap the dough and refrigerate for 45 minutes. This resting period is crucial—it allows the gluten to relax and the butter to stay separate from the dough, which creates those beautiful flaky layers.
- Remove the laminated dough from the refrigerator and roll it into a large rectangle (approximately 12x18 inches). While the dough rests, prepare your cinnamon filling by mixing 3/4 cup softened butter with 1 cup brown sugar and 1 1/2 tbsp cinnamon until well combined. Spread this filling evenly over the entire dough surface, leaving a small border on one long edge. Starting from the opposite long edge, tightly roll the dough into a log, then slice into 1-inch thick pieces using a sharp knife (I like to use a serrated knife and let it do the work rather than sawing). Place the rolls cut-side up in a parchment-lined 9x13-inch baking dish, cover loosely with plastic wrap, and refrigerate for 12 hours or overnight.
- Remove the rolls from the refrigerator and let them sit at room temperature for 30 minutes to allow them to proof slightly and come closer to room temperature. Preheat your oven to 350°F. Bake the rolls for 40 minutes until golden brown and cooked through. While they bake, prepare the cream cheese frosting by whisking together 1 1/2 cups sifted powdered sugar, 2 tsp vanilla, 1 pinch salt, and 3 tbsp milk until smooth and spreadable. Once the rolls are out of the oven and still warm, spread the frosting generously over the top of each roll, allowing it to melt slightly into the crevices. Let cool for a few minutes before serving.


