Nothing beats the smell of fresh bread baking in the oven. It fills the whole house and makes everyone gather in the kitchen asking when dinner will be ready. These old fashioned dinner rolls remind me of Sunday dinners growing up, when we’d pile around the table and fight over the last warm roll.
I’ve tried plenty of dinner roll recipes over the years, but I keep coming back to this one. It’s the kind of recipe that doesn’t need fancy ingredients or complicated steps. Just basic pantry staples and a little patience while the dough rises. The rolls come out soft and fluffy every time, with that perfect golden crust that makes you want to slather them with butter right away.
What I love most is how these rolls make any regular weeknight dinner feel special. Whether you’re serving them with soup, pasta, or just want fresh bread on the table, they turn a simple meal into something memorable.

Why You’ll Love These Dinner Rolls
- Soft, fluffy texture – These rolls come out perfectly tender and light every time, with that classic homemade bread taste that store-bought versions just can’t match.
- Simple pantry ingredients – You probably already have everything you need in your kitchen – no special flours or hard-to-find ingredients required.
- Perfect for any occasion – Whether it’s a holiday dinner, Sunday meal, or just a regular weeknight, these rolls make every meal feel a little more special.
- Make-ahead friendly – You can prepare the dough earlier in the day or even freeze the shaped rolls for later, making dinner prep so much easier.
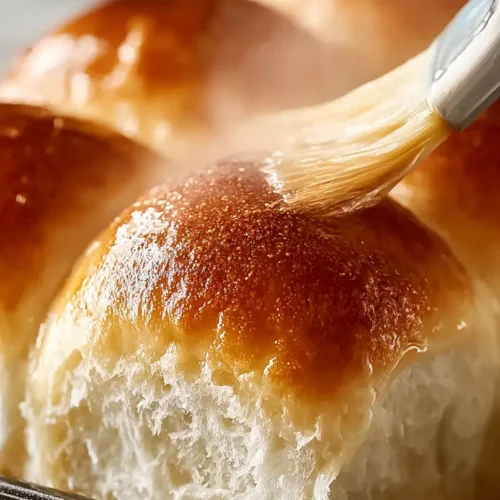
- Golden, buttery tops – The melted butter brushed on top gives these rolls a beautiful golden color and adds that extra touch of richness everyone loves.
What Kind of Flour Should I Use?
All-purpose flour is perfect for these dinner rolls and will give you that classic soft, tender texture you’re looking for. You don’t need to get fancy with bread flour here – regular all-purpose flour from any brand will work just fine. If you’re measuring by cups rather than weight, make sure not to pack the flour down when scooping, as this can make your rolls dense. A light scoop and level method works best, or even better, use a kitchen scale if you have one since the recipe provides weights. The key is getting the right flour-to-liquid ratio so your dough isn’t too sticky or too dry.

Options for Substitutions
These classic dinner rolls are pretty forgiving when it comes to swaps, but there are a few key ingredients you’ll want to keep as-is:
- Active dry yeast: You can substitute with instant yeast using the same amount, but don’t skip the yeast entirely – it’s what makes these rolls fluffy and light. If using instant yeast, you can mix it directly with the flour instead of proofing it first.
- Honey: Sugar works just as well here – use 3 tablespoons of granulated sugar instead of the honey. You could also try maple syrup or agave nectar for a different flavor twist.
- All-purpose flour: Bread flour will give you chewier, more structured rolls if that’s your preference. You can also substitute up to 1 cup with whole wheat flour for a heartier texture, though the rolls will be slightly denser.
- Salted butter: Unsalted butter works fine – just add an extra pinch of salt to the dough. In a pinch, you can use vegetable oil (about 6 tablespoons), but you’ll lose some of that rich, buttery flavor.
- Eggs: For each egg, you can substitute with ¼ cup applesauce or 3 tablespoons of water mixed with 1 tablespoon ground flaxseed (let it sit for 5 minutes first).
Watch Out for These Mistakes While Baking
The biggest mistake when making dinner rolls is using water that’s too hot, which will kill your yeast – aim for water that feels like a warm bath (100-110°F) and always test it with a thermometer if you’re unsure.
Another common error is not kneading the dough long enough, so make sure to knead for at least 8-10 minutes until the dough becomes smooth and elastic, or it passes the windowpane test where you can stretch a small piece thin enough to see through.
Don’t rush the rising process even if you’re short on time – your rolls need to double in size during both rises, and placing them in a slightly warm (but turned off) oven can help speed things up safely.
Finally, resist the urge to open the oven door during the first 15 minutes of baking, as this can cause your rolls to collapse, and brush them with melted butter immediately after they come out for that perfect golden finish.

What to Serve With Dinner Rolls?
These soft, buttery dinner rolls are perfect alongside just about any main dish you can think of! They’re amazing for soaking up gravy at Thanksgiving dinner, or for wiping your plate clean after a hearty pot roast or chicken dinner. I love serving them with soups and stews since they’re perfect for dunking, and they make any weeknight meal feel a little more special. You can also slice them open and use them for mini sandwiches with leftover turkey or ham, or just enjoy them warm with a pat of butter and some jam.
Storage Instructions
Keep Fresh: These dinner rolls stay soft and delicious when stored in an airtight container or covered with a clean kitchen towel at room temperature for up to 3 days. I like to brush the tops with a little melted butter before covering to keep them extra tender.
Freeze: You can freeze these rolls either baked or unbaked! For baked rolls, wrap them tightly in plastic wrap and freeze for up to 3 months. For unbaked rolls, shape them and place on a baking sheet to freeze solid, then transfer to freezer bags – they’ll keep for up to 2 months.
Warm Up: To bring back that fresh-from-the-oven taste, wrap the rolls in foil and warm them in a 350°F oven for about 10 minutes. If they’re frozen, let them thaw first or add a few extra minutes to the warming time. A quick brush of melted butter on top makes them taste like new again!
| Preparation Time | 25-35 minutes |
| Cooking Time | 15-16 minutes |
| Total Time | 105-116 minutes |
| Level of Difficulty | Medium |
Estimated Nutrition
Estimated nutrition for the whole recipe (without optional ingredients):
- Calories: 4200-4500
- Protein: 80-90 g
- Fat: 130-145 g
- Carbohydrates: 690-740 g
Ingredients
For the dough:
- 2 cups warm water (100–110°F, ideal for yeast activation)
- 4 tsp active dry yeast (fresh and not expired)
- 7 cups all-purpose flour (I prefer King Arthur all-purpose)
- 2 1/2 tsp salt
- 1/4 cup honey (I use raw honey for better fermentation)
- 1/2 cup salted butter (room temperature for smooth mixing)
- 2 eggs (room temperature)
For the finishing:
- 3–4 tbsp melted butter (for brushing tops before baking)
Step 1: Activate the Yeast and Mix the Dough
- 2 cups warm water
- 1/4 cup honey
- 4 tsp active dry yeast
- 1/2 cup salted butter
- 2 eggs
- 2 1/2 tsp salt
- 7 cups all-purpose flour
Pour the warm water into a large bowl and stir in the honey until dissolved.
Sprinkle the active dry yeast over the mixture and let it sit undisturbed for 5 minutes—this bloom period allows the yeast to activate and ensures a strong rise.
While waiting, cut the room-temperature butter into small pieces.
After 5 minutes, add the butter, eggs, and salt to the yeast mixture, then add the flour gradually while stirring.
Once the flour is incorporated, knead the dough by hand for 7–10 minutes (or 5–7 minutes with a stand mixer on medium speed) until it becomes smooth and elastic.
The dough should be slightly tacky but not sticky—this is where the magic happens for tender rolls.
Step 2: First Rise in Bulk
- dough from Step 1
- oil for coating bowl
Transfer the kneaded dough from Step 1 into a lightly oiled bowl, turning it once to coat all sides with oil.
This prevents a dry crust from forming on top.
Cover the bowl loosely with a damp kitchen towel or plastic wrap and let it rise in a warm, draft-free spot for about 1 hour, until the dough has roughly doubled in size.
I like to let my dough rise on the counter near a sunny window—the gentle warmth gives it a beautiful, even rise without overdoing it.
Step 3: Divide and Shape the Rolls
- risen dough from Step 2
Turn the risen dough out onto a clean, lightly floured work surface.
Divide it into 30 equal pieces—I find it helpful to cut the dough in half, then in half again, then into smaller sections to ensure even sizing.
Roll each piece into a tight ball by cupping it in your palm and rolling it toward you, creating surface tension.
This shaping technique gives the rolls that classic, neat appearance and helps them rise evenly in the pan.
Step 4: Second Rise in the Pan
- shaped rolls from Step 3
Arrange the shaped dough balls in a greased 9×13-inch baking pan (or similar size—they should fit snugly with just a little room to expand).
Cover the pan loosely with a damp towel or plastic wrap and let the rolls rise for another hour in a warm spot until they’re puffy and touching each other.
About 10–15 minutes before the rolls finish rising, preheat your oven to 375°F so it reaches temperature right when they’re ready to bake.
Step 5: Bake and Finish
- risen rolls from Step 4
- 3–4 tbsp melted butter
Bake the rolls at 375°F for 15–16 minutes until the tops are golden brown and the rolls are set but still tender.
They should sound slightly hollow when tapped on the bottom.
Remove them from the oven and immediately brush the hot rolls generously with the melted butter.
This brush of butter not only adds richness but also keeps the crust soft and gives them that bakery-quality finish.
Serve them warm for the best flavor and texture.
Perfect Old Fashioned Dinner Rolls
Ingredients
Dough
- 2 cups warm water (100–110°F, ideal for yeast activation)
- 4 tsp active dry yeast (fresh and not expired)
- 7 cups all-purpose flour (I prefer King Arthur all-purpose)
- 2 1/2 tsp salt
- 1/4 cup honey (I use raw honey for better fermentation)
- 1/2 cup salted butter (room temperature for smooth mixing)
- 2 eggs (room temperature)
Finishing
- 3–4 tbsp melted butter (for brushing tops before baking)
Instructions
- Pour the warm water into a large bowl and stir in the honey until dissolved. Sprinkle the active dry yeast over the mixture and let it sit undisturbed for 5 minutes—this bloom period allows the yeast to activate and ensures a strong rise. While waiting, cut the room-temperature butter into small pieces. After 5 minutes, add the butter, eggs, and salt to the yeast mixture, then add the flour gradually while stirring. Once the flour is incorporated, knead the dough by hand for 7–10 minutes (or 5–7 minutes with a stand mixer on medium speed) until it becomes smooth and elastic. The dough should be slightly tacky but not sticky—this is where the magic happens for tender rolls.
- Transfer the kneaded dough from Step 1 into a lightly oiled bowl, turning it once to coat all sides with oil. This prevents a dry crust from forming on top. Cover the bowl loosely with a damp kitchen towel or plastic wrap and let it rise in a warm, draft-free spot for about 1 hour, until the dough has roughly doubled in size. I like to let my dough rise on the counter near a sunny window—the gentle warmth gives it a beautiful, even rise without overdoing it.
- Turn the risen dough out onto a clean, lightly floured work surface. Divide it into 30 equal pieces—I find it helpful to cut the dough in half, then in half again, then into smaller sections to ensure even sizing. Roll each piece into a tight ball by cupping it in your palm and rolling it toward you, creating surface tension. This shaping technique gives the rolls that classic, neat appearance and helps them rise evenly in the pan.
- Arrange the shaped dough balls in a greased 9×13-inch baking pan (or similar size—they should fit snugly with just a little room to expand). Cover the pan loosely with a damp towel or plastic wrap and let the rolls rise for another hour in a warm spot until they’re puffy and touching each other. About 10–15 minutes before the rolls finish rising, preheat your oven to 375°F so it reaches temperature right when they’re ready to bake.
- Bake the rolls at 375°F for 15–16 minutes until the tops are golden brown and the rolls are set but still tender. They should sound slightly hollow when tapped on the bottom. Remove them from the oven and immediately brush the hot rolls generously with the melted butter. This brush of butter not only adds richness but also keeps the crust soft and gives them that bakery-quality finish. Serve them warm for the best flavor and texture.


How can I print your recipe I hate Pinterest anymore because of too many pop-up ads
I want to make the dough ahead and freeze the shaped balls. They need to rise a second time, correct? The instructions don’t say that explicitly.