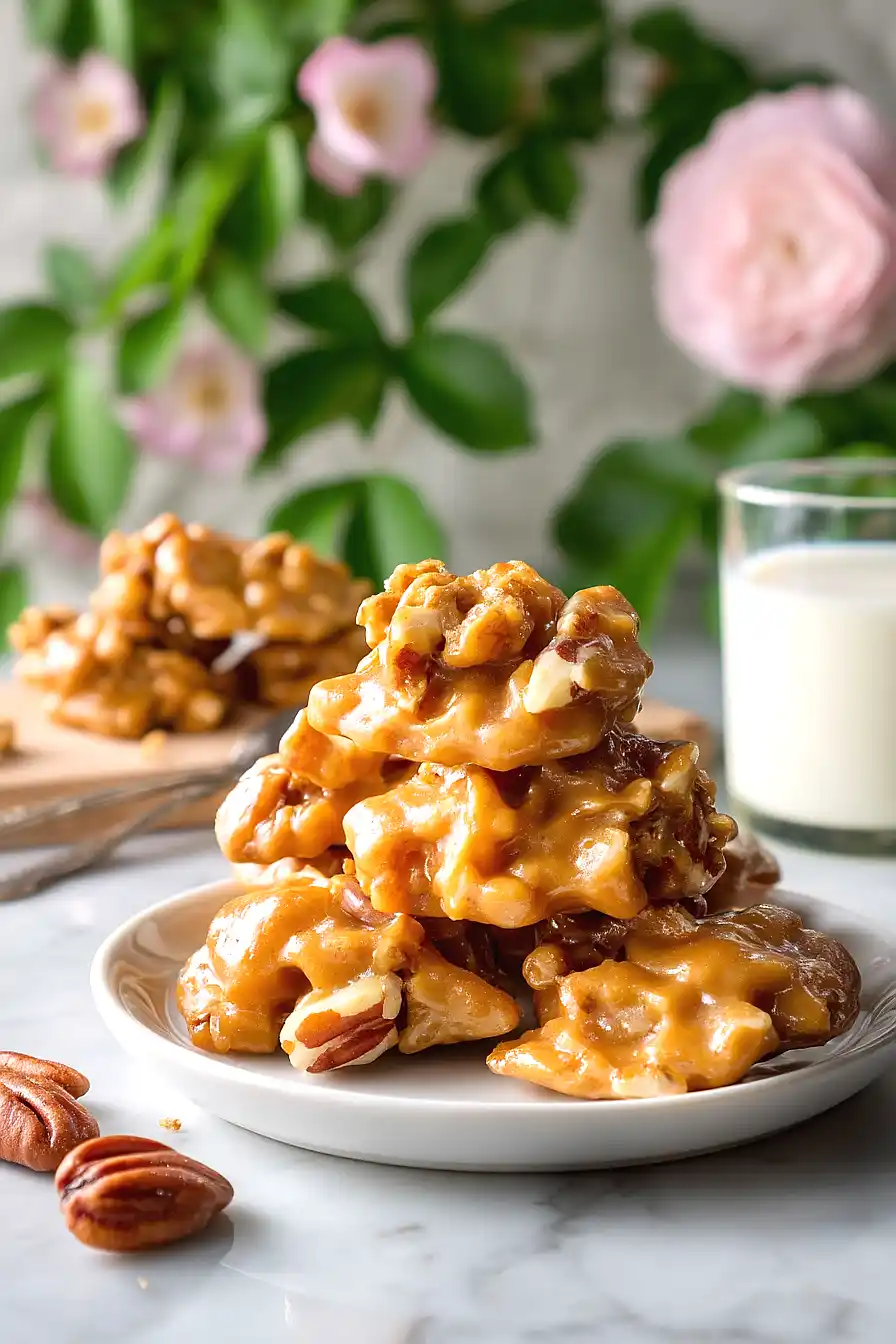
If you ask me, pralines are one of the best Southern treats you can make at home.
These buttermilk pecan pralines have a creamy, melt-in-your-mouth texture that’s hard to beat. The buttermilk adds a slight tang that balances out the sweetness, while the pecans give you that satisfying crunch in every bite.
They come together with just a handful of ingredients and a candy thermometer. The baking soda creates a lighter, more tender praline that’s not too heavy or tooth-achingly sweet.
They’re perfect for gifting during the holidays or just keeping around for when you need something sweet with your afternoon coffee.
Why You’ll Love These Buttermilk Pecan Pralines
- Quick and easy – These pralines come together in under 45 minutes, making them perfect for last-minute gift giving or when you need a sweet treat fast.
- Simple ingredients – You probably have most of these pantry staples on hand already, and the ingredient list is refreshingly short.
- Classic Southern candy – The buttermilk gives these pralines a unique tangy flavor that sets them apart from regular pralines, creating that perfect balance of sweet and creamy.
- Great for gifting – These homemade candies look impressive and taste even better, making them ideal for holidays, parties, or sharing with friends and neighbors.
- No special equipment needed – All you need is a pot and a spoon to make these delicious pralines—no candy thermometer required if you know what to look for.
What Kind of Pecans Should I Use?
For pralines, you’ll want to use fresh pecan halves rather than pieces, as they look better and hold up nicely in the candy. If your pecans have been sitting in the pantry for a while, give them a taste first to make sure they haven’t gone rancid – pecans have a high oil content and can turn bitter over time. You can store pecans in the freezer for up to a year to keep them fresh, and there’s no need to thaw them before using in this recipe. Some folks like to toast their pecans beforehand for extra flavor, but it’s totally optional since they’ll cook a bit in the hot sugar mixture anyway.
Options for Substitutions
While pralines are pretty traditional, here are a few swaps you can make if needed:
- Buttermilk: Don’t skip the buttermilk – it’s what gives these pralines their signature creamy texture and slight tang. If you’re out, make your own by mixing 2/3 cup regular milk with 2 teaspoons of white vinegar or lemon juice. Let it sit for 5 minutes before using.
- Pecan halves: Pecans are classic, but walnuts work great too. You can also try a mix of pecans and walnuts, or even use toasted almonds for something different.
- Salted butter: If you only have unsalted butter, go ahead and use it – just add a tiny pinch of salt to the mixture.
- Baking soda: The baking soda is important here as it reacts with the buttermilk to create the right texture, so I wouldn’t recommend substituting it.
- Granulated sugar: Stick with granulated sugar for this recipe – brown sugar or other sweeteners will change the texture and crystallization process that makes pralines work.
Watch Out for These Mistakes While Cooking
The biggest mistake when making pralines is not using a candy thermometer, which can lead to pralines that never set up properly or become rock-hard – you need to cook the mixture to exactly 236°F (soft ball stage) for that perfect creamy texture.
Stirring too much or too early will cause sugar crystals to form and make your pralines grainy instead of smooth, so resist the urge to stir constantly and only beat the mixture vigorously once it’s off the heat and has cooled slightly.
Another common error is waiting too long to drop the pralines onto your parchment paper – once the mixture starts to thicken and lose its gloss, you’ve got about 30 seconds to work before it hardens in the pot.
If your first batch doesn’t turn out, don’t worry – praline-making is all about timing and practice, and even experienced candy makers sometimes need to adjust for humidity and temperature in their kitchen.

What to Serve With Buttermilk Pecan Pralines?
These pralines are perfect on their own as a sweet treat with your afternoon coffee or tea, but they also make a great topping for vanilla ice cream or pound cake. I love crumbling them over yogurt parfaits in the morning for a special breakfast, or packing a few in a small box as homemade gifts for friends and neighbors. They’re also really nice served alongside other Southern desserts at a gathering, like peach cobbler or banana pudding, since the buttery pecan flavor complements just about any classic dessert.
Storage Instructions
Store: Keep your pralines in an airtight container at room temperature for up to 2 weeks. I like to layer them between sheets of wax paper or parchment to keep them from sticking together. They’ll stay creamy and delicious as long as you keep moisture out.
Freeze: Pralines freeze really well if you want to make them ahead for gifts or holidays. Wrap them individually in wax paper, then store in a freezer-safe container for up to 3 months. They thaw quickly at room temperature in about 15-20 minutes.
Gift Tip: If you’re giving these as gifts, wait until they’re completely set and cooled before packaging. Store them in a cool, dry place and avoid humid conditions, which can make them sticky or grainy. A tin or glass jar works great for keeping them fresh.
| Preparation Time | 10-15 minutes |
| Cooking Time | 20-30 minutes |
| Total Time | 30-45 minutes |
| Level of Difficulty | Medium |
| Servings | 30 pieces |
Estimated Nutrition
Estimated nutrition for the whole recipe (without optional ingredients):
- Calories: 2600-2800
- Protein: 18-22 g
- Fat: 125-135 g
- Carbohydrates: 360-380 g
Ingredients
- 2 cups sugar
- 1/3 tsp vanilla extract (pure vanilla, not imitation)
- 2 tbsp salted butter (I use Kerrygold for richer flavor)
- 2/3 tsp baking soda
- 2/3 cup buttermilk (adds tanginess and creates tender texture)
- 2 cups pecan halves (raw, not roasted for best texture)
Step 1: Prepare Your Workspace and Mise en Place
- Parchment paper
- Candy thermometer
- Pastry brush
Line a baking sheet with parchment paper and set it nearby—you’ll need it ready when the pralines reach the right consistency.
Measure out all your ingredients: sugar, buttermilk, butter, baking soda, vanilla extract, and pecans.
Have a candy thermometer ready and a wet pastry brush for brushing down the pan sides.
This preparation ensures you won’t scramble for supplies once the cooking begins, which is critical when working with hot sugar syrup.
Step 2: Combine and Dissolve the Base Ingredients
- 2 cups sugar
- 2/3 cup buttermilk
- 2 tbsp salted butter
- 2/3 tsp baking soda
In a heavy-bottomed saucepan, combine the sugar, buttermilk, salted butter, and baking soda.
The buttermilk’s acidity reacts with the baking soda to create a gentle foam—this is what gives these pralines their signature tender, almost creamy texture.
Heat over medium, stirring constantly with a wooden spoon until all the sugar dissolves and the mixture is smooth and uniform.
This usually takes 3–5 minutes.
I like to use Kerrygold butter here because its higher fat content creates a richer, more luxurious final candy.
Step 3: Cook the Mixture to Soft-Ball Stage
- Wet pastry brush
- Candy thermometer
Once the sugar is fully dissolved, stop stirring and insert your candy thermometer into the mixture, making sure it doesn’t touch the bottom of the pan.
Increase the heat to medium-high and allow the mixture to cook undisturbed.
As it heats, sugar crystals may form on the sides of the pan—use a wet pastry brush to gently brush them back into the mixture every minute or so to prevent graininess.
Cook until the thermometer reads 236°F (soft-ball stage), which usually takes 8–12 minutes depending on your stove.
This temperature is crucial: it ensures the pralines will set to the right fudgy texture without becoming rock-hard.
Step 4: Add Vanilla and Pecans, Then Beat to Thickening Point
- 1/3 tsp vanilla extract
- 2 cups pecan halves
Remove the pan from heat and let it cool for about 30 seconds—this prevents the vanilla from evaporating.
Stir in the vanilla extract and the raw pecan halves, folding them in gently but thoroughly.
Begin stirring constantly with a wooden spoon, using broad, deliberate strokes to incorporate air and encourage the mixture to thicken.
The mixture will gradually lose its glossy sheen and become noticeably thicker and more opaque—this is exactly what you want.
I find that raw pecans work better than roasted ones here because they absorb the sweet coating more evenly and maintain a firmer texture.
Keep stirring for 3–5 minutes until the mixture is thick enough that when you lift a spoonful, the candy holds together rather than running off the spoon.
Step 5: Portion and Set the Pralines
Working quickly while the mixture is still warm and pliable, use a spoon to drop roughly 1-inch mounds of the pecan mixture onto your prepared parchment paper, spacing them about 1 inch apart.
The mixture will firm up as it cools, so work with purpose but without rushing—you have several minutes before it becomes too stiff.
If the mixture gets too thick to scoop easily, you can gently reheat it for 10–15 seconds over low heat to soften it slightly.
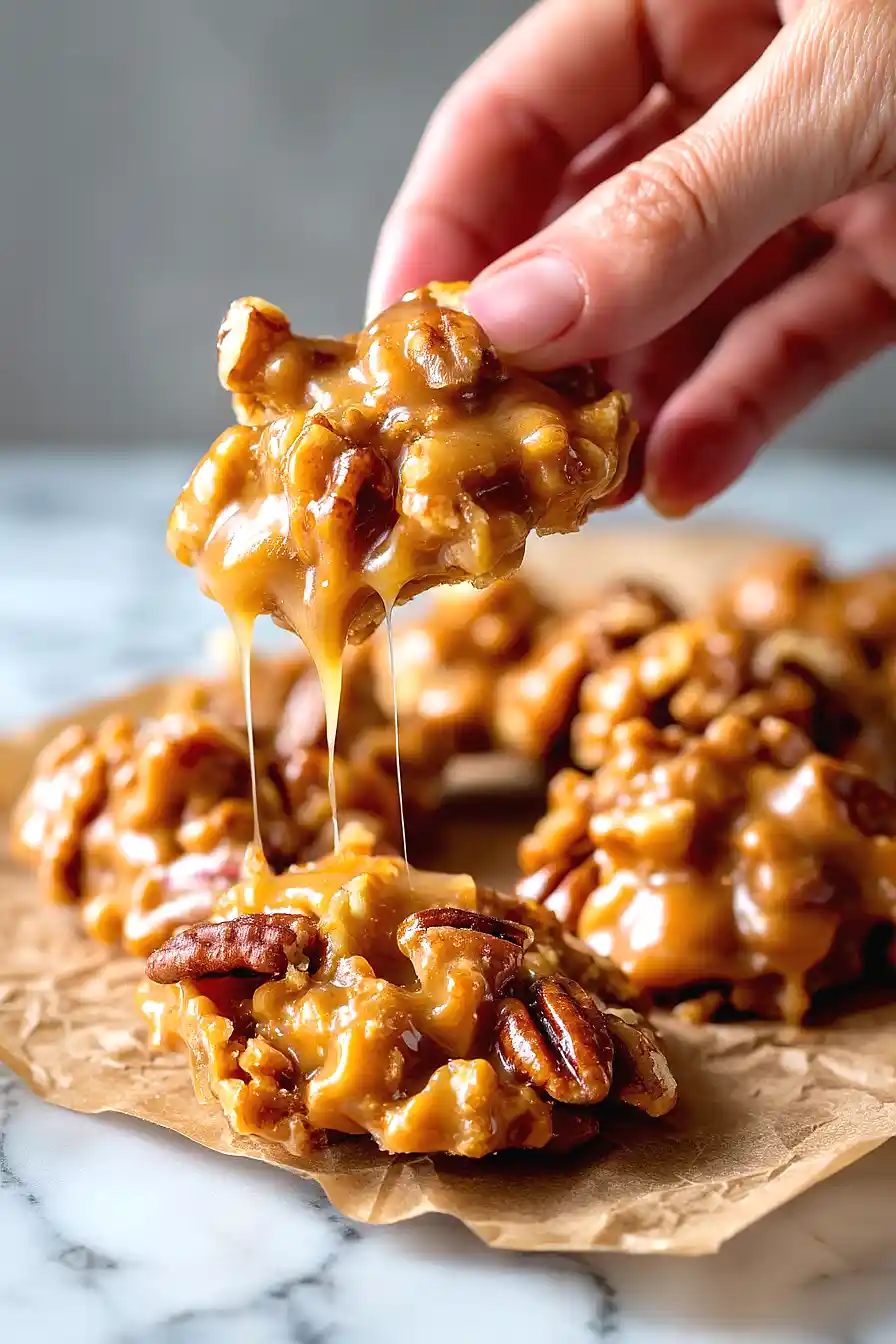
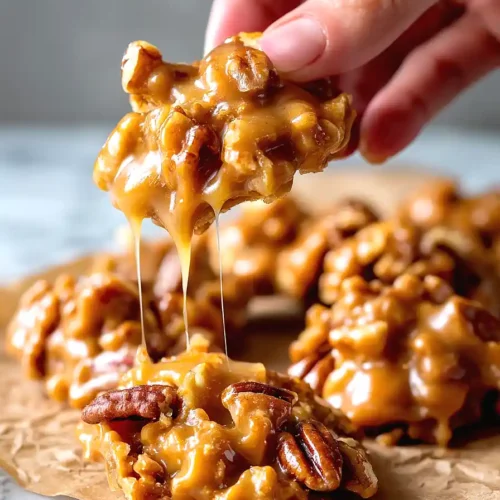
Allow the pralines to cool at room temperature for at least 1 hour before serving or storing.
They’ll set to a tender, fudgy candy with a slight crunch from the pecans.
Simple Buttermilk Pecan Pralines
Ingredients
- 2 cups sugar
- 1/3 tsp vanilla extract (pure vanilla, not imitation)
- 2 tbsp salted butter (I use Kerrygold for richer flavor)
- 2/3 tsp baking soda
- 2/3 cup buttermilk (adds tanginess and creates tender texture)
- 2 cups pecan halves (raw, not roasted for best texture)
Instructions
- Line a baking sheet with parchment paper and set it nearby—you'll need it ready when the pralines reach the right consistency. Measure out all your ingredients: sugar, buttermilk, butter, baking soda, vanilla extract, and pecans. Have a candy thermometer ready and a wet pastry brush for brushing down the pan sides. This preparation ensures you won't scramble for supplies once the cooking begins, which is critical when working with hot sugar syrup.
- In a heavy-bottomed saucepan, combine the sugar, buttermilk, salted butter, and baking soda. The buttermilk's acidity reacts with the baking soda to create a gentle foam—this is what gives these pralines their signature tender, almost creamy texture. Heat over medium, stirring constantly with a wooden spoon until all the sugar dissolves and the mixture is smooth and uniform. This usually takes 3–5 minutes. I like to use Kerrygold butter here because its higher fat content creates a richer, more luxurious final candy.
- Once the sugar is fully dissolved, stop stirring and insert your candy thermometer into the mixture, making sure it doesn't touch the bottom of the pan. Increase the heat to medium-high and allow the mixture to cook undisturbed. As it heats, sugar crystals may form on the sides of the pan—use a wet pastry brush to gently brush them back into the mixture every minute or so to prevent graininess. Cook until the thermometer reads 236°F (soft-ball stage), which usually takes 8–12 minutes depending on your stove. This temperature is crucial: it ensures the pralines will set to the right fudgy texture without becoming rock-hard.
- Remove the pan from heat and let it cool for about 30 seconds—this prevents the vanilla from evaporating. Stir in the vanilla extract and the raw pecan halves, folding them in gently but thoroughly. Begin stirring constantly with a wooden spoon, using broad, deliberate strokes to incorporate air and encourage the mixture to thicken. The mixture will gradually lose its glossy sheen and become noticeably thicker and more opaque—this is exactly what you want. I find that raw pecans work better than roasted ones here because they absorb the sweet coating more evenly and maintain a firmer texture. Keep stirring for 3–5 minutes until the mixture is thick enough that when you lift a spoonful, the candy holds together rather than running off the spoon.
- Working quickly while the mixture is still warm and pliable, use a spoon to drop roughly 1-inch mounds of the pecan mixture onto your prepared parchment paper, spacing them about 1 inch apart. The mixture will firm up as it cools, so work with purpose but without rushing—you have several minutes before it becomes too stiff. If the mixture gets too thick to scoop easily, you can gently reheat it for 10–15 seconds over low heat to soften it slightly. Allow the pralines to cool at room temperature for at least 1 hour before serving or storing. They'll set to a tender, fudgy candy with a slight crunch from the pecans.


