If you ask me, banana pudding is one of those desserts that brings people together.
This dairy-free version keeps all the comfort of the classic while making it accessible for anyone avoiding dairy. Creamy vanilla pudding layers with fresh banana slices and crunchy vanilla wafers for that familiar taste everyone loves.
The secret is using cook-and-serve pudding mix with your favorite dairy-free milk, then topping it all with fluffy coco whip. A splash of lemon juice keeps the bananas from browning too quickly.
It’s a crowd-pleasing dessert that tastes just as good as the traditional recipe, perfect for potlucks or family dinners.

Why You’ll Love This Dairy Free Banana Pudding
- Dairy-free and allergy-friendly – Perfect for anyone with lactose intolerance or dairy allergies, this pudding lets everyone enjoy a classic dessert without missing out on flavor or texture.
- Classic comfort dessert – You get all the nostalgic layers of creamy pudding, vanilla wafers, and fresh bananas that make traditional banana pudding so beloved.
- Simple ingredients – With just a handful of easy-to-find items, you can whip up this crowd-pleasing dessert without hunting down specialty products.
- Make-ahead friendly – This dessert actually tastes better after sitting in the fridge, making it ideal for potlucks, parties, or preparing the night before a gathering.
What Kind of Bananas Should I Use?
The ripeness of your bananas really matters for banana pudding. You’ll want bananas that are ripe but still firm – look for ones that are mostly yellow with just a few brown spots. If your bananas are too green, they’ll taste starchy and won’t have that sweet banana flavor you’re looking for. On the flip side, overly ripe bananas with lots of brown spots will get mushy too quickly and can make your pudding watery. A good trick is to slice your bananas right before assembling the pudding and toss them with that tablespoon of lemon juice, which keeps them from turning brown while you layer everything together.
Options for Substitutions
This dairy-free banana pudding is easy to customize based on what you have available:
- Dairy-free milk: Any plant-based milk works here – almond, oat, soy, or coconut milk all do the job. Just stick with unsweetened or lightly sweetened varieties so your pudding doesn’t get too sweet.
- Vanilla wafers: If you can’t find dairy-free vanilla wafers, graham crackers or shortbread cookies make great substitutes. You can also use ladyfinger cookies for a more traditional pudding texture.
- Coco whip: Other dairy-free whipped toppings like So Delicious CocoWhip or Silk Dairy-Free Whipped Topping work perfectly. In a pinch, you can make your own by whipping chilled coconut cream from a can.
- Pudding mix: Make sure you’re using instant pudding mix for this recipe – cook-and-serve pudding won’t set up properly. If you want to make it from scratch, you can use a homemade dairy-free pudding recipe instead.
- Lemon juice: The lemon juice keeps your bananas from browning. If you don’t have it, a little pineapple juice or orange juice does the same thing.
Watch Out for These Mistakes While Making
The biggest mistake people make with banana pudding is skipping the lemon juice on the banana slices, which causes them to turn brown and unappetizing within just a few hours – toss your sliced bananas in lemon juice right before layering to keep them looking fresh.
Another common error is not mixing the pudding long enough, so make sure to beat it for at least 2 minutes until it’s truly thick and smooth, otherwise you’ll end up with a runny texture that won’t set properly.
Don’t rush the refrigeration time either – those 3 hours are necessary for the vanilla wafers to soften just enough to create that perfect cake-like texture, and cutting into it too early will leave you with crunchy cookies instead of the creamy layers you’re after.
Finally, wait until right before serving to add your final toppings, as adding the coco whip and banana slices too early can make everything watery and cause the top bananas to oxidize.
What to Serve With Dairy Free Banana Pudding?
Banana pudding is pretty much a complete dessert on its own, but I love serving it after a big Southern-style meal with fried chicken, mac and cheese, and collard greens. If you’re looking for something lighter to balance out the richness, a simple fruit salad with fresh berries and mint is a great choice. You could also pair it with some strong black coffee or sweet tea to cut through the sweetness. For a fun dessert spread, set out banana pudding alongside other no-bake treats like brownies or chocolate chip cookies so everyone can pick their favorite.
Storage Instructions
Refrigerate: Keep your banana pudding covered tightly with plastic wrap in the fridge for up to 3 days. The wafers will soften over time, which some people actually prefer! Just know that the bananas might brown a bit after day two, even with the lemon juice.
Best Served: This dessert is really at its best within the first 24 hours when the wafers still have a little texture and the bananas are fresh. If you’re making it for a party or gathering, I’d suggest assembling it the night before or morning of for the best results.
Not Freezer-Friendly: I don’t recommend freezing this one since the pudding and coco whip can separate and get watery when thawed, plus the bananas turn mushy. It’s definitely a treat that’s meant to be enjoyed fresh from the fridge!
| Preparation Time | 20-30 minutes |
| Cooking Time | 10-15 minutes |
| Total Time | 200-225 minutes |
| Level of Difficulty | Easy |
| Servings | 10 servings |
Estimated Nutrition
Estimated nutrition for the whole recipe (without optional ingredients):
- Calories: 2200-2400
- Protein: 18-24 g
- Fat: 50-60 g
- Carbohydrates: 420-450 g
Ingredients
For the pudding:
- 2 boxes pudding mix (I use Jell-O Cook & Serve Vanilla for a more homemade flavor)
- 4.25 cups milk
- 1 teaspoon vanilla extract
For the assembly:
- 9 oz vanilla wafers
- 3 large bananas (sliced into 1/4-inch rounds)
- 3 cups coco whip (I prefer So Delicious brand for its airy texture)
For the garnish (optional):
- 1 tbsp lemon juice
Step 1: Prepare the Pudding Base
- 2 boxes pudding mix
- 4.25 cups milk
- 1 teaspoon vanilla extract
In a large bowl, whisk together both boxes of pudding mix with 4.25 cups milk and vanilla extract using an electric mixer on medium speed for about 2 minutes, until the mixture thickens to a custard-like consistency.
The pudding will continue to set as it cools, so you’re looking for a pourable but slightly thick texture at this stage.
Set aside to cool slightly while you prepare the other components.
Step 2: Prepare the Bananas and Wafers
- 3 large bananas
- 1 tbsp lemon juice
- 9 oz vanilla wafers
While the pudding cools, slice the bananas into 1/4-inch rounds and toss them gently with lemon juice in a small bowl to prevent browning.
Crush about 1/2 cup of the vanilla wafers into fine crumbs for filling gaps and garnish later.
Keep the remaining whole wafers separate for layering.
Step 3: Assemble the First Layer
- whole vanilla wafers
- wafer crumbs from Step 2
In a 9×13 inch baking dish or similar size, arrange whole vanilla wafers on the bottom and along the sides of the dish, standing them upright or laying them flat depending on your preference.
Fill any gaps between wafers with the crushed wafer crumbs from Step 2.
This creates a structural base and ensures every bite has that classic wafer texture.
Step 4: Build the Pudding Layers
- banana slices from Step 2
- pudding mixture from Step 1
- whole vanilla wafers
- pudding mixture from Step 1
Layer half of the banana slices (from Step 2) evenly over the wafers, then pour half of the pudding mixture (from Step 1) over the bananas, spreading it gently to cover.
Repeat with another layer of whole wafers on top, followed by the remaining banana slices and pudding.
I like to slightly overlap the banana slices in each layer so the pudding can flow between them and create a more cohesive texture throughout.
Step 5: Chill and Set
Cover the dish with plastic wrap and refrigerate for at least 3 hours, or until the pudding has fully set and the wafers have softened slightly from absorbing the pudding moisture.
This resting time allows the flavors to meld and creates that classic creamy pudding texture.
Step 6: Top and Serve
- 3 cups coco whip
- fresh banana slices
- reserved wafer crumbs from Step 2
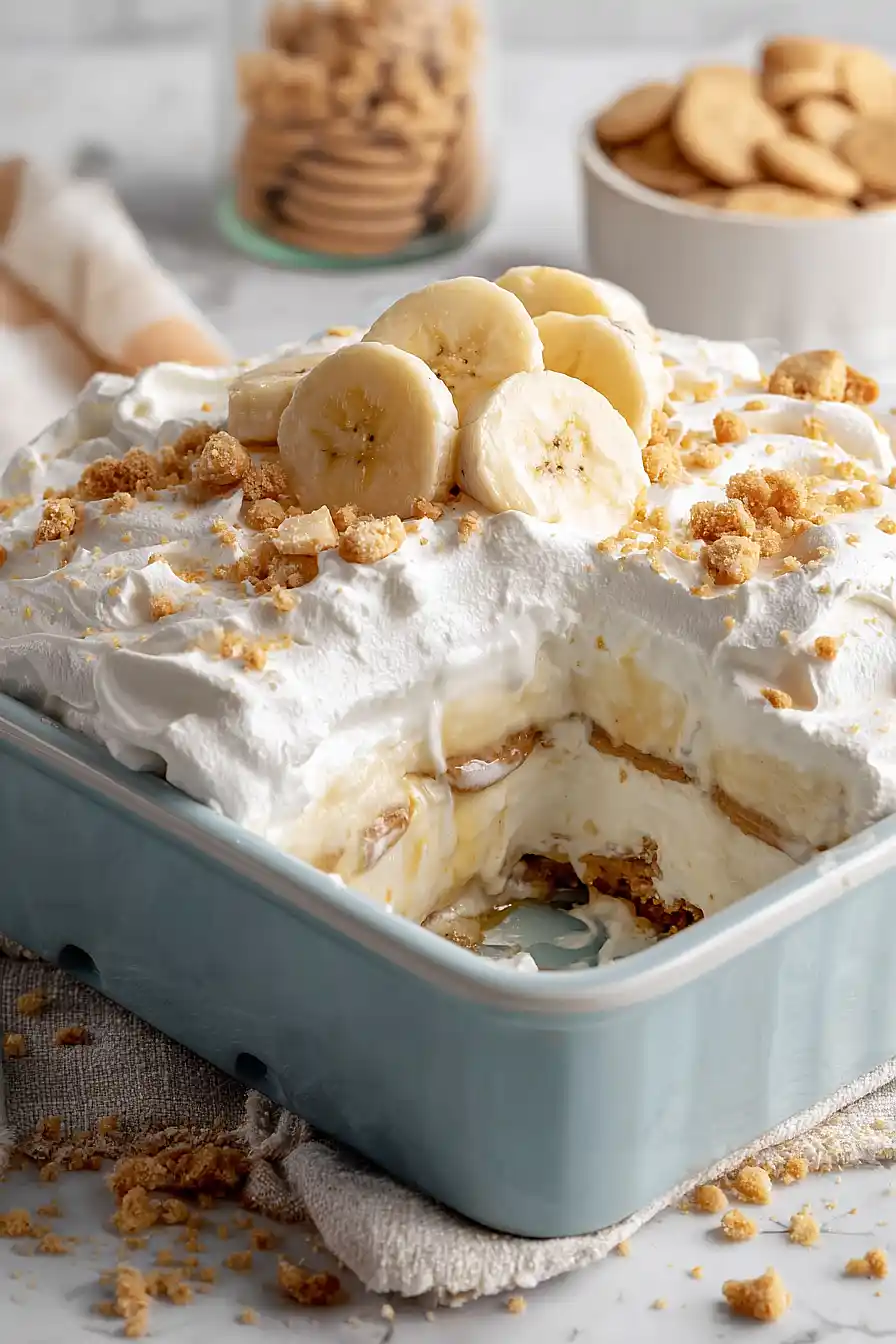
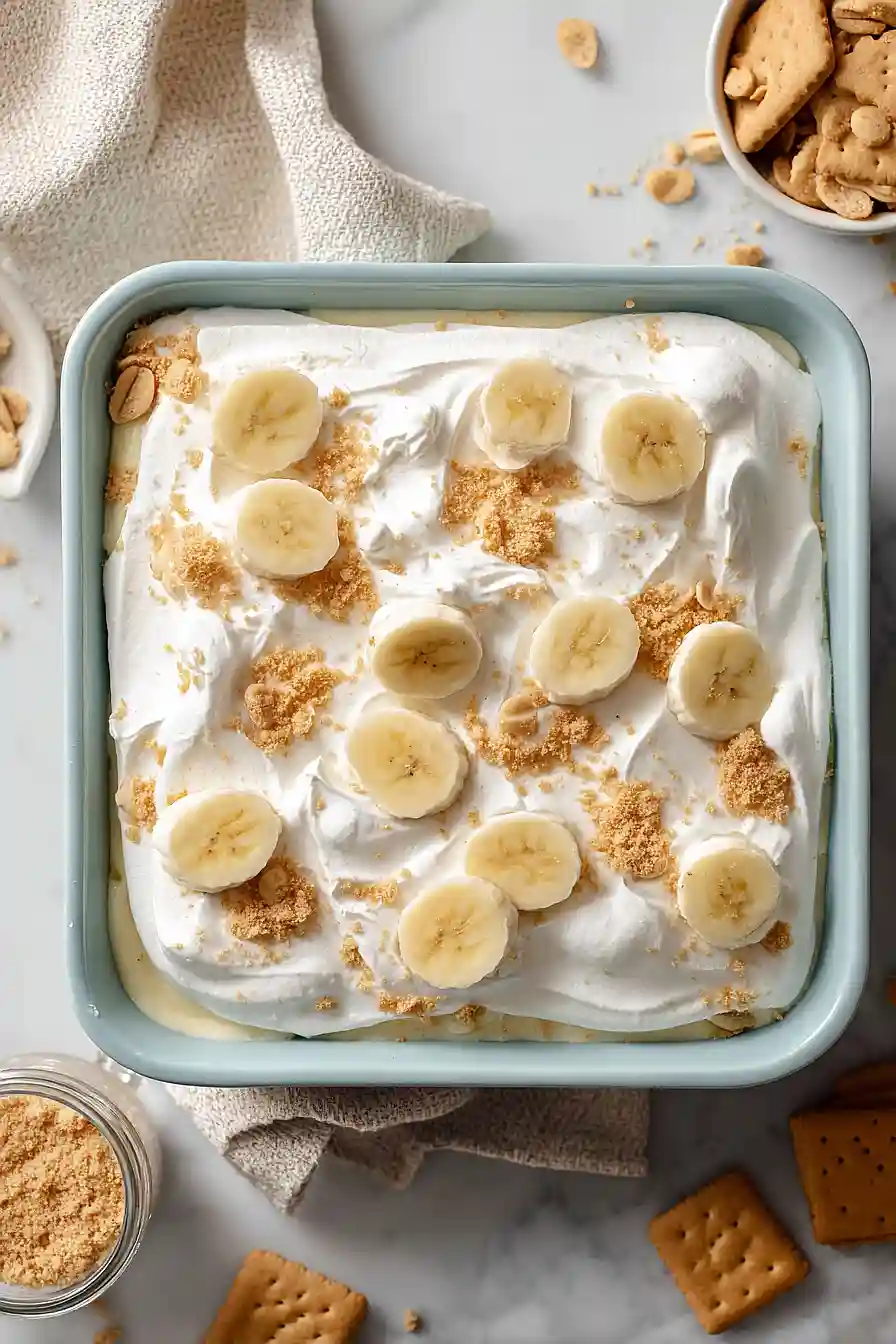
Just before serving, spread or dollop the coco whip generously over the top of the pudding.
Arrange fresh banana slices on top for visual appeal and texture contrast, then sprinkle with reserved wafer crumbs.
The cold pudding with the whipped topping and fresh banana creates a wonderful contrast of temperatures and textures.

Simple Dairy-Free Banana Pudding
Ingredients
For the pudding
- 2 boxes pudding mix (I use Jell-O Cook & Serve Vanilla for a more homemade flavor)
- 4.25 cups milk
- 1 teaspoon vanilla extract
For the assembly
- 9 oz vanilla wafers
- 3 large bananas (sliced into 1/4-inch rounds)
- 3 cups coco whip (I prefer So Delicious brand for its airy texture)
For the garnish (optional)
- 1 tbsp lemon juice
Instructions
- In a large bowl, whisk together both boxes of pudding mix with 4.25 cups milk and vanilla extract using an electric mixer on medium speed for about 2 minutes, until the mixture thickens to a custard-like consistency. The pudding will continue to set as it cools, so you're looking for a pourable but slightly thick texture at this stage. Set aside to cool slightly while you prepare the other components.
- While the pudding cools, slice the bananas into 1/4-inch rounds and toss them gently with lemon juice in a small bowl to prevent browning. Crush about 1/2 cup of the vanilla wafers into fine crumbs for filling gaps and garnish later. Keep the remaining whole wafers separate for layering.
- In a 9x13 inch baking dish or similar size, arrange whole vanilla wafers on the bottom and along the sides of the dish, standing them upright or laying them flat depending on your preference. Fill any gaps between wafers with the crushed wafer crumbs from Step 2. This creates a structural base and ensures every bite has that classic wafer texture.
- Layer half of the banana slices (from Step 2) evenly over the wafers, then pour half of the pudding mixture (from Step 1) over the bananas, spreading it gently to cover. Repeat with another layer of whole wafers on top, followed by the remaining banana slices and pudding. I like to slightly overlap the banana slices in each layer so the pudding can flow between them and create a more cohesive texture throughout.
- Cover the dish with plastic wrap and refrigerate for at least 3 hours, or until the pudding has fully set and the wafers have softened slightly from absorbing the pudding moisture. This resting time allows the flavors to meld and creates that classic creamy pudding texture.
- Just before serving, spread or dollop the coco whip generously over the top of the pudding. Arrange fresh banana slices on top for visual appeal and texture contrast, then sprinkle with reserved wafer crumbs. The cold pudding with the whipped topping and fresh banana creates a wonderful contrast of temperatures and textures.


