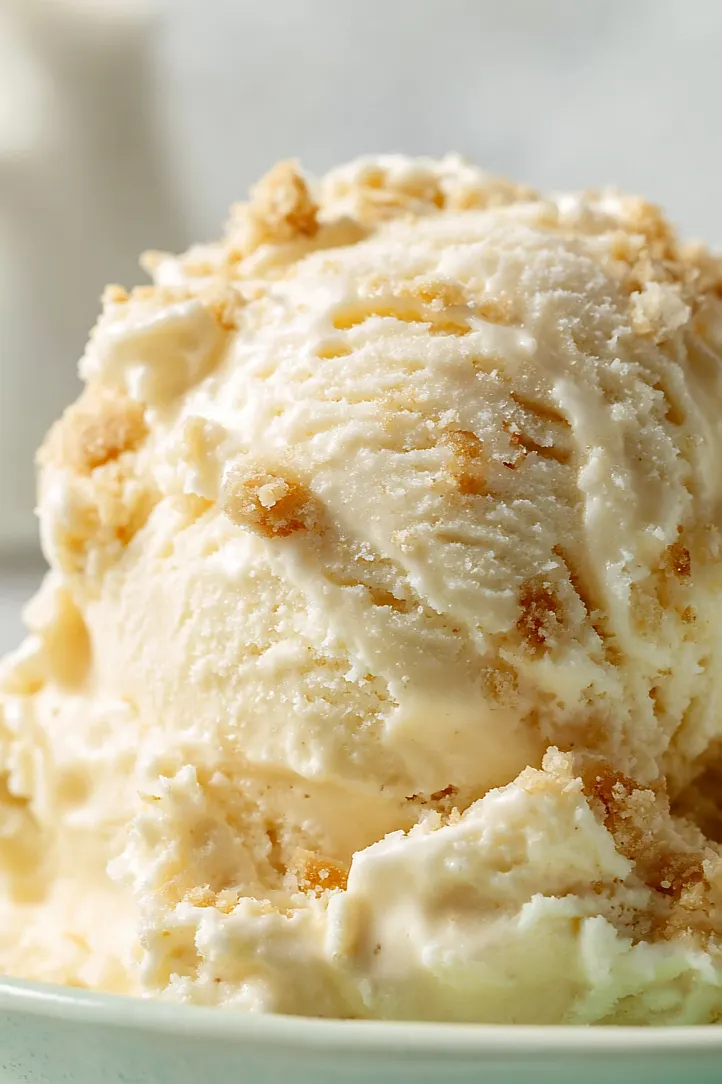
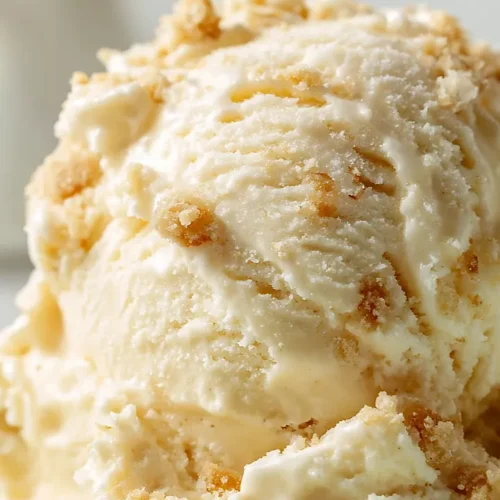
I’ve always thought banana pudding was perfect just the way it is. But then summer hits, and suddenly I’m craving something cold and creamy that reminds me of that classic dessert. That’s when I realized I could turn banana pudding into ice cream, and honestly, it’s become one of my go-to treats when it’s hot outside.
The best part? You don’t need an ice cream maker for this recipe. Just a mixer, a loaf pan, and a little patience while it freezes. I use cream cheese as the base because it gives you that thick, scoopable texture without any fancy equipment. Plus, when you fold in those crushed vanilla wafers, they get just soft enough to remind you of the real thing.
Want it extra banana-y? Add more banana slices. Prefer more crunch? Toss in extra wafers. This recipe is pretty forgiving, and you can make it your own.

Why You’ll Love This Banana Pudding Ice Cream
- No ice cream maker needed – You can whip up this creamy treat without any special equipment, just a mixing bowl and your freezer.
- Classic dessert in frozen form – It combines all the flavors you love from traditional banana pudding—creamy pudding, vanilla wafers, and fresh bananas—in a cool, scoopable treat.
- Simple ingredients – Everything you need is easy to find at your local grocery store, and you probably already have some of these items in your pantry.
- Perfect for summer gatherings – This crowd-pleasing dessert is great for cookouts, family dinners, or whenever you want something sweet and refreshing.
- Make-ahead friendly – You can prepare this ice cream days in advance and keep it in the freezer until you’re ready to serve, making party planning a breeze.
What Kind of Bananas Should I Use?
The ripeness of your bananas really matters for this ice cream recipe. You’ll want to use bananas that are ripe with some brown spots on the peel – they’re sweeter and have more flavor than green or barely-yellow bananas. If your bananas are too firm and green, they won’t blend as smoothly and the flavor will be a bit bland. On the flip side, don’t go with bananas that are completely brown and mushy, as they can make your ice cream taste a bit fermented. A good rule of thumb is to use bananas you’d be happy eating on their own – if they taste good fresh, they’ll taste even better in your ice cream.
Options for Substitutions
This ice cream recipe is pretty forgiving, so here are some swaps you can make:
- Instant banana pudding mix: This is really the star of the show, so I’d recommend keeping it as is. If you absolutely can’t find banana flavor, vanilla pudding mix works, but you’ll lose that signature banana taste.
- Cream cheese: Make sure it’s at room temperature before mixing. In a pinch, you could use mascarpone cheese for a slightly richer texture, though it’ll be a bit more expensive.
- Heavy cream: You can use half-and-half if you want a lighter version, but your ice cream won’t be quite as creamy. Avoid using milk as it won’t give you that scoopable texture.
- Vanilla wafers: Graham crackers or shortbread cookies make good substitutes. Just crush them to a similar consistency – you want small pieces, not powder.
- Fresh bananas: Use ripe bananas for the best flavor. If you’re worried about browning, toss the slices in a little lemon juice before adding them to the mix.
- Vanilla essence: Vanilla extract works just the same. If you only have imitation vanilla, that’s fine too – the banana flavor is strong enough to carry the recipe.
Watch Out for These Mistakes While Making
The biggest mistake when making banana pudding ice cream is adding the bananas without tossing them in a bit of lemon juice first, which prevents them from turning brown and keeps your ice cream looking fresh instead of spotted and gray.
Another common error is not letting your cream cheese come to room temperature before mixing – cold cream cheese creates lumps that are nearly impossible to smooth out, so give it at least 30 minutes on the counter before you start.
To avoid rock-hard ice cream that’s impossible to scoop, make sure you’re using heavy cream and whipping it to soft peaks before folding it in, which adds air and keeps the texture creamy rather than icy.
Finally, resist the urge to dig in right after freezing – letting it rest at room temperature for those 5-10 minutes makes scooping so much easier and brings out the flavors better.

What to Serve With Banana Pudding Ice Cream?
This ice cream is pretty rich and sweet on its own, so I like to keep things simple when serving it. A few extra vanilla wafers on the side are perfect for scooping up the ice cream, or you can crumble some Nilla wafers right on top for added crunch. If you want to make it feel more like a sundae, drizzle some caramel sauce or chocolate syrup over it and add a dollop of whipped cream. Fresh banana slices are always a good choice too, especially if you want to balance out the sweetness with some fresh fruit.
Storage Instructions
Store: Keep your banana pudding ice cream in an airtight, freezer-safe container for up to 2 weeks. Press a piece of parchment paper directly on the surface before sealing to prevent ice crystals from forming on top. The bananas might darken slightly over time, but the flavor stays great.
Scoop: This ice cream can get pretty hard straight from the freezer. Let it sit on the counter for about 5-10 minutes before scooping to make your life easier. If you’re impatient like me, you can run your ice cream scoop under hot water between scoops for smoother serving.
| Preparation Time | 10-15 minutes |
| Cooking Time | 300-360 minutes |
| Total Time | 310-375 minutes |
| Level of Difficulty | Easy |
| Servings | 10 servings |
Estimated Nutrition
Estimated nutrition for the whole recipe (without optional ingredients):
- Calories: 2700-3000
- Protein: 26-32 g
- Fat: 140-160 g
- Carbohydrates: 340-370 g
Ingredients
For the pudding base:
- 9 oz cream cheese (I use Philadelphia for the best consistency)
- 1 box instant banana pudding mix (Jell-O brand works best here)
- 14 oz sweetened condensed milk
- 1.5 tbsp vanilla
- 2 cups heavy cream (cold, straight from the fridge for better whipping)
- Pinch of salt
For the mix-ins:
- 2 bananas (sliced into 1/4-inch rounds)
- 1 cup vanilla wafers (roughly crushed into 1/2-inch pieces)
Step 1: Prepare the Cream Cheese Base
- 9 oz cream cheese
Remove the cream cheese from the refrigerator and let it sit at room temperature for about 5 minutes to soften slightly, which makes mixing much easier.
Using an electric mixer on medium speed, beat the cream cheese for 1-2 minutes until completely smooth and creamy with no lumps.
This creates the ideal texture foundation for incorporating the other ingredients.
Step 2: Build the Pudding Flavor Base
- smooth cream cheese from Step 1
- 1 box instant banana pudding mix
- 14 oz sweetened condensed milk
- 1.5 tbsp vanilla
Add the instant banana pudding mix to the smooth cream cheese and stir thoroughly on medium speed until the mixture is well combined and uniform in color.
Pour in the sweetened condensed milk and vanilla, mixing on medium-low speed until fully incorporated.
The mixture should be smooth and pale yellow.
I like to scrape down the sides of the bowl with a spatula halfway through mixing to ensure everything is evenly combined.
Step 3: Whip and Fold in the Cream
- pudding mixture from Step 2
- 2 cups heavy cream
- Pinch of salt
In a separate clean bowl, pour the cold heavy cream and add a pinch of salt.
Using an electric mixer on medium-high speed, whip the cream until stiff peaks form—this usually takes 2-3 minutes.
Be careful not to overbeat or you’ll start making butter.
Gently fold the whipped cream into the pudding mixture from Step 2 using a spatula with broad, sweeping motions, being careful to maintain the airiness of the whipped cream.
This creates the light, creamy texture that makes ice cream so satisfying.
Step 4: Add Bananas and Cookies
- ice cream mixture from Step 3
- 2 bananas
- 1 cup vanilla wafers
Gently fold the sliced bananas into the ice cream mixture, distributing them evenly throughout.
Then fold in the crushed vanilla wafers, reserving a small handful for garnish if desired.
I recommend folding rather than stirring to keep the mixture light and airy and to avoid breaking up the banana slices too much.
Step 5: Layer and Freeze
- ice cream mixture from Step 4
Pour the ice cream mixture into a 9×13 inch baking dish or similar-sized freezer-safe container.
Smooth the top with a spatula and sprinkle any reserved crushed vanilla wafers on top for extra texture and visual appeal.
Cover the container with plastic wrap or aluminum foil and place it in the freezer for 5-6 hours, or until the ice cream is completely frozen and scoopable.
If freezing for longer than one day, you may need to let it thaw slightly before scooping.
Step 6: Serve
Remove the ice cream from the freezer and let it rest at room temperature for 5-10 minutes before scooping.
This brief rest makes scooping easier and allows the ice cream to soften just enough for a creamy texture while remaining frozen.
Smooth Banana Pudding Ice Cream
Ingredients
For the pudding base::
- 9 oz cream cheese (I use Philadelphia for the best consistency)
- 1 box instant banana pudding mix (Jell-O brand works best here)
- 14 oz sweetened condensed milk
- 1.5 tbsp vanilla
- 2 cups heavy cream (cold, straight from the fridge for better whipping)
- Pinch of salt
For the mix-ins::
- 2 bananas (sliced into 1/4-inch rounds)
- 1 cup vanilla wafers (roughly crushed into 1/2-inch pieces)
Instructions
- Remove the cream cheese from the refrigerator and let it sit at room temperature for about 5 minutes to soften slightly, which makes mixing much easier. Using an electric mixer on medium speed, beat the cream cheese for 1-2 minutes until completely smooth and creamy with no lumps. This creates the ideal texture foundation for incorporating the other ingredients.
- Add the instant banana pudding mix to the smooth cream cheese and stir thoroughly on medium speed until the mixture is well combined and uniform in color. Pour in the sweetened condensed milk and vanilla, mixing on medium-low speed until fully incorporated. The mixture should be smooth and pale yellow. I like to scrape down the sides of the bowl with a spatula halfway through mixing to ensure everything is evenly combined.
- In a separate clean bowl, pour the cold heavy cream and add a pinch of salt. Using an electric mixer on medium-high speed, whip the cream until stiff peaks form—this usually takes 2-3 minutes. Be careful not to overbeat or you'll start making butter. Gently fold the whipped cream into the pudding mixture from Step 2 using a spatula with broad, sweeping motions, being careful to maintain the airiness of the whipped cream. This creates the light, creamy texture that makes ice cream so satisfying.
- Gently fold the sliced bananas into the ice cream mixture, distributing them evenly throughout. Then fold in the crushed vanilla wafers, reserving a small handful for garnish if desired. I recommend folding rather than stirring to keep the mixture light and airy and to avoid breaking up the banana slices too much.
- Pour the ice cream mixture into a 9x13 inch baking dish or similar-sized freezer-safe container. Smooth the top with a spatula and sprinkle any reserved crushed vanilla wafers on top for extra texture and visual appeal. Cover the container with plastic wrap or aluminum foil and place it in the freezer for 5-6 hours, or until the ice cream is completely frozen and scoopable. If freezing for longer than one day, you may need to let it thaw slightly before scooping.
- Remove the ice cream from the freezer and let it rest at room temperature for 5-10 minutes before scooping. This brief rest makes scooping easier and allows the ice cream to soften just enough for a creamy texture while remaining frozen.


