I was probably 25 before I realized you could make fried chicken at home that actually tasted good. Growing up, my mom would buy those frozen chicken patties from the store—you know, the ones that come out either soggy or rock-hard, depending on your luck with the oven.
The secret I finally learned is that homemade fried chicken fillet isn’t really that hard. You just need to get the oil temperature right and not rush it. Store-bought stuff tries to take shortcuts, but when you make it yourself, you control everything—the seasoning, the coating, and most importantly, how long it stays in that hot oil.
Why You’ll Love This Fried Chicken Fillet
- Crispy, golden coating – The buttermilk marinade and seasoned flour create that perfect crunch we all crave in fried chicken, with just the right amount of spice from the cayenne and hot sauce.
- Tender, juicy chicken – Soaking the chicken in buttermilk keeps it moist and flavorful on the inside while getting that crispy exterior we’re after.
- Simple pantry ingredients – You probably already have most of these spices and basics in your kitchen, making this an easy weeknight dinner option.
- Customizable heat level – You can adjust the cayenne pepper and hot sauce to make it as mild or spicy as your family likes.
- Classic comfort food – There’s nothing quite like homemade fried chicken to bring everyone to the dinner table, and this recipe delivers that restaurant-quality taste at home.
What Kind of Chicken Should I Use?
For the best fried chicken, you’ll want to use boneless, skinless chicken breasts that are fresh rather than frozen if possible. Fresh chicken tends to hold marinades better and gives you more control over the final texture. If you only have frozen chicken breasts, make sure to thaw them completely in the refrigerator before starting – this usually takes about 24 hours for thick pieces. Look for chicken breasts that are similar in size so they cook evenly, and don’t be afraid to pound them to an even thickness if some pieces are much thicker than others. This helps ensure everything cooks at the same rate and stays juicy throughout.
Options for Substitutions
This fried chicken recipe is pretty forgiving when it comes to swaps and substitutions:
- Buttermilk: No buttermilk? Mix 2 cups of regular milk with 2 tablespoons of white vinegar or lemon juice. Let it sit for 5 minutes and you’ll have a great substitute that works just as well for tenderizing.
- Self-rising flour: You can make your own by mixing 2 cups all-purpose flour with 3 teaspoons baking powder and 1 teaspoon salt. Regular all-purpose flour works too, but you might lose a bit of that fluffy texture.
- Frank’s RedHot sauce: Any hot sauce will work here – Tabasco, Louisiana hot sauce, or even sriracha if that’s what you have on hand. Just adjust the amount based on your heat preference.
- Corn oil: Vegetable oil, canola oil, or peanut oil are all great alternatives for frying. Just make sure whatever you use has a high smoke point for safe frying.
- Chicken breasts: Chicken thighs work wonderfully too and actually stay more moist during frying. You can also use drumsticks or wings – just adjust cooking time accordingly.
- Seasoning salt: If you don’t have seasoning salt, just use regular salt and add a pinch of onion powder and garlic powder to make up for the flavor.
Watch Out for These Mistakes While Cooking
The biggest mistake when frying chicken is not maintaining the proper oil temperature – if it’s too hot (over 375°F), your coating will burn before the chicken cooks through, and if it’s too cool (under 325°F), you’ll end up with greasy, soggy results.
Another common error is skipping the buttermilk soak, which should last at least 30 minutes but ideally 2-4 hours to tenderize the meat and help the coating stick better.
Don’t overcrowd your pan either, as this drops the oil temperature and prevents that crispy golden crust from forming – fry in batches if needed.
Finally, resist the urge to flip the chicken too early; let each side cook for 4-5 minutes undisturbed before turning, and always use a meat thermometer to ensure the internal temperature reaches 165°F for food safety.

What to Serve With Fried Chicken Fillet?
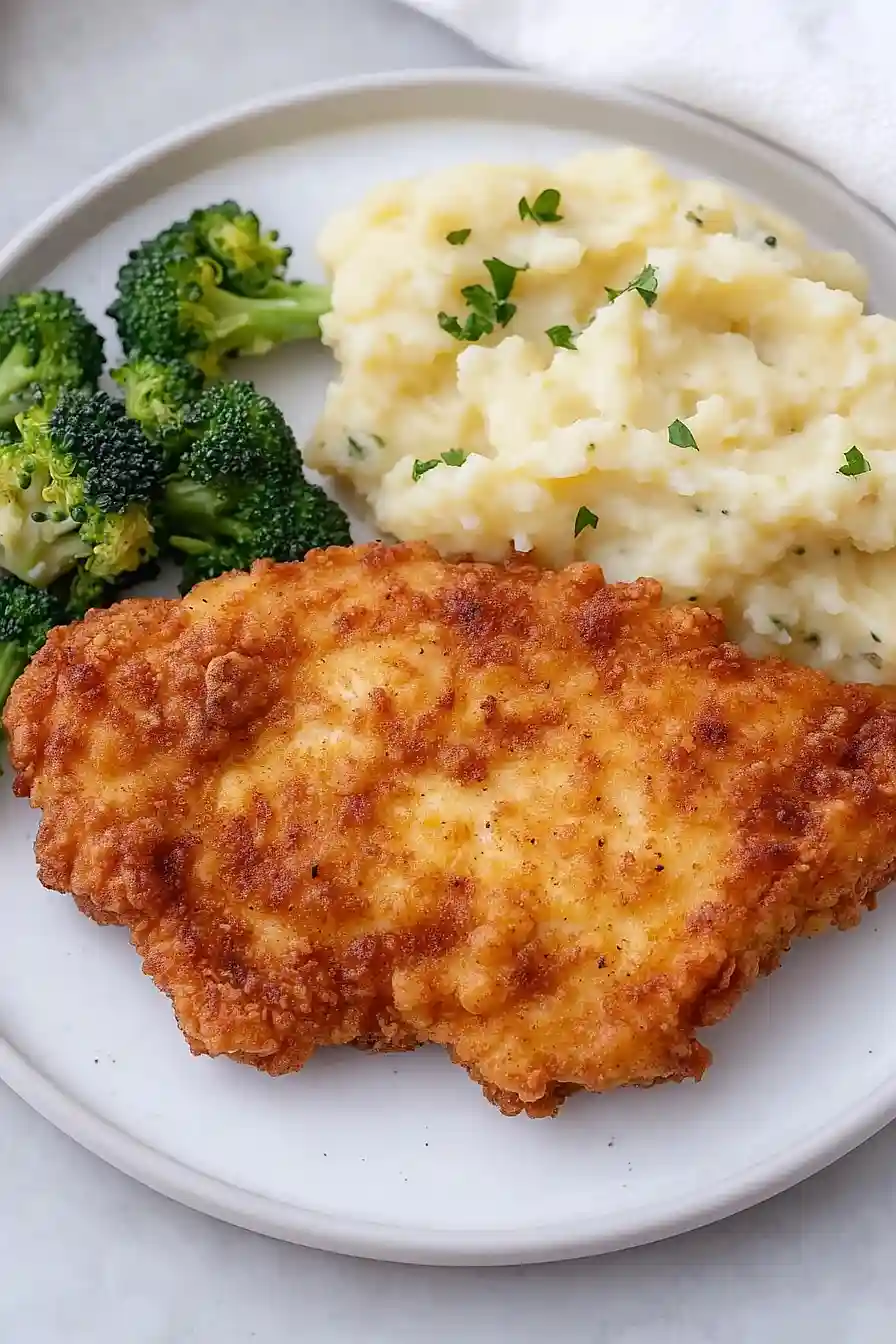
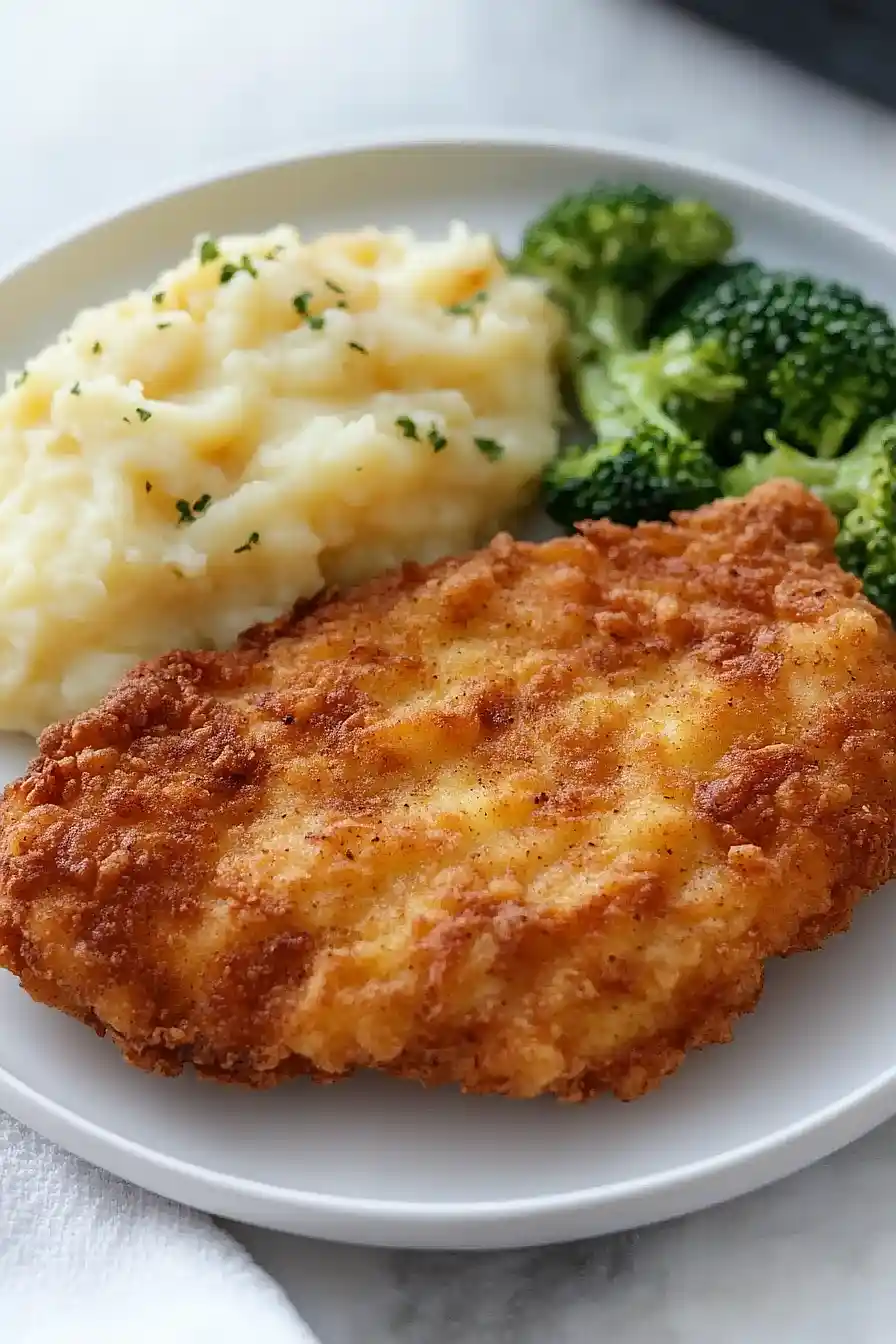
Fried chicken fillet is perfect with classic Southern sides like creamy mashed potatoes and gravy, coleslaw, and buttery biscuits. Since this recipe has a nice kick from the cayenne and hot sauce, cooling sides like mac and cheese or a fresh cucumber salad help balance out the heat. You can also go the comfort food route with green beans, corn on the cob, or crispy french fries for a more casual meal. For something lighter, try serving it over a bed of mixed greens with ranch dressing, or slice it up for chicken sandwiches with pickles and mayo.
Storage Instructions
Refrigerate: Your crispy fried chicken fillets will keep in the fridge for up to 3 days when stored in an airtight container or wrapped in foil. I like to place a paper towel underneath to absorb any moisture and keep that coating from getting soggy. It’s great for meal prep or making sandwiches later in the week.
Freeze: These chicken fillets freeze really well for up to 3 months! Let them cool completely first, then wrap each piece individually in plastic wrap or foil before placing in a freezer bag. This prevents them from sticking together and makes it easy to grab just what you need.
Warm Up: To get that crispy coating back, pop the chicken in a 350°F oven for about 10-15 minutes if it’s from the fridge, or 20-25 minutes if frozen. Skip the microwave since it’ll make the coating soggy – the oven will bring back that nice crunch we all love.
| Preparation Time | 30-1440 minutes |
| Cooking Time | 15-20 minutes |
| Total Time | 45-1460 minutes |
| Level of Difficulty | Medium |
Estimated Nutrition
Estimated nutrition for the whole recipe (without optional ingredients):
- Calories: 3300-3600
- Protein: 150-165 g
- Fat: 175-200 g
- Carbohydrates: 210-230 g
Ingredients
For the marinade:
- 3 boneless chicken breast halves (about 6-8 oz each)
- 1/4 tsp salt
- 2 cups buttermilk (or any buttermilk brand)
- 1/2 tsp cayenne
For the dredge and coating:
- 1/2 tsp black pepper
- 1/2 tsp paprika
- 1/2 tsp garlic salt
- 1 1/2 tsp coarsely ground black pepper (freshly ground for best flavor)
- 1/2 tsp seasoned salt
- 1 tbsp Frank’s RedHot sauce (adds tangy heat to egg mixture)
- 3 eggs (room temperature)
- 2 cups self-rising flour (I use King Arthur self-rising flour)
For frying:
- 2 cups corn oil (or any neutral oil like vegetable or canola)
Step 1: Prepare and Marinate the Chicken
- 3 boneless chicken breast halves
- 2 cups buttermilk
- 1/2 tsp cayenne
Slice each chicken breast horizontally into two thin, even pieces—this is key to achieving that tender, juicy center.
Place the chicken pieces in a bowl and cover completely with buttermilk, then add the cayenne pepper and stir to combine.
Cover the bowl and refrigerate for at least 24 hours (overnight is ideal).
This buttermilk marinade breaks down the proteins and tenderizes the meat while adding subtle tang.
I find that letting it sit the full 24 hours makes a noticeable difference in how tender the final result is.
Step 2: Mix the Coating Ingredients
- 1/4 tsp salt
- 1/2 tsp black pepper
- 1/2 tsp paprika
- 1/2 tsp garlic salt
- 1/2 tsp seasoned salt
- 3 eggs
- 1 tbsp Frank’s RedHot sauce
- 2 cups self-rising flour
- 1 1/2 tsp coarsely ground black pepper
While the chicken marinates, prepare your coating station.
In a small bowl, whisk together the salt, black pepper, paprika, garlic salt, and seasoned salt—set this seasoning blend aside.
In another bowl, beat the eggs with the Frank’s RedHot sauce until well combined and the sauce is evenly distributed.
In a third bowl or shallow dish, combine the self-rising flour with the coarsely ground black pepper.
Having everything prepped and ready before you remove the chicken from the marinade ensures the coating adheres properly and dries evenly.
Step 3: Season and Coat the Chicken
- marinated chicken from Step 1
- seasoning blend from Step 2
- egg wash mixture from Step 2
- flour mixture from Step 2
Remove the marinated chicken from the refrigerator and drain each piece well, letting excess buttermilk drip away.
Sprinkle both sides of each chicken piece generously with the seasoning blend from Step 2, working it in slightly so it adheres.
Now set up your breading station with the egg wash and flour mixture nearby.
Working with one piece at a time, dip each seasoned chicken piece into the egg wash from Step 2, making sure it’s fully coated, then immediately dredge it in the flour mixture, pressing gently so the flour adheres well.
Place each breaded piece on a clean plate—I like to let them rest for 5-10 minutes so the coating sets before frying.
Step 4: Heat the Oil and Fry the Chicken
- 2 cups corn oil
- breaded chicken pieces from Step 3
Pour the corn oil into a large, heavy skillet or deep pan and heat it to 350°F.
Use a thermometer to check the temperature—this is crucial because oil that’s too cool will produce soggy, greasy chicken, while oil that’s too hot will brown the outside before the inside cooks.
Once the oil reaches temperature, carefully place the breaded chicken pieces into the hot oil, working in batches if needed so you don’t overcrowd the pan.
Fry for 7-10 minutes per side, turning once, until the coating is deep golden brown and the internal temperature reaches 165°F.
The chicken should sound crispy when you tap it with the spatula.
Step 5: Drain and Serve
- fried chicken from Step 4
Using tongs or a slotted spoon, transfer the fried chicken to a wire rack set over a baking sheet or to paper towels.
The wire rack is better if you have one because it allows air to circulate underneath, keeping the bottom from getting soggy.
Let the chicken rest for 2-3 minutes before serving—this allows the juices to redistribute and keeps the meat tender inside.
Serve hot and enjoy the crispy, golden exterior with the impossibly tender, juicy meat inside.


