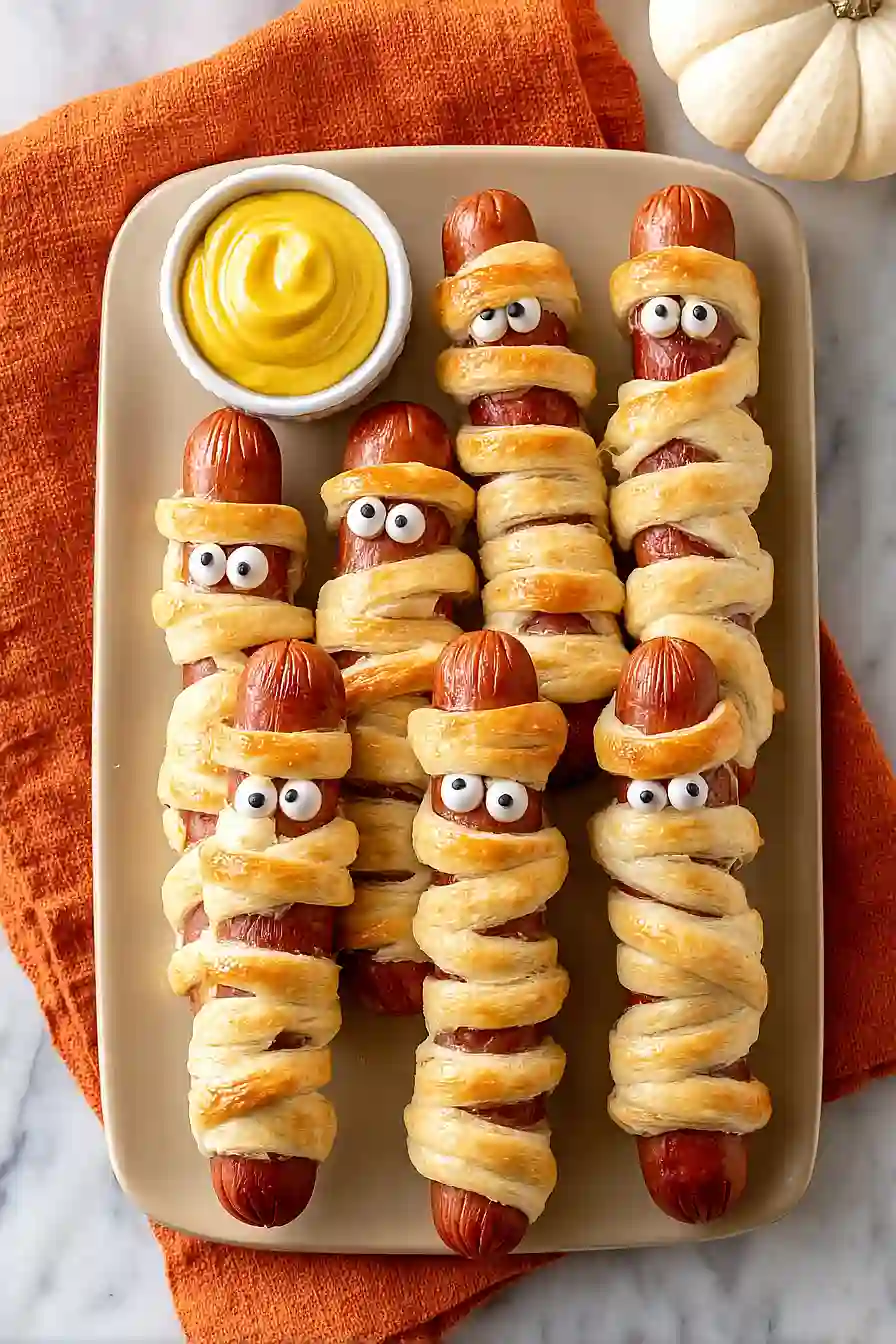
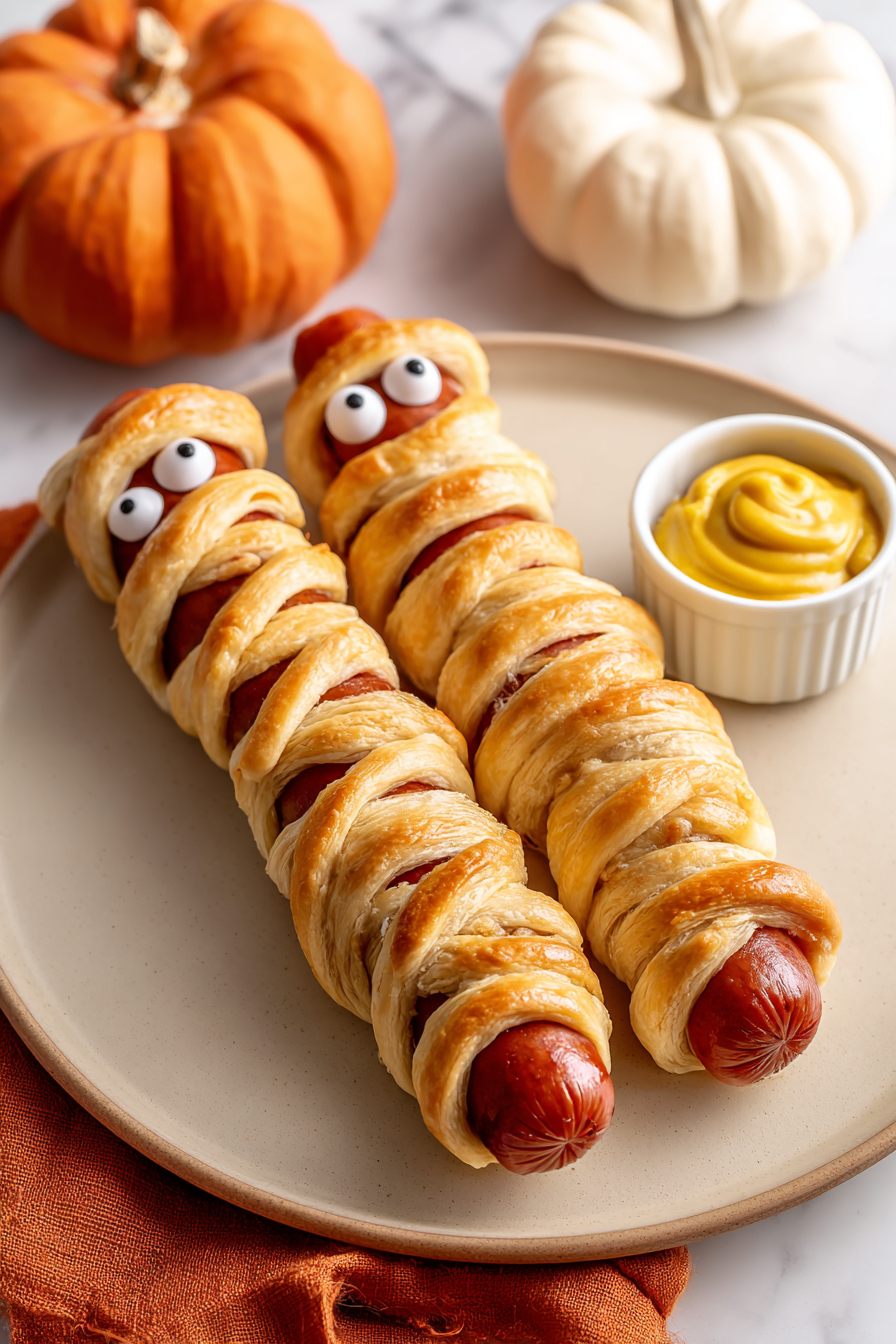
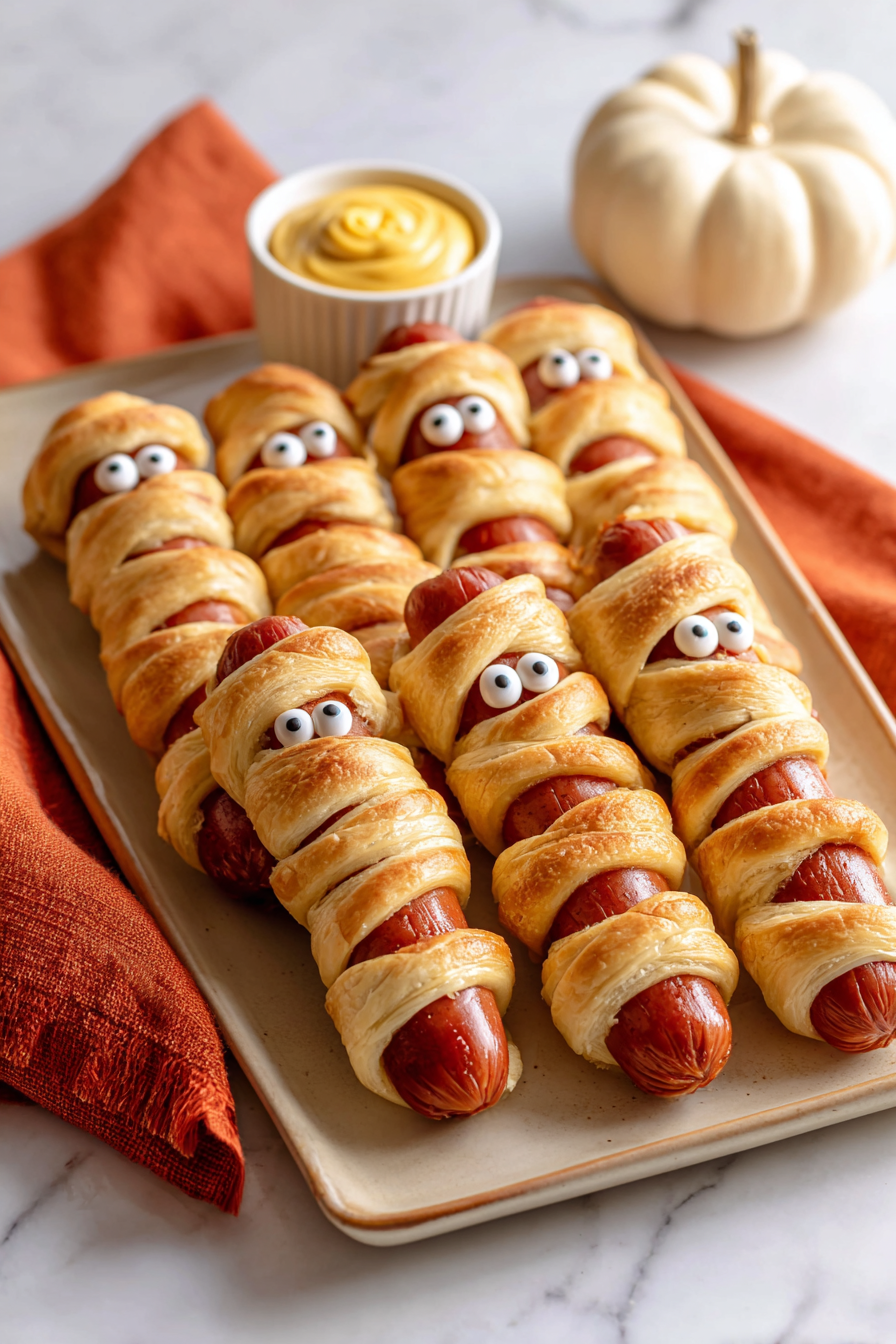
Halloween has always been my favorite holiday to cook for. I love making treats that are more fun than scary, especially when the kids help out in the kitchen. But I’m not into complicated recipes that take hours or need fancy decorating skills. I want something we can throw together while telling ghost stories.
That’s why hot dog mummies are my go-to Halloween dinner every year. They look festive, take less than thirty minutes from start to finish, and use ingredients I usually have on hand. The kids can wrap the dough strips while I work on the sides. No stress, no mess.
Want a dinner that makes everyone smile? These are it. They’re fun to make and even more fun to eat. Honestly, we’ve started making them for regular weeknight dinners too because they’re that easy.
Why You’ll Love These Hot Dog Mummies
- Kid-friendly fun – These hot dog mummies are a hit with children who love the playful presentation, making them perfect for Halloween parties or any time you want to make dinner more exciting.
- Super quick – Ready in just 20-30 minutes, this recipe is ideal for busy weeknights or last-minute party appetizers when you need something fast.
- Only two ingredients – You just need hot dogs and crescent roll dough, so there’s no long shopping list or complicated prep work involved.
- Easy enough for kids to help – Wrapping the dough around hot dogs is simple and fun, making this a great recipe to get your little ones involved in the kitchen.
What Kind of Hot Dogs Should I Use?
Any hot dogs you have on hand will work great for this recipe, whether you prefer beef, pork, chicken, or turkey varieties. If you’re feeding kids, regular-sized hot dogs are perfect, but you can also use jumbo dogs if that’s what you have in your fridge – just be aware you might need a bit more dough to wrap them completely. For a healthier option, turkey or chicken hot dogs work just as well and still get nice and juicy when baked. Just make sure your hot dogs are fully cooked (which most are), so all you’re really doing is heating them through and getting that dough golden brown.
Options for Substitutions
This simple recipe is easy to customize with a few swaps:
- Hot dogs: You can use any type of hot dog you prefer – beef, turkey, chicken, or even veggie dogs work great. Mini cocktail sausages are also fun for bite-sized versions, just adjust the wrapping accordingly.
- Crescent roll dough: If you can’t find crescent rolls, puff pastry sheets cut into thin strips work well too. You can also use pizza dough, though you’ll want to roll it thinner and cut it into strips yourself. The texture will be slightly different but still tasty.
Watch Out for These Mistakes While Baking
The biggest mistake when making hot dog mummies is wrapping the dough strips too tightly, which causes them to shrink and tear during baking – leave a little slack and those gaps will stay visible for that authentic mummy look.
Another common error is forgetting to seal the crescent roll seams before cutting your strips, which leads to uneven pieces that don’t wrap smoothly around the hot dogs.
To prevent soggy bottoms, make sure your hot dogs are completely dry before wrapping them, and consider placing them on a wire rack over your baking sheet for better air circulation.
Finally, resist the urge to add the condiment eyes right out of the oven – let the mummies cool for at least 5 minutes so the ketchup or mustard doesn’t slide right off the hot surface.
What to Serve With Hot Dog Mummies?
Hot dog mummies are perfect party food, so I like to keep the sides simple and fun. A big bowl of crispy french fries or tater tots is always a hit, especially with kids who love dipping them in ketchup alongside their mummies. You could also set out a veggie tray with ranch dip or a simple fruit salad to balance out the meal. For a more filling spread, mac and cheese or baked beans make great additions that everyone seems to enjoy.
Storage Instructions
Store: Keep your hot dog mummies in an airtight container in the fridge for up to 3 days. They’re great for making ahead if you’re planning a party or want to prep lunches for the kids. Just let them cool completely before storing so the dough doesn’t get soggy.
Freeze: You can freeze these either before or after baking. If freezing unbaked, assemble them on a baking sheet, freeze until solid, then transfer to a freezer bag for up to 2 months. Baked mummies can be frozen the same way and will keep just as long.
Reheat: Pop them in a 350°F oven for about 10 minutes if they’re coming from the fridge, or 15-20 minutes from frozen. You can also use the microwave for about 30 seconds, but the oven keeps the crescent dough nice and crispy on the outside.
| Preparation Time | 10-15 minutes |
| Cooking Time | 10-15 minutes |
| Total Time | 20-30 minutes |
| Level of Difficulty | Easy |
| Servings | 8 pieces |
Estimated Nutrition
Estimated nutrition for the whole recipe (without optional ingredients):
- Calories: 1200-1400
- Protein: 32-38 g
- Fat: 72-80 g
- Carbohydrates: 100-110 g
Ingredients
- 8 hot dogs (Hebrew National recommended)
- 2 cans (8 oz each) refrigerated crescent dough
- 2 tablespoons ketchup
- 2 tablespoons mustard
- 16 edible candy eyes
- 1 large egg (for egg wash)
- 1/2 teaspoon garlic powder
Step 1: Prep Mise en Place and Preheat
- 1 large egg
- 2 tablespoons ketchup
- 2 tablespoons mustard
- 16 edible candy eyes
Preheat your oven to 375°F.
While it heats, prepare a baking sheet by lining it with parchment paper or leaving it bare (these won’t stick much).
Crack the egg into a small bowl and whisk it with a fork until combined—this is your egg wash.
Set out the ketchup and mustard in small bowls, and arrange the candy eyes nearby so they’re ready for quick application after baking.
Step 2: Prepare Dough and Cut Into Strips
- 2 cans refrigerated crescent dough
Unroll both cans of crescent dough onto a clean work surface.
Gently press and seal any perforated seams so the dough forms a cohesive sheet rather than separating into triangles.
Using a sharp knife, cut the dough into strips approximately 1/4 inch wide—aim for consistency so they wrap evenly.
I like to cut diagonally across the dough to get longer strips, which gives you more flexibility when wrapping.
Step 3: Wrap Hot Dogs as Mummies
- 8 hot dogs
- dough strips from Step 2
Pat the hot dogs dry with a paper towel (this helps the dough stick better).
Starting near the top of each hot dog, wrap the dough strips around it in a crisscross pattern, leaving small intentional gaps between some strips to create the “mummy” effect—don’t cover the entire hot dog.
Leave the very top of each hot dog slightly exposed so you have room for the face.
Arrange wrapped hot dogs on the prepared baking sheet, spacing them about an inch apart.
Step 4: Egg Wash and Season
- egg wash from Step 1
- 1/2 teaspoon garlic powder
Lightly brush the egg wash from Step 1 over the dough strips on each wrapped hot dog—this creates a golden, slightly glossy appearance when baked.
Sprinkle a tiny pinch of garlic powder over each one for subtle seasoning (this adds a savory note that keeps them from tasting too sweet or plain).
Step 5: Bake Until Golden
- wrapped hot dogs from Step 3
Place the baking sheet in the preheated 375°F oven and bake for 10-12 minutes, until the dough is puffed and golden brown.
The hot dogs will heat through and the dough will turn a beautiful light tan color.
Watch toward the end to make sure the tips of the dough don’t brown too much.
Step 6: Add Eyes and Serve
- baked mummies from Step 5
- ketchup and mustard from Step 1
- candy eyes from Step 1
Remove the baking sheet from the oven and let the mummies cool for 1-2 minutes so they’re easier to handle.
Use a small dab of ketchup or mustard to “glue” two candy eyes onto the exposed top of each hot dog.
I find mustard works better for holding the eyes because it’s stickier, but either works—just use what you prefer.
Serve immediately while the dough is still warm and crispy.
5-Ingredient Hot Dog Mummies
Ingredients
- 8 hot dogs (Hebrew National recommended)
- 2 cans (8 oz each) refrigerated crescent dough
- 2 tablespoons ketchup
- 2 tablespoons mustard
- 16 edible candy eyes
- 1 large egg (for egg wash)
- 1/2 teaspoon garlic powder
Instructions
- Preheat your oven to 375°F. While it heats, prepare a baking sheet by lining it with parchment paper or leaving it bare (these won't stick much). Crack the egg into a small bowl and whisk it with a fork until combined—this is your egg wash. Set out the ketchup and mustard in small bowls, and arrange the candy eyes nearby so they're ready for quick application after baking.
- Unroll both cans of crescent dough onto a clean work surface. Gently press and seal any perforated seams so the dough forms a cohesive sheet rather than separating into triangles. Using a sharp knife, cut the dough into strips approximately 1/4 inch wide—aim for consistency so they wrap evenly. I like to cut diagonally across the dough to get longer strips, which gives you more flexibility when wrapping.
- Pat the hot dogs dry with a paper towel (this helps the dough stick better). Starting near the top of each hot dog, wrap the dough strips around it in a crisscross pattern, leaving small intentional gaps between some strips to create the "mummy" effect—don't cover the entire hot dog. Leave the very top of each hot dog slightly exposed so you have room for the face. Arrange wrapped hot dogs on the prepared baking sheet, spacing them about an inch apart.
- Lightly brush the egg wash from Step 1 over the dough strips on each wrapped hot dog—this creates a golden, slightly glossy appearance when baked. Sprinkle a tiny pinch of garlic powder over each one for subtle seasoning (this adds a savory note that keeps them from tasting too sweet or plain).
- Place the baking sheet in the preheated 375°F oven and bake for 10-12 minutes, until the dough is puffed and golden brown. The hot dogs will heat through and the dough will turn a beautiful light tan color. Watch toward the end to make sure the tips of the dough don't brown too much.
- Remove the baking sheet from the oven and let the mummies cool for 1-2 minutes so they're easier to handle. Use a small dab of ketchup or mustard to "glue" two candy eyes onto the exposed top of each hot dog. I find mustard works better for holding the eyes because it's stickier, but either works—just use what you prefer. Serve immediately while the dough is still warm and crispy.


