Summer means sour cherry season in my house. I wait all year for those tart little gems to show up at the farmers market. But let’s be honest – making individual cherry pies is a lot of work. Rolling out multiple crusts, crimping edges, and trying to get them all to bake evenly? No thank you.
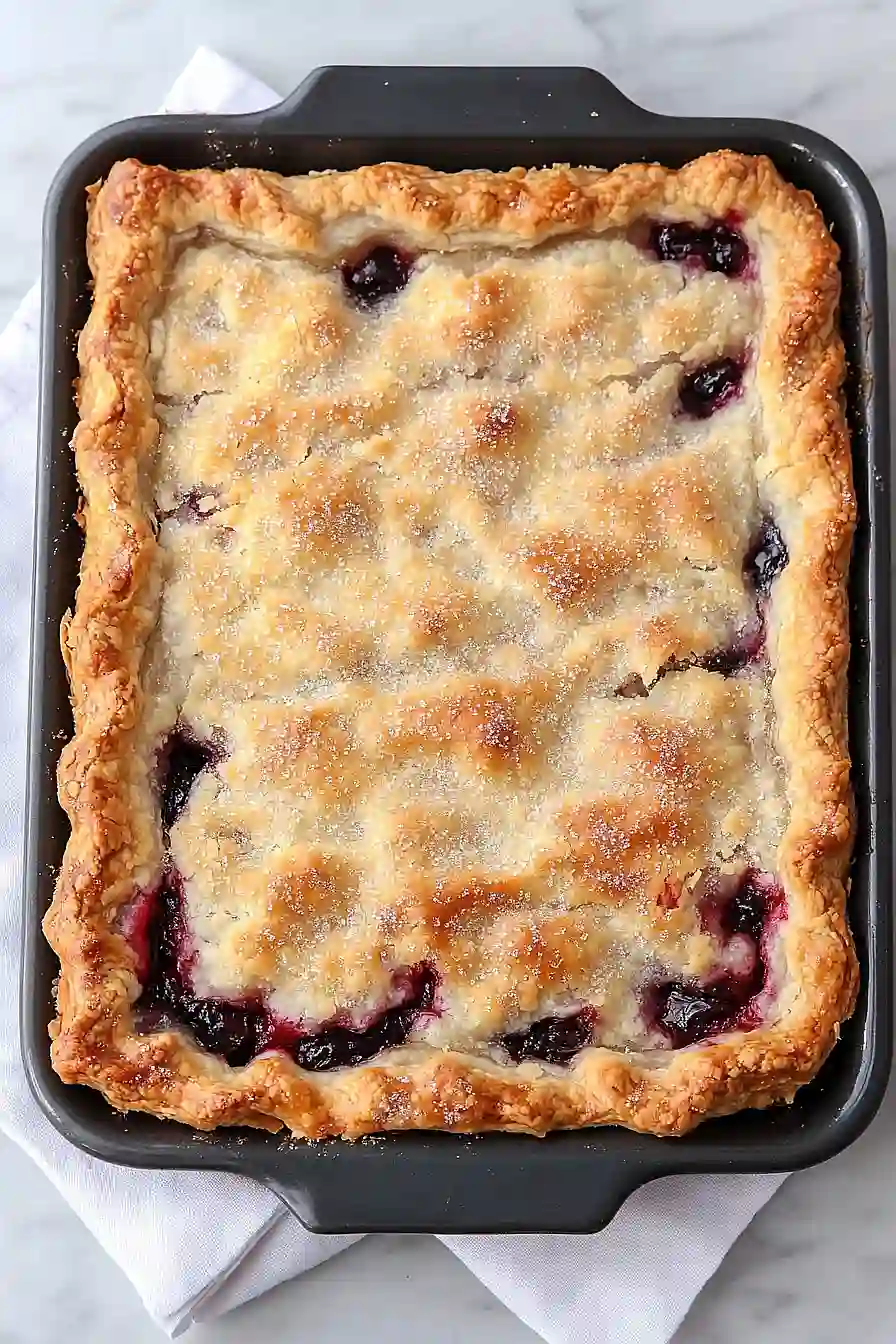
That’s why sour cherry slab pie is my go-to when I want to feed a crowd without losing my mind. One big rectangle of buttery crust, a generous layer of sweet-tart cherries, and you’re done. It bakes on a sheet pan, serves about twelve people, and tastes just as good as those fancy individual pies.
Want something easy for your next barbecue or potluck? This is it. Need to use up a bunch of fresh cherries before they go bad? Same answer. Trust me, once you try slab pie, you’ll never go back to the fussy round ones.
Why You’ll Love This Sour Cherry Slab Pie
- Perfect for feeding a crowd – This slab pie serves way more people than a regular pie, making it ideal for family gatherings, potlucks, or summer barbecues without having to make multiple pies.
- Easy to serve and transport – The rectangular shape makes it simple to cut into neat squares and carry to events, plus no need to worry about perfectly shaped pie slices.
- Tart and sweet balance – Sour cherries give you that perfect tangy flavor that’s not too sweet, and the lemon zest adds a bright pop that makes each bite refreshing.
- Impressive presentation – This rustic slab pie looks like you spent hours in the kitchen, but it’s actually easier to make than a traditional round pie since you don’t need to worry about crimping edges perfectly.
What Kind of Sour Cherries Should I Use?
For the best slab pie, tart sour cherries are your friend – they hold their shape beautifully during baking and won’t turn to mush like sweet cherries sometimes do. Fresh sour cherries are amazing if you can find them in season, but frozen ones work just as well and are available year-round. If you’re using frozen cherries, there’s no need to thaw them first – just toss them right into your pie filling. You can also use jarred or canned sour cherries in a pinch, though fresh or frozen will give you the best texture and flavor.
Options for Substitutions
This sour cherry slab pie is pretty forgiving when it comes to swaps, though a few ingredients are worth keeping as-is:
- Butter-lard pie pastry: If you don’t have homemade dough, store-bought pie crusts work fine – you’ll need about 3 standard crusts. All-butter pastry can replace the butter-lard version, though you might lose some of that flaky texture.
- Sour cherry pie filling: Fresh or frozen sour cherries are best for this recipe since they hold their shape and provide that perfect tart flavor. Sweet cherries can work but add an extra tablespoon of lemon juice to balance the sweetness.
- Heavy cream: For the wash, you can use milk, half-and-half, or a beaten egg mixed with water. Each gives a slightly different golden finish, but all work well.
- Demerara sugar: Regular granulated sugar or turbinado sugar can replace demerara for sprinkling on top. The texture won’t be quite as crunchy, but it’ll still add that nice sweet finish.
- Lemon zest: Orange zest makes a nice substitute, or you can skip it entirely if you don’t have fresh citrus on hand. The pie will still taste great without it.
Watch Out for These Mistakes While Baking
The biggest mistake when making sour cherry slab pie is not properly sealing the edges, which can cause the filling to bubble out and create a sticky mess on your baking sheet – press the top and bottom crusts together firmly and crimp with a fork for the best seal.
Another common error is skipping the egg wash or cream brushing step, as this simple addition gives you that beautiful golden-brown finish that makes your pie look bakery-perfect.
Since sour cherries release quite a bit of juice during baking, make sure to place your slab pie on a rimmed baking sheet or put a piece of parchment paper underneath to catch any drips.
Don’t forget to cut steam vents in the top crust before baking – without them, the steam has nowhere to escape and can cause your crust to puff up unevenly or even burst.
What to Serve With Sour Cherry Slab Pie?
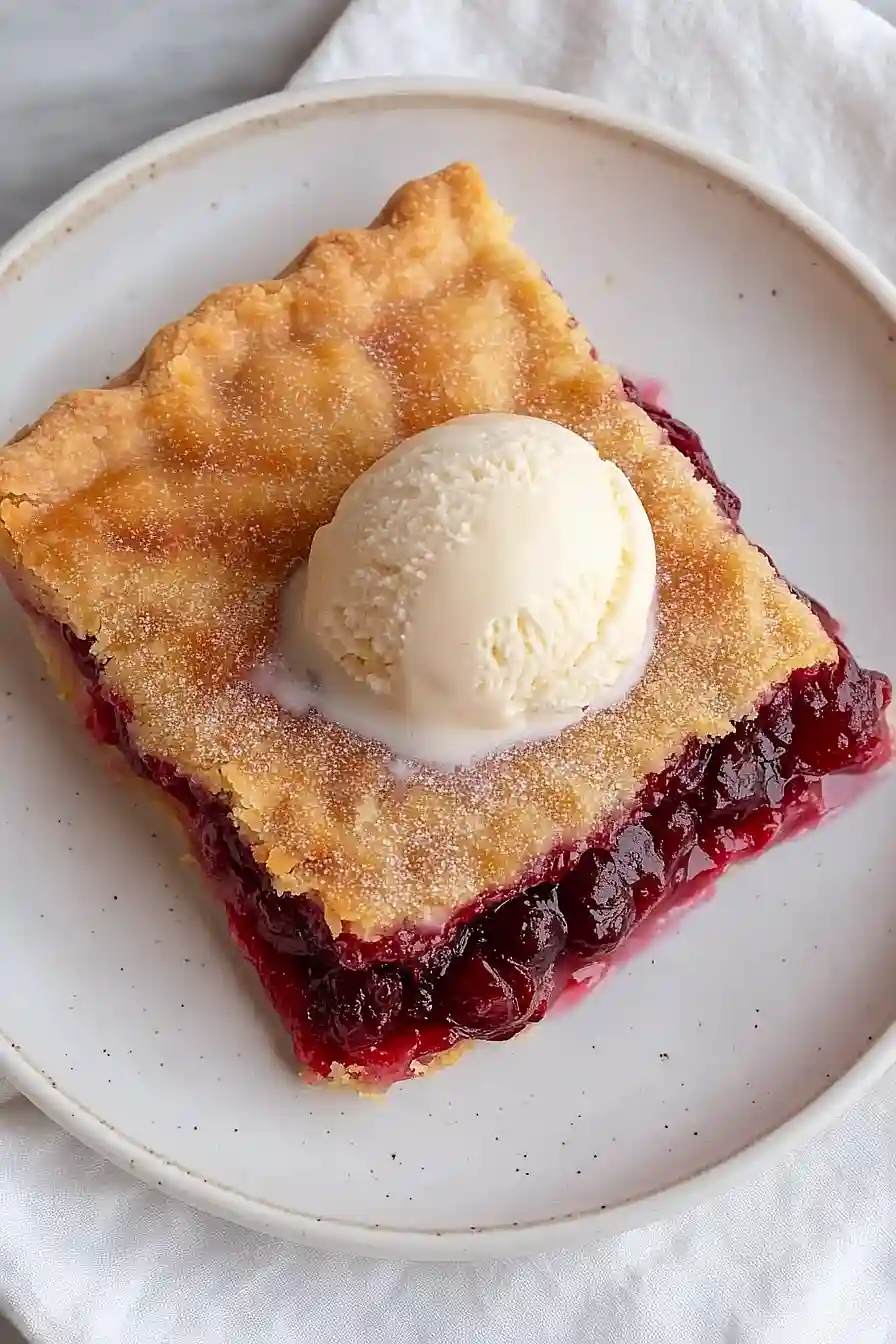
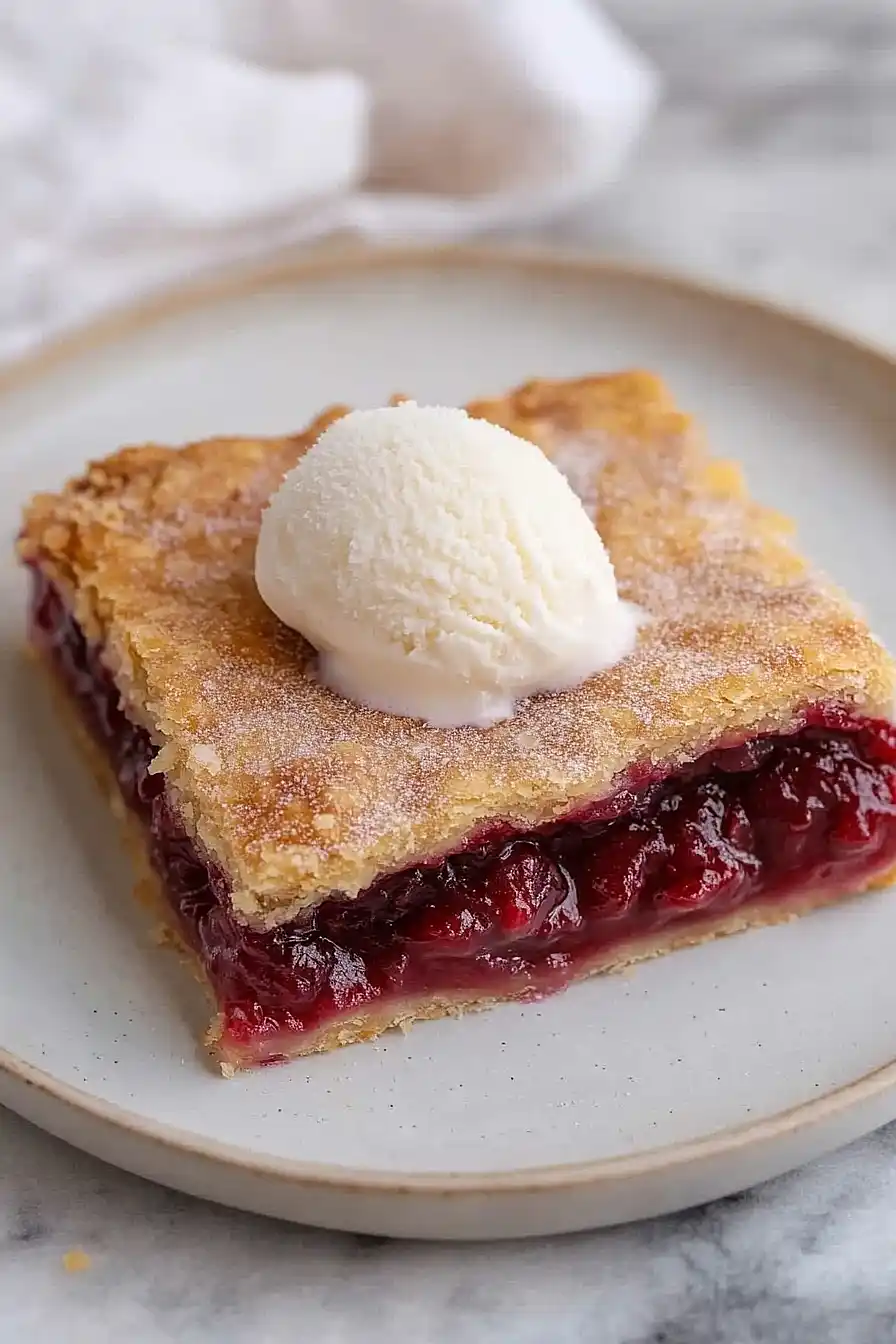
This tart and sweet slab pie is perfect on its own, but a scoop of vanilla ice cream really balances out those bright sour cherries. I love serving it with a dollop of freshly whipped cream or even some tangy Greek yogurt for breakfast the next morning. Since it’s already packed with fruit, you don’t need much else – maybe just a hot cup of coffee or black tea to round out the experience. The pie cuts into neat squares, making it great for potlucks or family gatherings where everyone can grab a piece and enjoy.
Storage Instructions
Keep Fresh: Your sour cherry slab pie will stay delicious covered loosely with foil or plastic wrap at room temperature for up to 2 days. After that, pop it in the fridge where it’ll keep for another 3-4 days. The crust might soften slightly in the fridge, but the flavors actually get better as they meld together.
Freeze: This pie freezes really well for up to 3 months! Wrap individual slices in plastic wrap and then foil, or freeze the whole thing covered tightly. I love having slices ready to go for unexpected guests or when I’m craving a sweet treat.
Serve: Frozen slices can be thawed at room temperature for about 30 minutes, or you can warm them in a 350°F oven for 10-15 minutes to crisp up the crust again. Room temperature pie is perfect as-is, but a quick warm-up in the oven makes the filling bubbly and brings back that fresh-baked taste.
| Preparation Time | 20-30 minutes |
| Cooking Time | 50-55 minutes |
| Total Time | 70-85 minutes |
| Level of Difficulty | Medium |
Estimated Nutrition
Estimated nutrition for the whole recipe (without optional ingredients):
- Calories: 3200-3600
- Protein: 25-35 g
- Fat: 160-190 g
- Carbohydrates: 400-450 g
Ingredients
For the crust:
- 3 discs homemade pie dough (butter-lard blend)
- 2 tbsp heavy cream or 1 large egg blended with 1 tbsp water
- Demerara sugar for topping
For the filling:
- 6 cups homemade sour cherry filling
- 1 tsp grated lemon peel
Step 1: Prepare the Baking Pan and Preheat the Oven
Preheat your oven to 375°F (190°C).
Line a 15x10x1 inch baking pan with parchment paper to prevent the pastry from sticking and to make cleanup easier.
Step 2: Roll Out and Fit the Bottom Crust
- 1 ½ discs homemade pie dough (butter-lard blend)
Take 1 ½ discs of the homemade pie dough (butter-lard blend) and roll them out together into a 12×18 inch rectangle.
Carefully transfer this rolled dough to the prepared pan, allowing the pastry to hang over the sides of the pan.
This will become the base and edges of your slab pie.
Step 3: Roll Out and Prepare the Top Crust
- 1 ½ discs homemade pie dough (butter-lard blend)
Using the remaining 1 ½ discs of homemade pie dough, roll them into an 11×16 inch rectangle.
Set this piece aside—it will be used to cover the filling after it’s added.
Step 4: Fill and Assemble the Pie
- 6 cups homemade sour cherry filling
- 1 tsp grated lemon peel
- top pastry from Step 3
- bottom crust from Step 2
Pour the homemade sour cherry filling into the prepared bottom crust in the pan.
Sprinkle the grated lemon peel evenly over the cherry filling.
Then gently place the prepared top crust from Step 3 over the filling.
Bring the overhanging edges of the bottom crust up over the top crust, pinching to seal and flute the edges for a decorative look.
I like to give the edges an extra press with my fingers to make sure they’re really sealed and golden once baked!
Step 5: Glaze and Decorate the Pie
- 2 tbsp heavy cream or 1 large egg blended with 1 tbsp water
- Demerara sugar for topping
Brush the top crust evenly with heavy cream, or use an egg wash made by blending 1 large egg with 1 tablespoon of water.
Sprinkle generously with coarse Demerara sugar for a crunchy, sparkly finish.
Using a fork, dock the top crust by poking small holes or vents; this allows steam to escape during baking.
Step 6: Bake the Pie
Place the assembled slab pie on the middle rack of the oven and bake for 50 to 55 minutes, or until the crust is deeply golden and the cherry filling is bubbling.
This ensures the pastry is cooked through and the filling is perfectly thickened.
Step 7: Cool, Slice, and Serve
Transfer the baked pie to a wire rack and let it cool until just warm, about 40 minutes.
This helps the filling set so you get clean slices.
Once cooled, slice and serve.
I always find the pie is easiest to cut and most delicious when it’s still a bit warm from the oven!
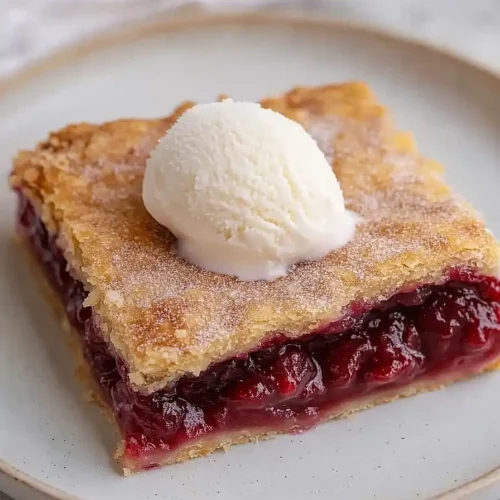
Classic Sour Cherry Slab Pie
Ingredients
For the crust:
- 3 discs homemade pie dough (butter-lard blend)
- 2 tbsp heavy cream or 1 large egg blended with 1 tbsp water
- Demerara sugar for topping
For the filling:
- 6 cups homemade sour cherry filling
- 1 tsp grated lemon peel
Instructions
- Preheat your oven to 375°F (190°C). Line a 15x10x1 inch baking pan with parchment paper to prevent the pastry from sticking and to make cleanup easier.
- Take 1 ½ discs of the homemade pie dough (butter-lard blend) and roll them out together into a 12x18 inch rectangle. Carefully transfer this rolled dough to the prepared pan, allowing the pastry to hang over the sides of the pan. This will become the base and edges of your slab pie.
- Using the remaining 1 ½ discs of homemade pie dough, roll them into an 11x16 inch rectangle. Set this piece aside—it will be used to cover the filling after it's added.
- Pour the homemade sour cherry filling into the prepared bottom crust in the pan. Sprinkle the grated lemon peel evenly over the cherry filling. Then gently place the prepared top crust from Step 3 over the filling. Bring the overhanging edges of the bottom crust up over the top crust, pinching to seal and flute the edges for a decorative look. I like to give the edges an extra press with my fingers to make sure they're really sealed and golden once baked!
- Brush the top crust evenly with heavy cream, or use an egg wash made by blending 1 large egg with 1 tablespoon of water. Sprinkle generously with coarse Demerara sugar for a crunchy, sparkly finish. Using a fork, dock the top crust by poking small holes or vents; this allows steam to escape during baking.
- Place the assembled slab pie on the middle rack of the oven and bake for 50 to 55 minutes, or until the crust is deeply golden and the cherry filling is bubbling. This ensures the pastry is cooked through and the filling is perfectly thickened.
- Transfer the baked pie to a wire rack and let it cool until just warm, about 40 minutes. This helps the filling set so you get clean slices. Once cooled, slice and serve. I always find the pie is easiest to cut and most delicious when it's still a bit warm from the oven!

