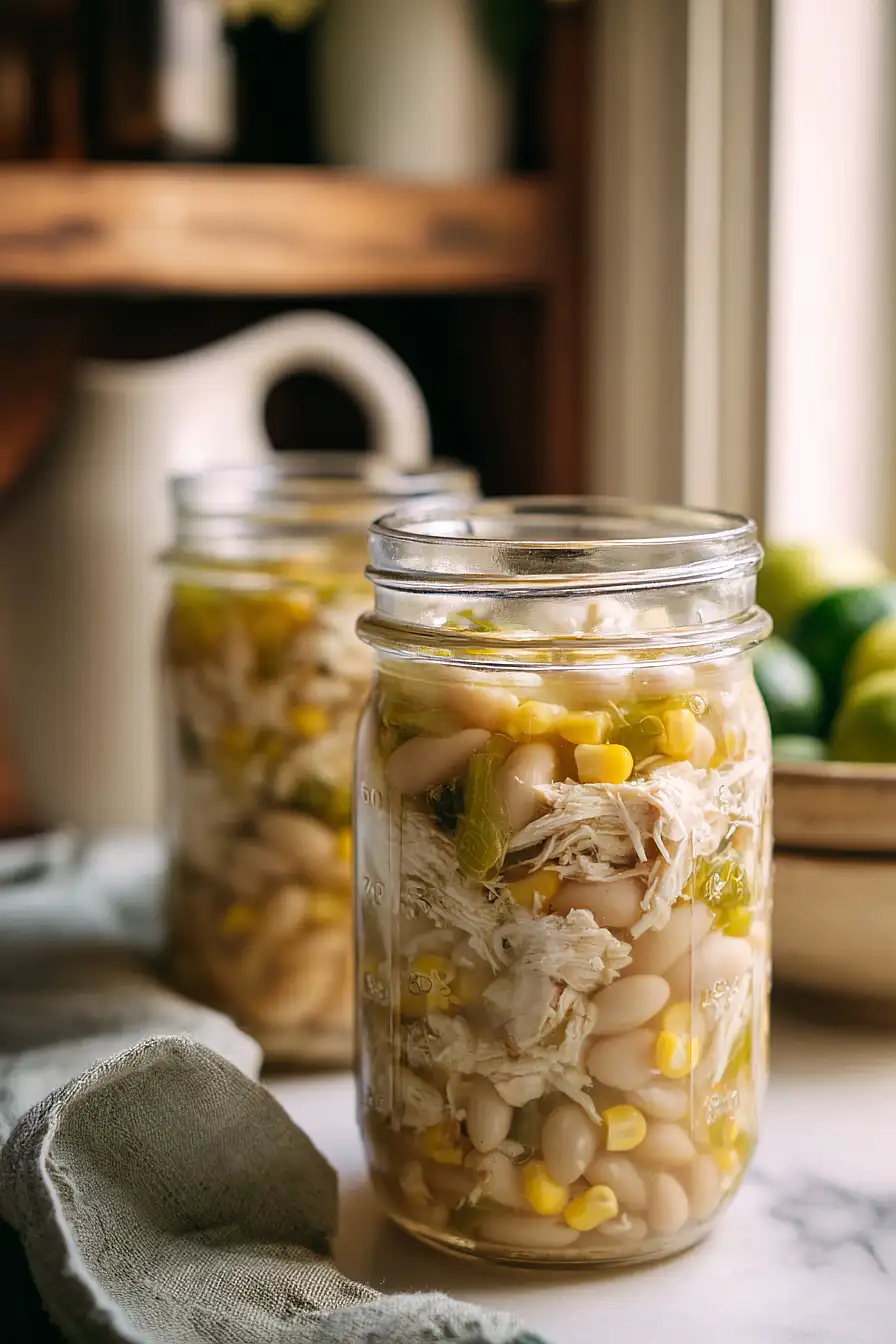
If you ask me, canning your own white chicken chili is one of the smartest ways to stock your pantry.
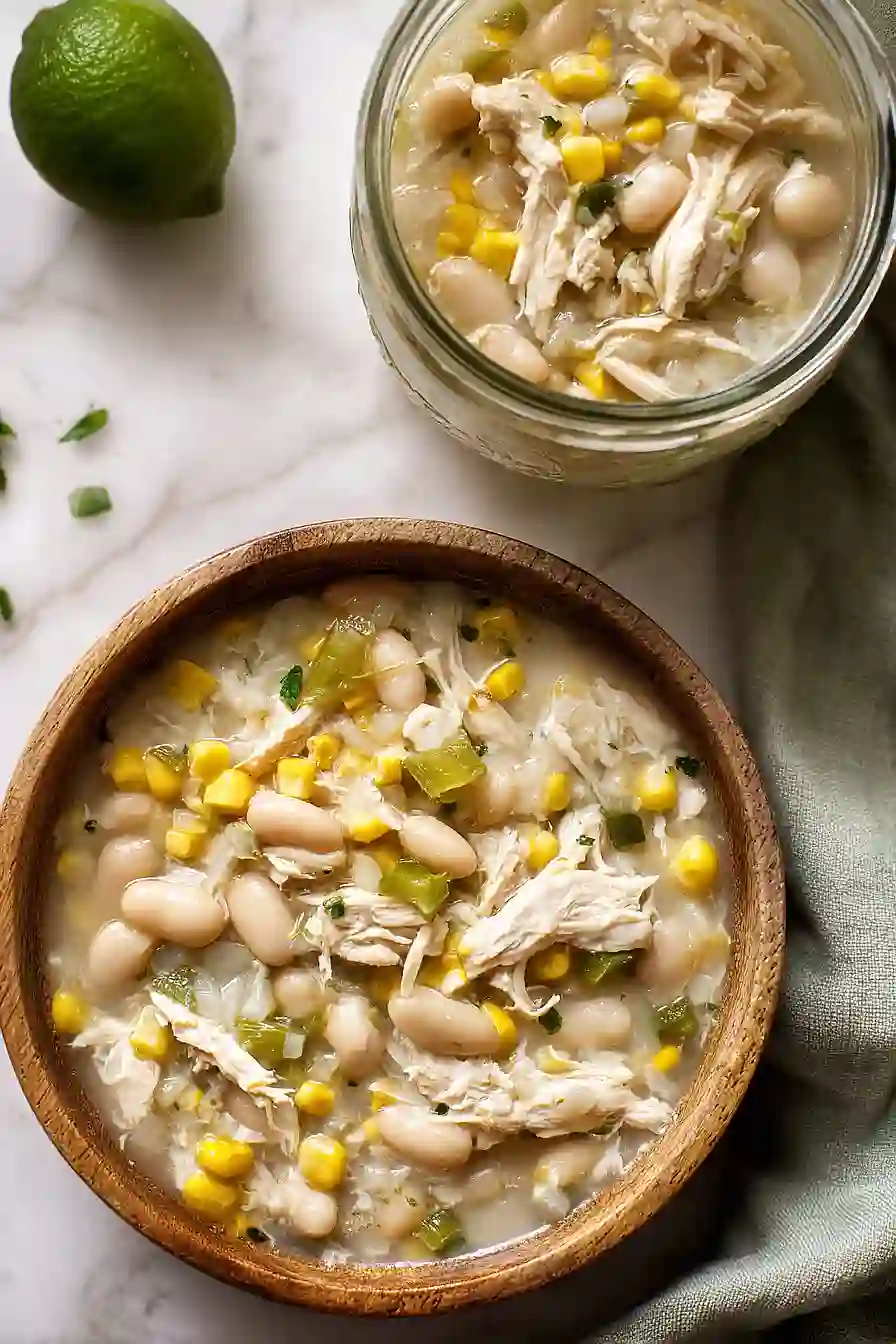
This hearty chili brings together tender chicken, creamy great northern beans, and sweet corn in a spiced broth that hits all the right notes. The cumin and Mexican oregano give it that warm, comforting flavor, while a touch of cayenne adds just enough heat.
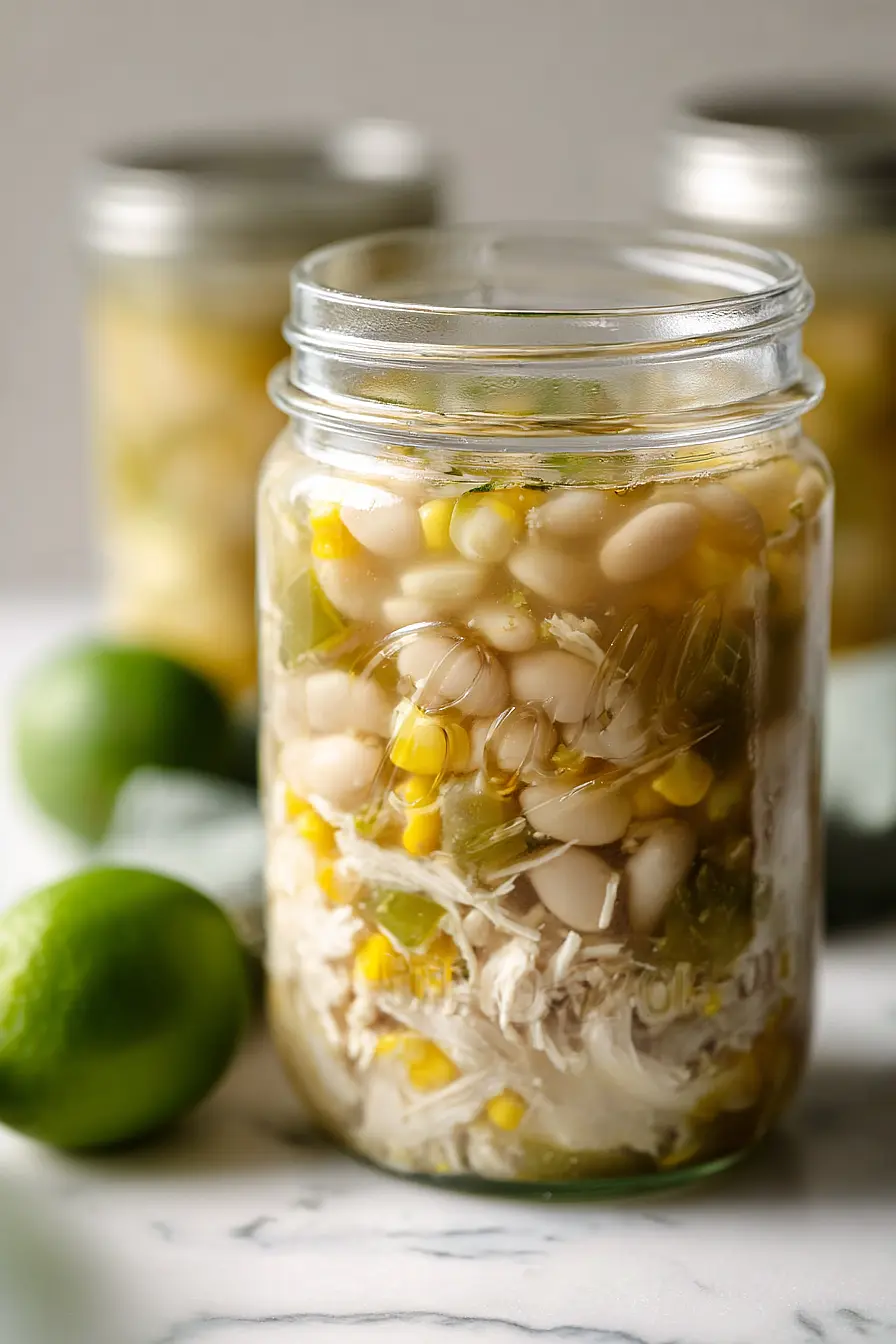
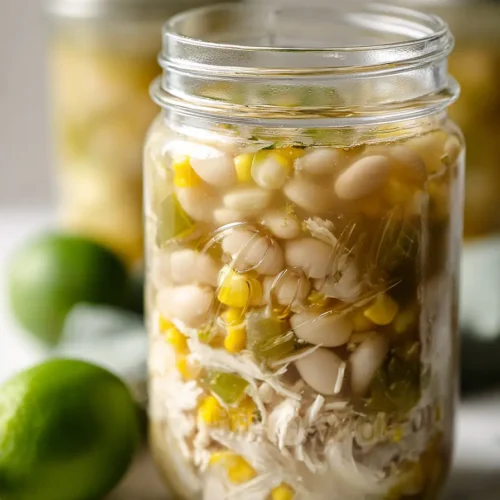
The best part? You can make big batches and preserve them in jars, so you’ve got ready-to-eat meals waiting on your shelf. Just crack open a jar, heat it up, and dinner is done.
It’s the kind of recipe that makes busy weeknights easier, and it tastes even better than anything you’d buy at the store.
Why You’ll Love This White Chicken Chili
- Meal prep made easy – Canning this chili means you’ll have ready-to-eat meals sitting in your pantry for months, perfect for those nights when you don’t feel like cooking.
- High-protein comfort food – With chicken breast and great northern beans, this chili packs plenty of protein to keep you full and satisfied.
- Customizable heat level – You can adjust the spice to your liking with the optional cayenne powder, making it mild enough for kids or spicy for those who love a kick.
- Budget-friendly batch cooking – Making a large batch at once saves you money compared to buying canned chili, and you control exactly what goes into it.
- Pantry-stable convenience – No freezer space needed – these jars of chili can sit on your shelf until you’re ready to enjoy a warm, hearty meal in minutes.
What Kind of Beans Should I Use?
Great northern beans are the classic choice for white chicken chili, and they’re what I recommend for this canning recipe. These white beans have a mild, slightly nutty flavor and hold their shape well during the long cooking and canning process. If you can’t find great northern beans, navy beans or cannellini beans make good substitutes – they’re all part of the white bean family and will give you similar results. Just make sure you soak whichever beans you choose overnight, as this helps them cook evenly and reduces the overall cooking time. Dried beans are definitely the way to go here rather than canned, since you’ll be processing them in jars anyway and the texture will be much better.
Options for Substitutions
While canning recipes need to be followed carefully for safety, there are still a few swaps you can make:
- Great northern beans: You can substitute with navy beans or cannellini beans – they’re similar in size and texture. Just make sure to pre-soak them overnight like the recipe calls for.
- Chicken breast: Chicken thighs work great here and actually add more flavor. You can also use a rotisserie chicken to save time – just remove the skin and shred the meat.
- Peppers: Use whatever peppers you prefer – poblanos for mild heat, jalapeños for medium spice, or bell peppers if you want to keep it mild. Just stick to the total amount called for in the recipe.
- Mexican oregano: If you can’t find Mexican oregano, regular oregano works fine. You might want to add a pinch of marjoram to get closer to that authentic flavor.
- Corn kernels: Fresh, frozen, or canned corn all work – just drain canned corn well before using.
- Canning salt: Don’t skip the salt entirely as it’s important for preservation, but you can use kosher salt or sea salt. Just avoid iodized table salt as it can make the liquid cloudy.
Watch Out for These Mistakes While Canning
The biggest mistake when canning white chicken chili is not following the exact processing times and pressure levels, as low-acid foods like beans and chicken require precise pressure canning to prevent botulism – never use a water bath canner for this recipe.
Skipping the pre-boiling step for the beans can lead to undercooked beans in your final product, so make sure to drain and boil them separately before adding them to the chili mixture.
Another common error is not leaving the full 1-inch headspace, which can cause jars to fail to seal properly or even burst during processing, so use a headspace tool or ruler to measure accurately.
Finally, resist the urge to add thickeners like flour or cornstarch to your chili before canning, as these can interfere with heat penetration and create unsafe conditions – it’s better to thicken individual servings after opening if desired.
What to Serve With White Chicken Chili?
White chicken chili is hearty enough to stand on its own, but I love serving it with warm cornbread or tortilla chips on the side for scooping. You can also set up a toppings bar with shredded cheese, sour cream, diced avocado, fresh cilantro, and lime wedges so everyone can customize their bowl. If you want to make it more filling, serve it over rice or with quesadillas cut into wedges for dipping. A simple side salad with a citrus vinaigrette is a nice fresh contrast to the rich, creamy chili.
Storage Instructions
Canning: Once your white chicken chili is properly canned following safe pressure canning guidelines, those jars will keep in a cool, dark place for up to a year. Make sure each jar is sealed correctly before storing, and always check for any signs of spoilage before eating.
Refrigerate: If you’re not canning and just want to enjoy it fresh, store the chili in an airtight container in the fridge for up to 4 days. It actually tastes even better the next day once all those flavors have had time to mingle together!
Freeze: You can also freeze portions in freezer-safe containers or bags for up to 3 months if you prefer that over canning. Just leave a little headspace for expansion, and thaw it in the fridge overnight when you’re ready to eat.
| Preparation Time | 30-40 minutes |
| Cooking Time | 75-90 minutes |
| Total Time | 105-130 minutes |
| Level of Difficulty | Hard |
| Servings | 8 servings |
Estimated Nutrition
Estimated nutrition for the whole recipe (without optional ingredients):
- Calories: 3100-3400
- Protein: 290-320 g
- Fat: 30-40 g
- Carbohydrates: 450-500 g
Ingredients
- 1 tsp black pepper (freshly ground for better flavor)
- 1 tbsp Mexican oregano (dried)
- 12 cups chicken broth
- 1 tbsp ground cumin
- 1 tsp cayenne powder
- 4 cups onions (diced into 1/2-inch pieces)
- 1 lb great northern beans (dried, soaked overnight)
- 2 lb chicken breast (cut into 1-inch chunks)
- 2 tsp canning salt (pickling salt preferred)
- 4 cups corn kernels (fresh or frozen)
- 1.5 cups bell peppers (diced, about 1/4-inch pieces)
- 4 garlic cloves (minced)
Step 1: Prepare Canning Equipment and Mise en Place
- 1 tsp black pepper
- 1 tbsp Mexican oregano
- 1 tbsp ground cumin
- 1 tsp cayenne powder
- 4 cups onions
- 4 garlic cloves
- 1.5 cups bell peppers
- 2 lb chicken breast
Set up your canning equipment by placing clean jars, lids, and bands within reach.
Fill your pressure canner with water and heat to 180°F—this gentle heat prevents jars from cracking when you add the hot chili later.
While the water heats, prepare all your ingredients: dice the onions into 1/2-inch pieces, mince the garlic cloves, dice the bell peppers into 1/4-inch pieces, and cut the chicken breasts into 1-inch chunks.
Combine all your dry spices (black pepper, Mexican oregano, cumin, and cayenne powder) in a small bowl so they’re ready to add to the pot in one go.
Step 2: Precook the Dried Beans
- 1 lb great northern beans
Drain the soaked great northern beans and place them in a large pot, then cover with fresh water.
Bring to a boil and let them boil for 2-3 minutes, then drain completely.
This pre-boiling step removes any remaining surface impurities and begins to soften the beans, which is important for achieving the right texture in the final canned product without overcooking them during the canning process.
Step 3: Build and Simmer the Chili Base
- precooked beans from Step 2
- 2 lb chicken breast
- 12 cups chicken broth
- 4 cups onions
- 4 garlic cloves
- 1.5 cups bell peppers
- 4 cups corn kernels
- spice mixture from Step 1
- 2 tsp canning salt
In a large, heavy-bottomed pot, combine the precooked beans from Step 2, chicken chunks, and chicken broth.
Bring to a rolling boil, then add the diced onions, minced garlic, diced bell peppers, corn kernels, and the spice mixture from Step 1.
Stir well to distribute the spices evenly.
I like to add the spices all at once rather than gradually because it creates a more cohesive flavor profile.
Return the mixture to a gentle boil and maintain it for exactly 5 minutes—this cooks the vegetables slightly while keeping them from becoming mushy, and ensures the chicken is cooked through.
Don’t skip this boiling time, as it’s crucial for food safety in pressure canning.
Step 4: Fill and Prepare Jars for Processing
- hot chili from Step 3
- 12 cups chicken broth
Working quickly while the chili is still hot, ladle it into the preheated jars from Step 1, leaving exactly 1 inch of headspace at the top—this space is essential for proper seal formation.
If you run short on chili before filling all jars, top them off with additional hot chicken broth to maintain the 1-inch headspace.
Using a clean, damp cloth, wipe the rims of each jar thoroughly to remove any food particles or spills, which would prevent a proper seal.
Place the lids on the jars and screw the bands down firmly by hand until they’re snug but not over-tightened—I find it helpful to tighten until I feel slight resistance, then stop.
Step 5: Process Jars in Pressure Canner
- prepared jars from Step 4
Carefully place the filled and sealed jars into the preheated canner from Step 1, ensuring they’re covered with about 2 inches of water.
Set your pressure canner to process at 10 psi, then start timing: process pint jars for 75 minutes or quart jars for 90 minutes, adjusting pressure as needed based on your altitude and canner type.
Maintain steady pressure throughout processing—fluctuating pressure compromises the seal.
This high-heat, high-pressure environment eliminates harmful bacteria that could cause botulism.
Step 6: Cool and Remove Jars
Once processing time is complete, turn off the heat and let the pressure canner cool naturally until the pressure gauge reads zero—do not force cool it by running cold water over it, as rapid temperature changes can crack the jars.
Carefully remove the jars from the canner using a jar lifter and place them on a clean towel or wooden surface, spacing them at least 1 inch apart.
Listen for the distinctive ‘ping’ sound as each jar cools and seals—this is the satisfying confirmation that the lids have sealed properly.
Let the jars sit undisturbed for at least 12 hours before checking seals or moving them.
Step 7: Test Seals and Store
After 12 hours of cooling, check each jar by pressing down on the center of the lid—it should be slightly concave and not flex or pop.
If a lid flexes, that jar did not seal properly and should be refrigerated for immediate use or reprocessed with a new lid.
Remove the metal bands and store sealed jars in a cool, dark place.
Your white chicken chili will keep for up to 1 year when properly canned.
Best Canning White Chicken Chili
Ingredients
- 1 tsp black pepper (freshly ground for better flavor)
- 1 tbsp Mexican oregano (dried)
- 12 cups chicken broth
- 1 tbsp ground cumin
- 1 tsp cayenne powder
- 4 cups onions (diced into 1/2-inch pieces)
- 1 lb great northern beans (dried, soaked overnight)
- 2 lb chicken breast (cut into 1-inch chunks)
- 2 tsp canning salt (pickling salt preferred)
- 4 cups corn kernels (fresh or frozen)
- 1.5 cups bell peppers (diced, about 1/4-inch pieces)
- 4 garlic cloves (minced)
Instructions
- Set up your canning equipment by placing clean jars, lids, and bands within reach. Fill your pressure canner with water and heat to 180°F—this gentle heat prevents jars from cracking when you add the hot chili later. While the water heats, prepare all your ingredients: dice the onions into 1/2-inch pieces, mince the garlic cloves, dice the bell peppers into 1/4-inch pieces, and cut the chicken breasts into 1-inch chunks. Combine all your dry spices (black pepper, Mexican oregano, cumin, and cayenne powder) in a small bowl so they're ready to add to the pot in one go.
- Drain the soaked great northern beans and place them in a large pot, then cover with fresh water. Bring to a boil and let them boil for 2-3 minutes, then drain completely. This pre-boiling step removes any remaining surface impurities and begins to soften the beans, which is important for achieving the right texture in the final canned product without overcooking them during the canning process.
- In a large, heavy-bottomed pot, combine the precooked beans from Step 2, chicken chunks, and chicken broth. Bring to a rolling boil, then add the diced onions, minced garlic, diced bell peppers, corn kernels, and the spice mixture from Step 1. Stir well to distribute the spices evenly. I like to add the spices all at once rather than gradually because it creates a more cohesive flavor profile. Return the mixture to a gentle boil and maintain it for exactly 5 minutes—this cooks the vegetables slightly while keeping them from becoming mushy, and ensures the chicken is cooked through. Don't skip this boiling time, as it's crucial for food safety in pressure canning.
- Working quickly while the chili is still hot, ladle it into the preheated jars from Step 1, leaving exactly 1 inch of headspace at the top—this space is essential for proper seal formation. If you run short on chili before filling all jars, top them off with additional hot chicken broth to maintain the 1-inch headspace. Using a clean, damp cloth, wipe the rims of each jar thoroughly to remove any food particles or spills, which would prevent a proper seal. Place the lids on the jars and screw the bands down firmly by hand until they're snug but not over-tightened—I find it helpful to tighten until I feel slight resistance, then stop.
- Carefully place the filled and sealed jars into the preheated canner from Step 1, ensuring they're covered with about 2 inches of water. Set your pressure canner to process at 10 psi, then start timing: process pint jars for 75 minutes or quart jars for 90 minutes, adjusting pressure as needed based on your altitude and canner type. Maintain steady pressure throughout processing—fluctuating pressure compromises the seal. This high-heat, high-pressure environment eliminates harmful bacteria that could cause botulism.
- Once processing time is complete, turn off the heat and let the pressure canner cool naturally until the pressure gauge reads zero—do not force cool it by running cold water over it, as rapid temperature changes can crack the jars. Carefully remove the jars from the canner using a jar lifter and place them on a clean towel or wooden surface, spacing them at least 1 inch apart. Listen for the distinctive 'ping' sound as each jar cools and seals—this is the satisfying confirmation that the lids have sealed properly. Let the jars sit undisturbed for at least 12 hours before checking seals or moving them.
- After 12 hours of cooling, check each jar by pressing down on the center of the lid—it should be slightly concave and not flex or pop. If a lid flexes, that jar did not seal properly and should be refrigerated for immediate use or reprocessed with a new lid. Remove the metal bands and store sealed jars in a cool, dark place. Your white chicken chili will keep for up to 1 year when properly canned.


