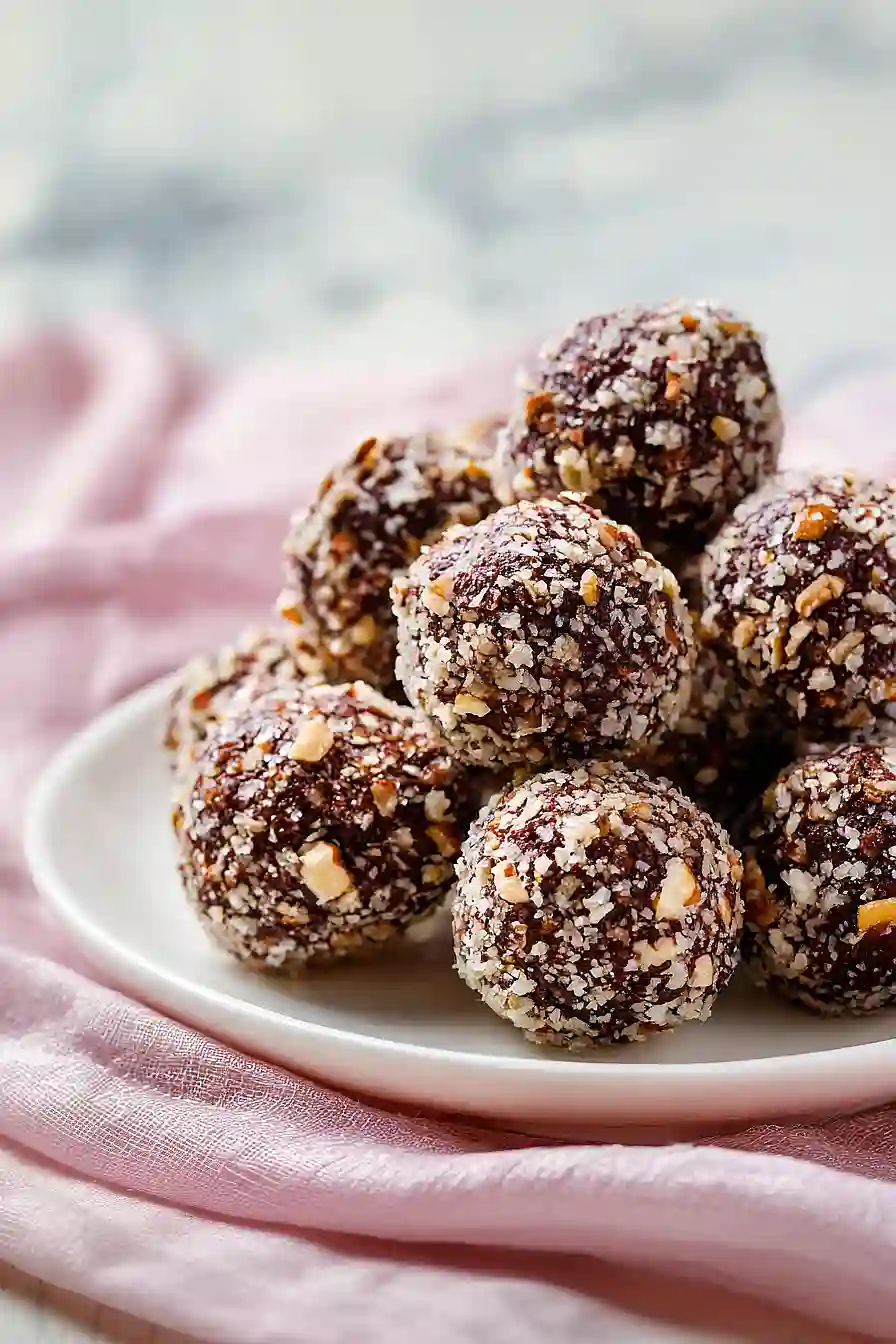
I’ve always had a thing for no-bake desserts. There’s something about whipping up something sweet without turning on the oven that feels like cheating in the best way. These chocolate walnut truffles are exactly that kind of recipe—quick to make, impressive to serve, and perfect when you need a homemade treat but don’t want to spend hours in the kitchen.
The best part? You probably have most of these ingredients already. We’re talking walnuts, dark chocolate, and dulce de leche doing all the heavy lifting. The dulce de leche gives these truffles a caramel-like sweetness, while the walnuts add that satisfying crunch. And the raisins? They might sound surprising, but trust me, they fit right in.
I make these when I need a last-minute dessert for company or when my kids are begging for something sweet after dinner. Mix everything together, roll them into balls, and you’re done. No complicated steps, no fancy equipment needed.
Why You’ll Love These Chocolate Walnut Truffles
- No-bake dessert – These truffles come together without turning on your oven, making them perfect for hot days or when you want something sweet without the fuss of baking.
- Simple ingredients – With just five ingredients, you probably have most of what you need already in your pantry.
- Perfect for gifting – These homemade truffles look fancy and taste amazing, making them ideal for holidays, parties, or as a thoughtful gift for friends and family.
- Rich and indulgent – The combination of dark chocolate, crunchy walnuts, and creamy dulce de leche creates a treat that tastes like it came from a gourmet chocolate shop.
What Kind of Walnuts Should I Use?
For these truffles, you’ll want to use fresh walnuts that still have a sweet, buttery flavor rather than any that taste bitter or stale. Raw walnuts work perfectly fine here, though lightly toasted walnuts can add an extra depth of flavor if you have a few minutes to spare. You can buy them already shelled in bags at most grocery stores, or go for halves and pieces which are usually cheaper than whole walnuts and work just as well since you’ll be chopping them up anyway. Just give them a quick taste before using to make sure they’re fresh – old walnuts can have an off flavor that’ll come through in your finished truffles.
Options for Substitutions
These truffles are easy to customize based on what you have in your pantry:
- Dark chocolate chips: You can use milk chocolate or semi-sweet chocolate chips instead, though the truffles will be a bit sweeter. Dark chocolate bars chopped into small pieces work just as well as chips.
- Unsalted butter: Salted butter works fine here – just skip any extra salt you might add. You can also use coconut oil for a dairy-free version, though the flavor will be slightly different.
- Walnuts: Feel free to swap walnuts with pecans, almonds, or hazelnuts. Each nut will give the truffles a slightly different flavor profile, but they’ll all work great.
- Raisins: Dried cranberries, chopped dates, or dried cherries make good substitutes. You can also leave them out entirely if you prefer a simpler truffle.
- Dulce de leche: If you can’t find dulce de leche, you can use caramel sauce (reduce the amount slightly as it’s thinner) or make a quick substitute by simmering a can of sweetened condensed milk for about 2 hours.
Watch Out for These Mistakes While Cooking
The biggest mistake when making chocolate truffles is working with a mixture that’s too warm, which makes rolling the balls nearly impossible and leaves you with a sticky mess on your hands – make sure to chill the mixture until it’s firm enough to hold its shape, and if it gets too soft while rolling, pop it back in the fridge for 10 minutes.
When melting the chocolate and butter, avoid overheating by using low heat or short microwave bursts, as burnt chocolate turns grainy and bitter instead of smooth and creamy.
To get perfectly round truffles, lightly dampen your hands with cold water before rolling each ball, which prevents sticking and helps you work faster before the mixture warms up from your body heat.
What to Serve With Chocolate Walnut Truffles?
These truffles are perfect for serving at the end of a dinner party alongside coffee or espresso, which really brings out the rich chocolate flavor. I like setting them out on a platter with fresh berries like raspberries or strawberries to cut through the sweetness, plus it makes for a nice presentation. A glass of dessert wine or even a bold red wine pairs beautifully if you’re feeling fancy. You could also serve them with a simple scoop of vanilla ice cream for an easy but impressive dessert, or just keep them in a tin for an afternoon treat with tea.
Storage Instructions
Store: Keep your chocolate walnut truffles in an airtight container in the fridge for up to 2 weeks. I like to place parchment paper between layers so they don’t stick together. They’re actually even better after a day or two when all the flavors have had time to meld together!
Freeze: These truffles freeze really well for up to 3 months. Just arrange them in a single layer on a baking sheet and freeze until solid, then transfer to a freezer bag. This way they won’t clump together and you can grab just one or two whenever you need a sweet treat.
Serve: Let the truffles sit at room temperature for about 10 minutes before serving if they’ve been in the fridge. If frozen, thaw them in the refrigerator overnight. They taste best when they’re slightly cool but not rock hard, so the texture is nice and creamy.
| Preparation Time | 30-45 minutes |
| Cooking Time | 0 minutes |
| Total Time | 105-135 minutes |
| Level of Difficulty | Easy |
| Servings | 24 truffles |
Estimated Nutrition
Estimated nutrition for the whole recipe (without optional ingredients):
- Calories: 1100-1250
- Protein: 13-17 g
- Fat: 80-90 g
- Carbohydrates: 100-120 g
Ingredients
- 1/2 cup dulce de leche (room temperature for easier mixing)
- 1/4 cup raisins
- 1.25 cups walnuts (finely chopped into 1/4-inch pieces)
- 2 tbsp unsalted butter (I use Kerrygold for rich flavor)
- 2 oz dark chocolate chips (finely chopped for even melting)
Step 1: Prepare Mise en Place
- 1.25 cups walnuts
- 1/4 cup raisins
Finely chop the walnuts into 1/4-inch pieces, then set aside 1/2 cup of the chopped walnuts in a shallow bowl for coating—this will be your truffle exterior.
Roughly chop the remaining walnuts and the raisins, keeping them separate for now.
Having everything prepped and ready makes the assembly process smooth and prevents the chocolate from setting while you’re still chopping.
Step 2: Melt Chocolate and Butter
- 2 oz dark chocolate chips
- 2 tbsp unsalted butter
Combine the finely chopped dark chocolate and unsalted butter in a heatproof bowl.
Set the bowl over simmering water (double boiler method) or microwave in 20-second intervals, stirring between each pulse, until completely melted and smooth.
I use Kerrygold butter here because its rich, creamy quality adds incredible depth to these truffles.
Once melted, remove from heat and let cool for 1-2 minutes before proceeding.
Step 3: Build the Truffle Core
- melted chocolate and butter mixture from Step 2
- 1/2 cup dulce de leche
- roughly chopped walnuts and raisins from Step 1
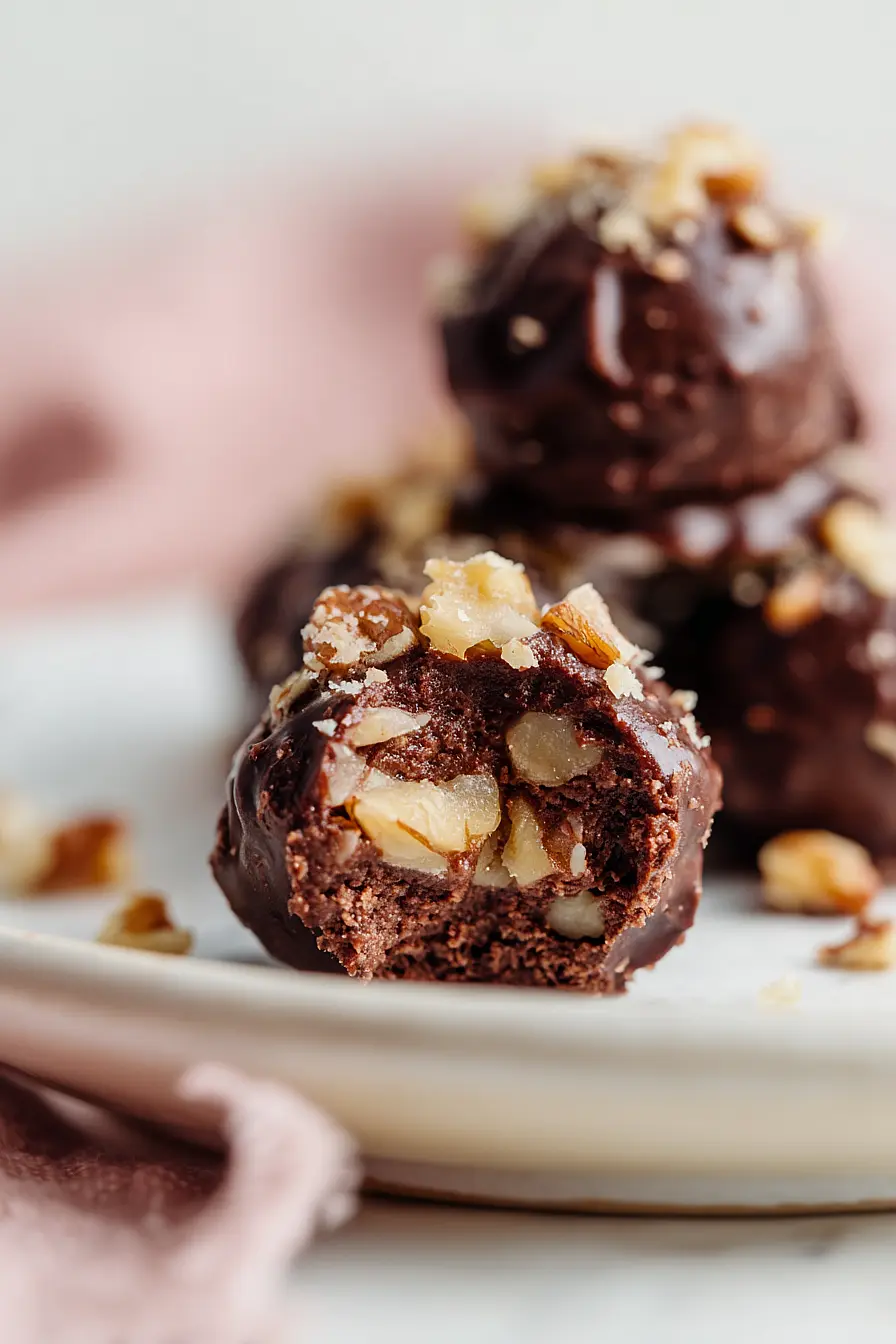
Stir the room-temperature dulce de leche into the melted chocolate mixture until fully incorporated and smooth.
The dulce de leche should be at room temperature for easier mixing—if it’s too cold, it will seize the chocolate.
Fold in the roughly chopped walnuts and raisins until evenly distributed throughout the mixture.
Step 4: Chill and Set the Mixture
- truffle mixture from Step 3
Transfer the mixture to the refrigerator and chill for 15-30 minutes, until it firms up enough to hold its shape when rolled but is still pliable.
The mixture should be cool to the touch and have a fudgy consistency.
Check at the 15-minute mark—you want it firm enough to roll but not so hard it becomes difficult to work with.
Step 5: Roll and Coat the Truffles
- chilled truffle mixture from Step 4
- reserved chopped walnuts from Step 1
Remove the chilled mixture from the refrigerator and, working quickly, use a small spoon or your hands to scoop and roll the mixture into 1-inch balls.
I find that slightly damp hands prevent sticking without adding moisture.
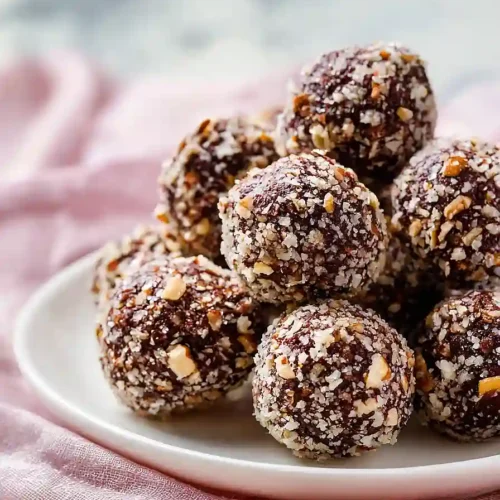
Immediately roll each ball in the reserved 1/2 cup of finely chopped walnuts, pressing gently so the coating adheres well.
Work efficiently—the truffles will soften as they sit at room temperature.
Step 6: Final Chill and Serve
- walnut-coated truffles from Step 5
Transfer the coated truffles to a parchment-lined plate and return to the refrigerator for at least 1 hour to firm up completely.
This final chill ensures the truffles hold their shape and develop a nice firm exterior.
Once set, store in an airtight container in the refrigerator for up to 2 weeks, or freeze for longer storage.
Classic Chocolate Walnut Truffles
Ingredients
- 1/2 cup dulce de leche (room temperature for easier mixing)
- 1/4 cup raisins
- 1.25 cups walnuts (finely chopped into 1/4-inch pieces)
- 2 tbsp unsalted butter (I use Kerrygold for rich flavor)
- 2 oz dark chocolate chips (finely chopped for even melting)
Instructions
- Finely chop the walnuts into 1/4-inch pieces, then set aside 1/2 cup of the chopped walnuts in a shallow bowl for coating—this will be your truffle exterior. Roughly chop the remaining walnuts and the raisins, keeping them separate for now. Having everything prepped and ready makes the assembly process smooth and prevents the chocolate from setting while you're still chopping.
- Combine the finely chopped dark chocolate and unsalted butter in a heatproof bowl. Set the bowl over simmering water (double boiler method) or microwave in 20-second intervals, stirring between each pulse, until completely melted and smooth. I use Kerrygold butter here because its rich, creamy quality adds incredible depth to these truffles. Once melted, remove from heat and let cool for 1-2 minutes before proceeding.
- Stir the room-temperature dulce de leche into the melted chocolate mixture until fully incorporated and smooth. The dulce de leche should be at room temperature for easier mixing—if it's too cold, it will seize the chocolate. Fold in the roughly chopped walnuts and raisins until evenly distributed throughout the mixture.
- Transfer the mixture to the refrigerator and chill for 15-30 minutes, until it firms up enough to hold its shape when rolled but is still pliable. The mixture should be cool to the touch and have a fudgy consistency. Check at the 15-minute mark—you want it firm enough to roll but not so hard it becomes difficult to work with.
- Remove the chilled mixture from the refrigerator and, working quickly, use a small spoon or your hands to scoop and roll the mixture into 1-inch balls. I find that slightly damp hands prevent sticking without adding moisture. Immediately roll each ball in the reserved 1/2 cup of finely chopped walnuts, pressing gently so the coating adheres well. Work efficiently—the truffles will soften as they sit at room temperature.
- Transfer the coated truffles to a parchment-lined plate and return to the refrigerator for at least 1 hour to firm up completely. This final chill ensures the truffles hold their shape and develop a nice firm exterior. Once set, store in an airtight container in the refrigerator for up to 2 weeks, or freeze for longer storage.


