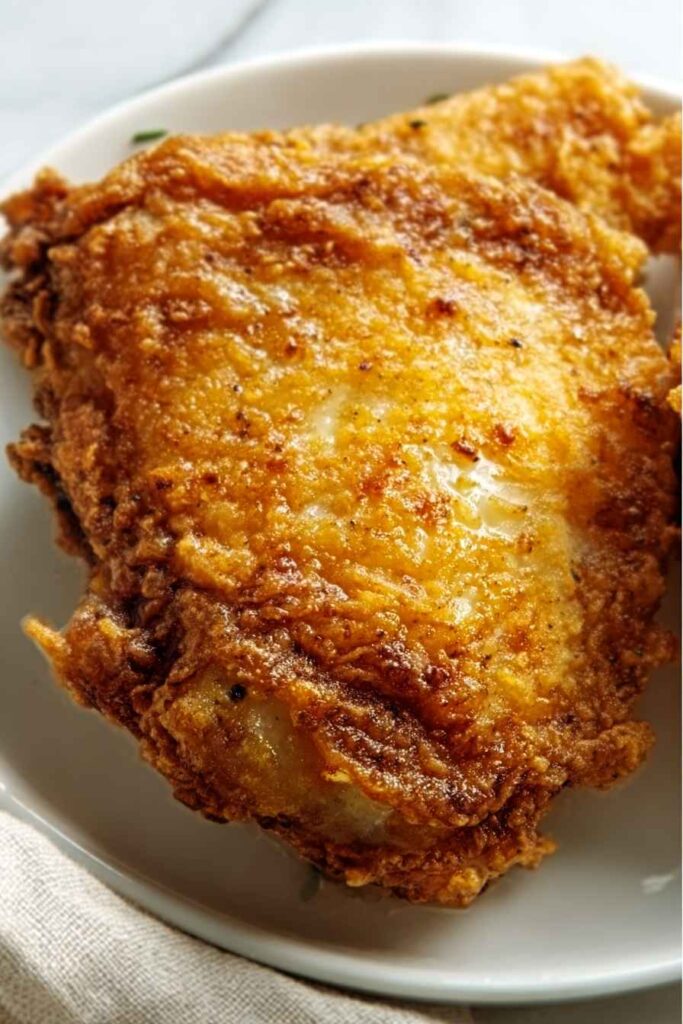
Finding a foolproof way to cook juicy, crispy fried chicken thighs at home can feel impossible. After all, getting that perfect golden crust while keeping the meat tender inside is tricky enough without worrying about oil temperature, timing, or ending up with a greasy mess on your stovetop.
Fortunately, this fried chicken thigh recipe takes all the guesswork out of the process. It’s straightforward enough for busy weeknights, uses simple ingredients you probably already have, and delivers restaurant-quality results every single time.
Why You’ll Love This Fried Chicken Thighs
- Juicy, flavorful meat – Chicken thighs stay tender and moist during frying, unlike chicken breasts that can easily dry out. The dark meat has so much more flavor too.
- Crispy, seasoned coating – The buttermilk marinade and well-spiced flour coating create that perfect golden crust that cracks when you bite into it.
- Budget-friendly option – Chicken thighs cost way less than breasts but taste so much better when fried. You get restaurant-quality results without the high price tag.
- Make-ahead friendly – The buttermilk marinade actually improves the longer it sits, so you can prep this the night before for even better flavor and tender meat.
- Crowd-pleasing comfort food – Nothing beats homemade fried chicken for family dinners, potlucks, or weekend gatherings. It’s the kind of food that brings people together.
What Kind of Chicken Thighs Should I Use?
For the best fried chicken, you’ll want to stick with bone-in, skin-on chicken thighs rather than boneless or skinless varieties. The bone helps the meat stay juicy during cooking, while the skin gets crispy and golden when fried properly. You can use either fresh or frozen thighs, but if you’re starting with frozen, make sure they’re completely thawed before you begin marinating. When shopping, look for thighs that are roughly the same size so they’ll cook evenly, and don’t worry if they seem a bit fatty – that’s what makes them so flavorful and tender.
Options for Substitutions
This fried chicken recipe is pretty forgiving when it comes to swaps and substitutions:
- Buttermilk: No buttermilk? Mix 1 cup regular milk with 1 tablespoon white vinegar or lemon juice and let it sit for 5 minutes. You can also use plain yogurt thinned with a little milk.
- Chicken thighs: While thighs give you the juiciest results, you can definitely use drumsticks, wings, or even bone-in chicken breasts. Just adjust cooking times – breasts will cook faster than thighs.
- Corn oil: Any neutral oil with a high smoke point works great – try vegetable oil, canola oil, or peanut oil. Avoid olive oil as it burns at high temperatures.
- All-purpose flour: You can substitute with self-rising flour (just reduce the salt in the coating by half) or use a gluten-free flour blend if needed.
- Spices: Feel free to adjust the heat level by reducing or omitting the cayenne pepper. You can also add other spices like dried thyme, oregano, or even a pinch of brown sugar for extra flavor.
Watch Out for These Mistakes While Cooking
The biggest mistake when frying chicken thighs is not maintaining the right oil temperature – if it’s too hot (over 375°F), your chicken will burn on the outside while staying raw inside, and if it’s too cool (under 325°F), you’ll end up with greasy, soggy coating.
Another common error is overcrowding the pan, which drops the oil temperature and prevents that crispy crust from forming, so fry in batches of 3-4 thighs at most.
Don’t skip the buttermilk marinating step or rush it – at least 2 hours (or overnight) helps tenderize the meat and creates better flavor, and always let the chicken come to room temperature for 30 minutes before frying for more even cooking.
Finally, resist the urge to flip too early or too often – let each side cook undisturbed for about 6-8 minutes until golden brown, and use a meat thermometer to ensure the internal temperature reaches 165°F at the thickest part.

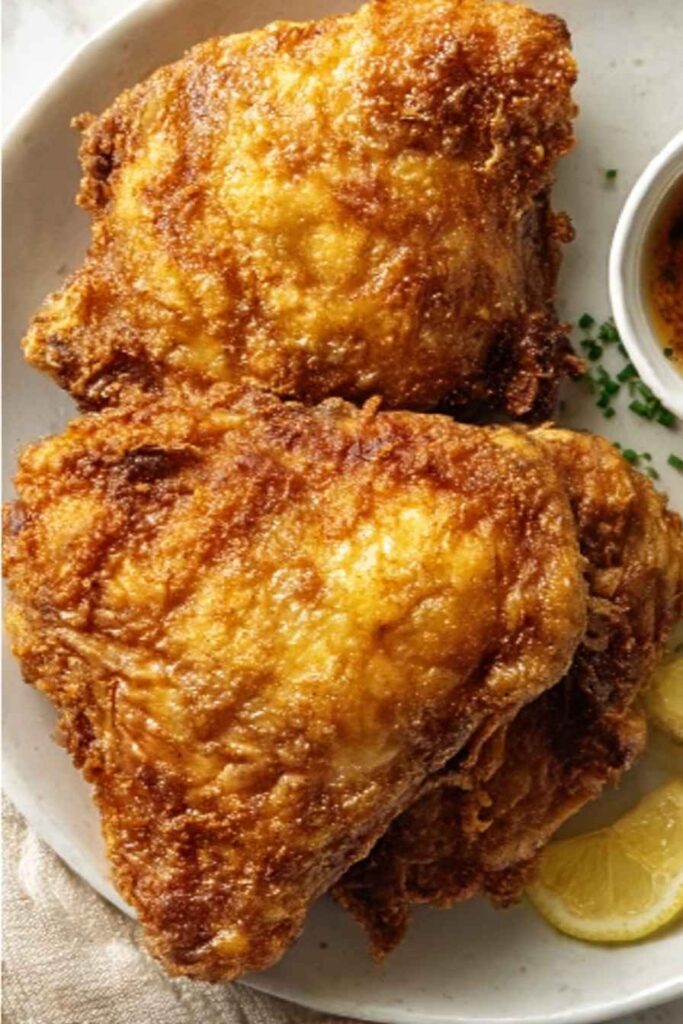
What to Serve With Fried Chicken Thighs?
Fried chicken thighs are perfect with classic Southern sides like creamy mashed potatoes and gravy, coleslaw, and buttery biscuits that can soak up all those crispy, flavorful drippings. Mac and cheese is another crowd-pleaser that pairs beautifully with the crispy, seasoned coating on these thighs. For something a bit lighter, try serving them with a fresh cucumber salad or some honey-drizzled cornbread on the side. Don’t forget about green beans or corn on the cob if you want to add some veggies to round out the meal!
Storage Instructions
Keep Fresh: Store your leftover fried chicken thighs in the refrigerator for up to 3-4 days in an airtight container or wrapped in foil. Let them cool completely before storing to keep that crispy coating from getting too soggy. I like to place a paper towel in the container to absorb any extra moisture.
Freeze: These chicken thighs freeze really well for up to 3 months! Wrap each piece individually in plastic wrap, then place them in a freezer bag. This way you can grab just what you need for a quick meal later on.
Reheat: To get that crispy skin back, reheat in a 375°F oven for about 15-20 minutes until heated through. Skip the microwave if you can – it’ll make the coating soft and chewy. If you’re reheating from frozen, add an extra 10-15 minutes to the oven time.
| Preparation Time | 30-240 minutes |
| Cooking Time | 50-60 minutes |
| Total Time | 80-300 minutes |
| Level of Difficulty | Medium |
Estimated Nutrition
Estimated nutrition for the whole recipe (without optional ingredients):
- Calories: 4000-4500
- Protein: 200-220 g
- Fat: 230-250 g
- Carbohydrates: 300-320 g
Ingredients
For the marinade:
- 1/2 tsp black pepper
- 1 tsp paprika
- 1 pint buttermilk (adds tenderness and tang)
- 1/2 tsp cayenne pepper (adjust to taste for heat level)
- 3 lb bone-in, skin-on chicken thighs (pat dry before coating)
- 1 tsp salt
- 2 tsp garlic powder (freshly ground preferred for more flavor)
- 1 tsp onion powder
For the flour coating:
- 2 cups all-purpose flour (I use King Arthur all-purpose flour)
- 1 tsp paprika (for color and mild flavor)
- 1/2 tsp salt
- 1/4 tsp black pepper
For frying:
- Corn oil for deep-frying (or any neutral oil like vegetable or canola)
Step 1: Prepare the Buttermilk Marinade and Marinate the Chicken
- 1 pint buttermilk
- 1 tsp salt
- 2 tsp garlic powder
- 1 tsp onion powder
- 1/2 tsp black pepper
- 1/2 tsp cayenne pepper
- 1 tsp paprika
- 3 lb bone-in, skin-on chicken thighs
Pat the chicken thighs dry with paper towels—this is crucial for better browning later.
In a large bowl, whisk together the buttermilk, salt, garlic powder, onion powder, black pepper, cayenne pepper, and paprika until well combined.
Submerge the chicken thighs completely in the marinade, cover the bowl, and refrigerate for at least 30 minutes and up to 4 hours.
The longer marinating time will develop deeper flavor and more tender meat.
I find that marinating for at least 2 hours gives the best results without overdoing it.
Step 2: Prepare the Dry Seasoning Mix and Set Up Your Workspace
- 2 cups all-purpose flour
- 1/2 tsp salt
- 1/4 tsp black pepper
- 1 tsp paprika
While the chicken marinates (or while you’re waiting near the end of marinating time), combine the flour, salt, black pepper, and paprika in a shallow bowl or large plate.
Whisk the mixture together so the seasonings are evenly distributed throughout the flour.
Set up your frying and baking stations: preheat your oven to 380°F and place a wire rack over a baking sheet near your stove.
This mise en place will keep everything moving smoothly once you start frying.
Step 3: Coat the Chicken and Let It Rest
- marinated chicken from Step 1
- seasoned flour mixture from Step 2
Remove the chicken from the buttermilk marinade one piece at a time, allowing excess liquid to drip back into the bowl for about 5 seconds.
Working with one thigh at a time, dredge it in the seasoned flour mixture from Step 2, making sure all sides are evenly coated.
Gently shake off any excess flour and place the coated thigh on a clean sheet or plate.
Once all pieces are coated, let them rest uncovered for 30 minutes at room temperature.
This resting period allows the coating to adhere better and creates a crispier crust when fried.
Step 4: Heat the Oil and Begin Frying
- corn oil for deep-frying
Fill a large, heavy-bottomed pot or Dutch oven with corn oil to about 2/3 capacity and heat it to 350°F on the stove.
Use a candy or deep-fry thermometer to monitor the temperature accurately—this is essential for even cooking and proper browning.
While the oil heats, make sure your wire rack is positioned on the baking sheet and placed near your stove for easy transfer.
Step 5: Fry the Chicken in Batches Until Golden
- coated chicken from Step 3
- heated oil from Step 4
Once the oil reaches 350°F, carefully place 3-4 chicken thighs into the hot oil, skin-side down first.
Avoid overcrowding the pot—working in batches ensures even cooking and maintains the oil temperature.
Fry for 12-15 minutes total, turning once halfway through, until the chicken is deep golden brown on all sides.
Use tongs or a slotted spoon to transfer each piece to the wire rack on the baking sheet.
I always make sure not to disturb the chicken too much while frying; letting it cook undisturbed creates that beautiful golden crust.
Step 6: Finish Cooking in the Oven and Rest
- fried chicken from Step 5
Transfer the baking sheet with the fried chicken on the wire rack to the preheated 380°F oven.
Bake for 40 minutes or until the internal temperature reaches 165°F when measured at the thickest part of the thigh without touching bone.
Once cooked through, remove the baking sheet from the oven and let the chicken rest for 5-10 minutes before serving.
This brief resting period allows the juices to redistribute throughout the meat, keeping it moist and tender.


