If you ask me, homemade raspberry jam is pure magic in a jar.
This simple three-ingredient recipe creates a sweet spread that’s bursting with fresh berry flavor. The natural tartness of raspberries balances perfectly with just the right amount of sugar and a splash of lemon juice.
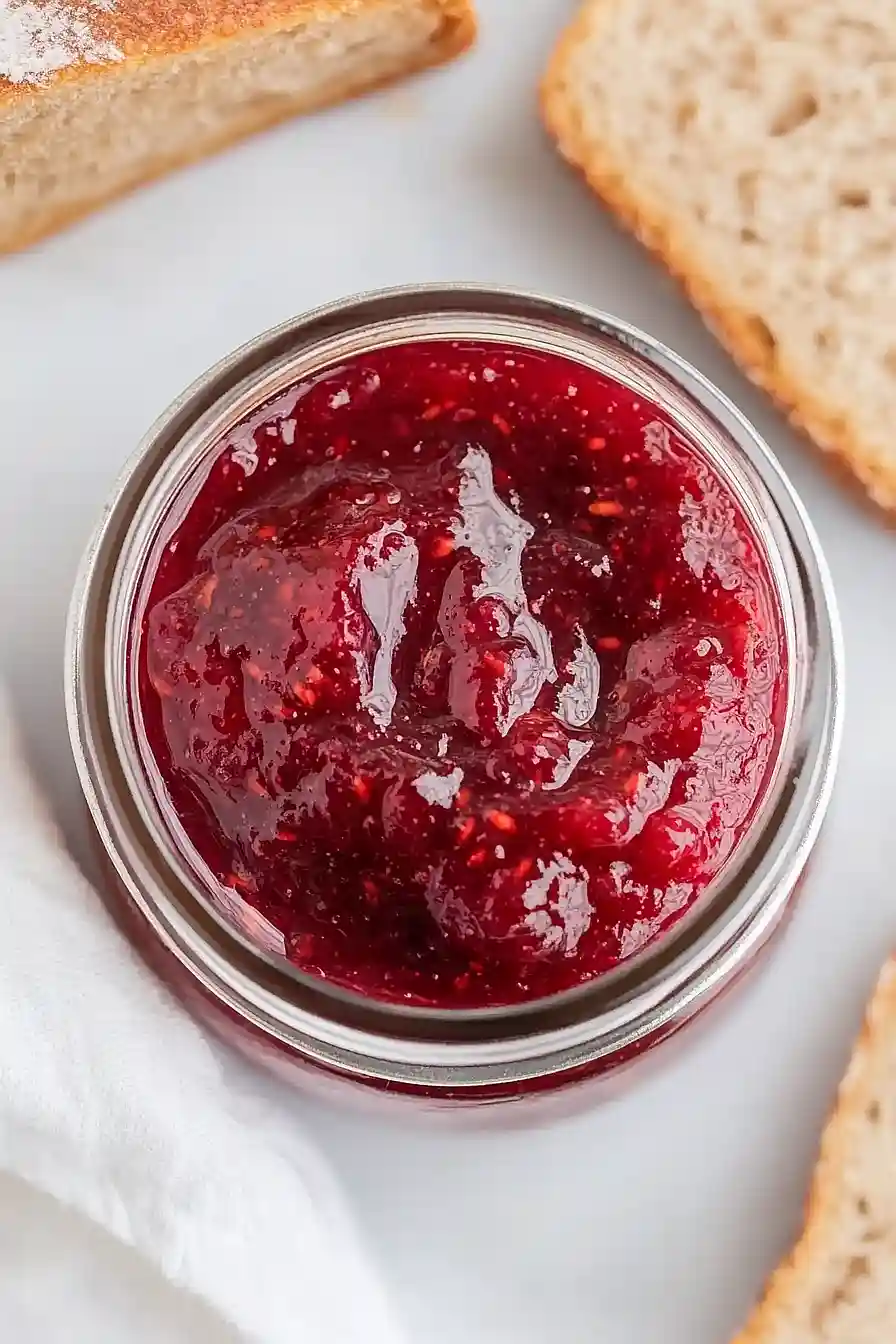
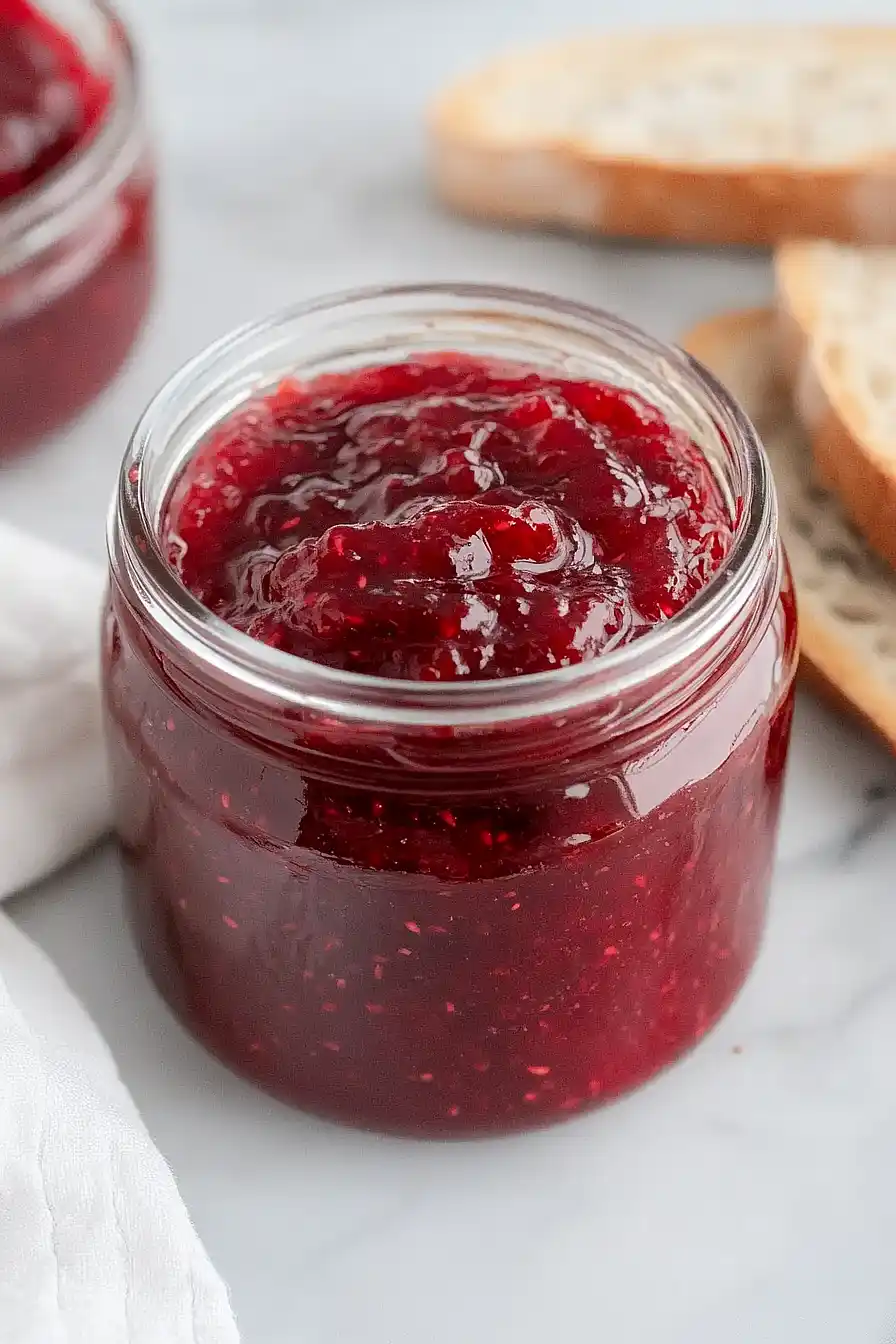
It’s cooked low and slow on the stovetop until it reaches that perfect jam consistency. Fresh raspberries break down naturally, creating chunky bits that give each spoonful great texture.
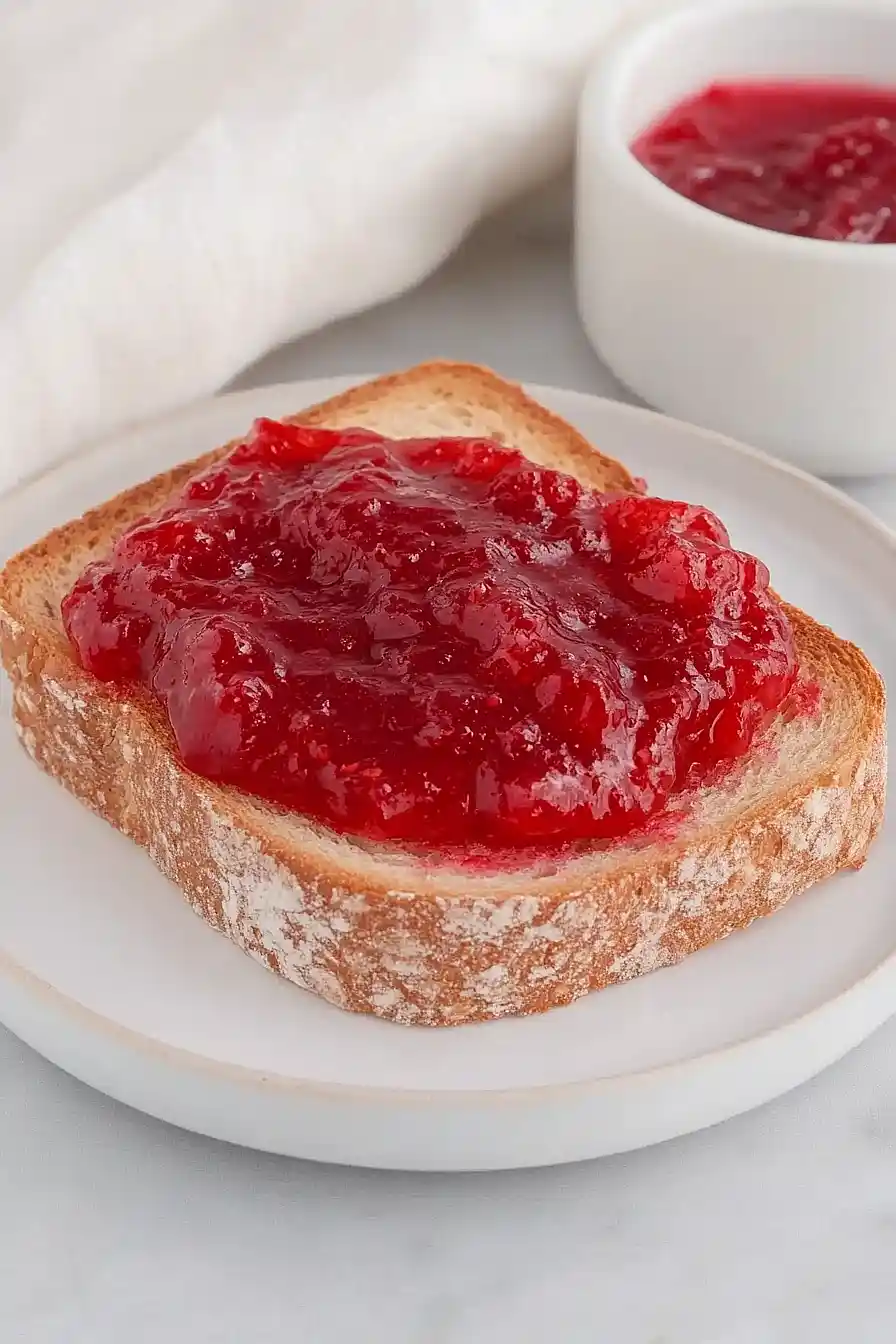
It’s the kind of homemade treat that makes your morning toast feel special, and it’s easier to make than you might think.
Why You’ll Love This Raspberry Jam
- Simple ingredients – Just four basic ingredients that you can easily find at any grocery store – no pectin or complicated additives needed.
- Quick homemade jam – Ready in under an hour, this recipe lets you enjoy fresh, homemade jam without spending all day in the kitchen.
- Fresh, bright flavor – The lemon zest and juice really make the raspberry flavor pop, giving you a jam that tastes so much better than store-bought versions.
- Perfect for beginners – This straightforward recipe is great if you’ve never made jam before – no special equipment or tricky techniques required.
- Versatile spread – Great on toast, biscuits, or even swirled into yogurt, plus it makes a thoughtful homemade gift for friends and family.
What Kind of Raspberries Should I Use?
Fresh raspberries are definitely the way to go for this jam recipe, and you’ll get the best flavor when they’re in season during summer months. Look for berries that are plump and bright red without any mushy spots or white fuzzy mold. If fresh raspberries aren’t available or are too pricey, frozen raspberries work just fine too – just thaw them completely and drain any excess liquid before using. You can even mix different varieties like red and black raspberries if you want to experiment with flavor, though traditional red raspberries will give you that classic jam taste most people expect.
Options for Substitutions
This simple jam recipe is pretty forgiving, but here are some swaps you can make:
- Fresh raspberries: You can use frozen raspberries instead – just thaw them completely and drain any excess liquid first. Other berries like strawberries, blackberries, or blueberries work great too, though cooking times might vary slightly.
- Sugar: Regular granulated sugar is really the best choice here since it helps the jam set properly. You can reduce it to 1½ cups if you prefer less sweetness, but don’t go lower than that or your jam might not thicken right.
- Lemon juice and zest: Fresh lemon is key for helping the jam set and balancing the sweetness, so I wouldn’t skip this. If you’re out of fresh lemons, bottled lemon juice works in a pinch – use the same amount.
- Pectin: This recipe relies on the natural pectin in raspberries, but if you want a firmer set, you can add 1 package of powdered pectin. Just follow the package directions for timing when to add it.
Watch Out for These Mistakes While Cooking
The biggest mistake when making raspberry jam is cooking it at too high heat, which can cause the fruit to break down too quickly and create a burnt taste – keep your heat at medium and be patient with the process.
Another common error is not testing for doneness properly, so use the plate test by dropping a small amount of jam on a chilled plate and pushing it with your finger – if it wrinkles and holds its shape, it’s ready.
Don’t skip the lemon juice even if you think you don’t need it, as the acid helps the jam set properly and prevents the sugar from crystallizing, plus it balances the sweetness perfectly.
Finally, avoid stirring too vigorously once the jam starts thickening, as gentle stirring preserves more of those lovely whole raspberry pieces that make homemade jam so much better than store-bought.
What to Serve With Raspberry Jam?
This homemade raspberry jam is perfect spread on warm buttery toast or fresh biscuits for breakfast or an afternoon snack. I love using it as a filling for thumbprint cookies or swirled into plain yogurt with some granola for a quick treat. It also makes a great topping for pancakes, waffles, or even vanilla ice cream when you want something a little special. For a fancy touch, try pairing it with cream cheese on a bagel or use it as a sweet layer in a peanut butter and jelly sandwich – the bright berry flavor really makes everything taste better!
Storage Instructions
Refrigerate: Once your raspberry jam has cooled completely, transfer it to clean glass jars or airtight containers and store in the refrigerator. It’ll keep fresh for up to 3 weeks, and honestly, it tastes even better after a day or two when all those flavors have had time to meld together.
Freeze: This jam freezes really well if you want to make a big batch! Leave about half an inch of space at the top of your containers since the jam will expand when frozen. It’ll keep in the freezer for up to 6 months, which is perfect for enjoying summer raspberries all year long.
Thaw: When you’re ready to use frozen jam, just move it to the fridge overnight to thaw slowly. Give it a good stir before using since it might separate slightly. The texture will be just as good as fresh, and you’ll have that homemade raspberry goodness ready to go!
| Preparation Time | 10-15 minutes |
| Cooking Time | 25-30 minutes |
| Total Time | 35-45 minutes |
| Level of Difficulty | Easy |
Estimated Nutrition
Estimated nutrition for the whole recipe (without optional ingredients):
- Calories: 1350-1450
- Protein: 4-6 g
- Fat: 2-4 g
- Carbohydrates: 340-360 g
Ingredients
- 2 cups sugar
- 1 tbsp lemon juice (freshly squeezed preferred)
- zest from 1 lemon (finely grated for best flavor)
- 4 cups fresh raspberries (room temperature, not chilled)
Step 1: Prepare Your Equipment and Mise en Place
- 1 small plate
- zest from 1 lemon
- 2 cups sugar
Place a small plate in the freezer—this will be your testing surface for doneness later.
While the plate chills, finely grate the lemon zest and measure out your sugar.
Room temperature raspberries work better than cold ones because they’ll release their juices more readily and cook more evenly, so make sure yours aren’t straight from the refrigerator.
Step 2: Macerate the Raspberries to Release Juices
- 4 cups fresh raspberries
- 2 cups sugar
- zest from 1 lemon
- 1 tbsp lemon juice
Combine the room temperature raspberries, sugar, lemon zest, and freshly squeezed lemon juice in a large heavy-bottomed pot.
Using a potato masher or the back of a wooden spoon, lightly mash the berries to break them down slightly—you want some whole berries to remain for texture, not a completely smooth pulp.
Let the mixture sit for 10 minutes to allow the sugar to draw out the raspberry juices, which will help the jam cook more evenly and develop better flavor.
Step 3: Cook the Jam to Proper Thickness
- macerated raspberry mixture from Step 2
Bring the macerated raspberry mixture from Step 2 to a boil over medium-high heat, then reduce the heat to medium.
Cook while stirring often for about 25 minutes—this consistent stirring prevents sticking and helps the jam cook evenly.
I like to stir more frequently toward the end of cooking to watch for the transition from loose berry sauce to thick jam.
You’ll notice the mixture will darken slightly and the bubbles will become larger and more sluggish as it thickens.
Step 4: Test for Doneness Using the Plate Test
- cooked jam from Step 3
- chilled plate from Step 1
Remove your chilled plate from the freezer.
Carefully spoon a small amount (about 1 teaspoon) of the hot jam onto the cold plate and return it to the freezer for 2 minutes.
After 2 minutes, remove the plate and drag your finger through the jam—if it holds its shape and wrinkles slightly, the jam has reached the proper gel stage and is ready.
If it still runs together, return the pot to the heat, cook for another 5 minutes, and repeat the test.
This method is more reliable than relying on temperature alone.
Step 5: Jar the Finished Jam
- finished jam from Step 4
Once the jam passes the doneness test, carefully pour the hot jam into clean jars, filling them to just below the rim.
The residual heat will help create a seal if you’re using traditional canning jars with lids and bands.
Allow the jam to cool completely at room temperature before sealing or refrigerating—it will continue to thicken as it cools.


