There’s something about a big pot of chili simmering on the stove that just feels right. Maybe it’s the smell that fills the whole house, or maybe it’s knowing that one pot will feed my family for days. Either way, chili is my go-to when I want something hearty without spending hours in the kitchen.
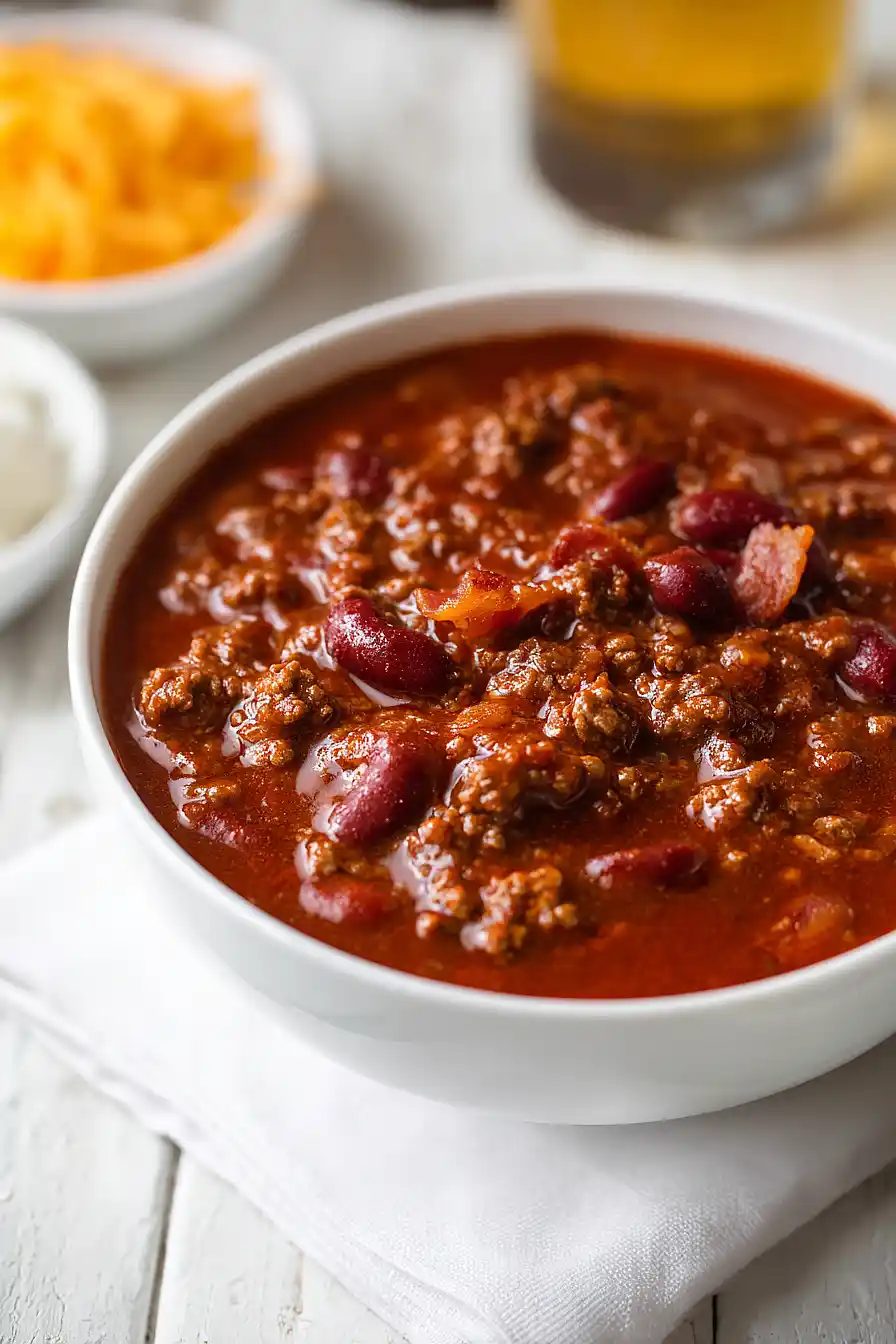
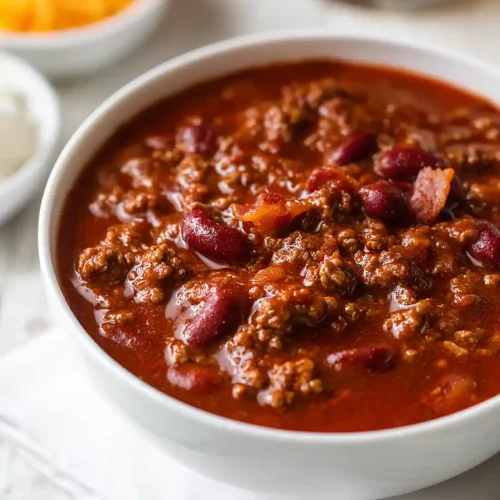
This beer and bacon chili takes the classic recipe and gives it a little something extra. The stout beer adds a deep, rich flavor that you just can’t get from tomatoes alone, and the bacon? Well, bacon makes everything better. I like to make this on Sunday afternoons so we have leftovers for busy weeknights.
The best part is that it’s all made in one pot. Brown the meat, dump in the rest, and let it do its thing. No fancy techniques, no complicated steps. Just good chili that tastes like you put way more effort into it than you actually did.
Why You’ll Love This Chili
- Ready in under an hour – This chili comes together in just 40-75 minutes, making it perfect for busy weeknights when you need something hearty and satisfying without spending hours in the kitchen.
- Bold, rich flavors – The combination of stout beer and crispy bacon adds a depth of flavor that takes this chili way beyond your typical recipe.
- One-pot meal – Everything cooks together in one pot, which means less cleanup and more time to relax after dinner.
- Great for feeding a crowd – This recipe makes a generous batch that’s perfect for game day gatherings, potlucks, or meal prepping for the week ahead.
- Customizable heat level – You can adjust the spiciness by choosing mild or hot chili beans, making it easy to please everyone at the table.
What Kind of Ground Beef Should I Use?
For this chili, you’ll want to pick ground beef with the right fat content to get the best flavor without ending up with a greasy pot. I recommend using 80/20 or 85/15 ground beef, which gives you enough fat for flavor but not so much that you’re draining off cups of grease. If you go leaner than 90/10, your chili might end up a bit dry since we’re browning and draining the meat first. You can also swap in ground turkey or a mix of beef and pork if that’s what you have on hand, though you might want to add a tiny bit of oil to the pan if using turkey since it’s so lean.
Options for Substitutions
This chili is pretty forgiving when it comes to swapping ingredients around:
- Ground beef: You can easily swap ground beef for ground turkey, chicken, or even plant-based meat crumbles. If using leaner meats like turkey, you might want to add a tablespoon of olive oil while browning to keep things moist.
- Stout beer: Not a beer fan or don’t have any on hand? Replace it with beef broth or additional water plus a tablespoon of molasses to mimic that dark, rich flavor stout brings to the pot.
- Brooks Chili Beans: Any canned chili beans will work here, or you can use plain kidney beans or pinto beans and adjust the spices to your taste. If using plain beans, you might want to add an extra teaspoon of chili powder.
- Bacon: Skip the bacon entirely for a lighter version, or swap it with turkey bacon or diced ham. The chili will still taste great without it.
- Celery: If you’re not a celery person, you can leave it out or replace it with diced bell peppers for a different flavor and texture.
- Flour: For thickening, cornstarch works just as well – use 2 tablespoons mixed with cold water and stir it in during the last 30 minutes of cooking.
Watch Out for These Mistakes While Cooking
The biggest mistake people make with chili is cranking up the heat too high during the simmering process, which can cause the bottom to scorch and leave a bitter taste throughout the entire pot – keep it on low and stir occasionally to prevent this.
Another common error is adding the flour directly to the pot without mixing it first, which creates lumps that are nearly impossible to break up, so whisk the flour with a bit of the beer or water before stirring it in.
Don’t skip browning your ground beef properly in the first step, as gray, steamed meat lacks the deep flavor that comes from a good sear, and make sure to drain off excess fat or your chili will end up greasy.
Finally, resist the urge to serve it right away – chili always tastes better after sitting for at least an hour (or even the next day), giving all those spices time to blend together.
What to Serve With Beer & Bacon Chili?
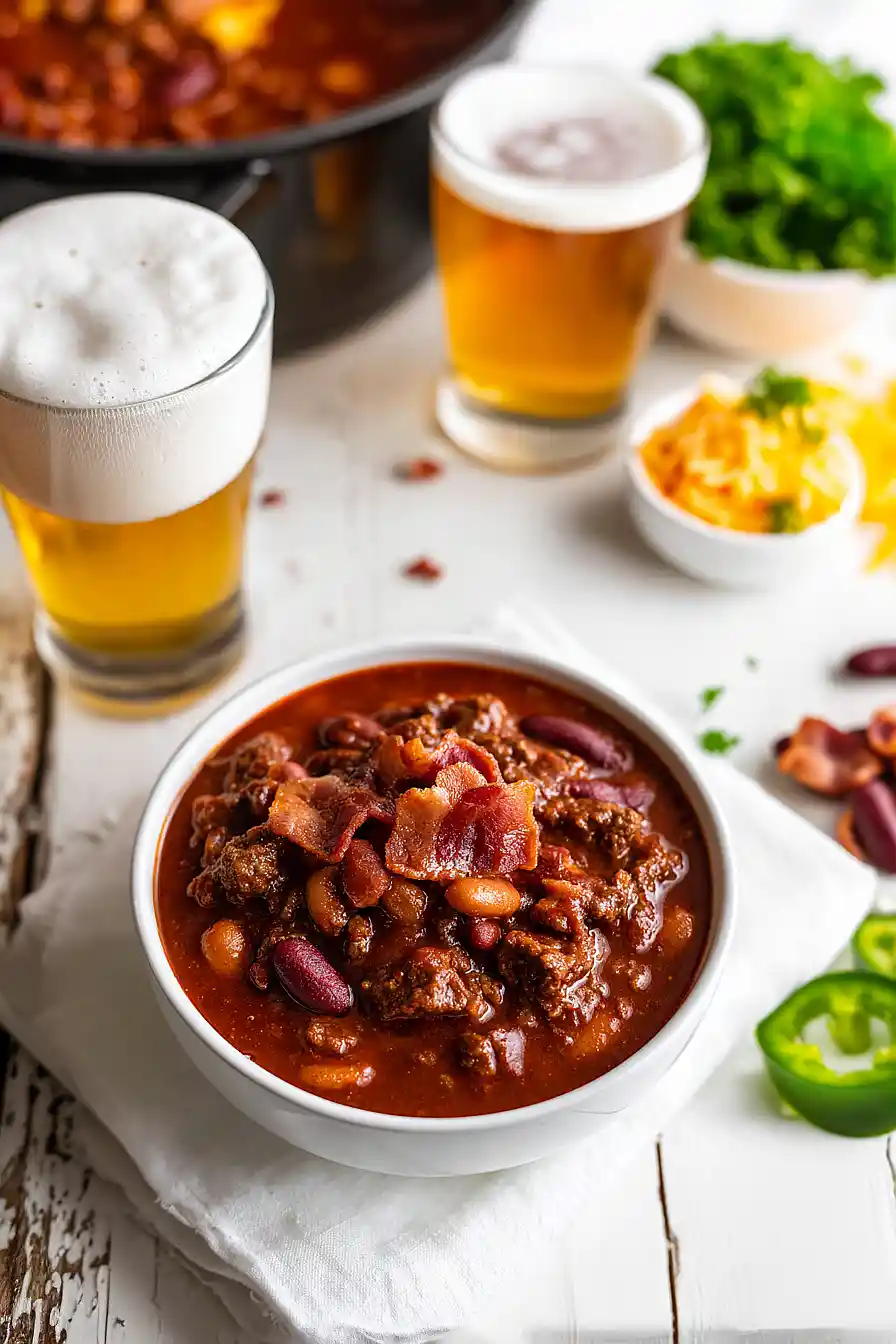
This hearty chili is perfect with a big pile of cornbread or some warm flour tortillas on the side for scooping. I love setting out a toppings bar with shredded cheddar cheese, sour cream, diced onions, and jalapeños so everyone can customize their bowl. If you want to make it more of a meal, serve it over baked potatoes or white rice, which soaks up all that rich, beefy sauce. A simple coleslaw or crisp green salad on the side helps balance out the richness of the bacon and beef.
Storage Instructions
Store: This chili actually tastes even better the next day after all those flavors have had time to hang out together. Keep it in an airtight container in the fridge for up to 5 days. It’s perfect for easy weeknight dinners when you don’t feel like cooking from scratch.
Freeze: Chili is one of those dishes that freezes like a dream. Let it cool completely, then portion it into freezer-safe containers or bags and freeze for up to 3 months. I like to freeze individual servings so I can grab just what I need for lunch.
Reheat: Warm it up on the stovetop over medium-low heat, stirring occasionally until it’s heated through. You can also microwave it, but add a splash of water or beer if it seems too thick. The flavors will be even richer after sitting for a day or two.
| Preparation Time | 10-15 minutes |
| Cooking Time | 30-60 minutes |
| Total Time | 40-75 minutes |
| Level of Difficulty | Easy |
| Servings | 8 servings |
Estimated Nutrition
Estimated nutrition for the whole recipe (without optional ingredients):
- Calories: 2700-3000
- Protein: 170-190 g
- Fat: 130-150 g
- Carbohydrates: 170-190 g
Ingredients
For the meat base:
- 2 lbs ground beef (80/20 blend works best)
- 4 slices bacon (chopped into 1/2-inch pieces)
- 1/2 cup celery (diced into 1/4-inch pieces)
- 1 small yellow onion (finely diced)
For the chilli:
- 3 tbsp chili powder (for depth and slight heat)
- 1 tsp Worcestershire sauce (freshly opened bottle preferred)
- 12 oz stout beer (adds rich, deep flavor)
- 1 cup water
- 2 tsp paprika
- 2 tsp cumin (freshly ground preferred)
- 2 cans chili beans (I use Bush’s)
- 8 oz tomato sauce (or any brand neutral tomato sauce)
- 1/4 cup flour (helps thicken the chili)
- 14.5 oz diced tomatoes
Step 1: Render Bacon and Build the Flavor Base
- 4 slices bacon
Chop the bacon into 1/2-inch pieces and place in a large heavy-bottomed pot or Dutch oven over medium heat.
Cook, stirring occasionally, until the bacon is crispy and has rendered its fat, about 8-10 minutes.
The rendered fat will become your cooking medium and add tremendous flavor to the dish.
Remove the bacon with a slotted spoon and set aside, leaving the bacon fat in the pot.
Step 2: Prepare the Mise en Place
- 1/2 cup celery
- 1 small yellow onion
- 3 tbsp chili powder
- 2 tsp paprika
- 2 tsp cumin
- 1/4 cup flour
While the bacon cooks, finely dice the yellow onion and celery into 1/4-inch pieces.
Measure out all dry spices (chili powder, paprika, cumin) and the flour into a small bowl.
Open your beer and have the Worcestershire sauce, tomato sauce, water, diced tomatoes, and chili beans ready nearby.
I prefer to have everything measured and within reach before the cooking gets intense—it keeps the process smooth and prevents overseasoning.
Step 3: Sear the Ground Beef and Build Depth
- 2 lbs ground beef
- Salt to taste
- flour from Step 2
Increase the heat under the pot to medium-high.
Add the ground beef in batches, breaking it up with a wooden spoon as it cooks—avoid stirring constantly, as this allows the meat to brown and develop flavor rather than steam.
Once the beef is mostly browned (about 8-10 minutes total), sprinkle with salt and stir in the flour.
The flour will help thicken the chili and create a light fond on the bottom of the pot.
Cook the flour into the meat for 1-2 minutes, stirring constantly.
Step 4: Bloom the Spices and Deglaze with Beer
- 1/2 cup celery
- 1 small yellow onion
- 3 tbsp chili powder
- 2 tsp paprika
- 2 tsp cumin
- 12 oz stout beer
Reduce heat to medium and add the diced onion and celery to the beef.
Cook for 3-4 minutes, stirring occasionally, until the vegetables begin to soften and release their aromatics.
Add the chili powder, paprika, and cumin from your spice mixture, stirring constantly for about 1 minute—this blooming process awakens the spices and prevents them from tasting raw.
Pour in the 12 oz stout beer, using a wooden spoon to scrape up any flavorful browned bits stuck to the bottom of the pot.
These fond bits are pure flavor and essential to great chili.
Step 5: Combine Remaining Ingredients and Build the Sauce
- 1 tsp Worcestershire sauce
- 8 oz tomato sauce
- 14.5 oz diced tomatoes
- 1 cup water
- 2 cans chili beans
- bacon from Step 1
Stir in the Worcestershire sauce, tomato sauce, diced tomatoes (with their juices), water, and the two cans of chili beans (drained and rinsed).
Add the cooked bacon back into the pot and stir well to combine.
I always rinse my canned beans because it removes excess sodium and starch, giving you a cleaner, more balanced chili.
Bring the mixture to a gentle simmer over medium heat, then reduce to low.
Step 6: Simmer Low and Let Flavors Meld
Let the chili simmer gently on low heat, uncovered or with the lid slightly ajar, for 45-60 minutes.
Stir occasionally to prevent sticking on the bottom.
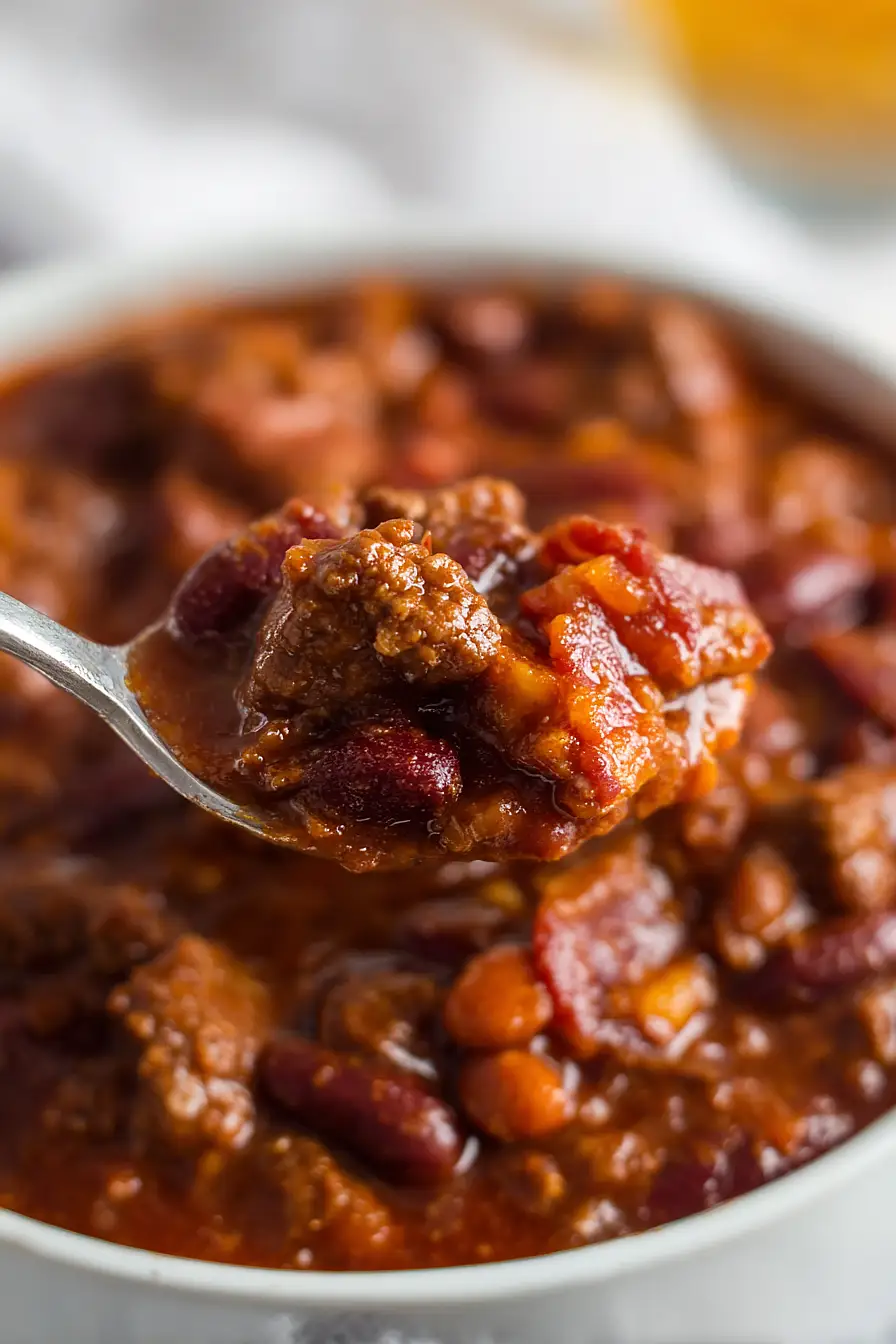
The long, slow simmer allows the flavors to deepen and the sauce to thicken naturally as liquid reduces.
The chili is done when it has achieved a thick, pourable consistency and the flavors taste well-integrated rather than individual.
Taste and adjust seasoning with additional salt, chili powder, or Worcestershire sauce as needed.
The chili will thicken slightly more as it cools.
Comforting Beer & Bacon Chili
Ingredients
For the meat base:
- 2 lbs ground beef (80/20 blend works best)
- 4 slices bacon (chopped into 1/2-inch pieces)
- 1/2 cup celery (diced into 1/4-inch pieces)
- 1 small yellow onion (finely diced)
For the chilli:
- 3 tbsp chili powder (for depth and slight heat)
- 1 tsp Worcestershire sauce (freshly opened bottle preferred)
- 12 oz stout beer (adds rich, deep flavor)
- 1 cup water
- 2 tsp paprika
- 2 tsp cumin (freshly ground preferred)
- 2 cans chili beans (I use Bush's)
- 8 oz tomato sauce (or any brand neutral tomato sauce)
- 1/4 cup flour (helps thicken the chili)
- 14.5 oz diced tomatoes
Instructions
- Chop the bacon into 1/2-inch pieces and place in a large heavy-bottomed pot or Dutch oven over medium heat. Cook, stirring occasionally, until the bacon is crispy and has rendered its fat, about 8-10 minutes. The rendered fat will become your cooking medium and add tremendous flavor to the dish. Remove the bacon with a slotted spoon and set aside, leaving the bacon fat in the pot.
- While the bacon cooks, finely dice the yellow onion and celery into 1/4-inch pieces. Measure out all dry spices (chili powder, paprika, cumin) and the flour into a small bowl. Open your beer and have the Worcestershire sauce, tomato sauce, water, diced tomatoes, and chili beans ready nearby. I prefer to have everything measured and within reach before the cooking gets intense—it keeps the process smooth and prevents overseasoning.
- Increase the heat under the pot to medium-high. Add the ground beef in batches, breaking it up with a wooden spoon as it cooks—avoid stirring constantly, as this allows the meat to brown and develop flavor rather than steam. Once the beef is mostly browned (about 8-10 minutes total), sprinkle with salt and stir in the flour. The flour will help thicken the chili and create a light fond on the bottom of the pot. Cook the flour into the meat for 1-2 minutes, stirring constantly.
- Reduce heat to medium and add the diced onion and celery to the beef. Cook for 3-4 minutes, stirring occasionally, until the vegetables begin to soften and release their aromatics. Add the chili powder, paprika, and cumin from your spice mixture, stirring constantly for about 1 minute—this blooming process awakens the spices and prevents them from tasting raw. Pour in the 12 oz stout beer, using a wooden spoon to scrape up any flavorful browned bits stuck to the bottom of the pot. These fond bits are pure flavor and essential to great chili.
- Stir in the Worcestershire sauce, tomato sauce, diced tomatoes (with their juices), water, and the two cans of chili beans (drained and rinsed). Add the cooked bacon back into the pot and stir well to combine. I always rinse my canned beans because it removes excess sodium and starch, giving you a cleaner, more balanced chili. Bring the mixture to a gentle simmer over medium heat, then reduce to low.
- Let the chili simmer gently on low heat, uncovered or with the lid slightly ajar, for 45-60 minutes. Stir occasionally to prevent sticking on the bottom. The long, slow simmer allows the flavors to deepen and the sauce to thicken naturally as liquid reduces. The chili is done when it has achieved a thick, pourable consistency and the flavors taste well-integrated rather than individual. Taste and adjust seasoning with additional salt, chili powder, or Worcestershire sauce as needed. The chili will thicken slightly more as it cools.


