If you ask me, brownies are one of life’s greatest pleasures.
These red velvet Nutella brownies take two favorite desserts and combine them into something totally worth the effort. A buttery red velvet cookie layer sits on top of a rich chocolate brownie base, with Nutella and Oreos sandwiched right in the middle.
The brownie layer gives you that fudgy texture we all love, while the red velvet adds a hint of cocoa and that classic cake-like softness. The Nutella and Oreos bring a creamy, cookie-crunch surprise that makes every bite different.
It’s a dessert that looks impressive but comes together easier than you’d think, perfect for parties or when you want to treat yourself to something special.
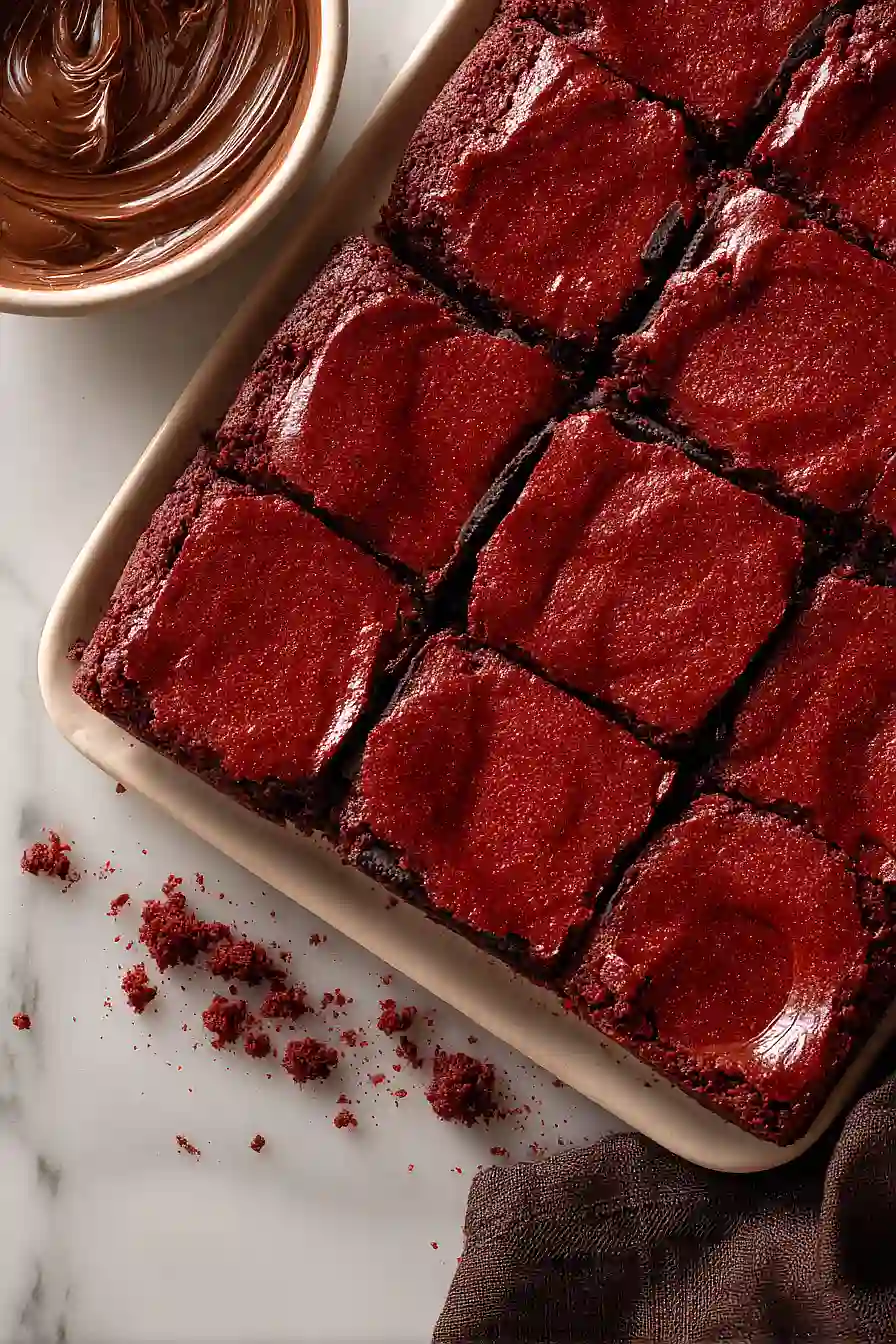
Why You’ll Love These Red Velvet Nutella Brownies
- Super easy to make – Using boxed mixes means you can whip up these brownies without measuring a ton of ingredients or being an expert baker.
- Three desserts in one – You get the rich chocolate of brownies, the tangy sweetness of red velvet, and the creamy hazelnut goodness of Nutella all in one bite.
- Perfect for parties – These brownies look impressive and taste amazing, making them ideal for potlucks, birthday parties, or any time you want to wow a crowd.
- Hidden Oreo surprise – The Oreos baked inside add an extra layer of texture and flavor that makes every bite exciting.
What Kind of Cake Mix Should I Use?
Any standard red velvet cake mix from your grocery store will work great for these brownies. Most brands like Duncan Hines, Betty Crocker, or Pillsbury will give you similar results, so just grab whichever one is on sale or you prefer. The cake mix is what gives these brownies their signature red color and slight cocoa flavor, so don’t skip it or try to substitute it with something else. If you can only find a smaller or larger box, just know that the standard size is usually around 15-16 ounces, which is what this recipe is designed for.
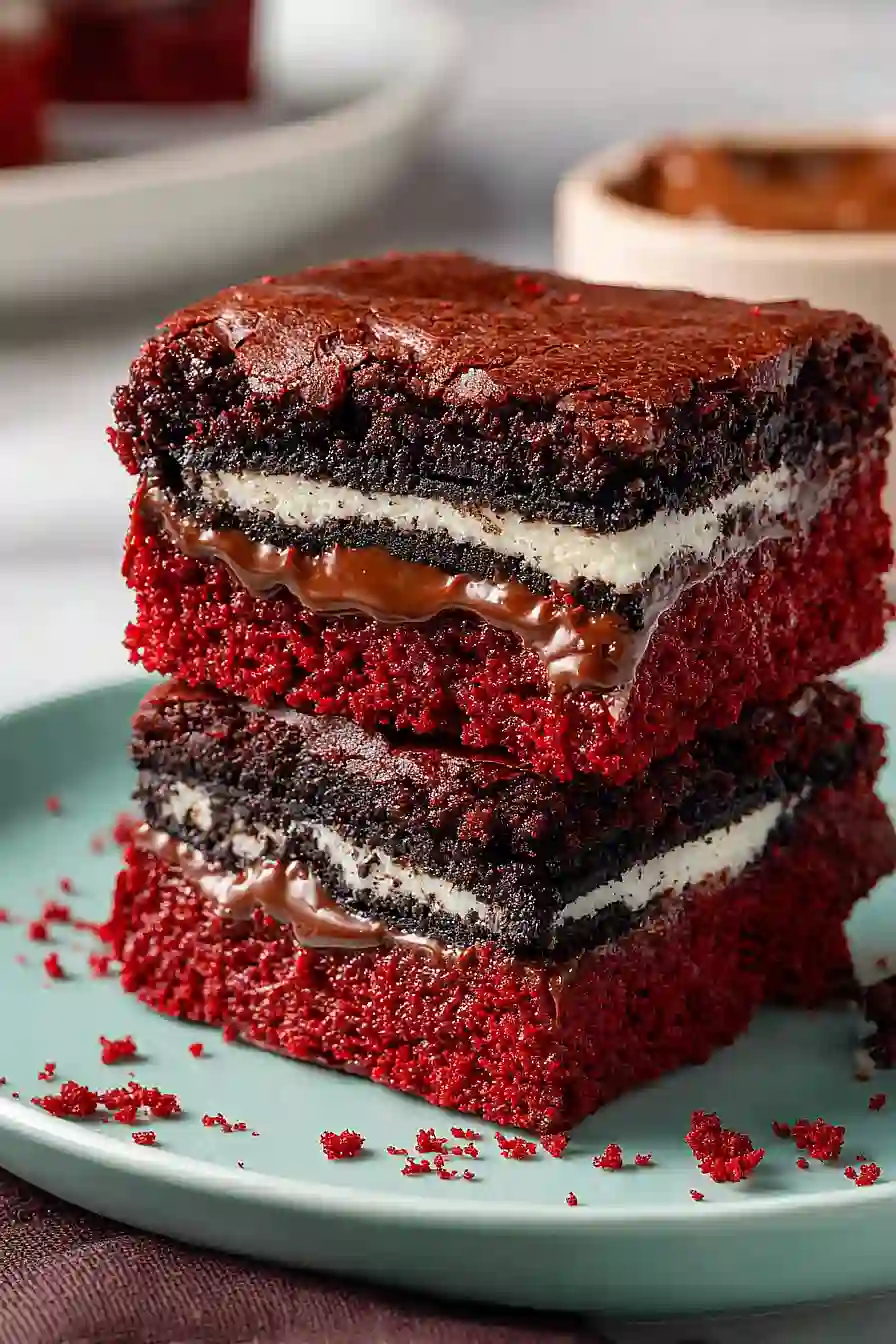
Options for Substitutions
This recipe is pretty straightforward, but here are some swaps you can make if needed:
- Butter: You can use margarine or coconut oil in place of butter. If using coconut oil, melt it first just like you would with butter.
- Nutella: Any chocolate hazelnut spread works here, or you can try cookie butter or even peanut butter for a different flavor profile. Just keep the same amount.
- Oreos: Feel free to use any sandwich cookie you like – chocolate chip cookies, Nutter Butters, or even Golden Oreos. You could also skip the cookies entirely and add chocolate chips instead.
- Vegetable oil: Canola oil or melted coconut oil work just as well. You can also use melted butter if you prefer, though it will make the brownies slightly richer.
- Red velvet cake mix: While red velvet gives these brownies their signature look and flavor, you could use chocolate cake mix if that’s what you have on hand. The color won’t be the same, but they’ll still taste great.
- Brownie mix: Stick with brownie mix here – it’s what gives these their fudgy texture that makes them brownies and not just cake bars.
Watch Out for These Mistakes While Baking
The biggest mistake you can make with these brownies is overbaking them, which turns the fudgy layers dry and crumbly – start checking at 40 minutes by inserting a toothpick into the center, and pull them out when it comes out with just a few moist crumbs attached.
When spreading the Nutella over the Oreos, work quickly since it firms up fast, and use an offset spatula or the back of a spoon dipped in hot water to make the job easier.
Don’t skip greasing your pan thoroughly (or better yet, line it with parchment paper), because these multi-layered brownies can stick like crazy and fall apart when you try to cut them.
Let the brownies cool completely in the pan for at least an hour before cutting – I know it’s tempting to dig in right away, but this cooling time helps all those layers set properly so you get clean, beautiful slices instead of a gooey mess.
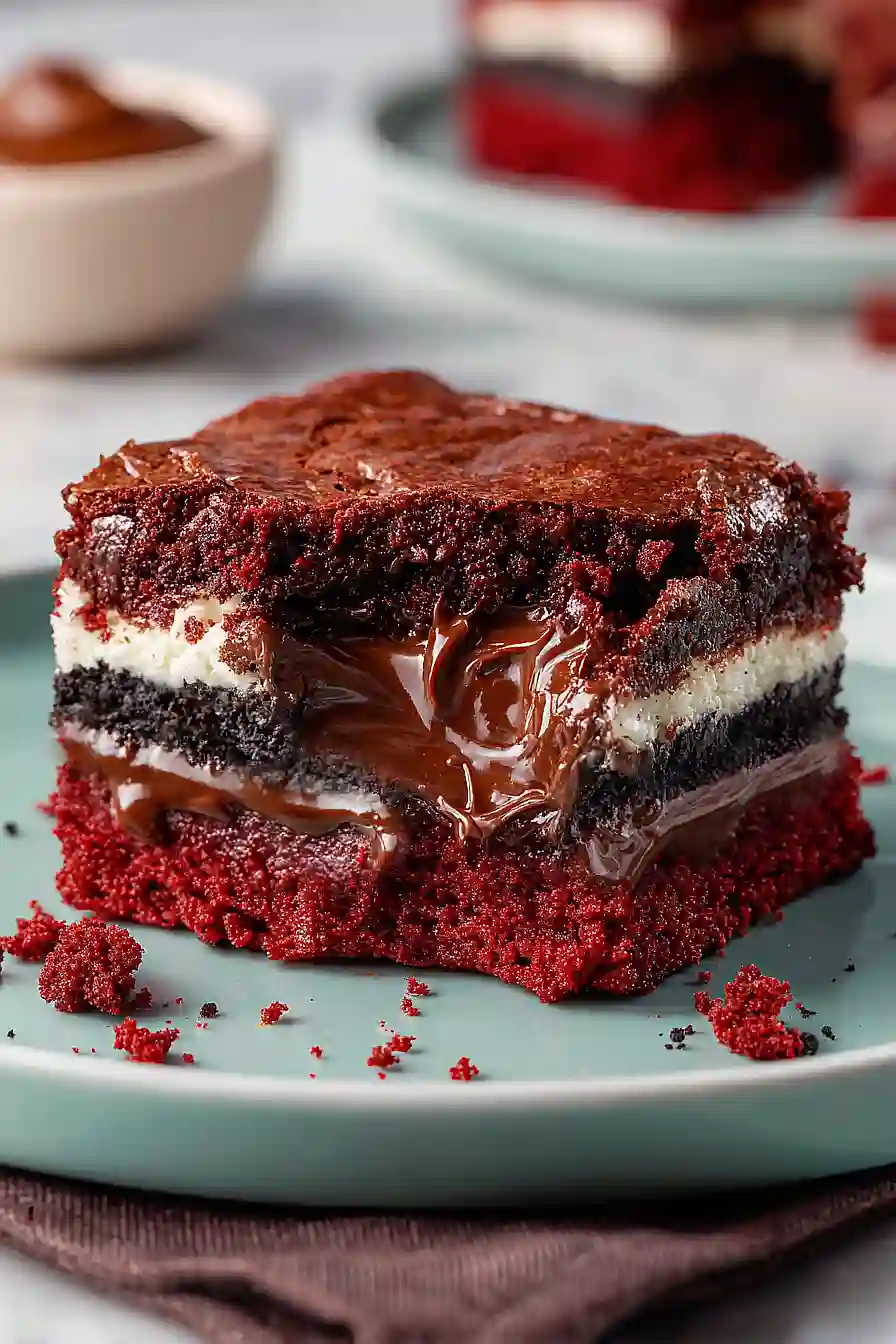
What to Serve With Red Velvet Nutella Brownies?
These brownies are pretty rich and decadent on their own, so they pair perfectly with a cold glass of milk or a scoop of vanilla ice cream to balance out all that chocolatey goodness. If you’re serving them at a party or gathering, consider setting out some fresh berries like strawberries or raspberries on the side – the tartness cuts through the sweetness nicely. A hot cup of coffee or espresso is another great option, especially if you’re enjoying these as an after-dinner treat. You could also whip up some homemade whipped cream to dollop on top, which adds a light and airy contrast to the dense, fudgy texture of the brownies.
Storage Instructions
Store: Keep your brownies in an airtight container at room temperature for up to 3 days, or in the fridge for up to a week. I actually think they taste even better the next day once all those flavors have had time to meld together!
Freeze: These brownies are perfect for freezing! Cut them into individual squares, wrap each one in plastic wrap, and store in a freezer bag for up to 3 months. It’s great to have a stash ready when you need a chocolate fix or unexpected guests drop by.
Serve: Let frozen brownies thaw at room temperature for about 30 minutes, or if you’re impatient like me, pop one in the microwave for 15-20 seconds. They’ll be warm and gooey, almost like they just came out of the oven.
| Preparation Time | 20-30 minutes |
| Cooking Time | 40-50 minutes |
| Total Time | 60-80 minutes |
| Level of Difficulty | Medium |
| Servings | 16 pieces |
Estimated Nutrition
Estimated nutrition for the whole recipe (without optional ingredients):
- Calories: 5400-6000
- Protein: 50-60 g
- Fat: 300-340 g
- Carbohydrates: 700-760 g
Ingredients
For the red velvet layer:
- 3/4 cup butter (I prefer Kerrygold unsalted butter for this)
- 1 box red velvet cake mix
- 1 large egg
For the brownie layer:
- 1 box brownie mix (I always use Ghirardelli chocolate brownie mix)
- 2 eggs
- 1/2 cup vegetable oil
- 3 tbsp water
- 1 teaspoon vanilla extract
For the filling:
- 1.5 cups nutella
- 22 oreos (standard size, not Double Stuf for the best layer consistency)
Step 1: Prepare Your Mise en Place and Preheat
- 9×13 inch baking pan
- Oven preheated to 350°F
Preheat your oven to 350°F.
While it heats, grease a 9×13 inch baking pan generously with butter or cooking spray.
Measure out all your ingredients and have them ready—this is especially important for the layering steps that follow quickly.
I like to crush the Oreos roughly by hand into the package before opening them, so you get a mix of whole cookies and chunks rather than uniform crumbs.
Step 2: Make the Red Velvet Layer
- 1 box red velvet cake mix
- 3/4 cup butter, melted
- 1 large egg
In a large bowl, combine the red velvet cake mix with the melted butter and 1 large egg.
Mix until you have a thick, cohesive dough—it should look like wet sand.
Press this mixture firmly and evenly into the bottom of your prepared pan, creating a solid base layer.
This red velvet foundation will provide a tender cake texture that contrasts beautifully with the brownie top.
Step 3: Layer Oreos and Warm Nutella
- 22 Oreos
- 1.5 cups Nutella
Arrange the 22 Oreos in a single layer directly over the red velvet mixture, spacing them as evenly as possible—they’ll soften and settle during baking so don’t worry about perfection.
Place the Nutella in a microwave-safe bowl and warm it for 30 seconds until it becomes spreadable but not too thin.
Spread the warm Nutella evenly over the Oreo layer, using an offset spatula or the back of a spoon to create a smooth, even coverage.
Step 4: Prepare and Add the Brownie Layer
- 1 box brownie mix
- 2 eggs
- 1/2 cup vegetable oil
- 3 tbsp water
- 1 teaspoon vanilla extract
In a separate bowl, whisk together the brownie mix, 2 eggs, vegetable oil, water, and vanilla extract until well combined and smooth.
I find that mixing the brownie batter just until combined—without overmixing—keeps it from becoming tough.
Carefully pour this brownie batter over the Nutella layer and spread it gently to the edges, being careful not to push down too hard and disrupt the layers underneath.
Step 5: Bake and Cool
Bake in the preheated 350°F oven for 40-50 minutes, until a toothpick inserted into the brownie layer comes out with just a few moist crumbs (not wet batter).
The brownies should look set on top but still have a slight jiggle in the center when you gently shake the pan—this indicates they’ll be fudgy rather than dry.
Remove from the oven and let cool in the pan for at least 15 minutes before cutting into squares; this resting time allows all three layers to set and hold together cleanly.
Decadent Red Velvet Nutella Brownies
Ingredients
For the red velvet layer::
- 3/4 cup butter (I prefer Kerrygold unsalted butter for this)
- 1 box red velvet cake mix
- 1 large egg
For the brownie layer::
- 1 box brownie mix (I always use Ghirardelli chocolate brownie mix)
- 2 eggs
- 1/2 cup vegetable oil
- 3 tbsp water
- 1 teaspoon vanilla extract
For the filling::
- 1.5 cups nutella
- 22 oreos (standard size, not Double Stuf for the best layer consistency)
Instructions
- Preheat your oven to 350°F. While it heats, grease a 9x13 inch baking pan generously with butter or cooking spray. Measure out all your ingredients and have them ready—this is especially important for the layering steps that follow quickly. I like to crush the Oreos roughly by hand into the package before opening them, so you get a mix of whole cookies and chunks rather than uniform crumbs.
- In a large bowl, combine the red velvet cake mix with the melted butter and 1 large egg. Mix until you have a thick, cohesive dough—it should look like wet sand. Press this mixture firmly and evenly into the bottom of your prepared pan, creating a solid base layer. This red velvet foundation will provide a tender cake texture that contrasts beautifully with the brownie top.
- Arrange the 22 Oreos in a single layer directly over the red velvet mixture, spacing them as evenly as possible—they'll soften and settle during baking so don't worry about perfection. Place the Nutella in a microwave-safe bowl and warm it for 30 seconds until it becomes spreadable but not too thin. Spread the warm Nutella evenly over the Oreo layer, using an offset spatula or the back of a spoon to create a smooth, even coverage.
- In a separate bowl, whisk together the brownie mix, 2 eggs, vegetable oil, water, and vanilla extract until well combined and smooth. I find that mixing the brownie batter just until combined—without overmixing—keeps it from becoming tough. Carefully pour this brownie batter over the Nutella layer and spread it gently to the edges, being careful not to push down too hard and disrupt the layers underneath.
- Bake in the preheated 350°F oven for 40-50 minutes, until a toothpick inserted into the brownie layer comes out with just a few moist crumbs (not wet batter). The brownies should look set on top but still have a slight jiggle in the center when you gently shake the pan—this indicates they'll be fudgy rather than dry. Remove from the oven and let cool in the pan for at least 15 minutes before cutting into squares; this resting time allows all three layers to set and hold together cleanly.







