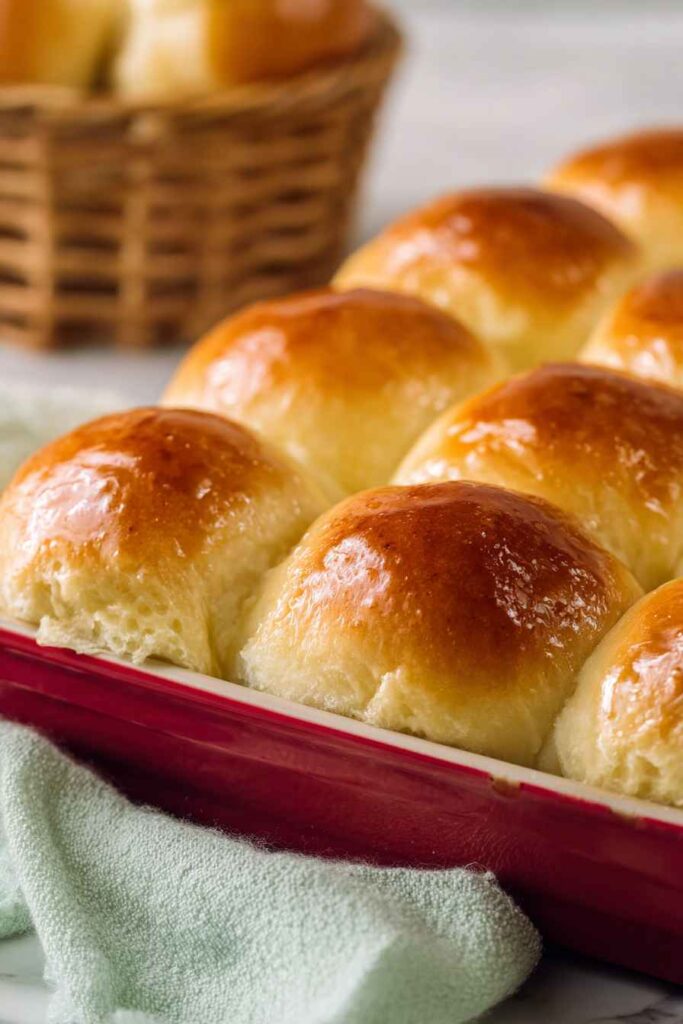
Finding the perfect dinner roll that’s both fluffy and filling can feel like an impossible task. After all, most rolls are either too small to satisfy hungry family members, or they’re dense and heavy, leaving everyone feeling stuffed before the main course even arrives. And when you’re hosting a dinner party or family gathering, the last thing you want is to run out of bread halfway through the meal.
Fortunately, these jumbo dinner rolls solve all those problems: they’re soft and airy despite their generous size, easy enough for home bakers to master, and guaranteed to make everyone at your table happy.
Why You’ll Love These Jumbo Dinner Rolls
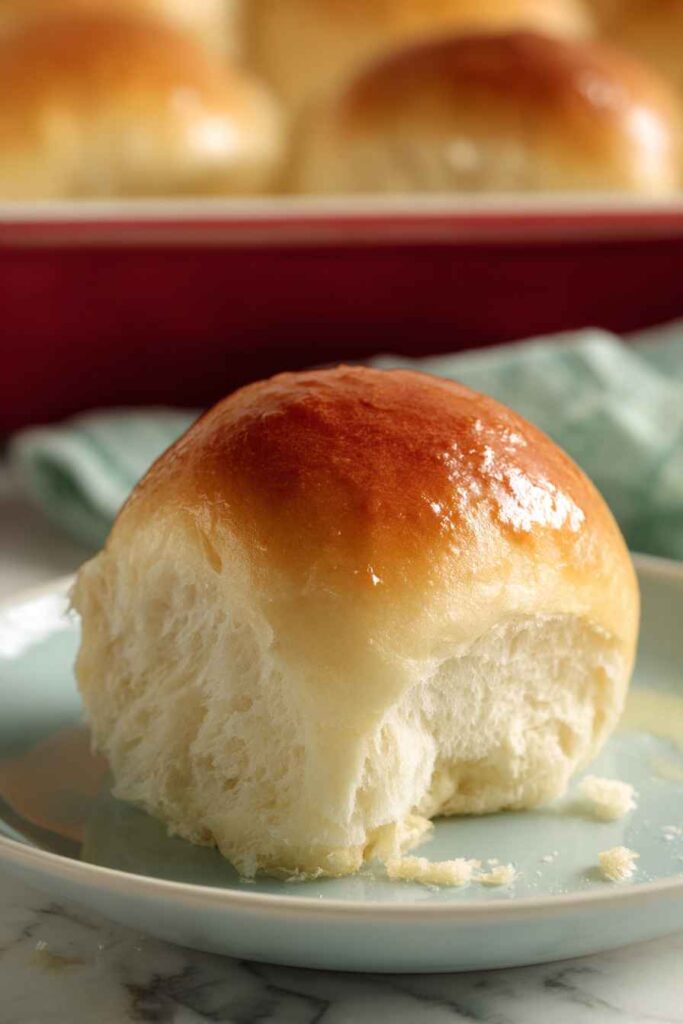
- Soft, fluffy texture – These rolls come out perfectly tender and light every time, making them the ideal side for any meal from weeknight dinners to holiday feasts.
- Quick rising time – With instant yeast, you can have fresh homemade rolls on the table in under an hour, which is perfect when you need bread fast.
- Simple pantry ingredients – You probably already have everything you need in your kitchen – no special trips to the store required.
- Impressive size – These jumbo rolls look and feel bakery-quality, making any meal feel more special without the bakery price tag.
- Beginner-friendly – Even if you’re new to bread making, this straightforward recipe gives you confidence with clear steps and reliable results.
What Kind of Flour Should I Use?
All-purpose flour is perfect for these jumbo dinner rolls and will give you that soft, fluffy texture you’re looking for. You don’t need to get fancy with bread flour or cake flour – regular all-purpose flour from any brand will work just fine. The key is to add the flour gradually, starting with the smaller amount and working your way up until your dough feels just right. You’ll know you’ve added enough when the dough is slightly sticky but doesn’t stick to your hands when you handle it. If you only have self-rising flour on hand, you can use it but skip the yeast since it already contains leavening agents.
Options for Substitutions
These fluffy dinner rolls are pretty forgiving when it comes to swaps, but there are a few things to keep in mind:
- Instant yeast: You can use active dry yeast instead – just use the same amount but dissolve it in the warm water first and let it foam for about 5 minutes before adding to your dough.
- Whole milk: Any milk works here – 2%, 1%, or even buttermilk will give you great results. For dairy-free options, try oat milk or whole milk coconut milk from a can.
- Butter: You can swap this with vegetable oil or melted coconut oil, but butter really gives these rolls their rich flavor and tender texture, so I’d stick with it if possible.
- All-purpose flour: Bread flour will make your rolls even chewier and more substantial, while cake flour will make them more tender. Start with 6 cups of either and add more as needed – different flours absorb liquid differently.
- Granulated sugar: Brown sugar, honey, or maple syrup work well too. If using liquid sweeteners, reduce the milk by 2-3 tablespoons to keep the dough consistency right.
- Eggs: For egg-free rolls, try 1/4 cup unsweetened applesauce or 2 tablespoons ground flaxseed mixed with 6 tablespoons water (let it sit for 5 minutes first).
Watch Out for These Mistakes While Baking
The biggest mistake when making jumbo dinner rolls is using water that’s too hot for the yeast, which can kill it completely – aim for water that feels just warm to the touch, around 100-110°F.
Another common error is adding too much flour too quickly, which creates dense, heavy rolls instead of light and fluffy ones – add the flour gradually and stop when the dough is just slightly sticky but pulls away from the bowl.
Don’t skip the proper rising times either, as rushing this process will give you rolls that don’t have that perfect airy texture, and make sure your kitchen is warm enough (around 75-80°F) for the dough to rise properly.
Finally, resist the urge to overbake them – these jumbo rolls are done when they’re golden brown on top and sound hollow when tapped, usually around 15-18 minutes depending on your oven.

What to Serve With Jumbo Dinner Rolls?
These fluffy jumbo dinner rolls are perfect alongside just about any hearty meal – think roast chicken, beef stew, or a big holiday spread with turkey and all the fixings. I love serving them with plenty of butter and honey on the side so everyone can slather them up however they like. They’re also great for soaking up gravies and sauces, so don’t be shy about placing them right next to your main dishes. For a cozy weeknight dinner, try them with a simple soup like chicken noodle or vegetable beef – they’ll turn any ordinary meal into something that feels special.
Storage Instructions
Keep Fresh: These jumbo dinner rolls stay soft and fluffy when stored in an airtight container or wrapped in plastic wrap at room temperature for up to 3 days. I like to keep them in a bread box or large container so they don’t get squished. They’re perfect for making sandwiches the next day!
Freeze: You can freeze these rolls for up to 3 months in a freezer-safe bag or container. I often make a double batch and freeze half for busy weeknights. They freeze really well both baked or you can even freeze the shaped dough before the final rise.
Warm Up: To bring back that fresh-from-the-oven taste, wrap the rolls in a damp paper towel and microwave for 15-20 seconds, or warm them in a 350°F oven for about 5 minutes. If they’re frozen, let them thaw at room temperature first, then warm them up the same way.
| Preparation Time | 20-30 minutes |
| Cooking Time | 14-18 minutes |
| Total Time | 34-48 minutes |
| Level of Difficulty | Medium |
Estimated Nutrition
Estimated nutrition for the whole recipe (without optional ingredients):
- Calories: 3500-3900
- Protein: 70-85 g
- Fat: 90-105 g
- Carbohydrates: 610-710 g
Ingredients
- 1/2 cup warm water (110°F, about body temperature)
- 2 cups milk (warm, around 110°F)
- 1/2 cup unsalted butter, sliced (I use Kerrygold for richness)
- 2 large eggs (room temperature for better mixing)
- 6 1/2 to 7 1/2 cups all-purpose flour (I use King Arthur, start with 6 1/2 cups)
- 2 tsp salt
- 1/2 cup sugar
- 2 tbsp instant yeast (active dry yeast works too, but instant dissolves faster)
Step 1: Bloom the Yeast and Combine Wet Ingredients
- 2 cups milk
- 1/2 cup unsalted butter, sliced
- 1/2 cup warm water
- 2 tbsp instant yeast
- 1/2 cup sugar
- 2 tsp salt
Heat the milk and butter together in the microwave for 2-3 minutes until the butter is melted and the milk reaches about 110°F (body temperature).
Let this mixture cool for 10 minutes so it won’t kill the yeast.
Meanwhile, combine the warm water and instant yeast in a large mixing bowl and let sit for 1 minute to begin blooming.
Add the cooled milk-butter mixture, sugar, and salt to the yeast mixture, then stir well and let sit for 5 minutes until the mixture becomes bubbly and fragrant—this confirms the yeast is alive and active, which is crucial for a good rise.
Step 2: Develop the Dough and Incorporate Eggs
- 6 1/2 to 7 1/2 cups all-purpose flour
- 2 large eggs
- wet ingredient mixture from Step 1
Add half of the flour (about 3-3.5 cups) to the wet mixture from Step 1 and stir vigorously with a wooden spoon or mixer for 3-5 minutes to develop the gluten and create a shaggy base—this is where the dough starts building structure.
Add the room-temperature eggs one at a time, fully incorporating each one before adding the next, which ensures a cohesive dough.
Gradually add the remaining flour (2.5-4 cups) in small additions, mixing between each addition, until a soft but slightly sticky dough forms that pulls away from the bowl sides.
Knead the dough for 5 minutes by hand or with a mixer on low speed to further develop gluten and create a smooth, elastic texture.
Step 3: First Rise Until Dough Doubles
- dough from Step 2
Transfer the dough from Step 2 into a lightly greased bowl, turning it to coat all sides with a thin layer of oil to prevent drying.
Cover the bowl tightly with plastic wrap or a damp towel and place it in a warm, draft-free area (like a turned-off oven with the light on, or a warm corner of your kitchen).
Let the dough rise undisturbed for 30-60 minutes until it has roughly doubled in size—you’ll know it’s ready when you poke it gently and the indent springs back slowly.
I like to use a warm spot near a sunny window or inside my oven with just the light on, as consistent warmth really speeds up the rise without over-proofing the dough.
Step 4: Shape the Rolls and Second Rise
- risen dough from Step 3
Punch down the risen dough from Step 3 with your fist to release excess gas, then turn it out onto a lightly floured work surface.
Divide the dough into 32 equal pieces (I use a bench scraper to portion it into quarters first, then eighths, making it easier to keep portions even).
Roll each piece between your palms into a smooth, tight ball, tucking the edges underneath to create tension on the surface—this shaping technique helps the rolls rise upward rather than spreading outward.
Place the balls seam-side down on two greased baking sheets, leaving about 1 inch of space between each roll.
Cover the baking sheets with plastic wrap or a damp towel and let them rise in a warm area for 30-60 minutes until visibly puffy and touching at the edges—they should look nearly doubled but still hold their shape when gently poked.
Step 5: Bake Until Golden Brown
- shaped rolls from Step 4
Preheat your oven to 400°F (200°C) about 15 minutes before the rolls finish their second rise so it reaches full temperature.
Place the baking sheets in the preheated oven and bake for 14-18 minutes, rotating the sheets halfway through if your oven has hot spots, until the tops turn a deep golden brown and the rolls sound hollow when tapped on the bottom.
Watch them carefully toward the end—they’ll color quickly once they start, and you want that beautiful golden exterior without any burnt spots.
Step 6: Finish and Serve
- 1/2 cup unsalted butter
- baked rolls from Step 5
Remove the hot rolls from the oven and immediately brush the tops generously with melted butter while they’re still warm—the butter will absorb into the surface and add richness and shine.
Let the rolls cool for 2-3 minutes on the baking sheet so they set slightly before serving, which makes them easier to handle without tearing.
Serve warm and enjoy!


