I didn’t try making croissants until my thirties because I was convinced they were impossible. Everyone said you needed to go to pastry school or have magic French grandmother hands. Turns out, that’s not really true.
The secret is that croissant dough is more about patience than skill. Yeah, there’s some folding and rolling involved, but it’s not complicated—it’s just time-consuming. You let the dough rest when it needs to rest, you keep your butter cold but not too cold, and you don’t rush it. That’s basically it.
Most people mess up because they try to speed through the process or they let their butter get too warm and it melts into the dough instead of creating those layers. But if you can follow steps and wait between folds, you can make croissants at home that actually work.
Why You’ll Love This Croissant Dough
- Authentic bakery-quality results – Making croissant dough from scratch gives you those flaky, buttery layers you’d normally pay premium prices for at a French bakery.
- Simple ingredient list – You only need basic pantry staples like flour, yeast, and butter—no fancy or hard-to-find ingredients required.
- Impressive but doable – While it takes some time, the actual technique is straightforward and perfect for a weekend baking project that’ll wow your family and friends.
- Freezer-friendly – You can make a big batch and freeze the shaped croissants, so you’ll have fresh-baked pastries ready whenever you want them.
What Kind of Butter Should I Use?
The recipe calls for two different types of butter, and yes, there’s actually a difference! For the 2 tablespoons that go into the dough, regular unsalted butter from your grocery store works perfectly fine. But for the 1½ cups of European butter, you’ll want to seek out the real deal – brands like Kerrygold, Plugrá, or President are great options. European butter has a higher fat content (around 82-86% compared to American butter’s 80%), which makes it easier to roll out and creates those flaky, buttery layers croissants are famous for. If you can’t find European butter, you can use regular butter for the laminating process, but your croissants might not be quite as flaky and rich.
Options for Substitutions
When it comes to croissant dough, some ingredients are pretty much non-negotiable, but here are a few things you can adjust:
- European butter: This is one ingredient you really shouldn’t substitute. European butter has a higher fat content (around 82-86%) compared to regular American butter, which is what gives croissants their signature flaky layers. Regular butter has too much water and will make your croissants soggy rather than crispy.
- Dry yeast: You can use instant yeast or active dry yeast interchangeably in the same amount. If using fresh yeast, you’ll need about 2½ tablespoons and should dissolve it in the warm water first.
- All-purpose flour: Bread flour can work if that’s what you have, and it’ll give you slightly chewier croissants. Just don’t use cake flour or self-rising flour – they won’t give you the right texture.
- Sugar: You can reduce the sugar by half if you prefer less sweet croissants, but don’t skip it entirely as it helps with browning and feeds the yeast.
- Water: Whole milk can replace the water for a richer dough, though traditional French croissants use water. If using milk, make sure it’s at room temperature.
Watch Out for These Mistakes While Baking
The biggest mistake when making croissant dough is using butter that’s too soft or too cold during the lamination process – your European butter should be cool but pliable, about the same consistency as the dough, so it rolls out smoothly without breaking through or melting into the layers.
Temperature control is critical throughout, so if your kitchen is warm or the dough starts feeling greasy at any point, pop it back in the fridge for 10-15 minutes to firm up before continuing.
Another common error is rolling the dough unevenly, which creates inconsistent layers – use a ruler to measure your rectangles and apply even pressure with your rolling pin to maintain uniform thickness.
Finally, resist the urge to skip or rush the chilling steps between folds, as these rest periods allow the gluten to relax and keep the butter from melting, which is what creates those beautiful, flaky layers you’re after.

What to Serve With Croissant Dough?
Once you’ve baked your croissants, the possibilities are pretty much endless! For a classic breakfast spread, serve them warm with good quality butter, your favorite jam, or honey for a simple but satisfying meal. I love making croissant sandwiches with ham, swiss cheese, and a smear of dijon mustard, or going the sweet route with almond paste and a dusting of powdered sugar. They’re also perfect alongside a bowl of soup or salad for lunch, and honestly, a fresh croissant with your morning coffee is one of life’s simple pleasures.
Storage Instructions
Refrigerate: If you’re not ready to bake right away, you can keep your shaped croissants in the fridge for up to 24 hours before the final proof and baking. Just cover them loosely with plastic wrap so they don’t dry out.
Freeze: Croissant dough freezes really well at different stages. You can freeze it after laminating but before shaping for up to 2 months, or freeze the shaped croissants before the final proof for up to 3 months. When you’re ready to use frozen shaped croissants, let them thaw in the fridge overnight, then proof and bake as usual.
Make Ahead: This is actually a great make-ahead project! You can do the laminating process over a couple of days, keeping the dough in the fridge between folds. Many bakers prefer to shape their croissants the night before, let them do a slow proof in the fridge overnight, then bake them fresh in the morning for that bakery experience at home.
| Preparation Time | 210-240 minutes |
| Cooking Time | 0 minutes |
| Total Time | 210-240 minutes |
| Level of Difficulty | Hard |
| Servings | 24 croissants |
Estimated Nutrition
Estimated nutrition for the whole recipe (without optional ingredients):
- Calories: 3500-3900
- Protein: 45-55 g
- Fat: 210-240 g
- Carbohydrates: 375-410 g
Ingredients
For the dough:
- 1.75 cups water (lukewarm, ideally between 100°F and 105°F)
- 1.25 tbsp yeast
- 4.25 cups flour (I always use King Arthur all-purpose flour for consistent protein content)
- 1/4 cup sugar
- 1 tbsp sugar
- 2.25 tsp salt
- 2.5 tbsp butter (softened to room temperature, about 70°F)
- 1/2 tsp ground cardamom
For the butter layer:
- 1.75 cups butter (I like Kerrygold unsalted butter for its high fat content and plasticity)
- 1.25 tbsp flour
Step 1: Activate Yeast and Build the Base Dough
- 1.75 cups water
- 1.25 tbsp yeast
- 4.25 cups flour
- 1/4 cup sugar
- 2.25 tsp salt
- 1/2 tsp ground cardamom
- 2.5 tbsp butter
Combine the lukewarm water and yeast in a small bowl, stirring gently to combine, and let it sit for 5 minutes until foamy—this activates the yeast and ensures it’s alive and ready to work.
Meanwhile, in a large mixing bowl, combine the flour, 1/4 cup sugar, salt, and ground cardamom, whisking together to distribute the seasonings evenly.
Add the softened butter and the yeast mixture to the dry ingredients, then mix on low speed for 3-4 minutes until a shaggy dough forms.
The dough should come together but won’t be perfectly smooth yet—this is correct.
Step 2: First Rise and Chill the Base Dough
- dough from Step 1
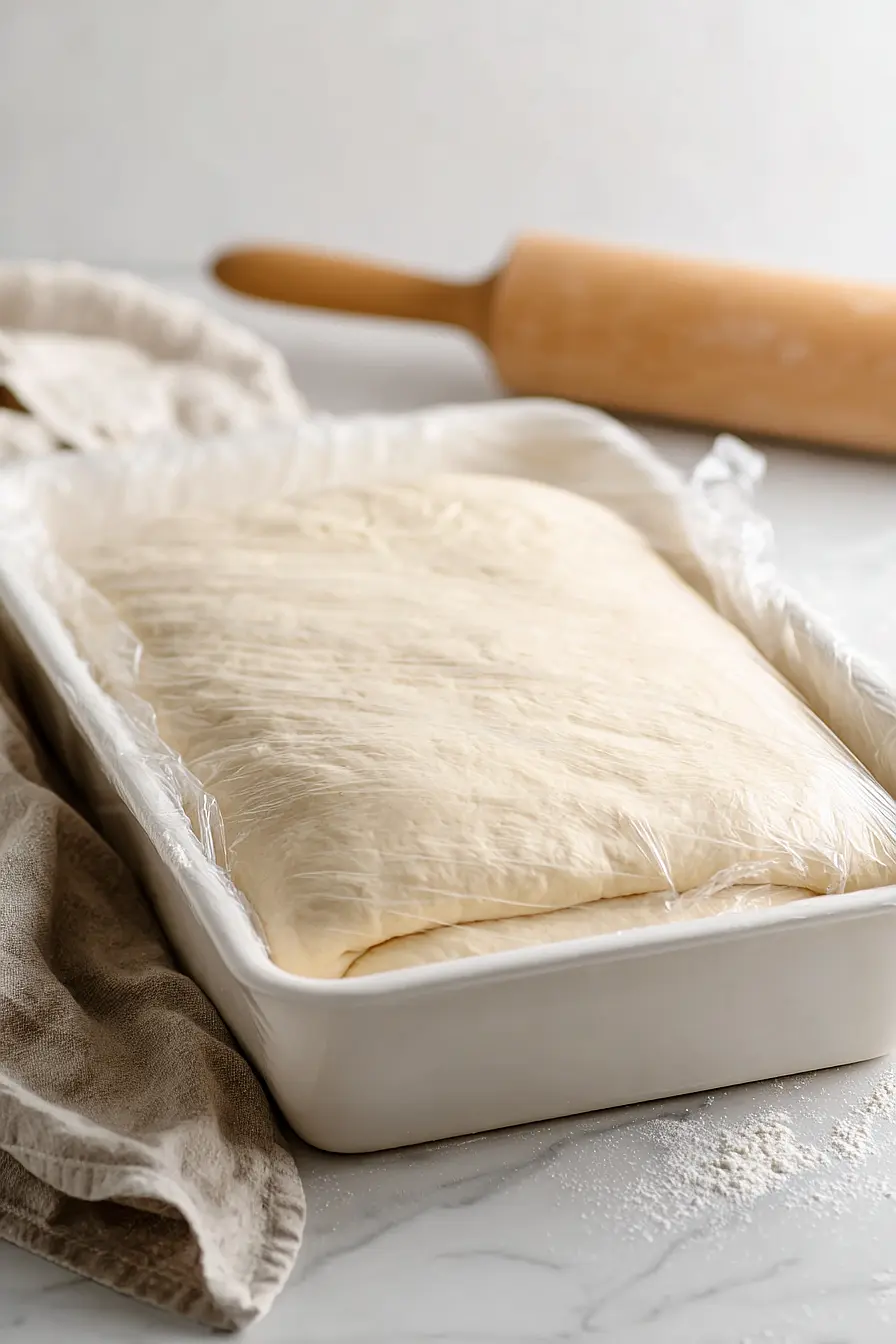
Transfer the dough from Step 1 to a lightly oiled bowl, cover with plastic wrap or a damp towel, and let it rise at room temperature for 1.5 to 2 hours until it increases in volume by about 50%—you’re not looking for a dramatic doubling, just gentle rise.
Once the rise is complete, gently press the gas out of the dough with your hand (don’t knead it), then shape it into a 10×12 inch rectangle on a lightly floured surface.
Wrap the rectangle in plastic wrap and refrigerate for at least 2 hours, or up to overnight.
I like to chill overnight when I have time because it makes the dough easier to work with and improves flavor development.
Step 3: Prepare the Lamination Butter
- 1.75 cups butter
- 1.25 tbsp flour
While the dough chills, prepare your lamination butter by combining the 1.75 cups of cold, high-fat butter (Kerrygold works beautifully here) with the 1.25 tbsp flour in a mixing bowl.
Mix on low speed for 2-3 minutes until the mixture is smooth, pliable, and creamy—it should have the same consistency as the dough so it spreads evenly without tearing.
The flour helps prevent the butter from leaking out during folding.
Keep this butter mixture at cool room temperature (around 65°F-70°F) so it stays pliable but doesn’t soften too much; if it gets too warm, refrigerate it briefly.
Step 4: First Lamination: Spread and Fold
- chilled dough from Step 2
- lamination butter mixture from Step 3
Remove the chilled dough rectangle from the refrigerator and place it on a lightly floured surface.
Roll it out gently to a 12×20 inch rectangle, then spread the butter mixture from Step 3 evenly across the entire surface, leaving a thin margin around the edges.
Fold the dough into thirds like a letter—fold one short end over the middle third, then fold the remaining third over the top.
You’ve now completed your first turn.
Wrap in plastic wrap and freeze for 6 minutes to set the butter layers.
Step 5: Second and Third Laminations: Complete the Folds
- dough with butter layers from Step 4
Remove the dough from the freezer and place it on a floured surface with the open fold facing you.
Roll gently to a 10×18 inch rectangle, then fold into thirds again (second turn), wrap in plastic, and freeze for 6 minutes.
Repeat this process one final time: roll to an 8×16 inch rectangle, fold into thirds (third turn), wrap in plastic, and freeze for 6 minutes.
These three folds create the hundreds of thin butter layers that make croissants flaky.
I find that freezing for exactly 6 minutes between turns keeps the butter at the perfect temperature—not too soft to blur the layers, but not so cold that it cracks.
Step 6: Final Chill Before Shaping
- laminated dough from Step 5
After the third fold is complete, place the dough back in the freezer for a final 6-minute chill.
The dough is now ready to be shaped into croissants or stored.
If you’re not using it immediately, you can wrap it tightly and refrigerate it for up to 24 hours, or freeze it for up to 3 months—just thaw it overnight in the refrigerator before shaping.
European Butter Croissant Dough
Ingredients
For the dough::
- 1.75 cups water (lukewarm, ideally between 100°F and 105°F)
- 1.25 tbsp yeast
- 4.25 cups flour (I always use King Arthur all-purpose flour for consistent protein content)
- 1/4 cup sugar
- 1 tbsp sugar
- 2.25 tsp salt
- 2.5 tbsp butter (softened to room temperature, about 70°F)
- 1/2 tsp ground cardamom
For the butter layer::
- 1.75 cups butter (I like Kerrygold unsalted butter for its high fat content and plasticity)
- 1.25 tbsp flour
Instructions
- Combine the lukewarm water and yeast in a small bowl, stirring gently to combine, and let it sit for 5 minutes until foamy—this activates the yeast and ensures it's alive and ready to work. Meanwhile, in a large mixing bowl, combine the flour, 1/4 cup sugar, salt, and ground cardamom, whisking together to distribute the seasonings evenly. Add the softened butter and the yeast mixture to the dry ingredients, then mix on low speed for 3-4 minutes until a shaggy dough forms. The dough should come together but won't be perfectly smooth yet—this is correct.
- Transfer the dough from Step 1 to a lightly oiled bowl, cover with plastic wrap or a damp towel, and let it rise at room temperature for 1.5 to 2 hours until it increases in volume by about 50%—you're not looking for a dramatic doubling, just gentle rise. Once the rise is complete, gently press the gas out of the dough with your hand (don't knead it), then shape it into a 10x12 inch rectangle on a lightly floured surface. Wrap the rectangle in plastic wrap and refrigerate for at least 2 hours, or up to overnight. I like to chill overnight when I have time because it makes the dough easier to work with and improves flavor development.
- While the dough chills, prepare your lamination butter by combining the 1.75 cups of cold, high-fat butter (Kerrygold works beautifully here) with the 1.25 tbsp flour in a mixing bowl. Mix on low speed for 2-3 minutes until the mixture is smooth, pliable, and creamy—it should have the same consistency as the dough so it spreads evenly without tearing. The flour helps prevent the butter from leaking out during folding. Keep this butter mixture at cool room temperature (around 65°F-70°F) so it stays pliable but doesn't soften too much; if it gets too warm, refrigerate it briefly.
- Remove the chilled dough rectangle from the refrigerator and place it on a lightly floured surface. Roll it out gently to a 12x20 inch rectangle, then spread the butter mixture from Step 3 evenly across the entire surface, leaving a thin margin around the edges. Fold the dough into thirds like a letter—fold one short end over the middle third, then fold the remaining third over the top. You've now completed your first turn. Wrap in plastic wrap and freeze for 6 minutes to set the butter layers.
- Remove the dough from the freezer and place it on a floured surface with the open fold facing you. Roll gently to a 10x18 inch rectangle, then fold into thirds again (second turn), wrap in plastic, and freeze for 6 minutes. Repeat this process one final time: roll to an 8x16 inch rectangle, fold into thirds (third turn), wrap in plastic, and freeze for 6 minutes. These three folds create the hundreds of thin butter layers that make croissants flaky. I find that freezing for exactly 6 minutes between turns keeps the butter at the perfect temperature—not too soft to blur the layers, but not so cold that it cracks.
- After the third fold is complete, place the dough back in the freezer for a final 6-minute chill. The dough is now ready to be shaped into croissants or stored. If you're not using it immediately, you can wrap it tightly and refrigerate it for up to 24 hours, or freeze it for up to 3 months—just thaw it overnight in the refrigerator before shaping.







