I used to think brining a turkey was this complicated, fancy cooking technique that only serious chefs bothered with. My mom never did it, and our Thanksgiving turkeys turned out fine—or so I thought.
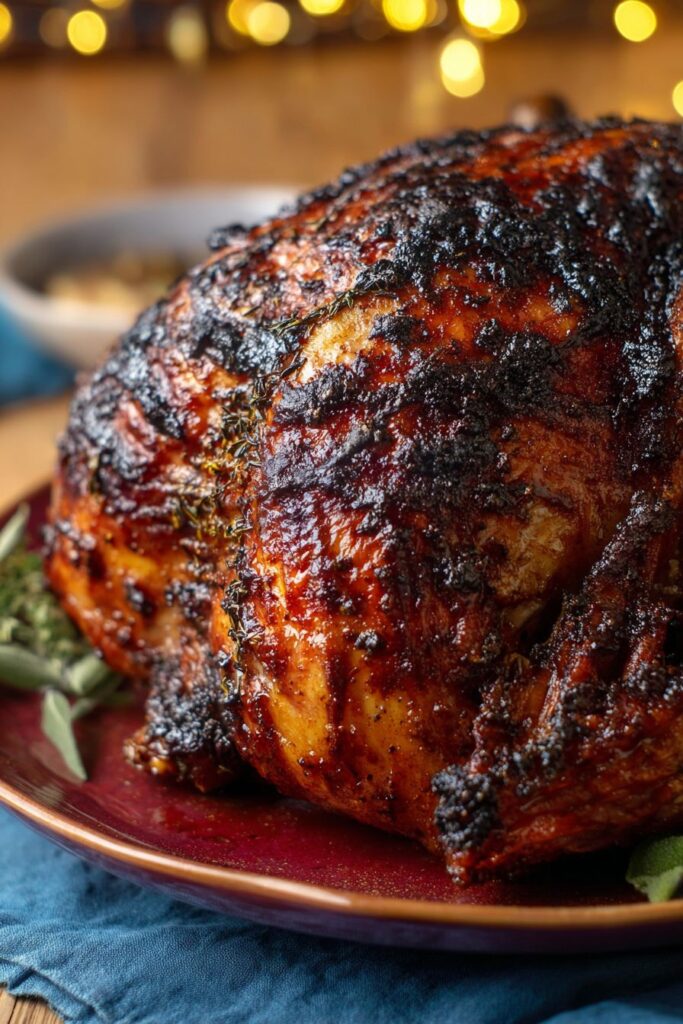
Then I tried an apple cider brine for the first time, and wow, what a difference. The turkey came out so juicy and flavorful that my family still talks about it. The best part? It’s actually pretty simple. You just need some time to plan ahead, because the turkey needs to sit in that sweet, salty bath for hours to work its magic.

Why You’ll Love This Apple Cider Turkey Brine
- Juicy, flavorful turkey – The apple cider brine infuses your turkey with moisture and subtle sweetness, ensuring every bite is tender and never dry.
- Simple ingredients – You probably already have most of these pantry staples at home, and apple cider is easy to find at any grocery store during fall season.
- Foolproof method – Brining takes the guesswork out of cooking turkey perfectly, giving you confidence that your holiday centerpiece will turn out amazing.
- Make-ahead convenience – You can prepare the brine the night before, letting it work its magic while you sleep, which means less stress on cooking day.
- Holiday-worthy results – The warm spices and apple cider create that perfect fall flavor that will have your guests asking for your secret to such delicious turkey.
What Kind of Apple Cider Should I Use?
For this turkey brine, you’ll want to use real apple cider, not apple cider vinegar – they’re completely different things! Look for unfiltered apple cider, which has a richer, more complex flavor that will give your turkey better taste. You can find this in the refrigerated section of most grocery stores, especially during fall months. If unfiltered isn’t available, regular filtered apple cider will still work well for brining. Just make sure whatever you choose is 100% apple juice without any added sugars or artificial flavors, as these can interfere with the brining process.
Options for Substitutions
This brine recipe is pretty forgiving, but here are some swaps you can make if needed:
- Apple cider: If you can’t find unfiltered apple cider, regular filtered apple cider works fine – you’ll just miss out on some of that rustic flavor. In a pinch, you can use apple juice mixed with 2 tablespoons of apple cider vinegar, though the flavor won’t be quite as rich.
- Kosher salt: Table salt can work, but use only ½ cup since it’s finer and more concentrated than kosher salt. Sea salt is another good option at the same measurement as kosher.
- Whole spices: Don’t have whole peppercorns or allspice? You can use 1 teaspoon each of ground black pepper and ground allspice instead. The flavor won’t be as bold, but it’ll still taste great.
- Valencia oranges: Any oranges will do here – navel oranges, blood oranges, or even lemons if you want a more tart flavor. You could also skip the citrus entirely if you don’t have any on hand.
- Turkey size: For smaller birds (8-10 pounds), you can cut this recipe in half. For larger turkeys over 20 pounds, definitely double everything to ensure proper brining coverage.
Watch Out for These Mistakes While Brining
The biggest mistake when brining turkey is using apple cider vinegar instead of apple cider – the vinegar will make your turkey taste sour and ruin the whole dish, so double-check that you’re buying the sweet, unfiltered apple cider from the refrigerated section.
Another common error is not ensuring your turkey is completely thawed before brining, as a partially frozen bird won’t absorb the brine properly and can lead to uneven seasoning and cooking.
Make sure your brine solution is completely cool before adding the turkey – hot brine can start cooking the meat and create food safety issues, so let it cool to room temperature or add ice to bring the temperature down quickly.
Finally, don’t skip weighing your turkey to determine if you need to double the brine recipe, as a 20+ pound bird needs more liquid to be fully submerged, and an under-brined turkey will have bland, dry spots.
What to Serve With Apple Cider Brined Turkey?
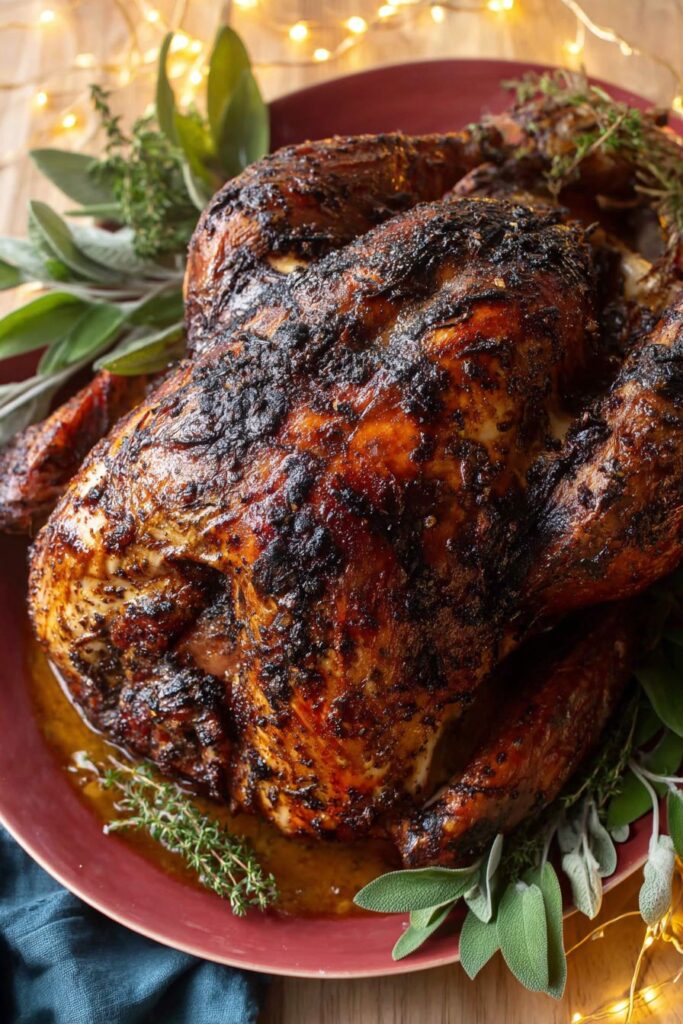
This apple cider brined turkey pairs beautifully with classic fall sides that complement those warm spice flavors from the brine. I love serving it with creamy mashed potatoes, roasted Brussels sprouts with bacon, and a simple stuffing made with sage and cranberries. The subtle apple and spice notes in the turkey also work great with roasted sweet potatoes or a fresh cranberry sauce that has a bit of orange zest. Don’t forget some good dinner rolls for soaking up all those delicious pan juices!
Storage Instructions
Prepare Ahead: You can mix up this apple cider brine up to 2 days before you plan to use it. Just store it in the fridge in a large container or pot until you’re ready to add your turkey. This actually works great since you want the brine nice and cold when the turkey goes in anyway.
Brining Time: Your turkey needs to hang out in this brine for 12-24 hours in the refrigerator, so plan accordingly. Make sure your turkey is completely submerged – you might need to weigh it down with a plate if it keeps floating to the surface.
After Use: Once you remove the turkey from the brine, toss the liquid right away – never reuse brine that’s had raw turkey in it. Give your turkey a good rinse under cold water and pat it completely dry before cooking. The oranges and spices can go straight in the compost or trash.
| Preparation Time | 30-45 minutes |
| Cooking Time | 0-240 minutes |
| Total Time | 18-24 hours (including brining time) |
| Level of Difficulty | Medium |
Estimated Nutrition
Estimated nutrition for the whole recipe (without optional ingredients):
- Calories: 7600-8800
- Protein: 1080-1300 g
- Fat: 360-410 g
- Carbohydrates: 140-160 g
Ingredients
For the brine:
- 1 tbsp black peppercorns (coarsely crushed just before using)
- 2 bay leaves
- 6 whole cloves (for warm spice notes)
- 8 cups ice (keeps brine chilled during brining process)
- 8 cups unfiltered apple cider (I use Martinelli’s for consistent sweetness)
- 1 tbsp whole allspice (coarsely crushed to release oils)
- 2/3 cup kosher salt (Diamond Crystal brand works best)
For the turkey:
- 2 valencia oranges (cut into quarters, placed inside cavity)
- 1 turkey (12 lb, thawed completely before brining)
Step 1: Prepare and Toast the Spices
- 1 tbsp black peppercorns
- 1 tbsp whole allspice
Before making the brine, lightly toast the black peppercorns and allspice berries in a dry skillet over medium heat for about 1-2 minutes, shaking the pan occasionally until fragrant.
This releases their essential oils and deepens their flavor.
Coarsely crush them using a mortar and pestle or the bottom of a heavy pan.
I find this step transforms the brine from one-dimensional to truly aromatic—it’s worth the extra minute.
Step 2: Build and Cool the Brine Base
- 8 cups unfiltered apple cider
- 2/3 cup kosher salt
- 6 whole cloves
- 2 bay leaves
- toasted spice mixture from Step 1
In a large pot, combine the apple cider, kosher salt, toasted and crushed spice mixture from Step 1, whole cloves, and bay leaves.
Bring to a boil over medium-high heat, stirring occasionally, until the salt completely dissolves—about 5 minutes.
Remove from heat and let the brine cool to room temperature, about 30-45 minutes.
Once cooled, transfer the brine to a large container or bowl and refrigerate until completely chilled, at least 2-3 hours (you can make this ahead and chill overnight).
Step 3: Prepare the Turkey for Brining
- 1 turkey
- 2 valencia oranges, cut into quarters
Remove the giblets and neck from the turkey cavity and discard them.
Rinse the turkey thoroughly under cold water, inside and out, then pat it completely dry with paper towels—this helps the brine penetrate more effectively.
Trim any excess fat from the exterior, if desired.
Cut the Valencia oranges into quarters and loosely stuff them into the turkey cavity (they add subtle citrus notes and help season the bird from within).
Step 4: Submerge Turkey in Brine and Chill
- prepared turkey from Step 3
- chilled brine from Step 2
- 8 cups ice
Place the prepared turkey into a large oven bag and set it in a pot or container deep enough to hold the liquid.
Slowly pour the chilled brine from Step 2 over the turkey, then add the ice to keep everything cold during the brining process.
Remove as much air as possible from the bag and seal it securely, ensuring the turkey is completely submerged in the brine—if needed, weigh it down with a plate.
Transfer to the refrigerator and brine for 18-24 hours, turning the turkey occasionally (about every 6 hours if possible) to ensure even brining.
I like to rotate it when I wake up, at dinner time, and before bed—this simple habit yields incredibly uniform seasoning.
Step 5: Remove Turkey and Discard Brine
- brined turkey from Step 4
After brining is complete, carefully remove the turkey from the oven bag and place it on a cutting board or in a clean roasting pan.
Discard the brine and ice.
Remove the orange quarters from the turkey cavity and discard them.
Pat the turkey dry inside and out with paper towels—this is crucial for getting crispy skin during roasting.
At this point, the turkey is fully seasoned and ready for your roasting method.


