I used to think protein powder was only for shakes until I started making these waffles. Now I make them at least twice a week because they’re actually filling enough to keep me satisfied until lunch—something regular waffles never did.
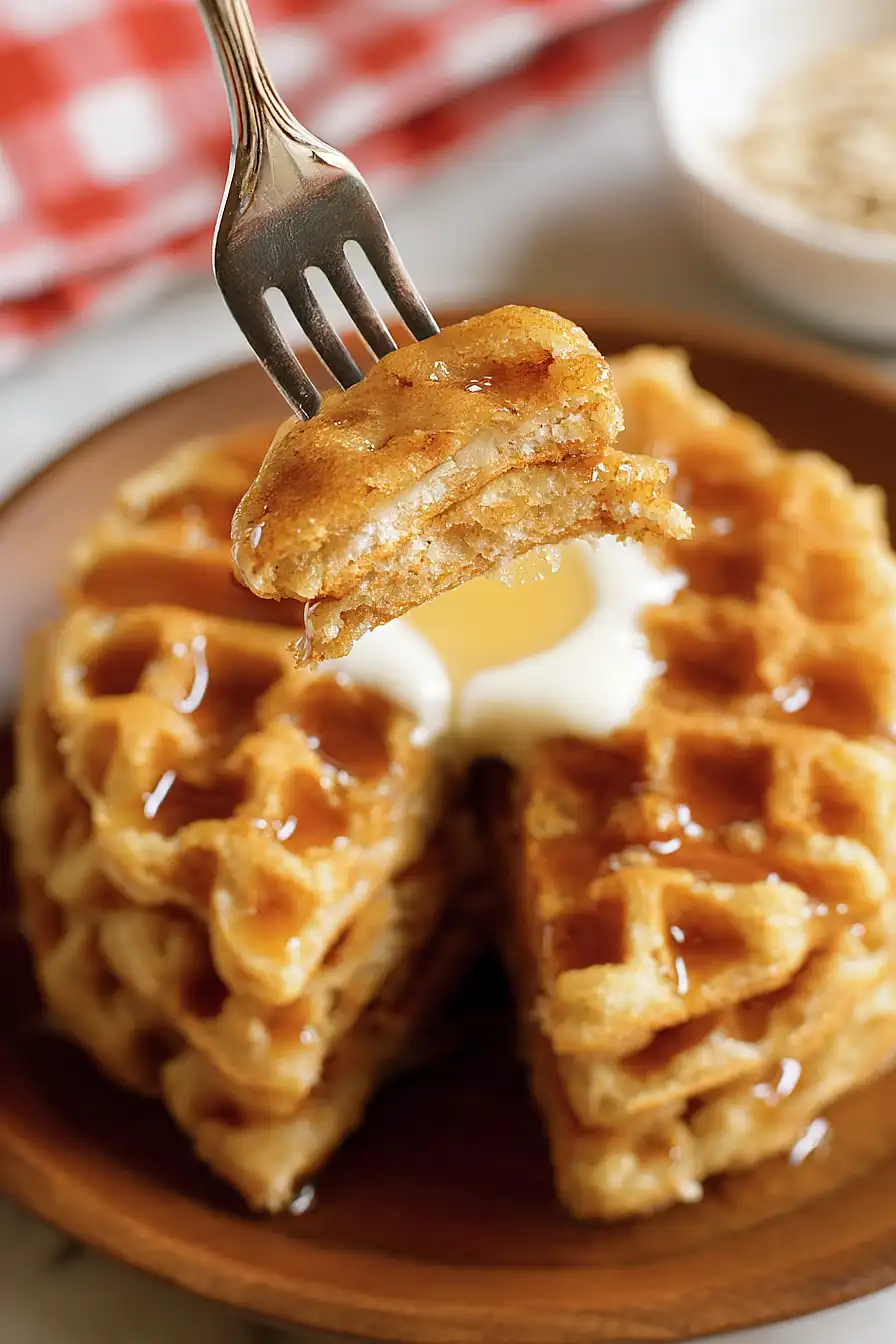
The best part? They don’t taste like cardboard or have that weird chalky texture some protein recipes end up with. The secret is using just the right amount of protein powder mixed with regular flour and yogurt. Too much protein powder and you’ll end up with hockey pucks. Get the balance right, and you’ve got waffles that taste like the real deal but actually fuel your morning.
Why You’ll Love These Protein Waffles
- High-protein breakfast – These waffles pack a serious protein punch to keep you full and energized throughout your morning, making them perfect for post-workout meals or busy days ahead.
- Ready in 15-30 minutes – You can whip up a batch of these waffles faster than waiting in line at a breakfast spot, and they’re just as satisfying.
- Simple pantry ingredients – No fancy or hard-to-find items here—just basic ingredients you probably already have in your kitchen.
- Customizable sweetness – You control how sweet they are with your choice of sweetener, so you can make them exactly to your taste.
What Kind of Protein Powder Should I Use?
For protein waffles, you have quite a bit of flexibility when it comes to choosing your protein powder. Whey protein is probably the most popular choice because it mixes easily and has a mild flavor that works well in sweet recipes, but plant-based options like pea protein or brown rice protein will also do the job. If you’re using a flavored protein powder like vanilla or chocolate, keep in mind that it will affect the taste of your waffles, so pick a flavor you enjoy. Just avoid using collagen protein for this recipe, as it doesn’t have the same binding properties and your waffles might not hold together as well.
Options for Substitutions
These protein waffles are easy to customize based on what you have in your kitchen:
- Protein powder: Any flavor works here – vanilla, chocolate, or unflavored. Whey, casein, or plant-based proteins all do the job, though plant-based varieties might make the batter slightly thicker, so add a splash more water if needed.
- Flour: Regular all-purpose flour is great, but you can use whole wheat flour for extra fiber or oat flour for a gluten-free option. Almond flour works too, though it’ll give you a denser waffle.
- Egg whites: A whole egg works just fine if you don’t have egg whites separated. You can also use a flax egg (1 tablespoon ground flaxseed mixed with 3 tablespoons water) for a vegan version.
- Yogurt: Greek yogurt, regular yogurt, or even sour cream all work. For a dairy-free option, try coconut yogurt or just use an extra 1/4 cup of your milk of choice.
- Sweetener: Use whatever you prefer – sugar, honey, maple syrup, stevia, or monk fruit sweetener. Liquid sweeteners might make the batter slightly thinner, so adjust the water accordingly.
- Water: Feel free to swap this with any milk – dairy, almond, oat, or soy milk all work great and add a bit more richness to the waffles.
Watch Out for These Mistakes While Cooking
The biggest mistake with protein waffles is overmixing the batter, which activates the gluten in the flour and makes your waffles tough and rubbery instead of light and fluffy – just stir until the ingredients are barely combined, even if there are a few lumps.
Another common error is not greasing the waffle maker between each batch, which causes the waffles to stick and tear apart when you try to remove them, so keep that cooking spray or oil handy.
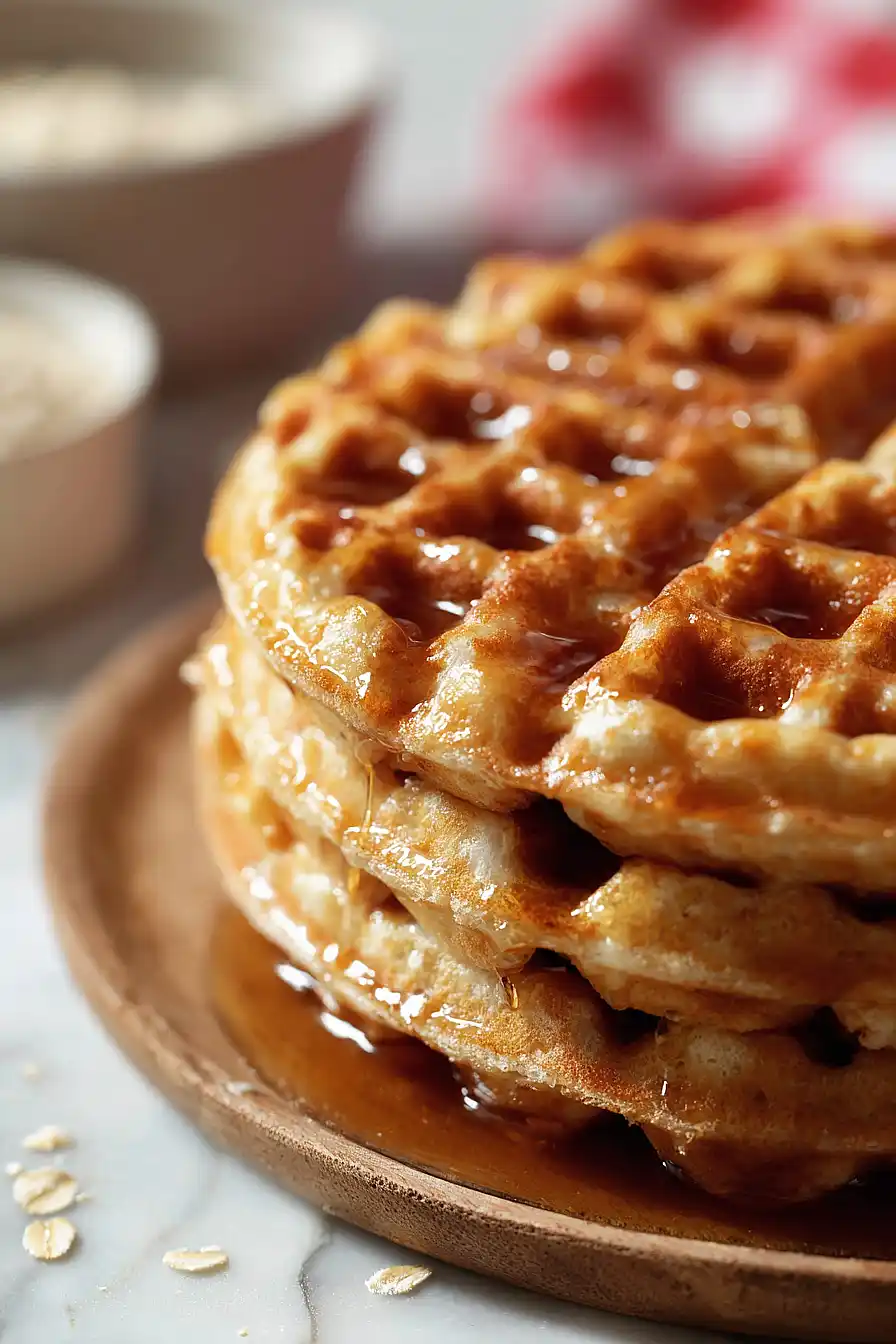
Many people also pull their protein waffles too early when they’re still soft and pale, but letting them cook until the steam stops coming out of the waffle maker will give you that crispy exterior everyone loves.
If your batter seems too thick and doesn’t spread easily in the waffle maker, add water one tablespoon at a time until it reaches a pourable consistency that still holds its shape.
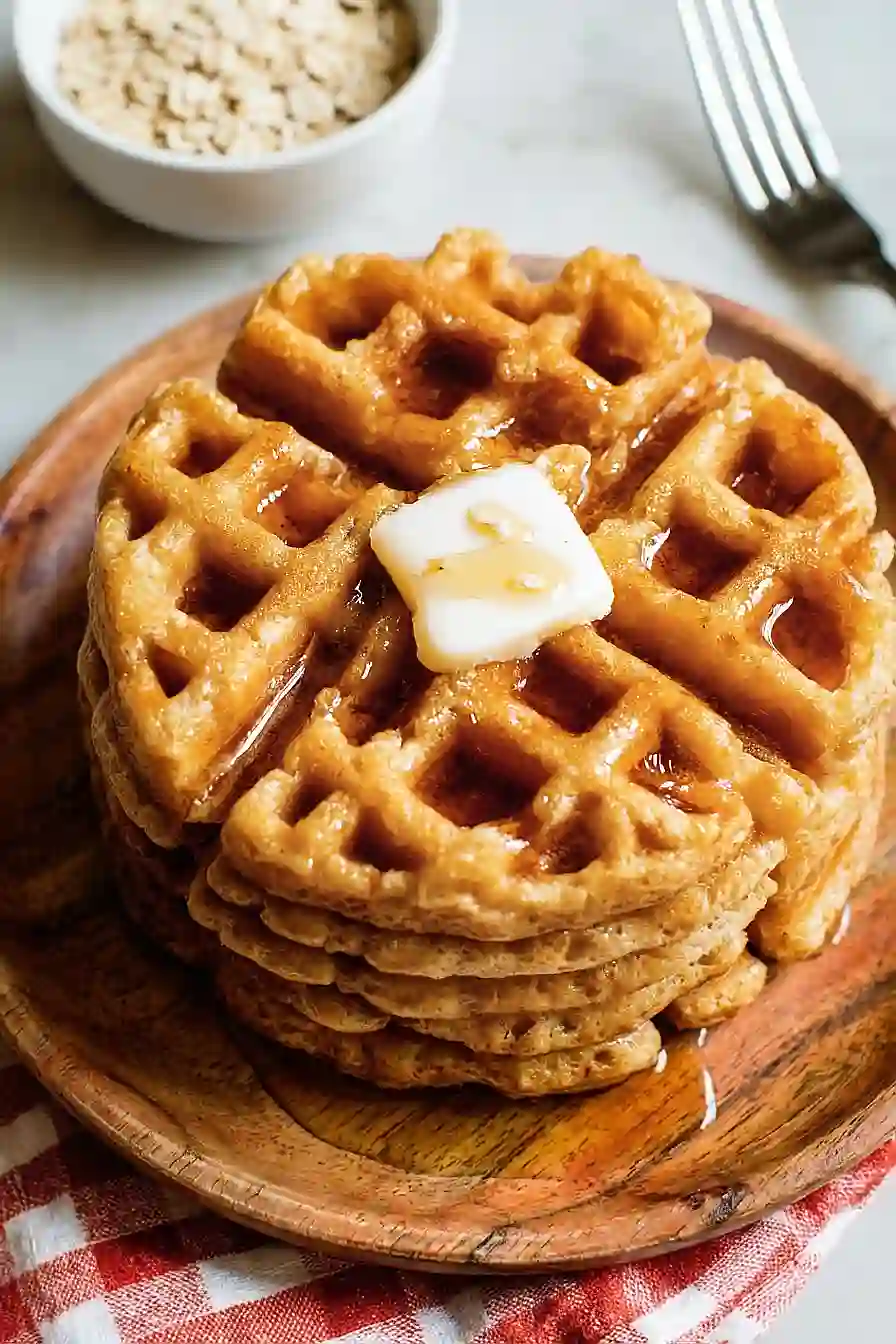
What to Serve With Protein Waffles?
Since these waffles are packed with protein, I like to keep the toppings simple and let them shine. Fresh berries like strawberries, blueberries, or sliced bananas are perfect for adding natural sweetness without going overboard. A drizzle of sugar-free syrup or a dollop of Greek yogurt works great if you want to keep things on the lighter side, while a spoonful of nut butter adds healthy fats and makes them even more filling. If you’re eating these post-workout, a side of scrambled eggs or turkey sausage turns them into a complete high-protein breakfast that’ll keep you satisfied for hours.
Storage Instructions
Refrigerate: These protein waffles keep great in the fridge for up to 5 days. Just stack them with a piece of parchment paper between each waffle in an airtight container. They make breakfast so easy during busy mornings when you can just grab one and go!
Freeze: I always make a double batch and freeze half for later. Let them cool completely, then stack with parchment paper between each one in a freezer bag. They’ll stay good for up to 3 months, and you’ll have quick breakfasts ready whenever you need them.
Reheat: Pop them straight from the fridge or freezer into your toaster for a couple minutes until they’re warm and crispy again. You can also use the microwave for about 30 seconds if you prefer them soft, but the toaster really brings back that fresh-made texture.
| Preparation Time | 5-10 minutes |
| Cooking Time | 10-20 minutes |
| Total Time | 15-30 minutes |
| Level of Difficulty | Easy |
| Servings | 2 waffles |
Estimated Nutrition
Estimated nutrition for the whole recipe (without optional ingredients):
- Calories: 230-270
- Protein: 25-30 g
- Fat: 4-6 g
- Carbohydrates: 28-34 g
Ingredients
- 1/2 cup protein powder (vanilla or unflavored work best)
- 1/3 cup flour (I use King Arthur all-purpose flour)
- 1 tsp baking powder
- 1/8 tsp salt
- 1/2 cup + 1 tbsp water
- 1/4 cup egg whites
- 1/4 cup yogurt (plain Greek yogurt adds extra protein)
- 2 tbsp sweetener (such as erythritol or stevia)
- 2 tsp oil
- 1/2 tsp vanilla extract
Step 1: Combine Dry Ingredients
- 1/2 cup protein powder
- 1/3 cup flour
- 1 tsp baking powder
- 1/8 tsp salt
In a medium mixing bowl, whisk together the protein powder, flour, baking powder, and salt until well combined and no lumps remain.
This ensures the leavening agent is evenly distributed throughout the batter for consistent rise and texture.
Step 2: Mix Wet Ingredients and Create Batter
- 1/4 cup egg whites
- 1/4 cup yogurt
- 1/2 cup + 1 tbsp water
- 2 tsp oil
- 1/2 tsp vanilla extract
- 2 tbsp sweetener
- dry ingredient mixture from Step 1
In a separate bowl, whisk together the egg whites, Greek yogurt, water, oil, vanilla extract, and sweetener until smooth and well combined.
Pour the wet mixture into the bowl with the dry ingredients from Step 1 and stir until just combined—don’t overmix, as this keeps the waffles light and fluffy.
If the batter seems too thick or dry, add a splash of water, a teaspoon at a time, until it reaches a consistency similar to pancake batter.
I like to let the batter rest for a minute or two while the waffle maker heats, which helps activate the baking powder.
Step 3: Preheat and Grease Waffle Maker
- 2 tsp oil
Preheat your waffle maker to medium-high heat (usually about 5-7 minutes) until it’s fully heated and the ready light comes on.
Once hot, lightly grease the cooking plates with a small amount of oil or cooking spray to prevent sticking.
Grease between each waffle to maintain consistent release.
Step 4: Cook Waffles Until Golden and Crispy
- batter from Step 2
Pour about 1/4 to 1/3 cup of batter from Step 2 into the center of the preheated waffle maker—the exact amount depends on your machine size.
Close the lid and cook for 3-5 minutes (or until the steam stops releasing and the exterior looks light golden and crispy).
I find that protein powder waffles benefit from an extra minute of cooking compared to regular waffles, as this helps them firm up and become less dense.
Carefully remove the finished waffle with a fork and repeat with remaining batter, re-greasing the iron between batches if needed.
Fluffy Protein Waffles
Ingredients
- 1/2 cup protein powder (vanilla or unflavored work best)
- 1/3 cup flour (I use King Arthur all-purpose flour)
- 1 tsp baking powder
- 1/8 tsp salt
- 1/2 cup + 1 tbsp water
- 1/4 cup egg whites
- 1/4 cup yogurt (plain Greek yogurt adds extra protein)
- 2 tbsp sweetener (such as erythritol or stevia)
- 2 tsp oil
- 1/2 tsp vanilla extract
Instructions
- In a medium mixing bowl, whisk together the protein powder, flour, baking powder, and salt until well combined and no lumps remain. This ensures the leavening agent is evenly distributed throughout the batter for consistent rise and texture.
- In a separate bowl, whisk together the egg whites, Greek yogurt, water, oil, vanilla extract, and sweetener until smooth and well combined. Pour the wet mixture into the bowl with the dry ingredients from Step 1 and stir until just combined—don't overmix, as this keeps the waffles light and fluffy. If the batter seems too thick or dry, add a splash of water, a teaspoon at a time, until it reaches a consistency similar to pancake batter. I like to let the batter rest for a minute or two while the waffle maker heats, which helps activate the baking powder.
- Preheat your waffle maker to medium-high heat (usually about 5-7 minutes) until it's fully heated and the ready light comes on. Once hot, lightly grease the cooking plates with a small amount of oil or cooking spray to prevent sticking. Grease between each waffle to maintain consistent release.
- Pour about 1/4 to 1/3 cup of batter from Step 2 into the center of the preheated waffle maker—the exact amount depends on your machine size. Close the lid and cook for 3-5 minutes (or until the steam stops releasing and the exterior looks light golden and crispy). I find that protein powder waffles benefit from an extra minute of cooking compared to regular waffles, as this helps them firm up and become less dense. Carefully remove the finished waffle with a fork and repeat with remaining batter, re-greasing the iron between batches if needed.


