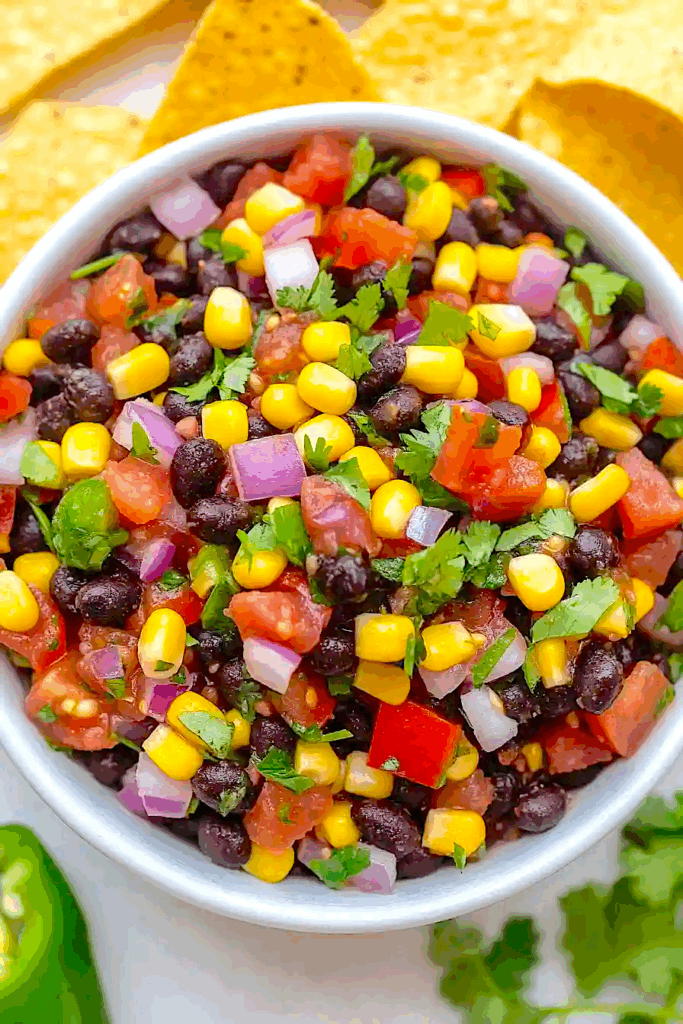
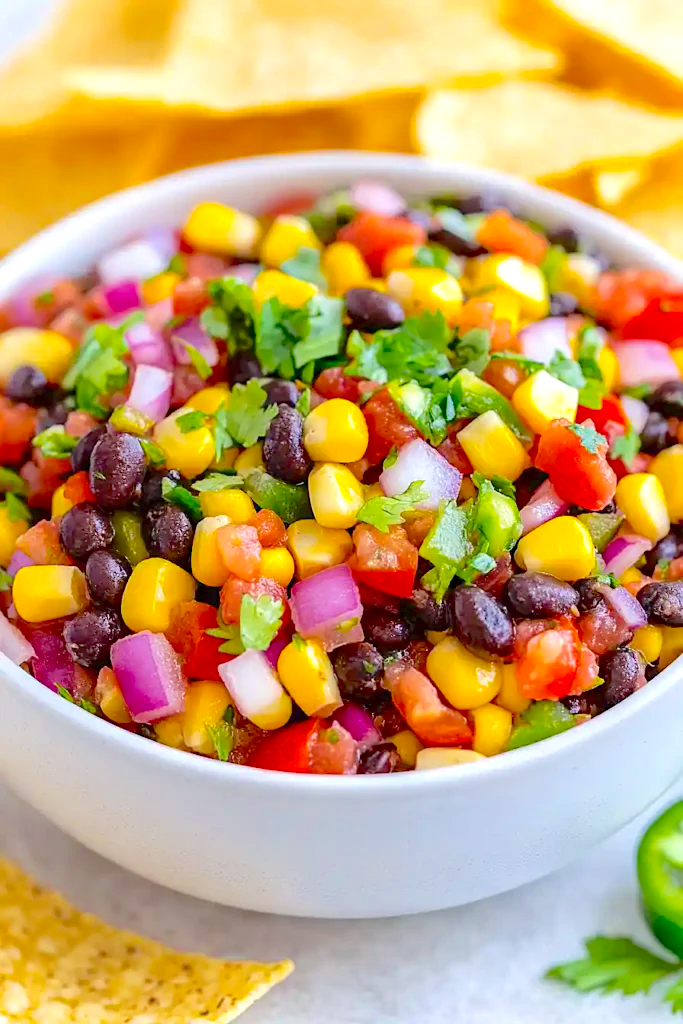
Fresh black bean and corn salsa that’s perfect for any occasion. This colorful salsa has become my go-to appetizer whenever we’re having friends over or need something quick for family taco night.
With sweet corn, hearty black beans, fresh cilantro, and a zesty lime dressing, this homemade salsa is so much better than anything you can buy at the store and takes just minutes to throw together.
5 Reasons You’ll Love This Salsa
- Quick and easy – This no-cook recipe comes together in just 15 minutes – perfect for last-minute gatherings or when you’re too busy to spend time in the kitchen.
- Diet-friendly – It’s naturally vegan, gluten-free, and packed with protein from black beans, making it a great choice for various dietary needs.
- Make-ahead friendly – You can prep this salsa several hours in advance – in fact, the flavors get even better as they mingle in the fridge.
- Fresh ingredients – Using simple, whole ingredients like fresh vegetables, herbs, and beans means you’re getting real food without any processed additives.
- Customizable heat level – You can easily adjust the spiciness by changing the amount of jalapeño, making it perfect for both mild and spicy food lovers.

Options for Substitutions
This fresh salsa recipe is super adaptable and you can make several easy swaps:
- Black beans: You can switch these out for pinto beans, kidney beans, or even chickpeas. Just make sure to rinse and drain them well before using.
- Bell pepper: Any color bell pepper works great here. You could also use mini sweet peppers or even jicama for a different crunch.
- Jalapeño: If jalapeños aren’t your thing, try serrano peppers for more heat, or poblanos for a milder kick. You can also use canned green chiles or skip the peppers altogether.
- Red wine vinegar: Apple cider vinegar or white wine vinegar work just as well. You could even use all lime juice instead.
- Cilantro: If you’re not a cilantro fan (we know some folks think it tastes like soap!), try using fresh parsley or a mix of parsley and mint instead.
- Avocado: While avocado adds nice creaminess, you can leave it out if you don’t have ripe ones on hand. The salsa is still great without it!
Great Pairings for Black Bean and Corn Salsa
This fresh and zesty black bean and corn salsa works perfectly as both a dip and a topping for all your favorite Mexican-inspired dishes.
The most obvious (and delicious!) way to serve it is with a big bowl of tortilla chips – I like to warm them up in the oven first for extra crunch.
You can also spoon this salsa over tacos, burritos, or grilled fish for an easy meal upgrade.
For a casual dinner spread, try setting out some warm flour tortillas, Mexican rice, and grilled vegetables alongside the salsa to let everyone build their own plates.
Storage Tips and Guidelines
Keep Fresh: This salsa stays good in an airtight container in the fridge for 3-4 days. For the best results, add the diced avocado just before serving instead of mixing it in with the rest of the ingredients. This way, you’ll avoid any browning and keep everything looking fresh!
Make Ahead: You can prep this salsa up to a day before serving – just combine all ingredients except the avocado and cilantro. When you’re ready to serve, stir in the fresh cilantro and top with diced avocado. The flavors actually get better as they hang out together in the fridge!
Serve: Take the salsa out of the fridge about 15 minutes before serving to let it come to room temperature – this helps bring out all the flavors. Give it a quick stir before serving, as some liquid might settle at the bottom of the container.
| Preparation Time | 10-15 minutes |
| Cooking Time | 0-0 minutes |
| Total Time | 10-15 minutes |
| Level of Difficulty | Easy |
Estimated Nutrition
Estimated nutrition for the whole recipe (without optional ingredients):
- Calories: 600-700
- Protein: 15-20 g
- Fat: 35-45 g
- Carbohydrates: 75-85 g
Ingredients
- 1/2 cup cilantro (fresh, finely chopped)
- 1/2 cup red onion (finely diced)
- 1 1/2 cups corn kernels (fresh or frozen)
- 1 tsp salt
- 1 cup tomatoes (diced into 1/2-inch pieces, I use Roma tomatoes)
- 1 can black beans (drained and rinsed)
- 2 tbsp red wine vinegar
- 1 tsp ground cumin (freshly ground preferred for more flavor)
- 1 bell pepper (diced into 1/4-inch pieces)
- 2 tbsp fresh lime juice (about 1-2 limes)
- 1 to 2 avocados (optional but recommended for creaminess, add just before serving)
- 1 jalapeno (minced, seeds removed for less heat)
Step 1: Prepare and Measure All Ingredients
- 1 can black beans
- 1 bell pepper
- 1/2 cup red onion
- 1 1/2 cups corn kernels
- 1 cup tomatoes
- 1 jalapeno
- 1/2 cup cilantro
Drain and rinse the black beans thoroughly under cold water to remove excess sodium and starch.
Dice the bell pepper, red onion, and tomatoes into their specified sizes—this precision matters for even distribution and eating experience.
Mince the jalapeno, removing seeds and white membranes if you prefer less heat (I like to keep a few seeds for a subtle kick).
Measure out the corn kernels, fresh lime juice, and cilantro.
Having everything prepped and ready before mixing ensures you can quickly combine flavors while they’re fresh.
Step 2: Create the Seasoning Base
- 2 tbsp red wine vinegar
- 2 tbsp fresh lime juice
- 1 tsp salt
- 1 tsp ground cumin
In a small bowl, whisk together the red wine vinegar, fresh lime juice, salt, and ground cumin.
I always use freshly ground cumin when I can—the aroma and flavor are noticeably brighter than pre-ground.
Let this mixture sit for just a minute so the salt begins to dissolve and the flavors start to meld together.
This creates a flavorful dressing that will coat all the ingredients evenly.
Step 3: Combine and Let Flavors Marry
- prepared vegetables from Step 1
- seasoning mixture from Step 2
- 1/2 cup cilantro
In a large mixing bowl, combine the prepared black beans, bell pepper, red onion, corn, tomatoes, and jalapeno.
Pour the seasoning mixture from Step 2 over the vegetables and gently fold everything together until evenly coated.
Add the fresh cilantro and fold in one more time.
If you have time, let the salsa sit for 15-30 minutes at room temperature so the vegetables absorb the lime-vinegar dressing and flavors develop.
Taste and adjust seasonings as needed—you may want an extra pinch of salt or squeeze of lime depending on your preference.
Step 4: Add Avocado and Serve
- 1 to 2 avocados
- prepared salsa from Step 3
Just before serving, dice the avocados and gently fold them into the salsa—I add them at the last moment to prevent browning and to keep their creamy texture intact.
Serve immediately with tortilla chips, as a side salad alongside grilled proteins, or tucked into warm tortillas for a fresh, satisfying meal.


