If you ask me, strawberry pie is one of those desserts that never goes out of style.
This classic no-jello version relies on fresh strawberries and potato starch to create a naturally thick, glossy filling. The berries shine through without any artificial flavor getting in the way.
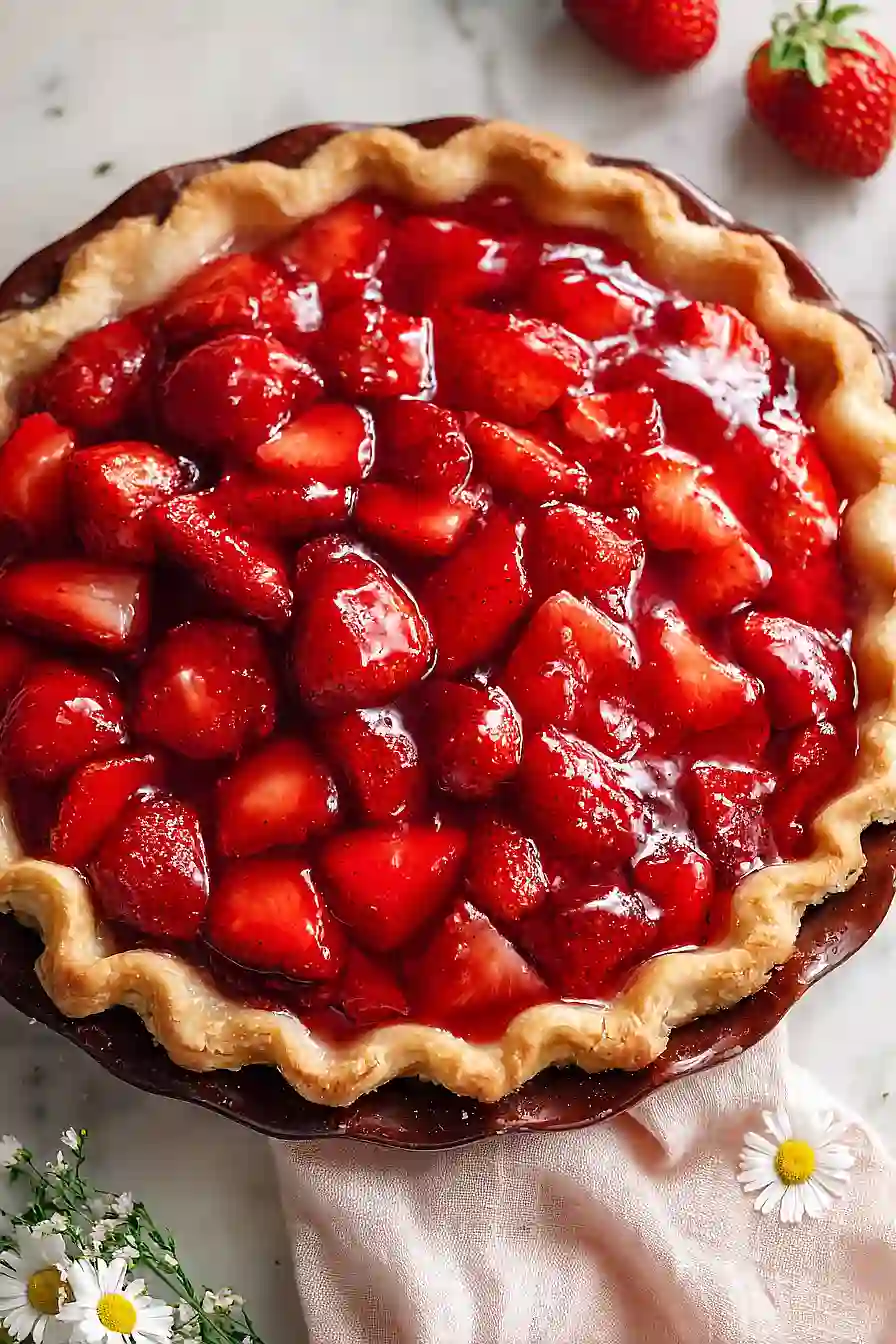
It starts with a flaky store-bought crust that gets filled with sliced strawberries and a homemade berry glaze. A mashed strawberry base gives you that thick texture, while lemon juice adds just the right amount of brightness.
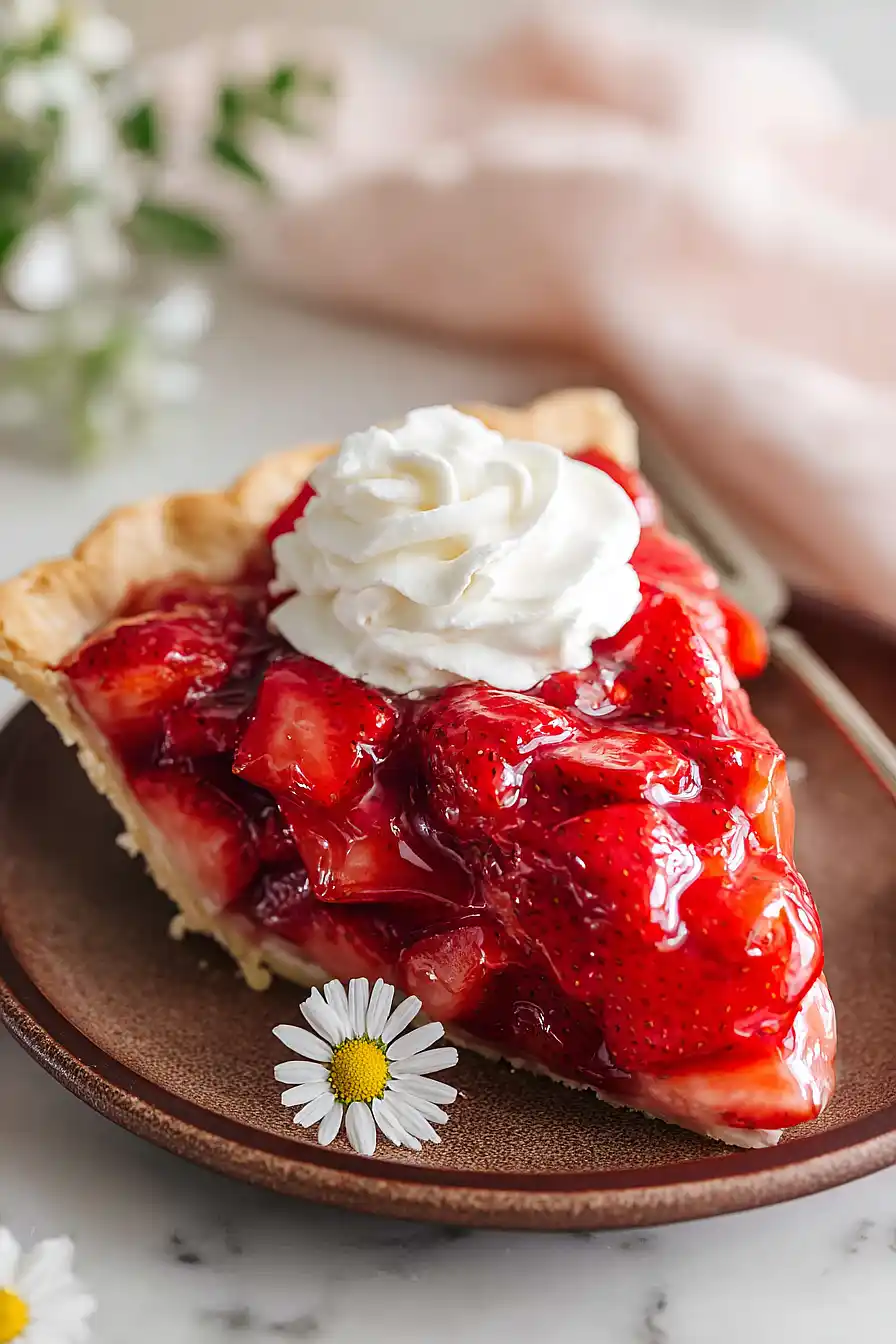
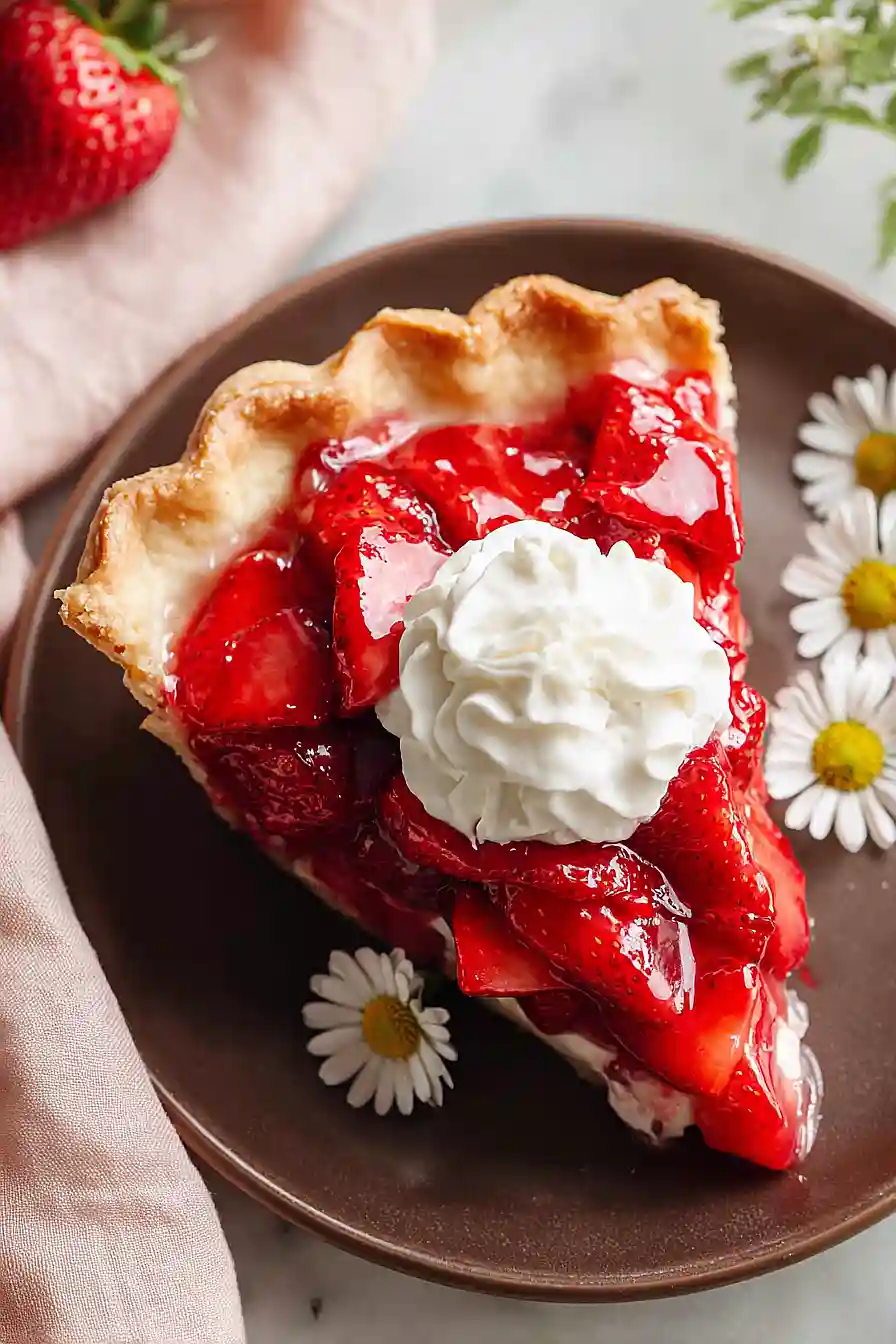
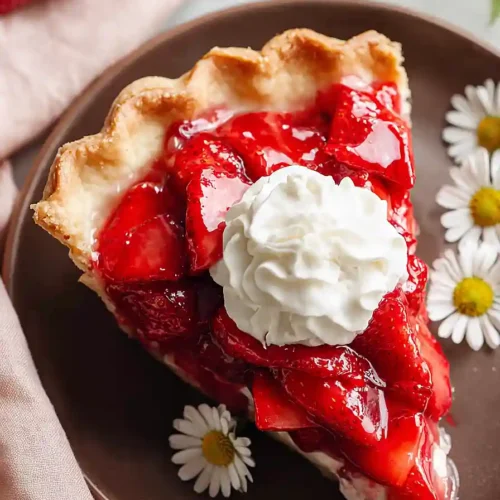
Top it with whipped cream and you’ve got yourself a simple dessert that tastes like summer, perfect for potlucks or Sunday dinner.
Why You’ll Love This Strawberry Pie
- No artificial jello – This pie uses fresh strawberries and natural ingredients to create a thick, glossy filling without any artificial flavors or colors.
- Quick and easy – You can have this pie ready in under 30 minutes, making it perfect for last-minute gatherings or when you need a dessert in a hurry.
- Fresh strawberry flavor – The filling lets the natural sweetness and bright taste of fresh strawberries shine through, especially when they’re in season.
- Simple ingredients – You probably have most of these items in your pantry already, and the recipe doesn’t require any fancy equipment or techniques.
What Kind of Strawberries Should I Use?
Fresh strawberries are definitely the way to go for this pie, and you’ll want to pick ones that are ripe but still firm enough to hold their shape. Look for berries that are bright red all the way through without any white or green spots near the stem, and give them a sniff – they should smell sweet and fragrant. If fresh strawberries aren’t in season or you’re in a pinch, frozen strawberries can work too, but make sure to thaw them completely and drain off any excess liquid before using them. Smaller to medium-sized berries tend to work better than those giant ones since they’re usually sweeter and fit more nicely in the pie.
Options for Substitutions
This strawberry pie is pretty straightforward, but here are some swaps you can make:
- Potato starch: If you don’t have potato starch, cornstarch works great as a substitute. Use the same amount – 3 tablespoons. You can also use tapioca starch, though it might give a slightly different texture.
- Sugar: The amount of sugar can be adjusted based on how sweet your strawberries are. Taste your berries first – if they’re really sweet, you can cut back to 1/2 cup. For a different sweetness, try using honey (reduce to about 1/2 cup) but add it after cooking so it doesn’t crystallize.
- Lemon juice: Fresh lemon juice is best, but bottled will work in a pinch. You can also use lime juice for a slightly different citrus note.
- Pie crust: Store-bought or homemade both work fine. You can also use a graham cracker crust for a different flavor, or even a shortbread cookie crust if you’re feeling fancy.
- Strawberries: This one’s non-negotiable – you really need strawberries for a strawberry pie! Just make sure they’re ripe and sweet for the best results.
Watch Out for These Mistakes While Baking
The biggest mistake when making this no-jello strawberry pie is not cooking the glaze long enough – if it doesn’t reach a thick, pudding-like consistency, your pie will be runny and won’t set properly in the fridge.
Another common error is using a warm or room-temperature pie crust, which can become soggy when you add the berries, so make sure your baked crust is completely cooled before filling it.
To get the best texture, avoid skipping the cooling step for the glaze – pouring hot glaze directly over the strawberries can make them mushy and cause the filling to slide around.
Finally, give your pie the full 2-3 hours to chill in the refrigerator, as cutting into it too early will result in a messy slice that won’t hold its shape.
What to Serve With Strawberry Pie?
This strawberry pie is pretty much a showstopper on its own, but a big dollop of whipped cream or a scoop of vanilla ice cream takes it to the next level. If you’re serving it for a summer gathering, I like to pair it with some iced coffee or lemonade to balance out the sweetness. For a more complete dessert spread, consider setting out some fresh berries on the side or a light fruit salad so guests can mix and match their bites. Since the pie is already rich and sweet, you don’t need much else – just let that fresh strawberry flavor shine through!
Storage Instructions
Refrigerate: This strawberry pie needs to stay cold, so keep it covered in the fridge for up to 3 days. The filling might release a bit of liquid as it sits, but that’s totally normal. Just make sure to cover it loosely with plastic wrap or foil so the crust doesn’t get too soggy.
Serve: This pie is best enjoyed chilled, straight from the fridge. Top each slice with a dollop of whipped cream right before serving for the freshest taste. If you made the whipped cream ahead, give it a quick whisk to fluff it back up before adding it to your pie.
| Preparation Time | 10-15 minutes |
| Cooking Time | 5-10 minutes |
| Total Time | 15-25 minutes |
| Level of Difficulty | Easy |
| Servings | 8 slices |
Estimated Nutrition
Estimated nutrition for the whole recipe (without optional ingredients):
- Calories: 1700-1900
- Protein: 10-14 g
- Fat: 40-48 g
- Carbohydrates: 360-400 g
Ingredients
For the fruit filling and crust:
- 5.5 cups strawberries (hulled and sliced into 1/4-inch pieces)
- 1 9-inch pie crust (I like Pillsbury Refrigerated Pie Crust for a flaky texture)
- whipped cream (optional but recommended for extra richness)
For the homemade glaze:
- 1 cup strawberries (thoroughly mashed to create a smooth base)
- 2/3 cup sugar
- 3.5 tbsp potato starch (I prefer Bob’s Red Mill for a clear, glossy finish)
- 1/2 cup water
- 1.5 tsp lemon juice (freshly squeezed for best brightness)
- 1/4 teaspoon vanilla extract
- Pinch of salt
Step 1: Prepare and Blind Bake the Pie Crust
- 1 9-inch pie crust
Preheat your oven to 375°F.
Remove the refrigerated pie crust and place it in a 9-inch pie dish, letting it come to room temperature for a few minutes so it’s easier to work with.
Prick the bottom and sides with a fork to prevent bubbling, then bake for 8-10 minutes until it’s set but still pale.
Remove from the oven and let cool while you prepare the filling—a partially baked crust ensures a crispy base instead of a soggy bottom.
Step 2: Prepare the Strawberries
- 5.5 cups strawberries
- 1 cup strawberries
While the crust bakes, hull and prepare your strawberries.
Thoroughly mash 1 cup of the strawberries in a bowl until you have a smooth, chunky puree—this will be your glaze base.
Slice the remaining 5.5 cups of strawberries into 1/4-inch pieces and set them aside in a separate bowl.
Keeping these separate ensures you have both a smooth glaze and beautiful whole berry pieces for texture.
Step 3: Make the Strawberry Glaze
- 1 cup mashed strawberries from Step 2
- 2/3 cup sugar
- 3.5 tbsp potato starch
- 1/2 cup water
In a medium pot, combine the mashed strawberries from Step 2, sugar, potato starch, and water.
Stir well to combine, making sure there are no lumps in the starch—this prevents a grainy texture in your final glaze.
Place the pot over medium heat and bring to a gentle boil, stirring frequently for 2-3 minutes until the mixture thickens noticeably and becomes glossy.
I prefer potato starch over cornstarch because it creates a clearer, more elegant glaze that really lets the strawberry color shine through.
Step 4: Cool and Season the Glaze
- 1.5 tsp lemon juice
- 1/4 teaspoon vanilla extract
- Pinch of salt
Remove the pot from heat and stir in the lemon juice, vanilla extract, and salt.
The lemon juice brightens the strawberry flavor and prevents the filling from tasting one-dimensional, while the vanilla adds subtle depth.
Let the glaze cool to room temperature for about 10 minutes, stirring occasionally—this prevents it from being too hot when you add the delicate fresh berries, which would make them release their juices and become mushy.
Step 5: Assemble and Chill the Pie
- Sliced strawberries from Step 2
- Pie crust from Step 1
- Cooled glaze from Step 4
Spread the sliced strawberries from Step 2 evenly in the cooled pie crust from Step 1.
Pour the cooled glaze from Step 4 over the berries, using a spatula to gently distribute it and coat all the berries without crushing them.
The fresh berries stay intact while the glaze holds everything together, creating a beautiful, jeweled appearance.
Refrigerate for at least 2-3 hours until the glaze is completely set and the flavors have melded together.
Step 6: Serve and Enjoy
- whipped cream
Remove the pie from the refrigerator and let it sit for 5 minutes before slicing—this allows the glaze to hold together cleanly when you cut.
Serve each slice with a generous dollop of whipped cream if desired, which adds richness and balances the bright strawberry flavor beautifully.
Gluten-Free No Jello Strawberry Pie
Ingredients
For the fruit filling and crust::
- 5.5 cups strawberries (hulled and sliced into 1/4-inch pieces)
- 1 9-inch pie crust (I like Pillsbury Refrigerated Pie Crust for a flaky texture)
- whipped cream (optional but recommended for extra richness)
For the homemade glaze::
- 1 cup strawberries (thoroughly mashed to create a smooth base)
- 2/3 cup sugar
- 3.5 tbsp potato starch (I prefer Bob's Red Mill for a clear, glossy finish)
- 1/2 cup water
- 1.5 tsp lemon juice (freshly squeezed for best brightness)
- 1/4 teaspoon vanilla extract
- Pinch of salt
Instructions
- Preheat your oven to 375°F. Remove the refrigerated pie crust and place it in a 9-inch pie dish, letting it come to room temperature for a few minutes so it's easier to work with. Prick the bottom and sides with a fork to prevent bubbling, then bake for 8-10 minutes until it's set but still pale. Remove from the oven and let cool while you prepare the filling—a partially baked crust ensures a crispy base instead of a soggy bottom.
- While the crust bakes, hull and prepare your strawberries. Thoroughly mash 1 cup of the strawberries in a bowl until you have a smooth, chunky puree—this will be your glaze base. Slice the remaining 5.5 cups of strawberries into 1/4-inch pieces and set them aside in a separate bowl. Keeping these separate ensures you have both a smooth glaze and beautiful whole berry pieces for texture.
- In a medium pot, combine the mashed strawberries from Step 2, sugar, potato starch, and water. Stir well to combine, making sure there are no lumps in the starch—this prevents a grainy texture in your final glaze. Place the pot over medium heat and bring to a gentle boil, stirring frequently for 2-3 minutes until the mixture thickens noticeably and becomes glossy. I prefer potato starch over cornstarch because it creates a clearer, more elegant glaze that really lets the strawberry color shine through.
- Remove the pot from heat and stir in the lemon juice, vanilla extract, and salt. The lemon juice brightens the strawberry flavor and prevents the filling from tasting one-dimensional, while the vanilla adds subtle depth. Let the glaze cool to room temperature for about 10 minutes, stirring occasionally—this prevents it from being too hot when you add the delicate fresh berries, which would make them release their juices and become mushy.
- Spread the sliced strawberries from Step 2 evenly in the cooled pie crust from Step 1. Pour the cooled glaze from Step 4 over the berries, using a spatula to gently distribute it and coat all the berries without crushing them. The fresh berries stay intact while the glaze holds everything together, creating a beautiful, jeweled appearance. Refrigerate for at least 2-3 hours until the glaze is completely set and the flavors have melded together.
- Remove the pie from the refrigerator and let it sit for 5 minutes before slicing—this allows the glaze to hold together cleanly when you cut. Serve each slice with a generous dollop of whipped cream if desired, which adds richness and balances the bright strawberry flavor beautifully.


