I thought drunken noodles were called that because you needed to be drunk to make them. Turns out, there’s no alcohol in the recipe at all—the name comes from the idea that these spicy, saucy noodles are perfect for soaking up a night of drinks. Or maybe it’s because the sauce-covered noodles look like something a drunk person tossed together. Either way, I’m not complaining.
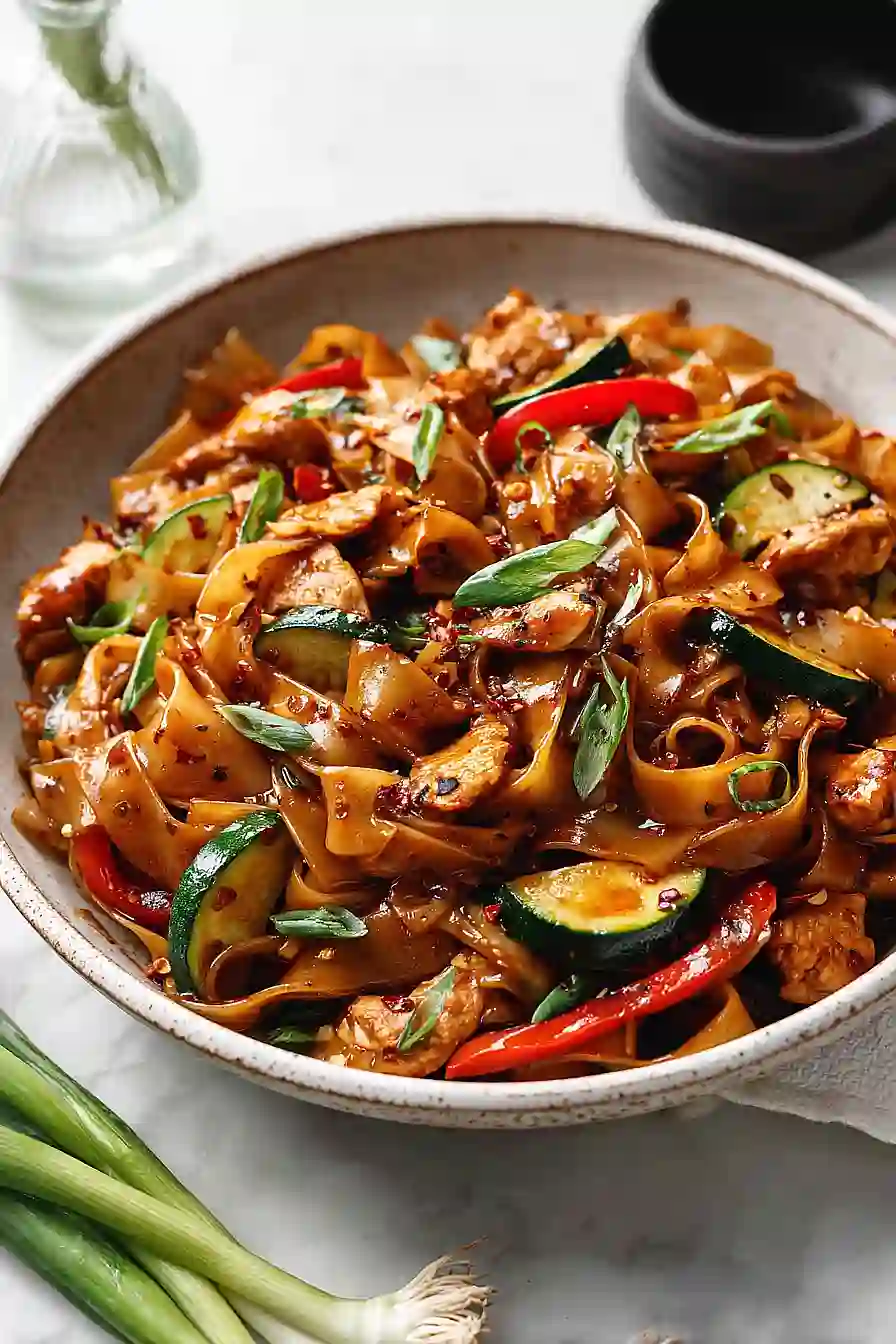
The first time I ordered drunken noodles at a Thai restaurant, I was hooked. That mix of chewy rice noodles, fresh basil, and just enough heat to make your nose tingle—it’s the kind of dish that makes you want to lick the plate. When I realized I could make them at home in less time than it takes to order takeout, my weeknight dinner game changed forever.
Why You’ll Love These Thai Drunken Noodles
- Ready in under 30 minutes – This recipe comes together faster than ordering takeout, making it perfect for busy weeknights when you want something flavorful without the wait.
- Restaurant-quality flavor at home – The combination of oyster sauce, fish sauce, and Thai basil creates that authentic taste you’d get from your favorite Thai restaurant, right in your own kitchen.
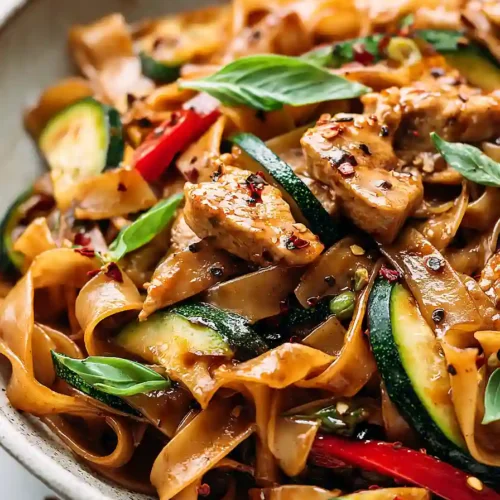
- Packed with fresh vegetables – With carrots, zucchini, bell peppers, and tomatoes, you’re getting a colorful, veggie-loaded meal that’s as nutritious as it is delicious.
- Customizable protein options – Whether you prefer chicken, shrimp, or tofu, this recipe works with whatever you have on hand or suits your dietary preferences.
- Adjustable spice level – You control the heat with the Thai red chili paste, so you can make it mild for the kids or turn up the spice for those who like it hot.
What Kind of Rice Noodles Should I Use?
For drunken noodles, you’ll want to grab wide rice noodles, sometimes labeled as “pad thai noodles” or “rice stick noodles” at the store. The wider the better here – look for noodles that are about ¼ to ½ inch wide, as they’ll hold up better to the sauce and give you that authentic chewy texture. You can find these in the Asian section of most grocery stores, either dried or fresh. Fresh noodles are great if you can find them since they cook faster and have a softer texture, but dried noodles work just as well – just make sure to soak them in warm water until they’re pliable before cooking. If you can’t find wide rice noodles, regular pad thai noodles will work in a pinch, though the dish won’t have quite the same hearty feel.
Options for Substitutions
This recipe is really forgiving when it comes to swaps, so feel free to work with what you have:
- Wide rice noodles: These flat noodles are pretty important for authentic drunken noodles, but if you can’t find them, use regular rice noodles or even linguine in a pinch. Just cook according to package directions.
- Thai Holy Basil: Regular basil works fine if you can’t track down Thai Holy Basil. The flavor will be slightly different but still tasty. You could also try a mix of regular basil and mint for something closer to the original.
- Chicken breast: Swap this out for shrimp, tofu, or even thinly sliced beef or pork. Cooking times will vary – shrimp cooks faster, so add it later in the process.
- Vegetables: The veggie mix here is flexible. Use what’s in your fridge – snap peas, broccoli, baby corn, or mushrooms all work great. Just keep the cooking times in mind for crunchier veggies.
- Fish sauce: If you don’t have fish sauce, add an extra tablespoon of soy sauce plus a pinch of salt. The flavor won’t be quite the same, but it’ll still be good.
- Thai red chili paste: Sriracha or crushed red pepper flakes make easy substitutes. Start with less and add more to your heat preference.
Watch Out for These Mistakes While Cooking
The biggest mistake with drunken noodles is overcooking the rice noodles, which turns them into a mushy clump – cook them just until they’re tender but still have a slight chew, then rinse them with cold water to stop the cooking process.
Another common error is adding the garlic and ginger too early, as they’ll burn in the high heat and turn bitter, so make sure to add them for just 10 seconds before moving on to the vegetables.
Don’t skip the step of having all your ingredients prepped and ready before you start cooking, because this dish comes together fast and you won’t have time to chop vegetables once the pan is hot.
Finally, add the basil at the very end and turn off the heat immediately after stirring it in, since overcooking fresh basil makes it turn black and lose its bright flavor.

What to Serve With Thai Drunken Noodles?
Since drunken noodles are already packed with veggies and protein, I like to keep the sides simple and let the noodles be the star of the show. A light cucumber salad with rice vinegar and a pinch of sugar is refreshing and helps balance out the spicy, savory flavors of the dish. If you want something a bit more filling, spring rolls or fresh summer rolls with peanut sauce make a great appetizer before diving into the noodles. For drinks, an ice-cold Thai iced tea or a crisp lager beer works perfectly to cool down your palate between bites of those spicy noodles.
Storage Instructions
Store: Keep your leftover drunken noodles in an airtight container in the fridge for up to 4 days. The noodles might soak up some of the sauce as they sit, but they’ll still taste great. I actually think the flavors get even better the next day!
Freeze: You can freeze these noodles for up to 2 months in a freezer-safe container. Just know that the veggies might be a bit softer after thawing, but the flavor will still be there. I usually freeze individual portions so I can grab one for a quick lunch.
Reheat: Warm up your noodles in a skillet over medium heat with a splash of water or soy sauce to loosen them up. You can also microwave them, but I find the stovetop method keeps the texture better. Add a drizzle of sesame oil while reheating to freshen everything up.
| Preparation Time | 10-15 minutes |
| Cooking Time | 10-15 minutes |
| Total Time | 20-30 minutes |
| Level of Difficulty | Medium |
| Servings | 4 servings |
Estimated Nutrition
Estimated nutrition for the whole recipe (without optional ingredients):
- Calories: 1100-1250
- Protein: 50-60 g
- Fat: 25-32 g
- Carbohydrates: 180-200 g
Ingredients
For the noodles and stir-fry:
- 8 oz rice noodles
- 2 tbsp sesame oil
- 2 shallots (thinly sliced into half-moons)
- 2 carrots (peeled and sliced into thin 2-inch matchsticks)
- 1 lb chicken breast (thinly sliced against the grain into 1/4-inch strips)
- 4 garlic cloves (minced)
- 1 tsp ginger (grated)
- 1/4 tsp ground white pepper
- 1 zucchini (halved lengthwise and sliced into 1/4-inch thick half-moons)
- 1 green bell pepper (sliced)
- 2 green onions (sliced, whites and greens separated)
- 1 roma tomato (wedged)
- 1 cup Thai basil (loosely packed)
For the sauce:
- 3 tbsp oyster sauce
- 1/4 cup soy sauce
- 1 tbsp dark soy sauce (for rich color)
- 1 tbsp fish sauce
- 1 tbsp brown sugar
- 2 tbsp water
- 2 tsp chili paste (Sambal Oelek)
Step 1: Prepare All Ingredients (Mise en Place)
- 1 lb chicken breast
- 2 shallots
- 2 carrots
- 1 zucchini
- 1 green bell pepper
- 2 green onions
- 1 roma tomato
- 4 garlic cloves
- 1 tsp ginger
Slice the chicken breast thinly against the grain into 1/4-inch strips—this is crucial for even cooking and tender results.
Thinly slice the shallots into half-moons, cut carrots into thin 2-inch matchsticks, halve the zucchini lengthwise then slice into 1/4-inch half-moons, slice the bell pepper, separate the white and green parts of the green onions, wedge the tomato, mince the garlic, and grate the ginger.
Measure out all remaining ingredients into separate bowls or small containers so everything is ready when you start cooking.
Step 2: Cook Noodles and Make Sauce
- 8 oz rice noodles
- 3 tbsp oyster sauce
- 1/4 cup soy sauce
- 1 tbsp dark soy sauce
- 1 tbsp fish sauce
- 1 tbsp brown sugar
- 2 tbsp water
- 2 tsp chili paste
Bring a large pot of water to a boil and cook the rice noodles according to package directions until just tender, then drain and set aside.
While the noodles cook, combine the oyster sauce, soy sauce, dark soy sauce, fish sauce, brown sugar, water, and chili paste in a small bowl, stirring until the sugar dissolves completely.
Set the sauce aside—this ensures both components are ready at the same time and prevents any bottlenecks during the quick stir-frying stage.
Step 3: Sear Chicken and Build the Flavor Base
- 1 lb chicken breast
- 1 tbsp sesame oil
- 4 garlic cloves
- 1 tsp ginger
- 1/4 tsp ground white pepper
Heat 1 tablespoon of sesame oil in a large wok or skillet over high heat until smoking.
Add the sliced chicken in a single layer and cook undisturbed for 2-3 minutes until the bottom develops a golden crust, then stir and cook another 1-2 minutes until cooked through.
Immediately add the minced garlic and grated ginger, stirring constantly for about 10 seconds to bloom the aromatics and prevent burning.
I find this brief moment is key—the residual heat from the seared chicken is perfect for releasing the oils in garlic and ginger without turning them bitter.
Step 4: Build Layers with Quick-Cooking Vegetables
- 1 tbsp sesame oil
- 2 shallots
- 2 carrots
- 1 green bell pepper
- 1 zucchini
- 1 roma tomato
- green onion whites
Add the remaining sesame oil to the pan, then add the shallots and carrots and stir-fry for 2 minutes—they should be starting to soften but still have some crunch.
Add the bell pepper, zucchini, tomato wedges, and the white parts of the green onions, continuing to stir-fry for another 2 minutes until all vegetables are tender-crisp.
This sequencing ensures that harder vegetables like carrots get a head start while tender ones like zucchini don’t get overcooked.
Step 5: Combine Noodles with Sauce and Finish
- sauce mixture from Step 2
- cooked noodles from Step 2
Pour the sauce from Step 2 into the pan with all the vegetables and chicken, then add the cooked noodles from Step 2.
Toss everything together continuously for 1-2 minutes until the noodles are heated through and evenly coated with the sauce.
I always toss with a bit of vigor here—it helps the noodles separate and absorb all that delicious sauce rather than clumping together.
Step 6: Add Basil and Plate
- 1 cup Thai basil
- green onion greens
Remove the pan from heat and stir in the fresh Thai basil until just wilted—this takes only about 20 seconds and keeps the basil’s bright, distinctive flavor intact rather than cooking it away.
Divide the noodles among serving bowls and top with the green parts of the green onions for a fresh garnish.
Serve immediately while hot.
Gluten-Free Thai Drunken Noodles with Chicken
Ingredients
For the noodles and stir-fry
- 8 oz rice noodles
- 2 tbsp sesame oil
- 2 shallots (thinly sliced into half-moons)
- 2 carrots (peeled and sliced into thin 2-inch matchsticks)
- 1 lb chicken breast (thinly sliced against the grain into 1/4-inch strips)
- 4 garlic cloves (minced)
- 1 tsp ginger (grated)
- 1/4 tsp ground white pepper
- 1 zucchini (halved lengthwise and sliced into 1/4-inch thick half-moons)
- 1 green bell pepper (sliced)
- 2 green onions (sliced, whites and greens separated)
- 1 roma tomato (wedged)
- 1 cup Thai basil (loosely packed)
For the sauce
- 3 tbsp oyster sauce
- 1/4 cup soy sauce
- 1 tbsp dark soy sauce (for rich color)
- 1 tbsp fish sauce
- 1 tbsp brown sugar
- 2 tbsp water
- 2 tsp chili paste (Sambal Oelek)
Instructions
- Slice the chicken breast thinly against the grain into 1/4-inch strips—this is crucial for even cooking and tender results. Thinly slice the shallots into half-moons, cut carrots into thin 2-inch matchsticks, halve the zucchini lengthwise then slice into 1/4-inch half-moons, slice the bell pepper, separate the white and green parts of the green onions, wedge the tomato, mince the garlic, and grate the ginger. Measure out all remaining ingredients into separate bowls or small containers so everything is ready when you start cooking.
- Bring a large pot of water to a boil and cook the rice noodles according to package directions until just tender, then drain and set aside. While the noodles cook, combine the oyster sauce, soy sauce, dark soy sauce, fish sauce, brown sugar, water, and chili paste in a small bowl, stirring until the sugar dissolves completely. Set the sauce aside—this ensures both components are ready at the same time and prevents any bottlenecks during the quick stir-frying stage.
- Heat 1 tablespoon of sesame oil in a large wok or skillet over high heat until smoking. Add the sliced chicken in a single layer and cook undisturbed for 2-3 minutes until the bottom develops a golden crust, then stir and cook another 1-2 minutes until cooked through. Immediately add the minced garlic and grated ginger, stirring constantly for about 10 seconds to bloom the aromatics and prevent burning. I find this brief moment is key—the residual heat from the seared chicken is perfect for releasing the oils in garlic and ginger without turning them bitter.
- Add the remaining sesame oil to the pan, then add the shallots and carrots and stir-fry for 2 minutes—they should be starting to soften but still have some crunch. Add the bell pepper, zucchini, tomato wedges, and the white parts of the green onions, continuing to stir-fry for another 2 minutes until all vegetables are tender-crisp. This sequencing ensures that harder vegetables like carrots get a head start while tender ones like zucchini don't get overcooked.
- Pour the sauce from Step 2 into the pan with all the vegetables and chicken, then add the cooked noodles from Step 2. Toss everything together continuously for 1-2 minutes until the noodles are heated through and evenly coated with the sauce. I always toss with a bit of vigor here—it helps the noodles separate and absorb all that delicious sauce rather than clumping together.
- Remove the pan from heat and stir in the fresh Thai basil until just wilted—this takes only about 20 seconds and keeps the basil's bright, distinctive flavor intact rather than cooking it away. Divide the noodles among serving bowls and top with the green parts of the green onions for a fresh garnish. Serve immediately while hot.


