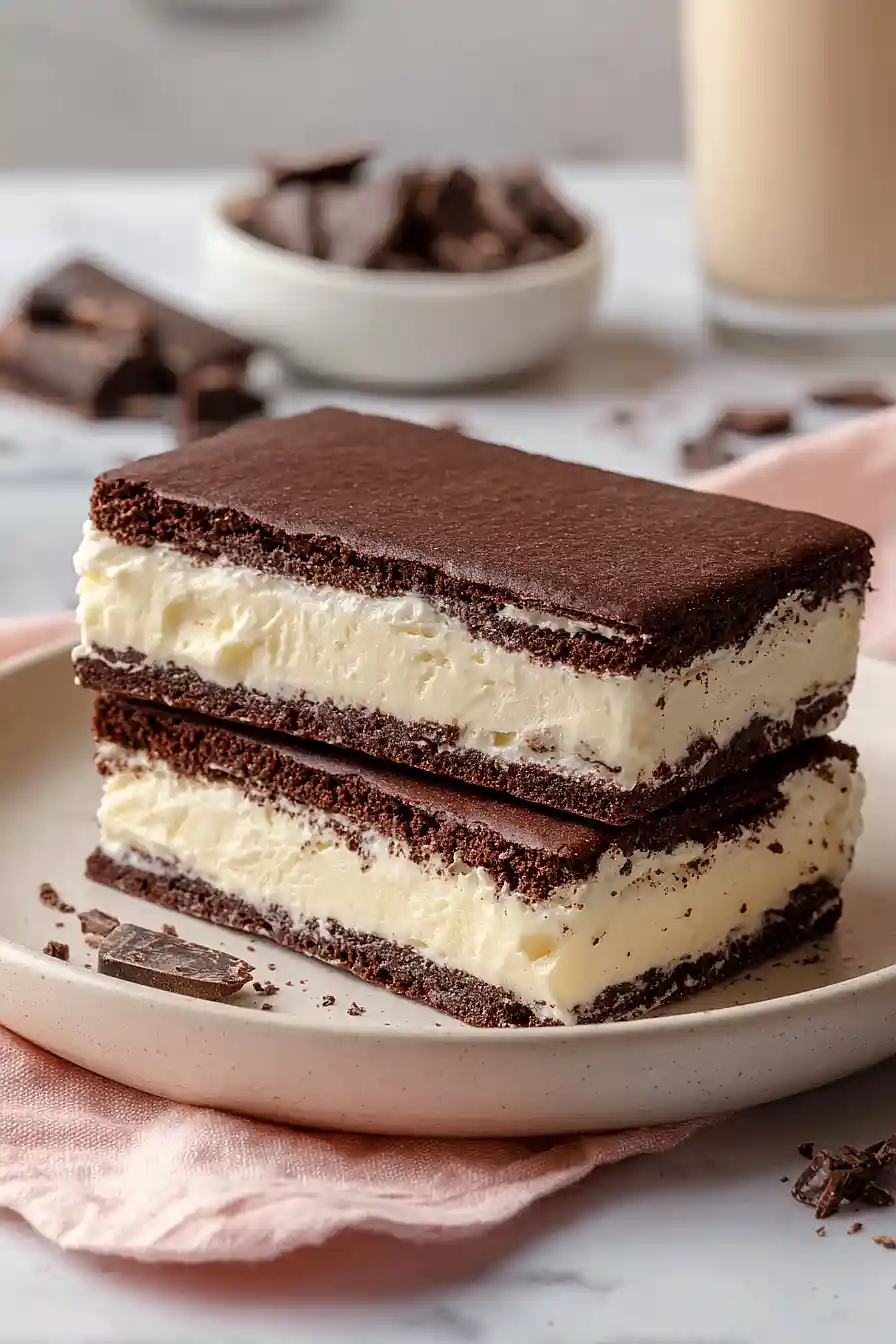
Here is my favorite ice cream sandwich recipe, with rich, fudgy chocolate cookies made from scratch with cocoa powder and espresso, and creamy vanilla bean ice cream sandwiched in between.
These ice cream sandwiches are a huge hit with my kids during the summer. I usually make a double batch and keep them in the freezer so we always have a sweet treat ready to go. Nothing better than homemade ice cream sandwiches, right?
Why You’ll Love These Ice Cream Sandwiches
- Homemade chocolate cookies – These soft, chewy cookies are so much better than store-bought wafers, and they stay perfectly soft even when frozen.
- Customizable – You can use any ice cream flavor you like and even roll the edges in sprinkles, mini chocolate chips, or crushed cookies for a fun twist.
- Make-ahead dessert – These ice cream sandwiches can be made days or even weeks in advance and stored in the freezer, making them perfect for parties or whenever a craving hits.
- Crowd-pleaser – Kids and adults alike go crazy for these, and they’re way more impressive than grabbing a box from the freezer aisle.
What Kind of Ice Cream Should I Use?
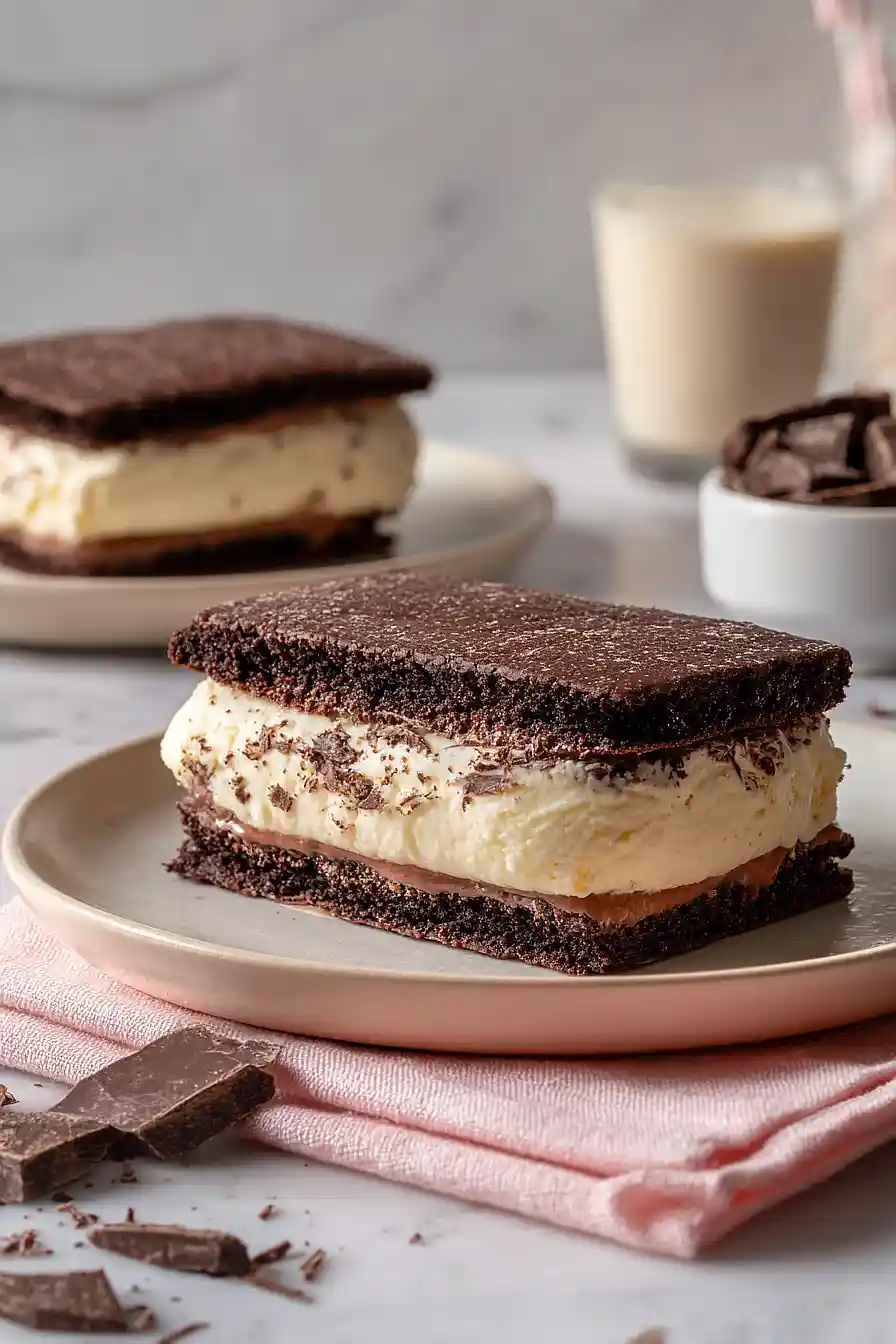
For these ice cream sandwiches, vanilla is the classic choice, but honestly, you can use whatever flavor you like best. The beauty of making your own is that you’re not limited to what’s available at the store – try chocolate, strawberry, cookies and cream, or even something fun like mint chip. Just make sure your ice cream is softened enough to spread easily but not completely melted, which usually means leaving it on the counter for about 10-15 minutes before assembling. If you want to get fancy, you can even use two different flavors and create your own custom combination.
Options for Substitutions
This recipe is pretty straightforward, but here are a few swaps you can make if needed:
- Vanilla ice cream: Feel free to get creative with the ice cream flavor! Chocolate, strawberry, mint chip, or coffee all make great ice cream sandwiches. You can even use frozen yogurt or non-dairy ice cream if you prefer.
- Dutch-processed cocoa powder: Regular unsweetened cocoa powder works fine here. The cookies will have a slightly different flavor – a bit more acidic and less smooth – but they’ll still taste great.
- Unsalted butter: If you only have salted butter on hand, you can use it but skip the added salt in the recipe to avoid overly salty cookies.
- All-purpose flour: This is one ingredient you’ll want to stick with as written. All-purpose flour gives these cookies the right texture – not too cakey, not too crispy.
- Granulated sugar: You can use half granulated and half brown sugar for a chewier cookie with a hint of molasses flavor, but keep at least half as granulated sugar for the best texture.
Watch Out for These Mistakes While Baking
The biggest mistake when making ice cream sandwiches is letting the ice cream soften too much before assembly – if it gets too melty, your sandwiches will be impossible to cut cleanly and will ooze everywhere.
Another common error is not spreading the cookie dough evenly on the baking sheet, which leads to uneven baking and cookies that don’t match up properly when you’re trying to sandwich them together.
To avoid crumbly, broken cookies, make sure to let them cool completely before handling – rushing this step means they’ll crack when you try to layer them with the ice cream.
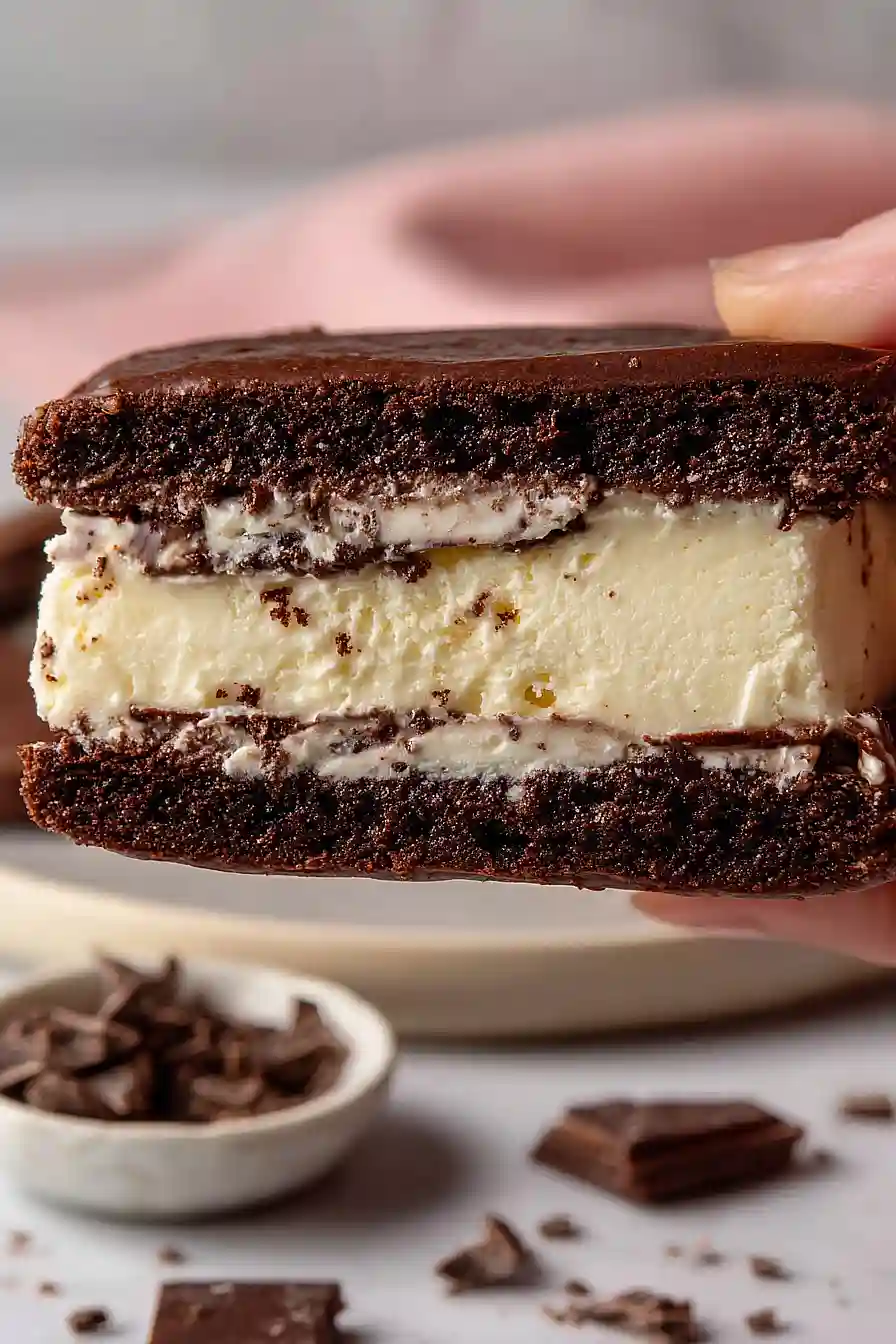
For cleaner cuts, run your knife under hot water and wipe it dry between each slice, and work quickly so the ice cream doesn’t start melting while you’re portioning them out.
What to Serve With Ice Cream Sandwiches?
Ice cream sandwiches are pretty much a complete dessert on their own, but they’re always fun to serve at summer gatherings alongside other cold treats. I like setting out a toppings bar where people can roll the edges of their sandwiches in mini chocolate chips, sprinkles, or crushed cookies to make them extra special. If you’re serving these at a party, they pair nicely with fresh lemonade, iced coffee, or cold milk for the kids. You could also slice up some fresh strawberries or other berries on the side for anyone who wants a little fruity contrast to the rich chocolate and vanilla.
Storage Instructions
Store: Keep your ice cream sandwiches wrapped individually in plastic wrap or parchment paper, then store them in an airtight container in the freezer. They’ll stay fresh for up to 2 weeks, though they rarely last that long at my house!
Make Ahead: These are actually perfect for making ahead since they need to freeze anyway. I like to make a big batch on the weekend and have them ready to grab whenever a craving hits. Just assemble them, wrap them up, and freeze for at least 2 hours before enjoying.
Serve: Let your ice cream sandwich sit at room temperature for about 2-3 minutes before eating so the cookies soften slightly and the ice cream isn’t rock hard. This makes them way easier to bite into without the ice cream squishing out the sides.
| Preparation Time | 45-60 minutes |
| Cooking Time | 10-15 minutes |
| Total Time | 10-15 hours |
| Level of Difficulty | Medium |
| Servings | 12 sandwiches |
Estimated Nutrition
Estimated nutrition for the whole recipe (without optional ingredients):
- Calories: 4200-4600
- Protein: 45-55 g
- Fat: 280-320 g
- Carbohydrates: 430-470 g
Ingredients
For the cookies:
- 1 1/4 cups unsalted butter, softened
- 1 1/4 cups granulated sugar
- 2 large eggs (room temperature)
- 1 1/2 tablespoons vanilla extract
- 1 tablespoon whole milk
- 7/8 cup all-purpose flour
- 1 cup unsweetened cocoa powder (sifted)
- 1/2 teaspoon baking powder
- 3/4 teaspoon fine sea salt
- 1 teaspoon espresso powder (optional, to enhance chocolate flavor)
For the filling:
- 1.5 quarts premium vanilla bean ice cream
Step 1: Prepare the Ice Cream Layer
- 1.5 quarts premium vanilla bean ice cream
- parchment paper
Remove the ice cream from the freezer and let it soften at room temperature for about 30 minutes until it’s spreadable but not melted.
Line a 9×13 inch baking dish with parchment paper, allowing some overhang on the sides for easy removal later.
Once softened, spread the ice cream evenly across the prepared dish in a single, uniform layer.
Place in the freezer for at least 2 hours until completely firm—this creates a solid base for your sandwich.
Step 2: Make the Cookie Dough
- 1 1/4 cups unsalted butter, softened
- 1 1/4 cups granulated sugar
- 2 large eggs
- 1 1/2 tablespoons vanilla extract
- 1 tablespoon whole milk
- 7/8 cup all-purpose flour
- 1 cup unsweetened cocoa powder
- 1/2 teaspoon baking powder
- 3/4 teaspoon fine sea salt
- 1 teaspoon espresso powder
Preheat your oven to 350°F.
In a medium bowl, whisk together the flour, sifted cocoa powder, baking powder, salt, and espresso powder (if using)—sifting the cocoa removes lumps and ensures even distribution.
In a separate large bowl, beat the softened butter and granulated sugar together for about 3 minutes until light and fluffy, which incorporates air and creates a tender cookie.
Add the room-temperature eggs one at a time, beating well after each addition, then mix in the vanilla extract and milk until fully combined.
Step 3: Combine and Bake the Cookie Layers
- dry ingredient mixture from Step 2
- wet ingredient mixture from Step 2
- parchment paper
Gently fold the dry ingredient mixture into the wet ingredients until just combined—overmixing develops gluten and can make the cookies tough.
Line a 9×13 inch baking sheet with parchment paper and spread the dough evenly across it to match the dimensions of your ice cream layer.
I like to use an offset spatula for this as it distributes the dough uniformly and prevents gaps.
Bake for about 10 minutes until the cake is set but still slightly fudgy in the center—it will continue cooking slightly as it cools and should be tender enough to layer with ice cream without cracking.
Step 4: Cool and Prepare for Assembly
- baked cookie from Step 3
- frozen ice cream layer from Step 1
Remove the baked cookie sheet from the oven and let it cool on the counter for about 30 minutes.
While still slightly warm, use a sharp knife or bench scraper to cut the cookie into two 9×13 inch pieces (you can do this directly on the parchment).
Once completely cooled, carefully transfer one cookie layer to the top of the frozen ice cream layer using the parchment paper overhang from Step 1 to help lift it if needed.
Step 5: Assemble and Final Freeze
- assembled ice cream sandwich from Step 4
Working quickly to prevent the ice cream from melting, place the second cooled cookie layer on top of the ice cream, pressing gently to create an even sandwich.
I recommend having everything prepped and ready before you start assembly so you’re not fumbling around while the ice cream softens.
Cover the assembled sandwich with plastic wrap or foil and place it back in the freezer overnight—this allows the layers to fuse together and makes slicing much cleaner.
Step 6: Slice and Serve
- frozen ice cream sandwich from Step 5
Remove the ice cream sandwich from the freezer and let it sit at room temperature for just 2-3 minutes to soften slightly—this prevents the cookie from cracking when you cut.
Using a sharp, warm knife (dip it in hot water and wipe dry between cuts for cleaner slices), cut the sandwich into individual rectangles of your desired size.
Serve immediately while still cold, or wrap individual sandwiches in parchment and store in the freezer for up to a week.
Homemade Ice Cream Sandwich
Ingredients
For the cookies
- 1 1/4 cups unsalted butter, softened
- 1 1/4 cups granulated sugar
- 2 large eggs (room temperature)
- 1 1/2 tablespoons vanilla extract
- 1 tablespoon whole milk
- 7/8 cup all-purpose flour
- 1 cup unsweetened cocoa powder (sifted)
- 1/2 teaspoon baking powder
- 3/4 teaspoon fine sea salt
- 1 teaspoon espresso powder (optional, to enhance chocolate flavor)
For the filling
- 1.5 quarts premium vanilla bean ice cream
Instructions
- Remove the ice cream from the freezer and let it soften at room temperature for about 30 minutes until it's spreadable but not melted. Line a 9x13 inch baking dish with parchment paper, allowing some overhang on the sides for easy removal later. Once softened, spread the ice cream evenly across the prepared dish in a single, uniform layer. Place in the freezer for at least 2 hours until completely firm—this creates a solid base for your sandwich.
- Preheat your oven to 350°F. In a medium bowl, whisk together the flour, sifted cocoa powder, baking powder, salt, and espresso powder (if using)—sifting the cocoa removes lumps and ensures even distribution. In a separate large bowl, beat the softened butter and granulated sugar together for about 3 minutes until light and fluffy, which incorporates air and creates a tender cookie. Add the room-temperature eggs one at a time, beating well after each addition, then mix in the vanilla extract and milk until fully combined.
- Gently fold the dry ingredient mixture into the wet ingredients until just combined—overmixing develops gluten and can make the cookies tough. Line a 9x13 inch baking sheet with parchment paper and spread the dough evenly across it to match the dimensions of your ice cream layer. I like to use an offset spatula for this as it distributes the dough uniformly and prevents gaps. Bake for about 10 minutes until the cake is set but still slightly fudgy in the center—it will continue cooking slightly as it cools and should be tender enough to layer with ice cream without cracking.
- Remove the baked cookie sheet from the oven and let it cool on the counter for about 30 minutes. While still slightly warm, use a sharp knife or bench scraper to cut the cookie into two 9x13 inch pieces (you can do this directly on the parchment). Once completely cooled, carefully transfer one cookie layer to the top of the frozen ice cream layer using the parchment paper overhang from Step 1 to help lift it if needed.
- Working quickly to prevent the ice cream from melting, place the second cooled cookie layer on top of the ice cream, pressing gently to create an even sandwich. I recommend having everything prepped and ready before you start assembly so you're not fumbling around while the ice cream softens. Cover the assembled sandwich with plastic wrap or foil and place it back in the freezer overnight—this allows the layers to fuse together and makes slicing much cleaner.
- Remove the ice cream sandwich from the freezer and let it sit at room temperature for just 2-3 minutes to soften slightly—this prevents the cookie from cracking when you cut. Using a sharp, warm knife (dip it in hot water and wipe dry between cuts for cleaner slices), cut the sandwich into individual rectangles of your desired size. Serve immediately while still cold, or wrap individual sandwiches in parchment and store in the freezer for up to a week.


