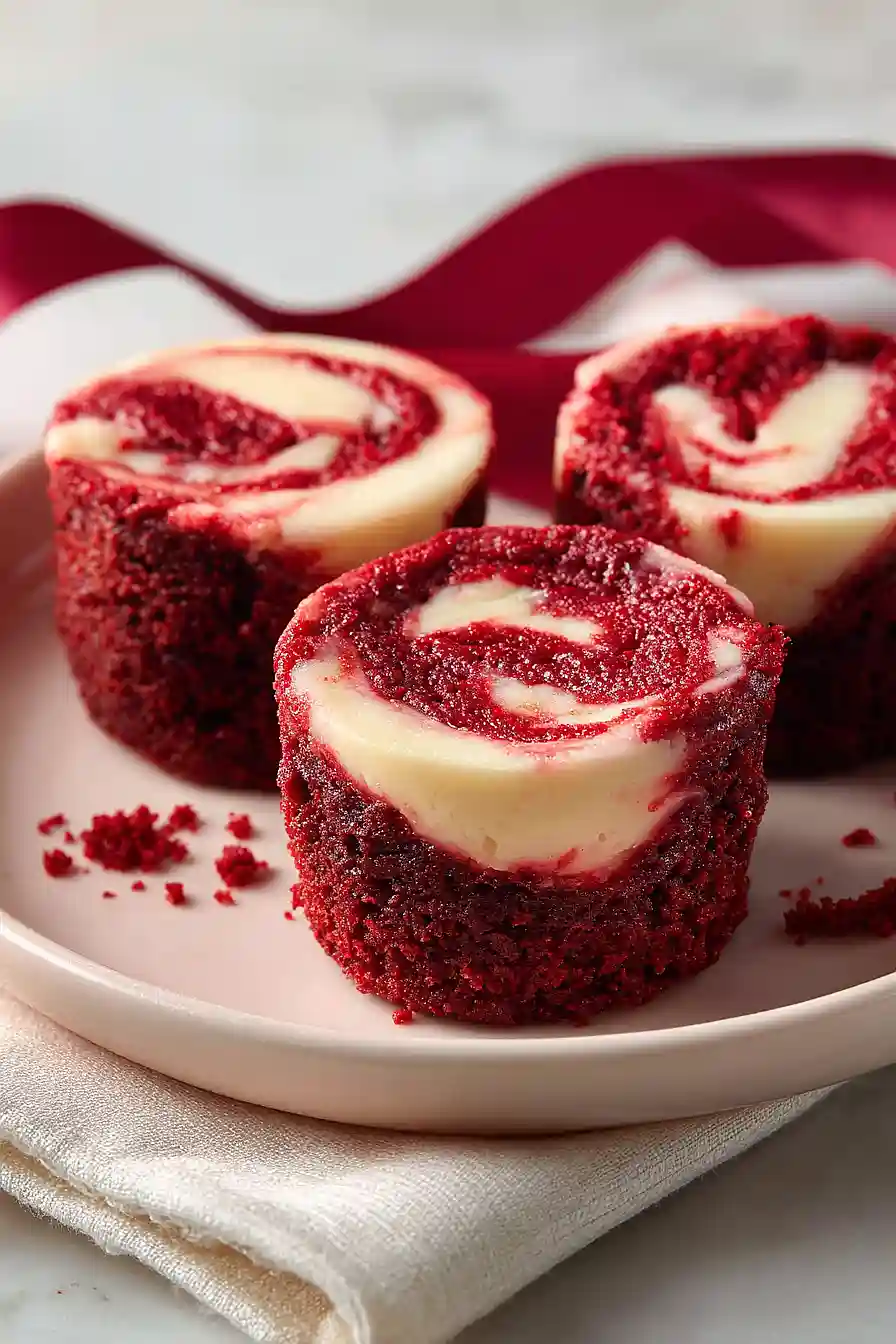
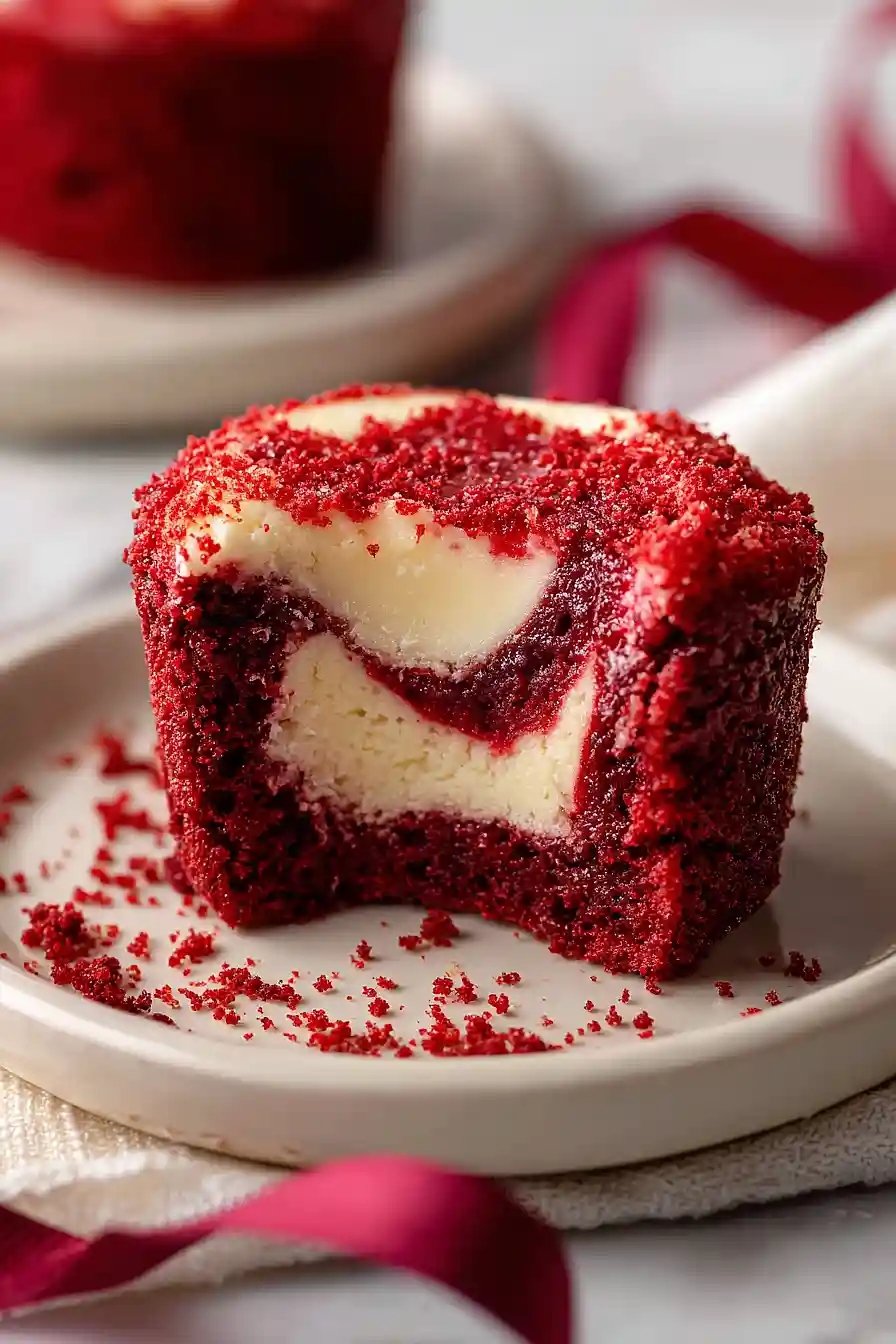
I’ll be honest—I never thought brownies needed improving until I made them bite-sized with a cream cheese swirl. Something about that little pop of tangy filling against the chocolatey red velvet base just works. And yes, these are actual brownies, not cake. The texture is fudgy and dense, exactly how a brownie should be.
The best part? You get the fancy look of a swirled dessert without any complicated techniques. Just dollop some cream cheese mixture on top of the brownie batter in a mini muffin tin, swirl it with a toothpick, and bake. That’s it. No special equipment, no pastry skills required. They look like you spent all afternoon on them, but really, you’ll have these in the oven in about fifteen minutes.
Why You’ll Love These Red Velvet Brownie Bites
- Quick and easy – These brownie bites come together in under 45 minutes, making them perfect for last-minute gatherings or when you need a sweet treat fast.
- Bite-sized portions – The small size makes them ideal for parties, potlucks, or portion control when you just want a little something sweet without committing to a full brownie.
- Cream cheese swirl – The tangy cream cheese layer on top balances out the sweetness and adds a nice contrast to the chocolatey red velvet base.
- Eye-catching presentation – The red color and marbled cream cheese topping make these brownie bites look impressive, even though they’re simple to make.
- Simple pantry ingredients – You probably have most of these ingredients in your kitchen already, so you can whip up a batch whenever the craving hits.
What Kind of Cocoa Powder Should I Use?
For red velvet brownie bites, you can use either natural or Dutch-process cocoa powder, though natural cocoa powder is the traditional choice for red velvet recipes. Natural cocoa has a lighter color and slightly more acidic taste, which works well with the vinegar in this recipe and helps the red color really pop. Dutch-process cocoa is darker and has a mellower flavor, so if you use it, your brownie bites might have a deeper chocolate taste and slightly less bright red color. Either way, make sure your cocoa powder is fresh and hasn’t been sitting in your pantry for years, as old cocoa can taste flat and won’t give you the best chocolate flavor.
Options for Substitutions
These brownie bites are pretty straightforward, but here are some swaps you can make if needed:
- Butter: You can use margarine or coconut oil as a substitute, though butter gives the best flavor and texture for brownies.
- Red food coloring: If you want to skip artificial coloring, try using beet powder (about 2 tablespoons) for a natural red tint. Keep in mind the color won’t be as bright, and you might taste a slight earthiness.
- Cream cheese: Regular cream cheese works best here and shouldn’t be substituted, as it creates that signature cheesecake swirl. Make sure it’s at room temperature so it mixes smoothly.
- Cocoa powder: Either natural or Dutch-process cocoa will work fine. Dutch-process gives a darker color and milder flavor, while natural cocoa is slightly more acidic.
- Vinegar: White vinegar is standard, but apple cider vinegar works too. The vinegar reacts with the cocoa to give red velvet its characteristic tang, so don’t skip it.
- All-purpose flour: Stick with all-purpose flour for the right texture. Substituting with other flours like almond or whole wheat will change the consistency and may make the brownies dense or crumbly.
Watch Out for These Mistakes While Baking
The biggest mistake with brownie bites is overbaking them, which turns fudgy treats into dry pucks – pull them out at 12 minutes even if they look slightly underdone, since they’ll continue cooking in the hot pan.
Skipping the greasing step or not greasing thoroughly enough will make removing these bites nearly impossible, so use cooking spray or butter and get into every corner of those mini muffin cups.
When layering your batters, don’t press down too hard with the toothpick while swirling or you’ll break through to the bottom and lose that nice marbled effect – gentle circular motions work best.
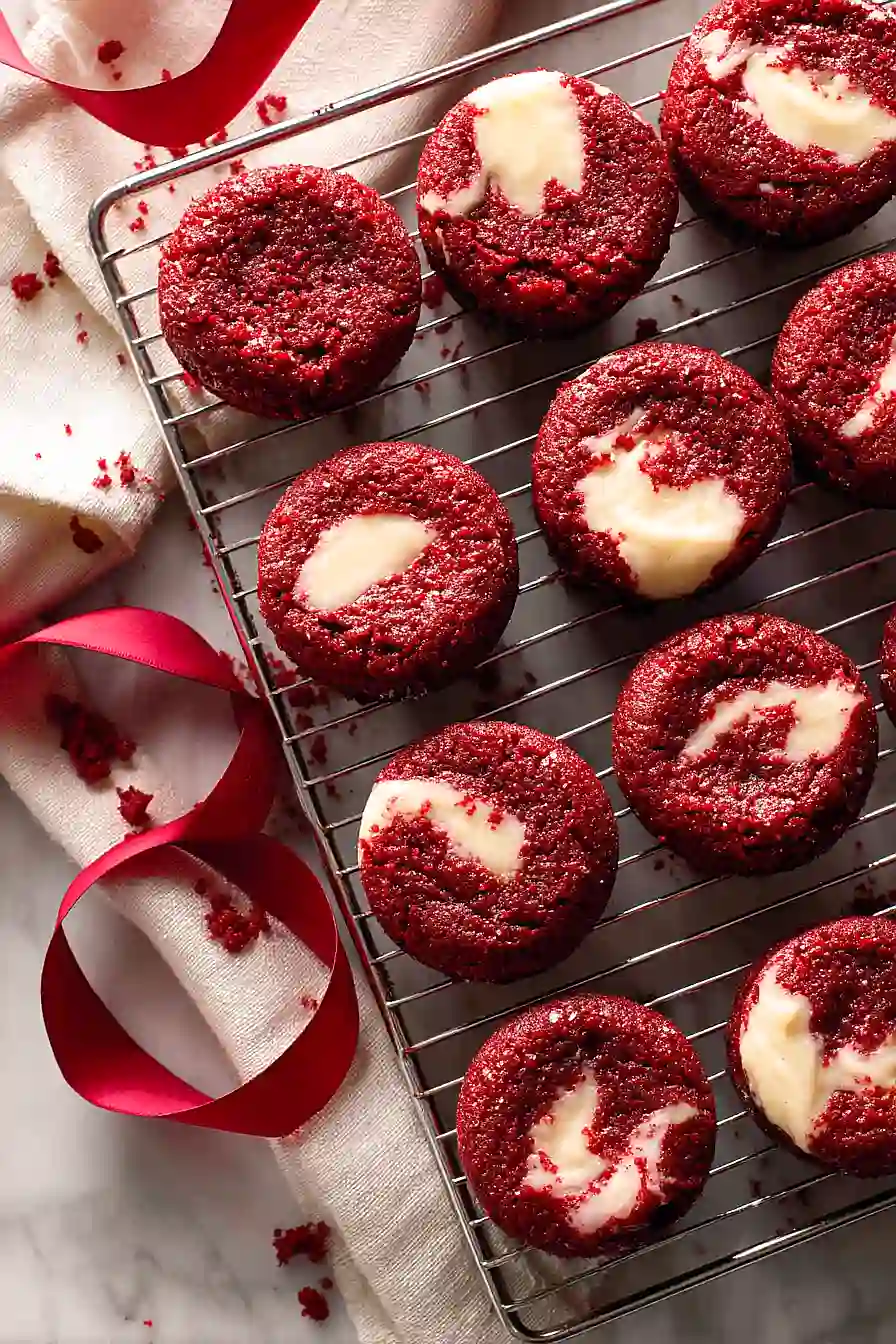
Finally, resist the urge to remove them from the pan immediately after baking, as that 5-minute cooling time is crucial for the brownies to firm up enough to release cleanly.
What to Serve With Red Velvet Brownie Bites?
These brownie bites are pretty rich on their own, so they pair really well with a hot cup of coffee or a cold glass of milk to balance out the sweetness. If you’re serving them at a party, set them out alongside fresh berries like strawberries or raspberries, which add a nice tart contrast to the cream cheese swirl. You could also make them part of a dessert spread with vanilla ice cream on the side, letting everyone build their own little dessert plates. For a cozy movie night, just grab a few bites and your favorite drink – they’re the perfect size for snacking without feeling too heavy.
Storage Instructions
Store: Keep your red velvet brownie bites in an airtight container in the fridge since they have that cream cheese swirl. They’ll stay fresh and fudgy for up to 5 days, though they rarely last that long in my house!
Freeze: These brownie bites freeze really well for up to 3 months. Just wrap them individually in plastic wrap or layer them with parchment paper in a freezer-safe container. Perfect for when you want a quick dessert without all the work.
Serve: Let frozen brownie bites thaw in the fridge overnight or at room temperature for about 30 minutes. You can also warm them in the microwave for 10-15 seconds if you want that fresh-from-the-oven feel with a gooey center.
| Preparation Time | 20-30 minutes |
| Cooking Time | 10-15 minutes |
| Total Time | 30-45 minutes |
| Level of Difficulty | Medium |
| Servings | 36 brownie bites |
Estimated Nutrition
Estimated nutrition for the whole recipe (without optional ingredients):
- Calories: 2500-2700
- Protein: 35-40 g
- Fat: 140-155 g
- Carbohydrates: 295-315 g
Ingredients
For the brownie mixture:
- 9 tbsp butter (I like Kerrygold unsalted butter for this)
- 1 1/4 cups sugar
- 1/4 cup cocoa powder (sifted to remove lumps)
- 1/2 tsp vanilla
- 1 tbsp red food coloring
- 1/8 tsp salt
- 1/4 tsp espresso powder
- 1/2 tsp vinegar
- 2 eggs
- 3/4 cup flour (I always use King Arthur all-purpose flour)
For the cheesecake swirl:
- 9 oz cream cheese (room temperature, about 70°F)
- 3 tbsp sugar
- 1/2 tsp vanilla
- 1 egg yolk
Step 1: Prepare Equipment and Mise en Place
- butter
- 1/4 cup cocoa powder
Preheat your oven to 350°F and generously grease a mini muffin pan with butter or cooking spray, making sure to coat the sides and bottoms of each cup.
This prevents sticking and ensures clean release.
Sift the cocoa powder into a small bowl to remove any lumps—this prevents streaks in your final brownies.
Have all ingredients at room temperature, especially the cream cheese (around 70°F) and eggs, as this helps them blend smoothly and incorporate air for better texture.
Step 2: Create the Brownie Base Batter
- 9 tbsp butter
- 1 1/4 cups sugar
- 1/4 cup cocoa powder
- 1/2 tsp vanilla
- 1 tbsp red food coloring
- 1/8 tsp salt
- 1/4 tsp espresso powder
- 1/2 tsp vinegar
- 2 eggs
- 3/4 cup flour
In a medium bowl, melt the 9 tablespoons of butter and whisk together with the 1 1/4 cups sugar, sifted cocoa powder, 1/2 teaspoon vanilla, red food coloring, 1/8 teaspoon salt, espresso powder, and vinegar.
The espresso powder enhances the chocolate flavor without making it taste like coffee, while the vinegar adds tang that deepens the red velvet character.
Once combined, whisk in the 2 eggs one at a time, ensuring each is fully incorporated.
Finally, gently fold in the 3/4 cup flour until just combined—overmixing develops gluten and makes brownies tough, so stop as soon as you see no dry flour streaks.
Step 3: Prepare the Cream Cheese Filling
- 9 oz cream cheese
- 3 tbsp sugar
- 1/2 tsp vanilla
- 1 egg yolk
In a separate bowl, beat the room-temperature cream cheese with 3 tablespoons sugar and 1/2 teaspoon vanilla until smooth and creamy—about 1 minute of mixing.
I like to use a whisk to avoid overbeating, which can make the filling grainy.
Gently fold in the egg yolk until just combined.
This filling will stay soft during baking and create a luxurious contrast to the fudgy brownie.
Step 4: Layer and Swirl the Bites
- brownie batter from Step 2
- cream cheese filling from Step 3
Working with the greased mini muffin pan, spoon about 1 tablespoon of brownie batter from Step 2 into each cup, filling it roughly halfway.
Top each with about 1 teaspoon of the cream cheese filling from Step 3, then add another 1 teaspoon of brownie batter on top to seal it.
Using a toothpick or thin skewer, drag it through the layers in a figure-eight or circular motion to create a swirled pattern—don’t overmix or you’ll muddy the red velvet effect.
The key is gentle swirling just enough to create visual interest without fully blending the layers.
Step 5: Bake and Cool
Bake the pan in your preheated 350°F oven for 12 minutes—the tops should look just set and spring back lightly when touched, but the centers will still be slightly soft and fudgy.
Remove from the oven and let the bites cool in the pan for 5 minutes, which helps them set enough to remove cleanly without crumbling.
I recommend using a thin knife or small offset spatula to gently pop each bite from the pan once they’ve cooled slightly—this prevents them from breaking apart.
Allow them to cool completely on a wire rack before serving.

Homemade Red Velvet Brownie Bites
Ingredients
For the brownie mixture::
- 9 tbsp butter (I like Kerrygold unsalted butter for this)
- 1 1/4 cups sugar
- 1/4 cup cocoa powder (sifted to remove lumps)
- 1/2 tsp vanilla
- 1 tbsp red food coloring
- 1/8 tsp salt
- 1/4 tsp espresso powder
- 1/2 tsp vinegar
- 2 eggs
- 3/4 cup flour (I always use King Arthur all-purpose flour)
For the cheesecake swirl::
- 9 oz cream cheese (room temperature, about 70°F)
- 3 tbsp sugar
- 1/2 tsp vanilla
- 1 egg yolk
Instructions
- Preheat your oven to 350°F and generously grease a mini muffin pan with butter or cooking spray, making sure to coat the sides and bottoms of each cup. This prevents sticking and ensures clean release. Sift the cocoa powder into a small bowl to remove any lumps—this prevents streaks in your final brownies. Have all ingredients at room temperature, especially the cream cheese (around 70°F) and eggs, as this helps them blend smoothly and incorporate air for better texture.
- In a medium bowl, melt the 9 tablespoons of butter and whisk together with the 1 1/4 cups sugar, sifted cocoa powder, 1/2 teaspoon vanilla, red food coloring, 1/8 teaspoon salt, espresso powder, and vinegar. The espresso powder enhances the chocolate flavor without making it taste like coffee, while the vinegar adds tang that deepens the red velvet character. Once combined, whisk in the 2 eggs one at a time, ensuring each is fully incorporated. Finally, gently fold in the 3/4 cup flour until just combined—overmixing develops gluten and makes brownies tough, so stop as soon as you see no dry flour streaks.
- In a separate bowl, beat the room-temperature cream cheese with 3 tablespoons sugar and 1/2 teaspoon vanilla until smooth and creamy—about 1 minute of mixing. I like to use a whisk to avoid overbeating, which can make the filling grainy. Gently fold in the egg yolk until just combined. This filling will stay soft during baking and create a luxurious contrast to the fudgy brownie.
- Working with the greased mini muffin pan, spoon about 1 tablespoon of brownie batter from Step 2 into each cup, filling it roughly halfway. Top each with about 1 teaspoon of the cream cheese filling from Step 3, then add another 1 teaspoon of brownie batter on top to seal it. Using a toothpick or thin skewer, drag it through the layers in a figure-eight or circular motion to create a swirled pattern—don't overmix or you'll muddy the red velvet effect. The key is gentle swirling just enough to create visual interest without fully blending the layers.
- Bake the pan in your preheated 350°F oven for 12 minutes—the tops should look just set and spring back lightly when touched, but the centers will still be slightly soft and fudgy. Remove from the oven and let the bites cool in the pan for 5 minutes, which helps them set enough to remove cleanly without crumbling. I recommend using a thin knife or small offset spatula to gently pop each bite from the pan once they've cooled slightly—this prevents them from breaking apart. Allow them to cool completely on a wire rack before serving.


