Fall mornings are made for cozy breakfasts. There’s something about the crisp air that makes me want to bake something warm and comforting. But I don’t always have time to make pancakes or waffles from scratch on busy school mornings.
That’s where these pumpkin scones come to the rescue. I can whip up a batch on Sunday afternoon and have breakfast ready all week long. The vanilla glaze makes them feel special, but they’re simple enough that I’m not stressed about measuring ingredients while my coffee is still brewing.
Want something that tastes like fall but doesn’t require hours in the kitchen? These scones are your answer. They’re tender, lightly spiced, and that glaze on top makes them taste like a treat from your favorite bakery.

Why You’ll Love These Pumpkin Scones
- Quick and easy – These scones come together in under 40 minutes, making them perfect for weekend mornings or when you want fresh-baked treats without spending all day in the kitchen.
- Perfect fall flavors – The combination of pumpkin purée, cinnamon, and pumpkin pie spice gives you all those cozy autumn tastes you crave in one bite.
- Simple pantry ingredients – You probably already have most of these basic baking staples at home, so no special shopping trip required.
- Bakery-style results – The vanilla glaze on top makes these scones look and taste like something you’d pay good money for at a coffee shop, but you can make them right in your own kitchen.
- Great for sharing – This recipe makes enough scones to enjoy with family or bring to work, and they’re impressive enough for brunch guests too.
What Kind of Pumpkin Purée Should I Use?
For these scones, you’ll want to use plain pumpkin purée, not pumpkin pie filling – there’s a big difference! Pumpkin pie filling already has spices and sugar added, which will throw off the balance of your recipe. Look for canned pumpkin purée that lists only pumpkin as the ingredient, like Libby’s 100% Pure Pumpkin. If you’re feeling ambitious, you can absolutely make your own by roasting a sugar pumpkin and pureeing the flesh, but the canned stuff works just as well and saves you time. Just make sure to give the can a good stir before measuring, as the purée can separate a bit while sitting on the shelf.

Options for Substitutions
These pumpkin scones are pretty forgiving when it comes to swaps, so here’s what you can switch up:
- Pumpkin purée: If you’re out of pumpkin purée, try sweet potato purée or butternut squash purée for a similar texture and sweetness. You could even use mashed banana, though the flavor will be different.
- Buttermilk: No buttermilk? Make your own by adding 1 tablespoon of lemon juice or white vinegar to regular milk and let it sit for 5 minutes. You can also use plain yogurt thinned with a little milk.
- Pumpkin pie spice: Don’t have pumpkin pie spice? Mix together 1 teaspoon cinnamon, 1/2 teaspoon ground ginger, 1/4 teaspoon nutmeg, and 1/4 teaspoon allspice or cloves.
- Brown sugar: You can swap this with regular white sugar, though you’ll lose some of that caramel-like depth. Coconut sugar works well too and adds a slight molasses flavor.
- All-purpose flour: For a heartier texture, you can replace up to 1 cup of the all-purpose flour with whole wheat flour or white whole wheat flour.
- Salted butter: Unsalted butter works fine – just add an extra pinch of salt to the dry ingredients. Cold coconut oil can work as a dairy-free option, though the texture will be slightly different.
Watch Out for These Mistakes While Baking
The biggest mistake when making pumpkin scones is overworking the dough, which leads to tough, dense scones instead of the light, flaky texture you want – mix just until the ingredients come together and don’t worry if the dough looks a bit shaggy.
Another common error is using warm butter, so make sure your butter is very cold (even grated frozen butter works great) and handle the dough as little as possible to keep those butter pieces intact for maximum flakiness.
Don’t skip brushing the tops with buttermilk before baking, as this creates a beautiful golden color, and resist the urge to open the oven door during the first 15 minutes of baking since the temperature drop can cause your scones to fall flat.
For the best results, let the scones cool completely before adding the glaze – warm scones will cause the glaze to melt right off instead of creating that perfect sweet coating.

What to Serve With Pumpkin Scones?
These pumpkin scones are perfect for a cozy fall breakfast or afternoon tea break, and they pair beautifully with a hot cup of coffee or spiced chai tea. I love serving them alongside some fresh fruit like sliced apples or pears to balance out the warm spices and sweetness. For a more indulgent treat, try them with a dollop of whipped cream or even some maple butter for spreading. They’re also great on their own as a grab-and-go breakfast or packed in a lunchbox for a sweet afternoon snack.
Storage Instructions
Keep Fresh: These pumpkin scones are best enjoyed within 2-3 days when stored in an airtight container at room temperature. The glaze might soften a bit, but they’ll still taste amazing! If you want to keep that crispy exterior, store them uncovered for the first day, then cover after that.
Freeze: You can freeze these scones for up to 3 months, either glazed or unglazed. I like to freeze them individually on a baking sheet first, then transfer to a freezer bag. If you’re planning to freeze them, I’d recommend adding the glaze after thawing for the best texture.
Warm Up: To bring back that fresh-baked taste, warm your scones in a 300°F oven for about 5-8 minutes. You can also pop them in the toaster for a minute or two. If they’re frozen, let them thaw at room temperature first, then warm them up and add fresh glaze if needed.
| Preparation Time | 20-25 minutes |
| Cooking Time | 13-15 minutes |
| Total Time | 33-40 minutes |
| Level of Difficulty | Medium |
Estimated Nutrition
Estimated nutrition for the whole recipe (without optional ingredients):
- Calories: 2100-2300
- Protein: 25-30 g
- Fat: 60-70 g
- Carbohydrates: 370-410 g
Ingredients
For the scone dough:
- 2 1/2 cups plain flour
- 1/2 cup light brown sugar, packed
- 1 tbsp baking powder
- 2 tsp ground cinnamon
- 2 tsp pumpkin spice blend
- 1/2 tsp fine sea salt
- 1/2 cup salted butter, very cold, diced or grated
- 3/4 cup pumpkin purée
- 1/3 cup buttermilk or milk, plus extra for brushing
- 1 tsp vanilla extract
For the glaze:
- 1/2 cup confectioners’ sugar
- 2 to 3 tsp buttermilk or milk
- 1/2 tsp vanilla extract
- Optional: 1/4 tsp ground cinnamon, ginger, or cardamom
Step 1: Mix the Dry Ingredients
- 2 1/2 cups plain flour
- 1/2 cup light brown sugar, packed
- 1 tbsp baking powder
- 2 tsp ground cinnamon
- 2 tsp pumpkin spice blend
- 1/2 tsp fine sea salt
In a large mixing bowl, whisk together the flour, light brown sugar, baking powder, ground cinnamon, pumpkin spice blend, and fine sea salt until they are evenly combined.
This forms the base of the scone dough.
Step 2: Cut in the Butter
- 1/2 cup salted butter, very cold, diced or grated
Add the very cold, diced or grated butter to the dry ingredients.
Use a pastry cutter, two forks, or a food processor to cut the butter evenly into the mixture until it becomes crumbly and the butter is in small, pea-sized chunks.
Step 3: Combine Wet Ingredients and Form Dough
- 3/4 cup pumpkin purée
- 1/3 cup buttermilk or milk
- 1 tsp vanilla extract
- plain flour (for dusting surface)
Add the pumpkin purée, buttermilk or milk, and vanilla extract to the bowl.
Using a spatula, gently stir just until everything is combined and there are no dry streaks, being careful not to over-mix.
Turn the sticky dough out onto a flour-dusted surface, fold it over a few times to bring it together, then pat into an 8-inch circle.
Slice the dough into 8 equal-sized wedges.
I always wipe my knife between slices to prevent sticking—it makes it so much easier!
Step 4: Chill and Bake the Scones
- buttermilk or milk (for brushing)
Transfer the wedges to a parchment-lined baking sheet, spacing them at least 2 inches apart.
Freeze the scones for about 15 minutes while you preheat the oven to 425°F (220°C).
Before baking, briefly brush the tops with a little bit of extra buttermilk or milk.
Bake the scones for 13-15 minutes, or until lightly golden and cooked through.
Once they’re done, transfer them to a wire rack to cool.
Step 5: Make and Apply the Glaze
- 1/2 cup confectioners’ sugar
- 2 to 3 tsp buttermilk or milk
- 1/2 tsp vanilla extract
- optional: 1/4 tsp ground cinnamon, ginger, or cardamom
While the scones cool, whisk together the confectioners’ sugar, buttermilk or milk, vanilla extract, and, if desired, a pinch of ground cinnamon, ginger, or cardamom to make the glaze.
If the glaze is too thin, add a little more confectioners’ sugar until satisfied.
Once the scones have cooled a bit, drizzle or brush the glaze over the tops.
I like to sprinkle just a touch of extra spice into the glaze for a fragrant finish.

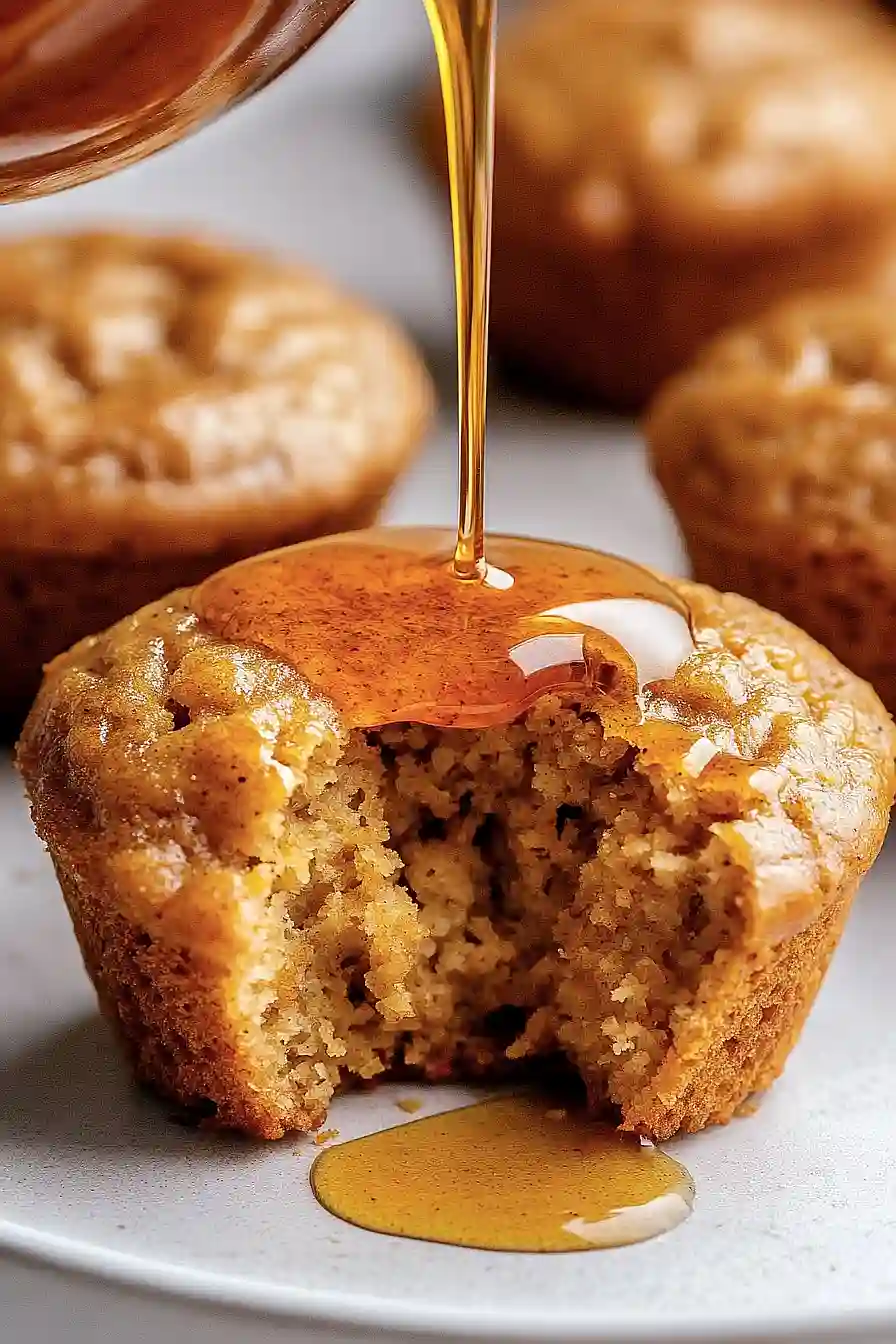
Homemade Vanilla Glazed Pumpkin Scones
Ingredients
For the scone dough:
- 2 1/2 cups plain flour
- 1/2 cup light brown sugar, packed
- 1 tbsp baking powder
- 2 tsp ground cinnamon
- 2 tsp pumpkin spice blend
- 1/2 tsp fine sea salt
- 1/2 cup salted butter, very cold, diced or grated
- 3/4 cup pumpkin purée
- 1/3 cup buttermilk or milk, plus extra for brushing
- 1 tsp vanilla extract
For the glaze:
- 1/2 cup confectioners' sugar
- 2 to 3 tsp buttermilk or milk
- 1/2 tsp vanilla extract
- optional: 1/4 tsp ground cinnamon, ginger, or cardamom
Instructions
- In a large mixing bowl, whisk together the flour, light brown sugar, baking powder, ground cinnamon, pumpkin spice blend, and fine sea salt until they are evenly combined. This forms the base of the scone dough.
- Add the very cold, diced or grated butter to the dry ingredients. Use a pastry cutter, two forks, or a food processor to cut the butter evenly into the mixture until it becomes crumbly and the butter is in small, pea-sized chunks.
- Add the pumpkin purée, buttermilk or milk, and vanilla extract to the bowl. Using a spatula, gently stir just until everything is combined and there are no dry streaks, being careful not to over-mix. Turn the sticky dough out onto a flour-dusted surface, fold it over a few times to bring it together, then pat into an 8-inch circle. Slice the dough into 8 equal-sized wedges. I always wipe my knife between slices to prevent sticking—it makes it so much easier!
- Transfer the wedges to a parchment-lined baking sheet, spacing them at least 2 inches apart. Freeze the scones for about 15 minutes while you preheat the oven to 425°F (220°C). Before baking, briefly brush the tops with a little bit of extra buttermilk or milk. Bake the scones for 13-15 minutes, or until lightly golden and cooked through. Once they’re done, transfer them to a wire rack to cool.
- While the scones cool, whisk together the confectioners' sugar, buttermilk or milk, vanilla extract, and, if desired, a pinch of ground cinnamon, ginger, or cardamom to make the glaze. If the glaze is too thin, add a little more confectioners' sugar until satisfied. Once the scones have cooled a bit, drizzle or brush the glaze over the tops. I like to sprinkle just a touch of extra spice into the glaze for a fragrant finish.