I’ve been making cookies in my air fryer for a few years now, and I’m still amazed at how well they turn out. The edges get perfectly crispy while the centers stay soft and chewy. Plus, my kitchen doesn’t heat up like it does when I turn on the oven for just a few cookies.
Red velvet anything reminds me of special occasions, but these cookies are easy enough for a random Tuesday. The combination of cocoa and that pop of red makes them fun without being fussy. And here’s the best part – my air fryer preheats in about three minutes, which means I can go from craving to eating warm cookies in under twenty minutes.
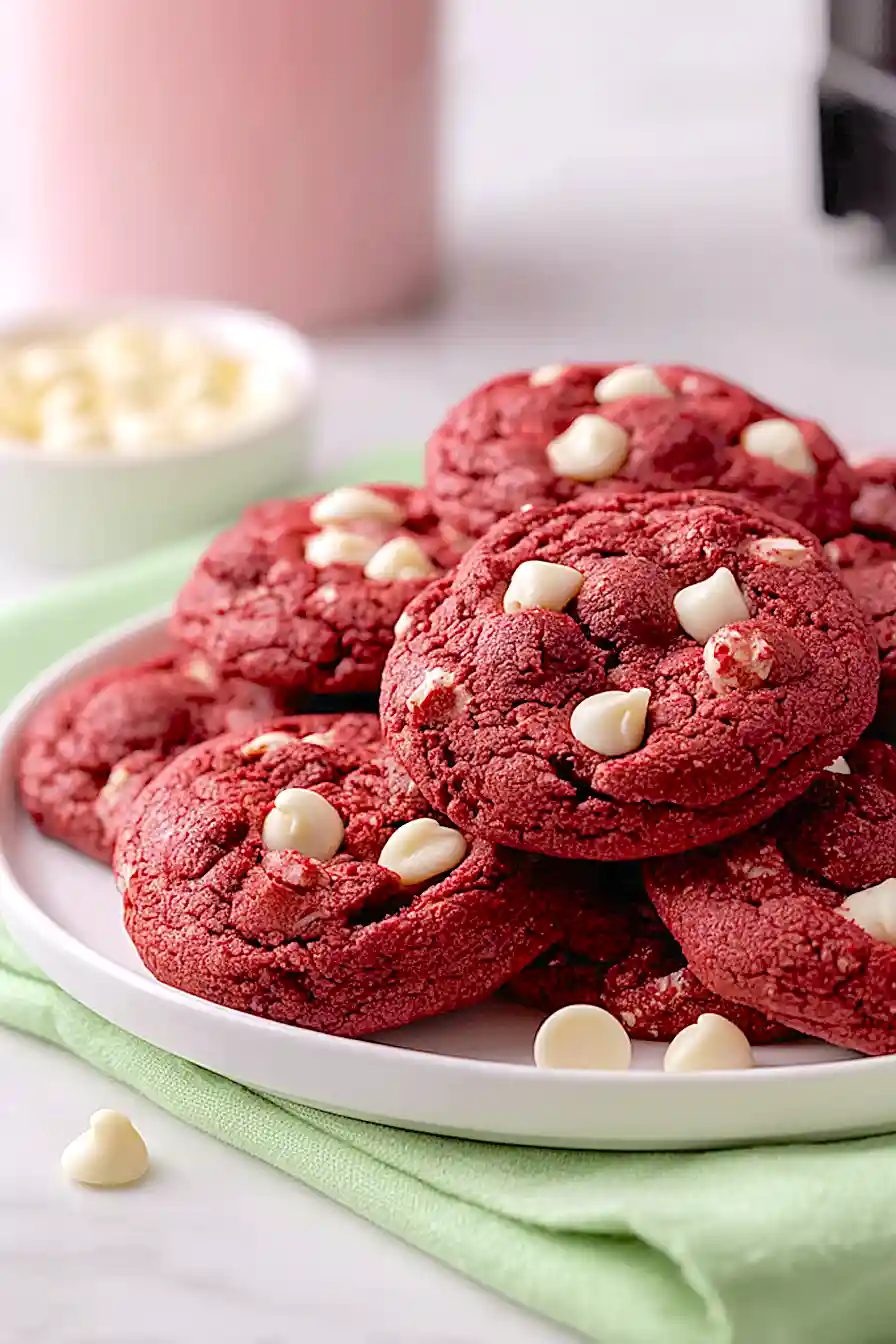
Want a cookie that looks fancy but comes together quickly? These air fryer red velvet cookies are what you’re looking for. The white chocolate chips make them extra special, and nobody needs to know how simple they actually are to make.
Why You’ll Love These Air Fryer Red Velvet Cookies
- Quick baking time – Using the air fryer cuts down on baking time significantly, so you can have warm cookies ready in just 15-25 minutes from start to finish.
- No oven required – Perfect for hot summer days when you don’t want to heat up your kitchen, or when your oven is already occupied with dinner.
- Classic red velvet flavor – These cookies have that signature red velvet taste with a hint of cocoa and the sweetness of white chocolate chips in every bite.
- Simple ingredients – You probably already have most of these pantry staples on hand, making this an easy recipe to whip up on a whim.
- Fun and festive – The bright red color makes these cookies perfect for Valentine’s Day, Christmas, or any time you want to add a pop of color to your dessert table.
What Kind of Butter Should I Use?
For these red velvet cookies, you’ll want to use regular unsalted butter so you can control the salt level in your recipe. Room temperature butter works best since it creams together more easily with the sugars, giving you that perfect cookie texture. If you only have salted butter on hand, you can still use it – just reduce or skip the added salt in the recipe. Some people like to use European-style butter for a richer flavor, but honestly, standard supermarket butter will give you great results too.
Options for Substitutions
These cookies are pretty forgiving when it comes to swaps, so here are some options if you need to make changes:
- Butter: You can use margarine or coconut oil in place of butter, but stick with butter if you can – it really gives these cookies their soft texture and rich flavor.
- Brown sugar: If you’re out of brown sugar, mix 3/4 cup white sugar with 1 tablespoon of molasses. Or just use all white sugar, though your cookies will be slightly less chewy.
- Red food coloring: You can use gel food coloring instead of liquid – just use about 1/2 teaspoon since gel is more concentrated. Or skip it altogether for chocolate cookies without the red color.
- White chocolate chips: Feel free to swap these with regular chocolate chips, butterscotch chips, or even cream cheese chips for a classic red velvet twist.
- Mini chocolate chips: Regular-sized chocolate chips work just fine here. You can also use chopped chocolate or leave them out if you want to keep it simple with just white chocolate.
- Cornstarch: In a pinch, you can leave out the cornstarch and add an extra tablespoon of flour, though the cornstarch does help keep the cookies tender.
Watch Out for These Mistakes While Baking
The biggest mistake people make with air fryer cookies is skipping the refrigeration step, which causes the dough to spread too quickly and results in flat, crispy cookies instead of thick, chewy ones – aim for at least 30 minutes in the fridge before baking.
Another common error is overcrowding the air fryer basket, so stick to baking 4-6 cookies at a time with proper spacing to ensure even air circulation and consistent results.
Don’t be tempted to increase the temperature to speed things up, as air fryers cook faster than regular ovens and anything above 300°F will burn the outside while leaving the inside raw.
Finally, resist the urge to touch or move the cookies right after baking since they’ll be extremely soft and fragile – letting them rest for those 1-2 minutes allows them to firm up just enough for safe removal.
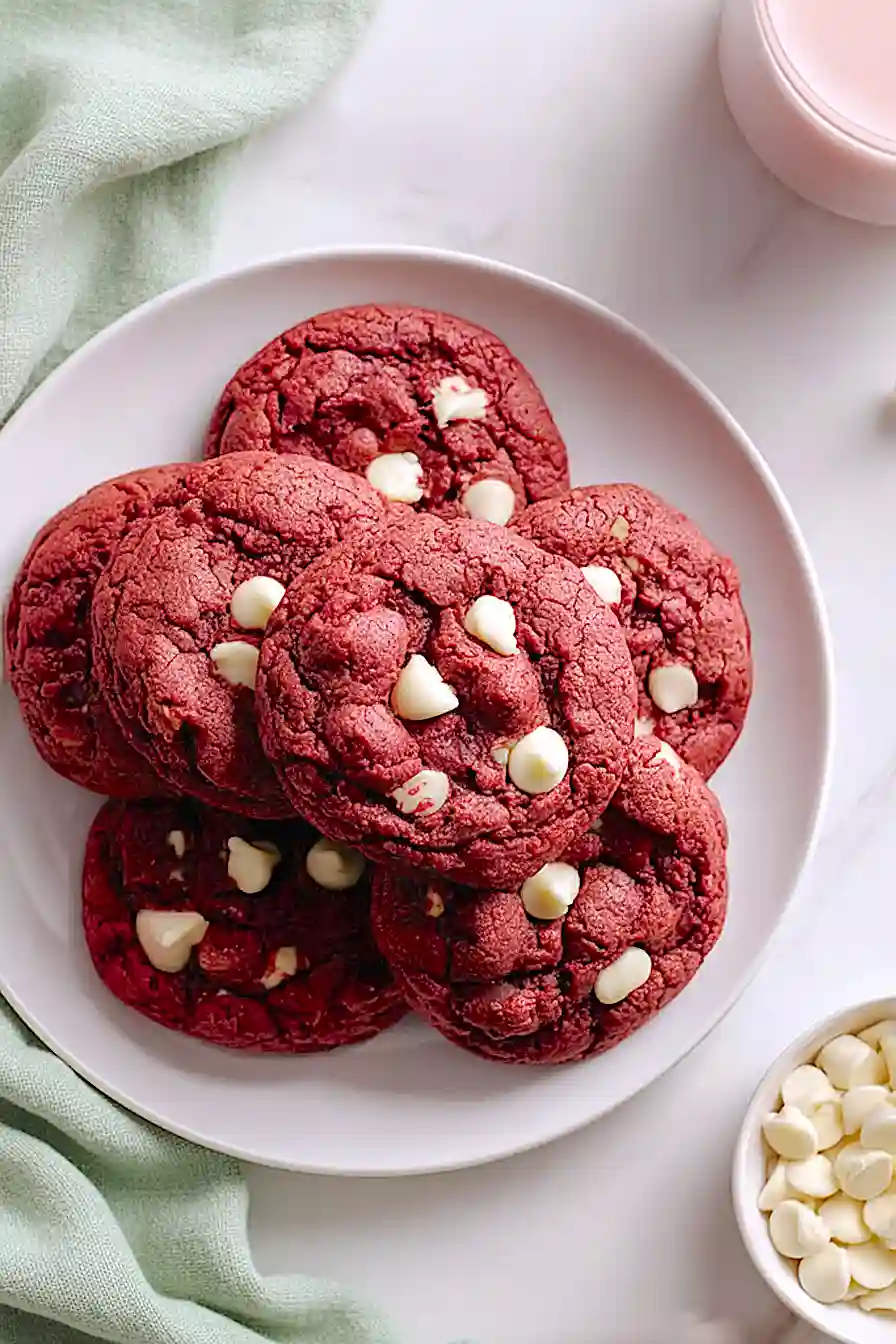
What to Serve With Red Velvet Cookies?
These red velvet cookies are perfect on their own, but they’re even better with a cold glass of milk for dunking. If you’re serving them at a party or gathering, set them out alongside some vanilla ice cream for an easy dessert that everyone will love. Coffee or hot chocolate also pairs really well with these cookies, especially if you’re enjoying them as an afternoon treat. For a fun dessert spread, you could serve them with other cookie varieties like chocolate chip or sugar cookies to give people options.
Storage Instructions
Store: Keep your red velvet cookies in an airtight container at room temperature for up to 5 days. I like to toss a piece of bread in the container to help keep them soft and chewy. They taste amazing for days, so feel free to make them ahead for parties or just to have a sweet treat ready whenever you need one.
Freeze: These cookies freeze really well, either baked or as dough. For baked cookies, layer them between parchment paper in a freezer bag for up to 3 months. You can also scoop the dough into balls and freeze them on a baking sheet, then transfer to a bag once solid. That way you can air fry fresh cookies whenever a craving hits!
Enjoy: Thaw frozen baked cookies at room temperature for about 30 minutes, or warm them in the air fryer at 300°F for just a minute or two. If you froze the dough, add an extra minute to the cooking time when air frying from frozen. They’ll taste like you just made them!
| Preparation Time | 10-15 minutes |
| Cooking Time | 5-10 minutes |
| Total Time | 15-25 minutes |
| Level of Difficulty | Easy |
| Servings | 24 cookies |
Estimated Nutrition
Estimated nutrition for the whole recipe (without optional ingredients):
- Calories: 2000-2200
- Protein: 20-25 g
- Fat: 100-110 g
- Carbohydrates: 265-285 g
Ingredients
For the dough:
- 2/3 cup butter (I like Kerrygold unsalted for a richer flavor)
- 1 cup brown sugar
- 1/3 cup sugar
- 1 large egg (at room temperature, about 70°F)
- 1 1/2 tsp vanilla extract
- 2 1/2 tsp red food coloring
- 4 tbsp cocoa powder (I always use Hershey’s Special Dark)
- 1/2 tsp baking soda
- 1/4 tsp salt
- 1/4 tsp espresso powder
- 1 tsp cornstarch (makes the cookies extra soft and chewy)
- 1 1/3 cup all-purpose flour
For the mix-ins:
- 2/3 cup white chocolate chips (I use Ghirardelli for the best creaminess)
- 1/3 cup mini semi-sweet chocolate chips
Step 1: Cream Butter and Sugars
- 2/3 cup butter
- 1 cup brown sugar
- 1/3 cup sugar
In a medium bowl, combine the softened butter, brown sugar, and sugar.
Beat together for 2-3 minutes until the mixture is light, fluffy, and pale in color.
This creaming process incorporates air into the dough, which helps create a tender cookie texture.
Make sure your butter is at room temperature so it combines smoothly with the sugars.
Step 2: Add Wet Ingredients and Color
- 1 large egg
- 1 1/2 tsp vanilla extract
- 2 1/2 tsp red food coloring
Add the room temperature egg and vanilla extract to the creamed butter mixture and beat until well combined.
Pour in the red food coloring and mix thoroughly until the dough is evenly colored and no streaks remain.
The room temperature egg emulsifies better with the butter, creating a smoother batter.
Step 3: Prepare Dry Ingredient Mixture
- 4 tbsp cocoa powder
- 1/2 tsp baking soda
- 1/4 tsp salt
- 1/4 tsp espresso powder
- 1 tsp cornstarch
- 1 1/3 cup all-purpose flour
In a separate bowl, whisk together the cocoa powder, baking soda, salt, espresso powder, cornstarch, and all-purpose flour.
Make sure to break up any lumps in the cocoa powder and espresso powder so they distribute evenly throughout the dough.
I always use Hershey’s Special Dark cocoa for a richer, deeper chocolate flavor that complements the red velvet perfectly.
Step 4: Combine Wet and Dry Ingredients
- wet ingredient mixture from Step 2
- dry ingredient mixture from Step 3
Pour the dry ingredient mixture from Step 3 into the wet ingredients from Step 2 and fold together gently with a spatula until just combined.
Do not overmix—stop as soon as no dry streaks remain.
Overmixing develops gluten, which can make the cookies tough instead of tender.
Step 5: Add Chocolate Chips and Chill Dough
- 2/3 cup white chocolate chips
- 1/3 cup mini semi-sweet chocolate chips
Fold the white chocolate chips and mini semi-sweet chocolate chips into the dough until evenly distributed.
Roll the dough into one tablespoon-sized balls and place them on a plate.
Refrigerate for at least 30 minutes—this helps the cookies hold their shape during air frying and prevents excessive spreading.
I like using Ghirardelli white chocolate chips because they’re creamy and add a nice contrast to the cocoa-forward red velvet flavor.
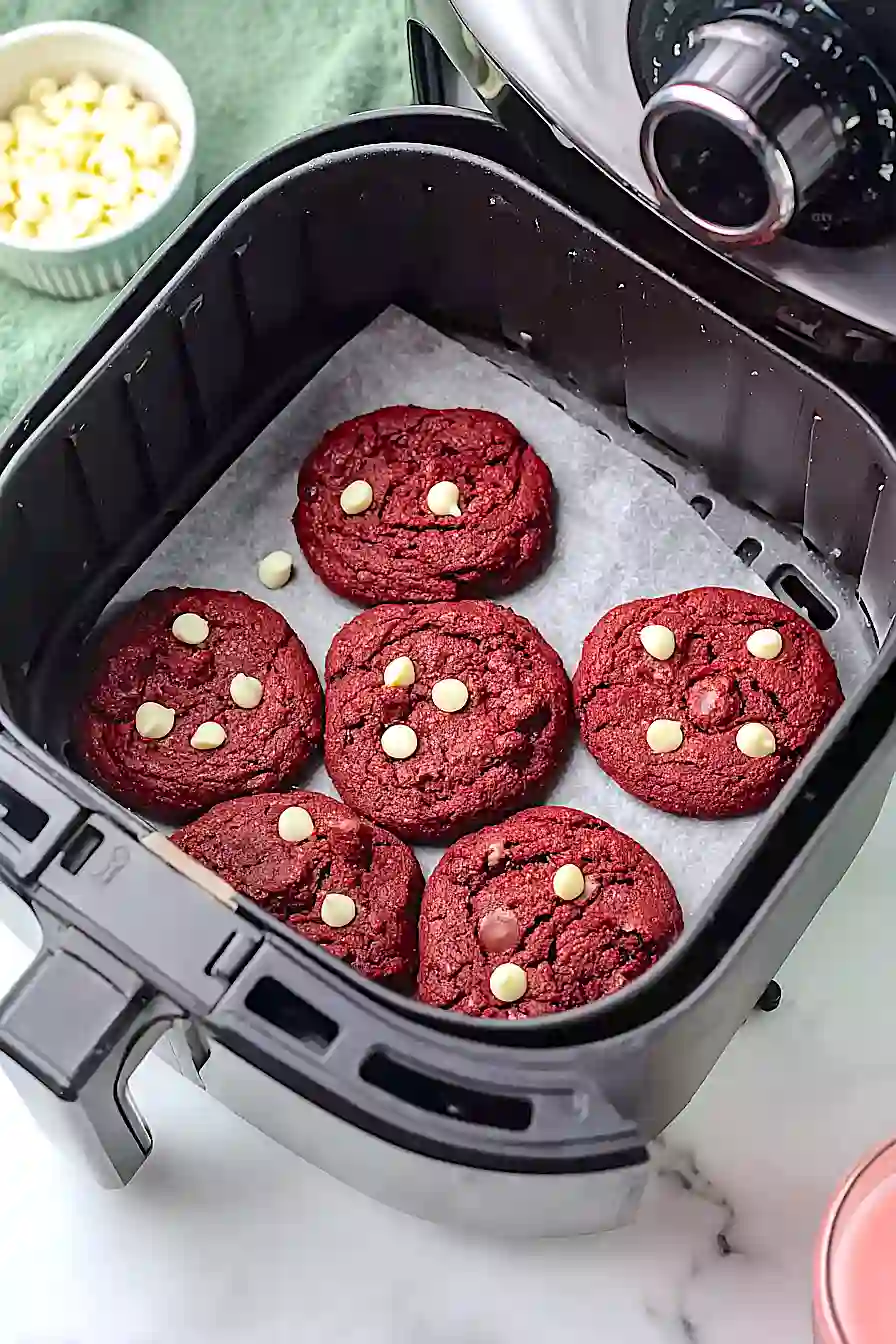
Step 6: Prepare Air Fryer and Bake Cookies
- chilled dough balls from Step 5
Line your air fryer basket with parchment paper that has small holes punched or cut into it to allow air circulation.
Arrange the chilled dough balls on the parchment paper about 1 inch apart—they will spread slightly during cooking.
Air fry at 300°F for 6-7 minutes, checking at the 6-minute mark.
The cookies should be set around the edges but still slightly soft in the center.
Step 7: Rest and Remove Cookies
Remove the basket from the air fryer and let the cookies rest on the parchment paper for 1-2 minutes.
This resting period allows them to firm up slightly, making them easier to handle without falling apart.
Carefully transfer the cookies to a wire rack to cool completely.
They’ll continue to set as they cool and will develop the perfect chewy texture inside.
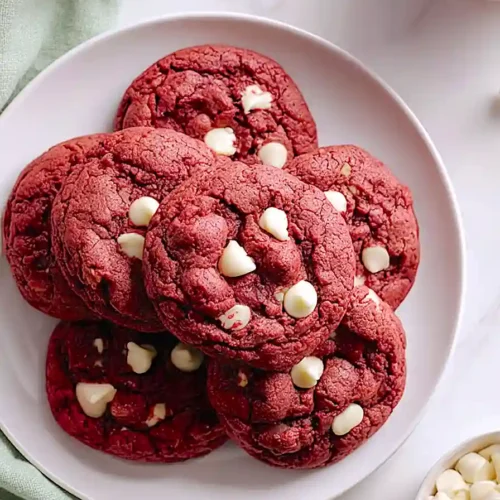
Irresistible Air Fryer Red Velvet Cookies
Ingredients
For the dough::
- 2/3 cup butter (I like Kerrygold unsalted for a richer flavor)
- 1 cup brown sugar
- 1/3 cup sugar
- 1 large egg (at room temperature, about 70°F)
- 1 1/2 tsp vanilla extract
- 2 1/2 tsp red food coloring
- 4 tbsp cocoa powder (I always use Hershey's Special Dark)
- 1/2 tsp baking soda
- 1/4 tsp salt
- 1/4 tsp espresso powder
- 1 tsp cornstarch (makes the cookies extra soft and chewy)
- 1 1/3 cup all-purpose flour
For the mix-ins::
- 2/3 cup white chocolate chips (I use Ghirardelli for the best creaminess)
- 1/3 cup mini semi-sweet chocolate chips
Instructions
- In a medium bowl, combine the softened butter, brown sugar, and sugar. Beat together for 2-3 minutes until the mixture is light, fluffy, and pale in color. This creaming process incorporates air into the dough, which helps create a tender cookie texture. Make sure your butter is at room temperature so it combines smoothly with the sugars.
- Add the room temperature egg and vanilla extract to the creamed butter mixture and beat until well combined. Pour in the red food coloring and mix thoroughly until the dough is evenly colored and no streaks remain. The room temperature egg emulsifies better with the butter, creating a smoother batter.
- In a separate bowl, whisk together the cocoa powder, baking soda, salt, espresso powder, cornstarch, and all-purpose flour. Make sure to break up any lumps in the cocoa powder and espresso powder so they distribute evenly throughout the dough. I always use Hershey's Special Dark cocoa for a richer, deeper chocolate flavor that complements the red velvet perfectly.
- Pour the dry ingredient mixture from Step 3 into the wet ingredients from Step 2 and fold together gently with a spatula until just combined. Do not overmix—stop as soon as no dry streaks remain. Overmixing develops gluten, which can make the cookies tough instead of tender.
- Fold the white chocolate chips and mini semi-sweet chocolate chips into the dough until evenly distributed. Roll the dough into one tablespoon-sized balls and place them on a plate. Refrigerate for at least 30 minutes—this helps the cookies hold their shape during air frying and prevents excessive spreading. I like using Ghirardelli white chocolate chips because they're creamy and add a nice contrast to the cocoa-forward red velvet flavor.
- Line your air fryer basket with parchment paper that has small holes punched or cut into it to allow air circulation. Arrange the chilled dough balls on the parchment paper about 1 inch apart—they will spread slightly during cooking. Air fry at 300°F for 6-7 minutes, checking at the 6-minute mark. The cookies should be set around the edges but still slightly soft in the center.
- Remove the basket from the air fryer and let the cookies rest on the parchment paper for 1-2 minutes. This resting period allows them to firm up slightly, making them easier to handle without falling apart. Carefully transfer the cookies to a wire rack to cool completely. They'll continue to set as they cool and will develop the perfect chewy texture inside.


