I grew up thinking poke cakes were something only fancy bakeries could make. Turns out, they’re one of the easiest desserts you can throw together on a weeknight. The “poke” part just means you poke holes in a baked cake and pour pudding over it—that’s it.
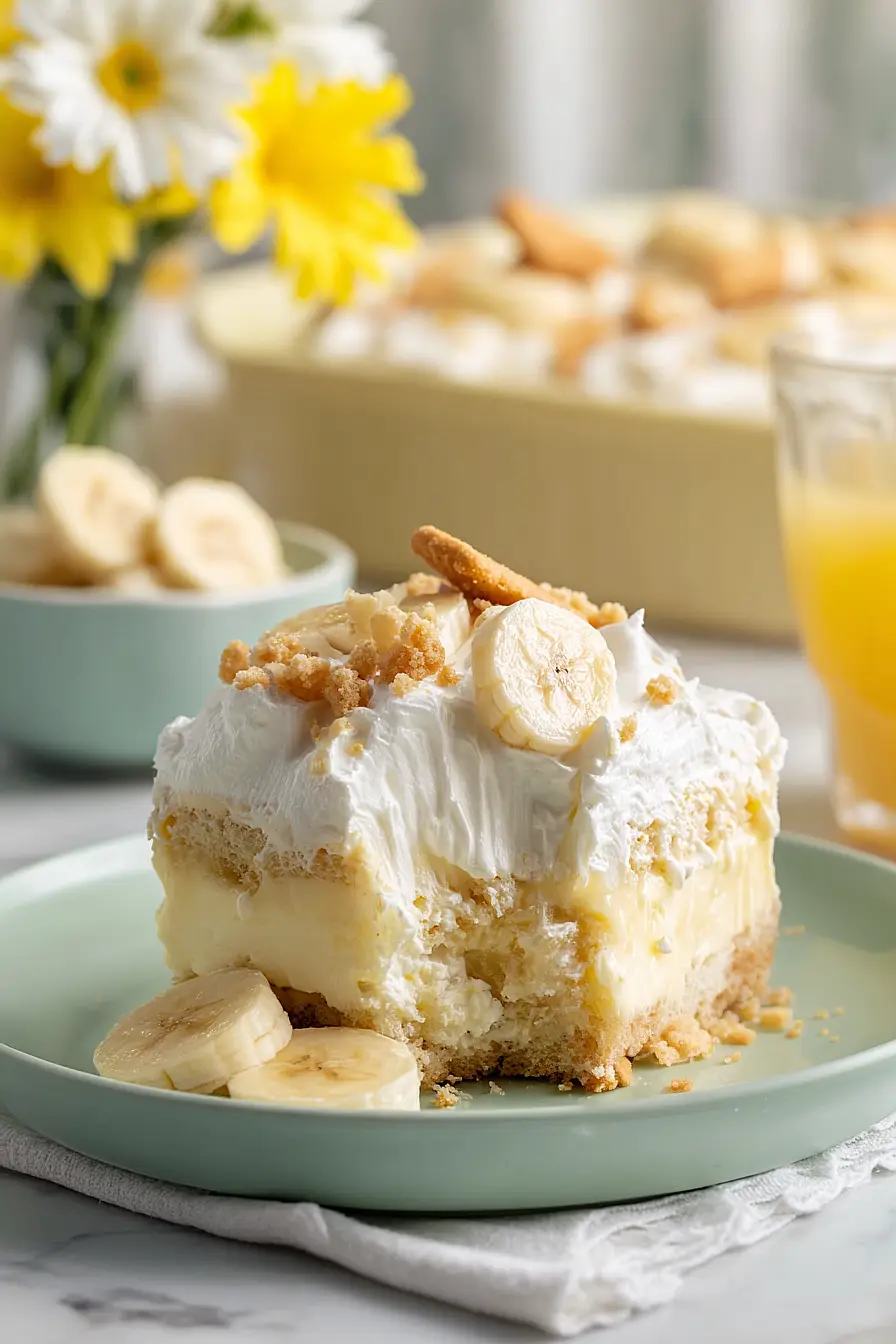
This banana pudding version is basically banana pudding and cake having a baby, and it’s exactly as good as it sounds. You get all those classic banana pudding flavors—the creamy vanilla pudding, fresh banana slices, and those crunchy Nilla wafers—but in cake form. It’s the kind of dessert that looks like you spent hours on it, but really you just used a boxed cake mix and let the pudding do all the work.

Why You’ll Love This Banana Pudding Poke Cake
- Simple ingredients – This cake uses a box mix and instant pudding, so you don’t need any fancy ingredients or baking skills to pull it off.
- Classic flavor combo – If you love traditional banana pudding, you’ll enjoy this cake version with all the same flavors – vanilla wafers, creamy pudding, and fresh bananas.
- Great for potlucks and parties – This cake feeds a crowd and travels well, making it perfect for family gatherings, church suppers, or any time you need to bring a dessert.
- Make-ahead friendly – You can prepare this cake a day in advance, giving the pudding time to soak into every bite and making your life easier when entertaining.
What Kind of Bananas Should I Use?
For banana pudding poke cake, you’ll want to use bananas that are ripe but still firm enough to slice cleanly. Look for bananas that are mostly yellow with just a few brown spots – they’ll be sweet and flavorful without being mushy. If your bananas are still a bit green, just let them sit on the counter for a day or two until they ripen up. Avoid using overripe bananas with lots of brown spots, as they can turn too soft and break down in the cake, making things a bit soggy. And here’s a tip: slice your bananas right before you’re ready to assemble the cake to prevent them from browning.

Options for Substitutions
This cake is pretty forgiving when it comes to swaps, so here are some options if you need them:
- Yellow cake mix: You can use white cake mix or even vanilla cake mix instead. Both will work just fine and give you a similar light, fluffy base for the pudding.
- Banana pudding mix: If you can’t find banana pudding mix, vanilla pudding mix works great. You’ll still get that creamy texture, and the fresh bananas will bring plenty of banana flavor to the cake.
- Milk: Any milk works here – whole, 2%, skim, or even almond milk if you prefer. Just stick with whatever you normally keep in the fridge.
- Whipped topping: Store-bought whipped topping is convenient, but you can make your own by whipping 2 cups of heavy cream with 2-3 tablespoons of powdered sugar until stiff peaks form.
- Bananas: The bananas are pretty important for this recipe since it’s banana pudding cake, so I’d recommend keeping them in. Choose bananas that are ripe but still firm – not too brown or they’ll get mushy.
- Nilla wafers: Any vanilla wafer cookie will do the trick. You can also use graham crackers crushed up if that’s what you have on hand.
Watch Out for These Mistakes While Baking
The biggest mistake people make with poke cakes is not poking enough holes or making them deep enough – use the handle of a wooden spoon and push it almost to the bottom of the cake, spacing holes about an inch apart so the pudding can really soak through.
Pouring the pudding mixture while it’s too thick is another common issue, so make sure to pour it over the cake immediately after whisking it with the milk, before it starts to set up.
Wait until just before serving to add your banana slices and crushed Nilla wafers on top, since bananas turn brown quickly and the cookies will get soggy if they sit too long.
For extra banana flavor, try mashing half a banana into the pudding mixture before pouring it over the cake, and always make sure your cake is completely cooled before adding the pudding layer.
What to Serve With Banana Pudding Poke Cake?
This cake is pretty rich and sweet on its own, so I like to keep things simple and serve it with a hot cup of coffee or a cold glass of milk. If you’re serving it at a party or potluck, it pairs nicely with fresh berries on the side – strawberries or blueberries add a nice pop of freshness that balances out all that creamy sweetness. You could also set out some extra Nilla wafers for people who want to crumble them on top of their slice. Since it’s such a filling dessert, I usually skip any other sides and just let this cake be the star of the show.
Storage Instructions
Refrigerate: This cake needs to stay in the fridge since it has pudding and whipped topping. Cover it tightly with plastic wrap or foil and it’ll keep for about 3-4 days. The bananas might brown a bit after a day or two, but the cake will still taste great.
Make Ahead: You can definitely make this cake a day ahead, which actually makes it even better since the pudding has more time to soak in. Just wait to add the sliced bananas and wafer topping until a few hours before serving to keep everything looking fresh.
Serve: This cake is best served cold straight from the fridge. If you have leftovers, just keep them covered and grab a slice whenever you need a sweet treat. No need to bring it to room temperature – it’s meant to be enjoyed chilled!
| Preparation Time | 20-30 minutes |
| Cooking Time | 30-35 minutes |
| Total Time | 80-120 minutes |
| Level of Difficulty | Easy |
| Servings | 12 slices |
Estimated Nutrition
Estimated nutrition for the whole recipe (without optional ingredients):
- Calories: 2000-2200
- Protein: 25-30 g
- Fat: 60-70 g
- Carbohydrates: 360-390 g
Ingredients
For the cake:
- 15 oz yellow cake mix (I always use Duncan Hines for a moist crumb)
- 3.5 cups milk
For the filling:
- 7 oz banana pudding mix (I prefer Jell-O brand for the best set and flavor)
For the topping:
- 8 oz whipped topping (thawed completely in the fridge for a smooth spread)
- 3 bananas (sliced into 1/4-inch rounds)
- 7 nilla wafers
Step 1: Bake the Cake Base
- 15 oz yellow cake mix
- 9×13 inch baking dish
Preheat your oven to the temperature listed on the yellow cake mix box.
Prepare the cake batter according to package directions and pour into a 9×13 inch baking dish.
Bake for the time specified on the box until a toothpick inserted in the center comes out clean.
This creates the foundation for absorbing the pudding mixture.
Step 2: Create Poke Holes and Prepare Pudding Mixture
- 3.5 cups milk
- 7 oz banana pudding mix
- cooled cake from Step 1
Allow the baked cake to cool for about 5 minutes—this slight warmth helps the pudding soak in better.
Using the handle of a wooden spoon, poke holes throughout the entire cake about 1 inch apart, working methodically across the surface.
While the cake cools, whisk together the milk and banana pudding mix in a bowl until smooth and well combined, about 1-2 minutes.
I like to make sure there are no lumps in the pudding mixture before pouring it over the cake, so I’ll strain it through a fine sieve if needed.
Step 3: Soak the Cake with Pudding and Chill
- pudding mixture from Step 2
- cooled cake from Step 1
Slowly pour the pudding mixture over the entire surface of the poked cake, allowing it to seep into all the holes and distribute evenly.
Cover the cake with plastic wrap and refrigerate for at least 1 hour—this allows the pudding to fully set and the cake to absorb the flavors completely.
The longer you can chill it, the better the pudding integrates with the cake.
Step 4: Assemble with Whipped Topping and Bananas
- 8 oz whipped topping
- 3 bananas
- chilled cake from Step 3
Remove the chilled cake from the refrigerator.
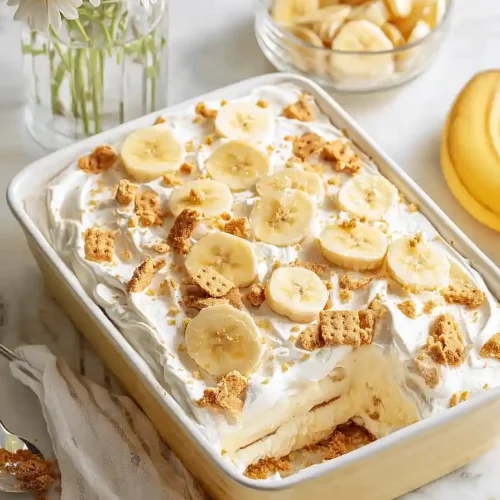
Spread the thawed whipped topping evenly over the entire surface using an offset spatula or the back of a spoon, creating an even layer.
Arrange the banana slices in a decorative pattern over the whipped topping, pressing them gently so they stay in place.
I find it helpful to slice the bananas just before this step to keep them fresh and prevent browning.
Step 5: Finish and Serve
- 7 nilla wafers
- assembled cake from Step 4
Crush or crumble the nilla wafers into small pieces and sprinkle them over the top of the cake just before serving, ensuring they stay crispy.
Slice and serve immediately—the contrast between the creamy pudding, fluffy topping, fresh bananas, and crunchy cookies is best enjoyed fresh.
Irresistible Banana Pudding Poke Cake
Ingredients
For the cake::
- 15 oz yellow cake mix (I always use Duncan Hines for a moist crumb)
- 3.5 cups milk
For the filling::
- 7 oz banana pudding mix (I prefer Jell-O brand for the best set and flavor)
For the topping::
- 8 oz whipped topping (thawed completely in the fridge for a smooth spread)
- 3 bananas (sliced into 1/4-inch rounds)
- 7 nilla wafers
Instructions
- Preheat your oven to the temperature listed on the yellow cake mix box. Prepare the cake batter according to package directions and pour into a 9x13 inch baking dish. Bake for the time specified on the box until a toothpick inserted in the center comes out clean. This creates the foundation for absorbing the pudding mixture.
- Allow the baked cake to cool for about 5 minutes—this slight warmth helps the pudding soak in better. Using the handle of a wooden spoon, poke holes throughout the entire cake about 1 inch apart, working methodically across the surface. While the cake cools, whisk together the milk and banana pudding mix in a bowl until smooth and well combined, about 1-2 minutes. I like to make sure there are no lumps in the pudding mixture before pouring it over the cake, so I'll strain it through a fine sieve if needed.
- Slowly pour the pudding mixture over the entire surface of the poked cake, allowing it to seep into all the holes and distribute evenly. Cover the cake with plastic wrap and refrigerate for at least 1 hour—this allows the pudding to fully set and the cake to absorb the flavors completely. The longer you can chill it, the better the pudding integrates with the cake.
- Remove the chilled cake from the refrigerator. Spread the thawed whipped topping evenly over the entire surface using an offset spatula or the back of a spoon, creating an even layer. Arrange the banana slices in a decorative pattern over the whipped topping, pressing them gently so they stay in place. I find it helpful to slice the bananas just before this step to keep them fresh and prevent browning.
- Crush or crumble the nilla wafers into small pieces and sprinkle them over the top of the cake just before serving, ensuring they stay crispy. Slice and serve immediately—the contrast between the creamy pudding, fluffy topping, fresh bananas, and crunchy cookies is best enjoyed fresh.


